This rustic dresser makeover was a project I wasn’t sure about how it was going to go. I knew I had the know-how to make this dresser look brand new, but sometimes all the know-how doesn’t match up to the stubbornness of wood furniture. I am happy to report, this makeover was successful! 🙂
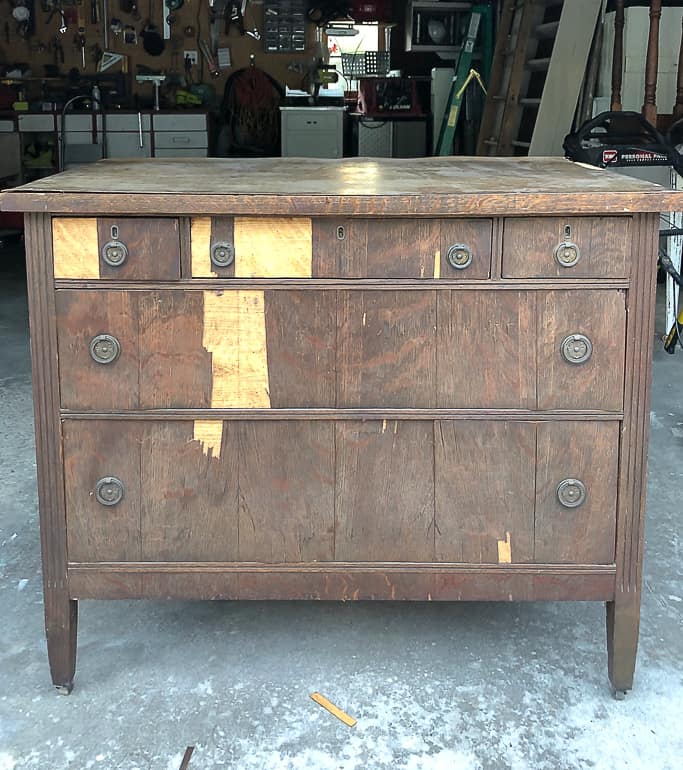
I found this dresser at my local Restore. Like in my last painted dresser DIY, this dresser didn’t have a lot of things going for it. The veneer was peeling so bad on this one. I knew that was the reason no one had taken it home before me. From the looks of this dresser, most people would think there is no potential.
I am not most people.

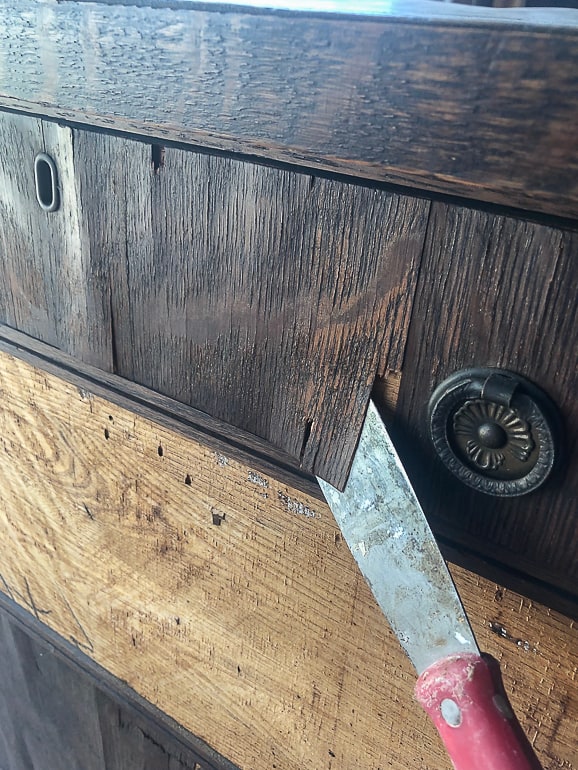
Sure, most of the veneer was missing or loose, but…..
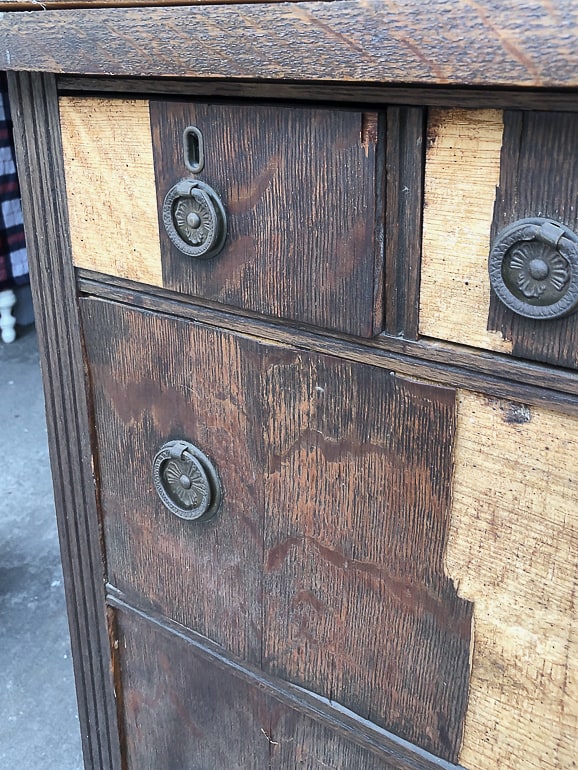
… it still had all the original hardware.
Sure, the top was coming off in chunks. BUT…..
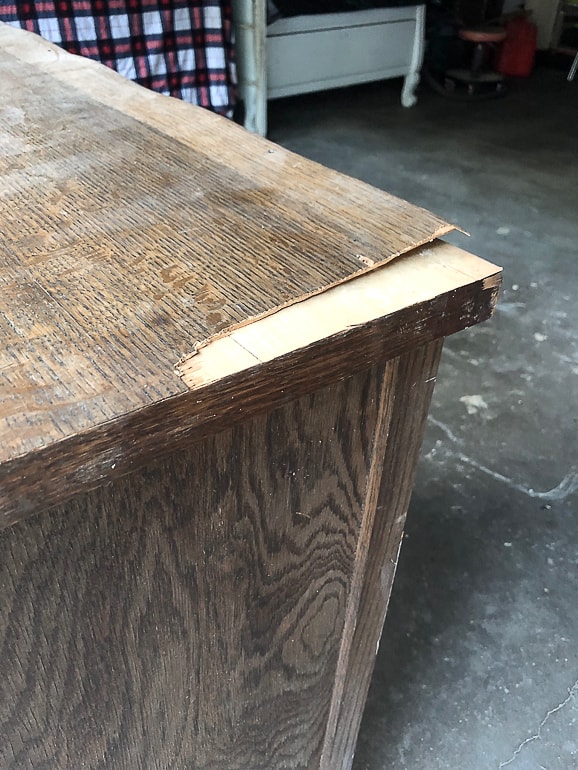
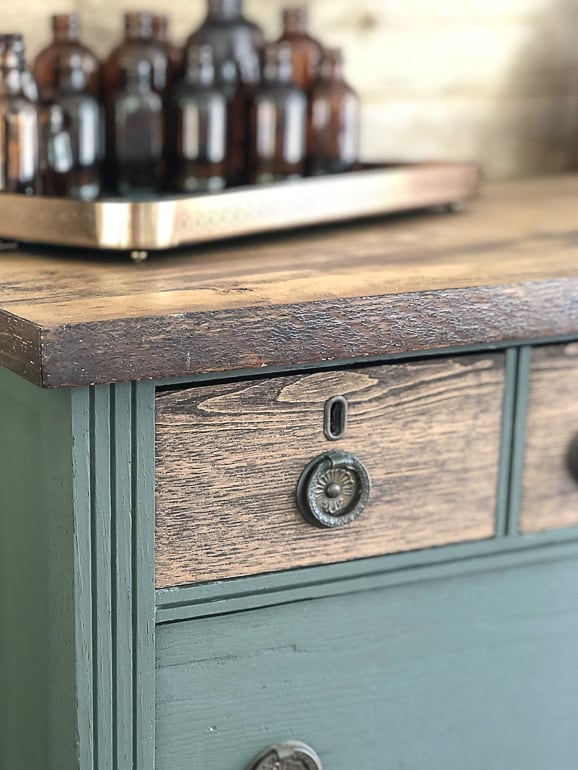
… the wood underneath looked amazing!
{Affiliate links are used in this post so you can easily find the products I used. You can read my disclosure here.}
Steps To Making This Rustic Dresser Pretty Again:
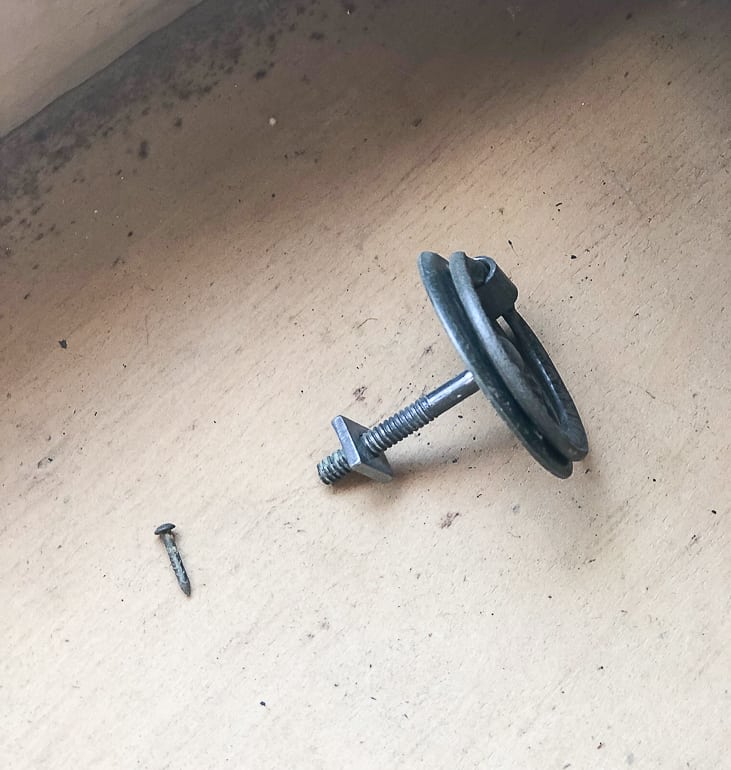
- Remove all the hardware. Thus hardware had tiny nails on the bottom of the knobs to keep them in place. These are usually missing, but every single knob still had the nail. When you remove hardware like this, put it in a place that is out-of-the-way so you won’t lose them while you are working on the dresser.
- Use a small putty knife to remove the veneer that is loose. This part is all fun and games until the veneer stops peeling off so easily. That used to be so frustrating for me, but I discovered the easy way to remove veneer from furniture and I never get frustrated anymore. I did have to use this technique on the top of the dresser.
- If you have some stubborn spots, try a heat gun. The heat gun didn’t work on the drawers of this dresser, but it did work on some of the top that I was too impatient to wait for. 😉
- Once all of the veneer is off, use an orbital sander and sand the entire dresser. I used a 60 and 80 grit sandpaper and then went over it all with a 120 grit sandpaper to smooth it all out.
- Use a tack cloth or damp rag and wipe down the entire dresser to get rid of the sanding dust.
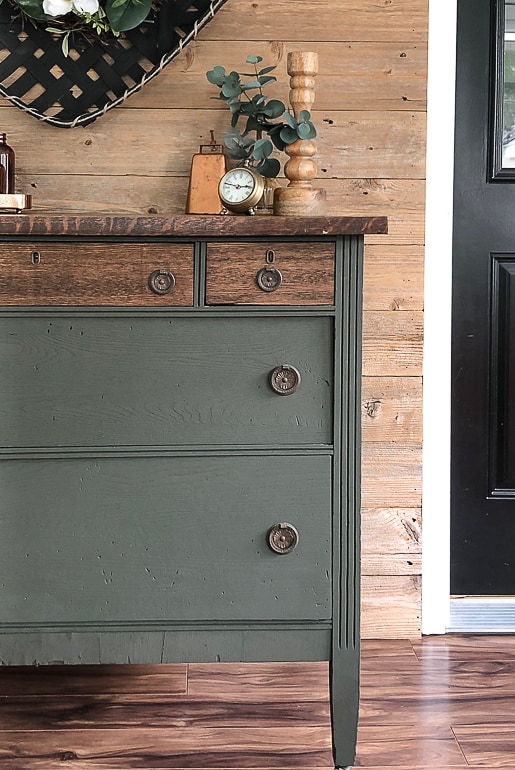
- Now, the dresser is ready for paint and/or stain. I did both like I did in this nightstand makeover for Gabrielle’s bedroom. I used “Dark Walnut” stain for the top drawers. Then, I chose to paint the dresser in this green color from Dixie Belle Paint.
- Once the paint and stain are dry, put the hardware back on.
- Stand back and look at what you created!
Supplies Recap – Rustic Dresser Makeover:
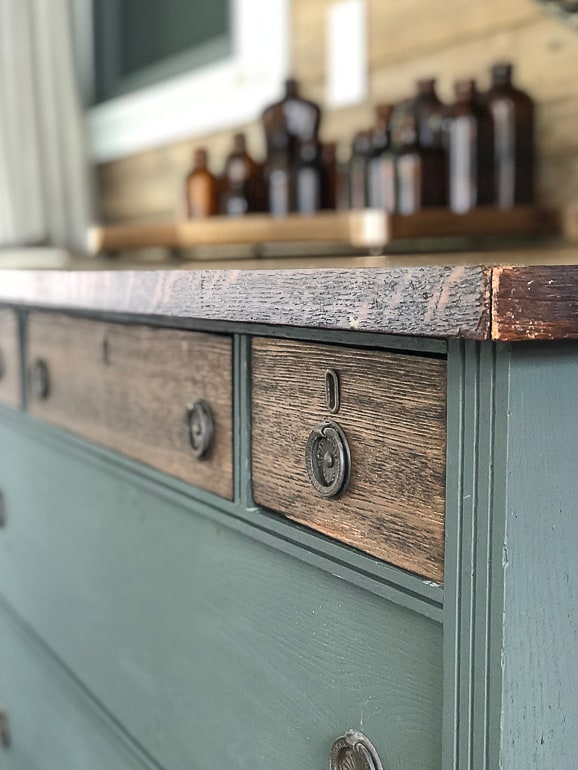
This dresser is beautiful now! I love the look of paint and stain together and this green color is one of my favorite paint colors from Dixie Belle Paint.
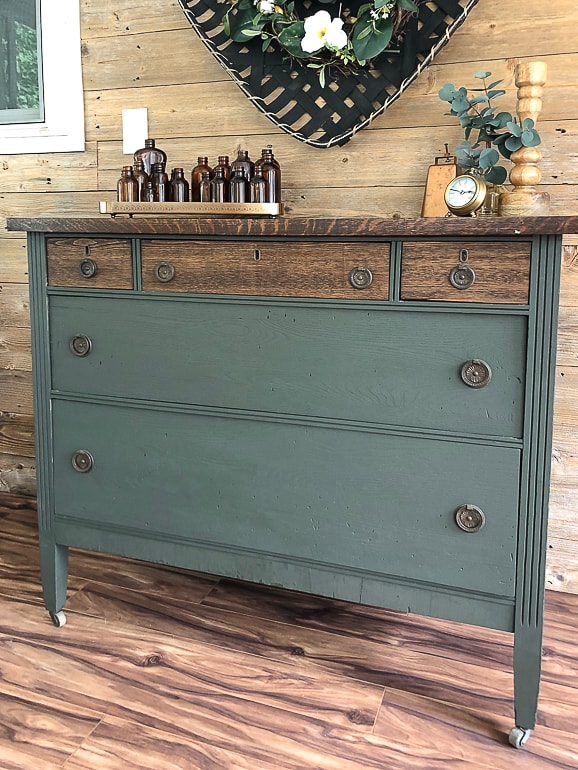
I forgot to mention that this dresser was missing the wheel on one of the back legs. We keep of stash of those from previous projects so it was an easy repair.
*Pro Tip: If you pick up pieces like this that have original hardware, wheels, key holes, etc. and you can’t use them, take them off and keep them for future projects when they might come in handy. Dong that has saved so many projects for us.
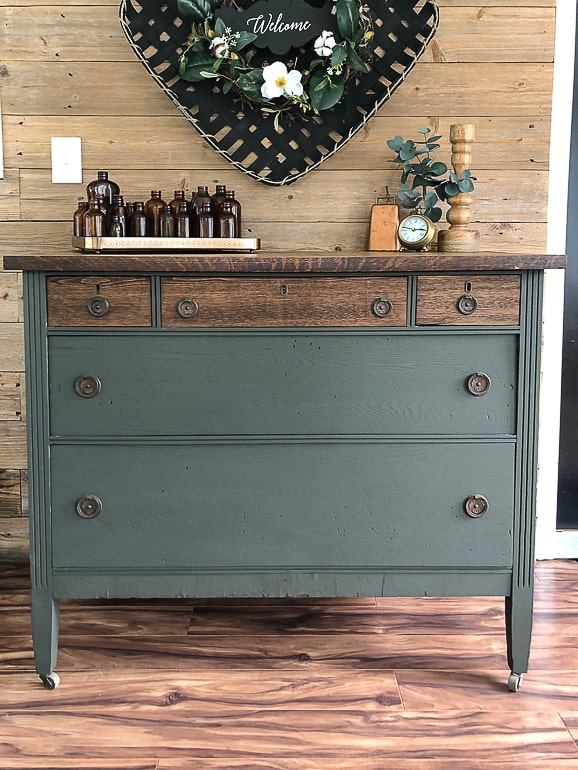
I don’t know what it is, but a piece that has both stained areas and painted areas are so pretty to me. This rustic dresser makeover was fairly easy to do and it turned a dresser destined for the landfill into a beautiful and functional piece. We didn’t have room for this beauty in our home so we sold it. The buyer was so excited to get it and put it in her home. Makeovers like this always fuel my soul and when someone else gets to enjoy the end product in their home, it makes me even more happier.
I hope this makeover inspires you to try a furniture makeover soon!
Do You Want To Make Money Flipping Furniture?
After twenty years of doing this, I am still picking up pieces when I can find them, but I am spending most of my time coaching other furniture flippers on how to make more money in their business. If you are someone who is looking to start and/or grow a furniture flipping business, I would love to help you. There are ways to make money in your business that don’t even include painting a piece of furniture. Once I learned that my business flourished. Don’t waste your time trying to figure it out on your own.
I have created a furniture flipping course. This course goes over everything from finding the right pieces, to the makeover process, and selling. I also included the other ways you can make money with your flipping business in the course. I included everything I wish a course had when I was starting out and trying to grow. You can find more information about the course HERE.
I also have a community for furniture flippers where I offer one-on-one monthly coaching for the business. If you are ready to take your business to the next level, that would be a great fit for you. You can find more information about that HERE.
Let’s get your business started and/or moving in the right direction. If your business is stagnant, there is a reason for that. Let me help you grow it into a flipping career that is profitable and fits the lifestyle you want to live.
PIN THIS POST!
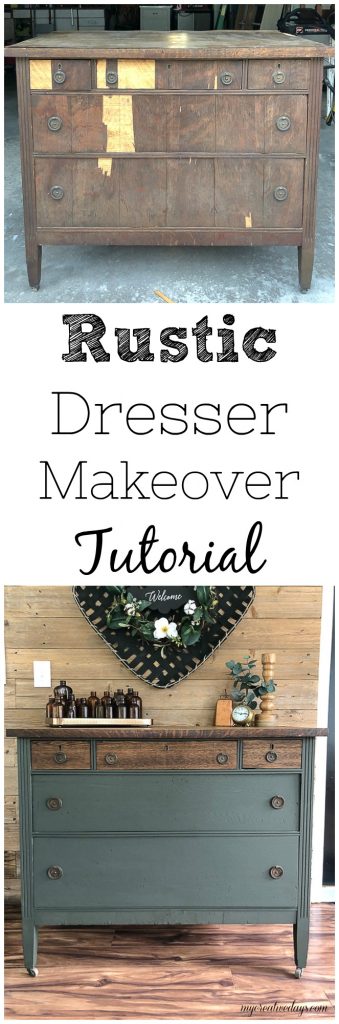
Beautiful makeover! Saw this on Instagram and had to click over here to read the tutorial. The wood you uncovered under the veneer is so pretty, it’s hard to believe it was ever covered up. (Also, just FYI, in Step No. 5, I think you meant “damp rag.” Or maybe not…)
Thank you! Going to change it now.
OMG! THANK YOU FOR CATCHING THAT! {insert embarrassed emoji}
Lindsay, this is a beautiful dresser makeover!!! Love the green color with the upper drawers left stained…makes it so unique and very handsome!!! Great, great job!!
Thank you so much!
So the wood that was under the veneer is what the final product is? With the walnut stain? I’m using this dresser idea to do an old dresser that I just picked up. This will be my first dresser!
Yes, the wood under the veneer is the final product. You need to sand it down and prep it for paint or stain! Good luck! Share on Instagram and tag me so I can see it!
Really nice turnaround! Can you tell me which green you used from Dixie Bell please?
Just click on the “green paint” link and it will take you right to it!
The paint is that you used for this piece is Collard Greens? It looks very different on the Dixie Belle Paint website so I just wanted to be sure before I bought it. The dresser is beautiful!
That is why I love sharing the colors. It is hard to see the real colors on websites. Collard green is one of my all-time favorite paint colors! You will love it!
How much paint did you need for this project?
Do you have to scrape off veneers if they’re in good shape or can you sand the veneer and stain that? I’m new to this!
If it’s in good condition, paint it or stain it, sand it!!! It’s great when it is in good condition!!