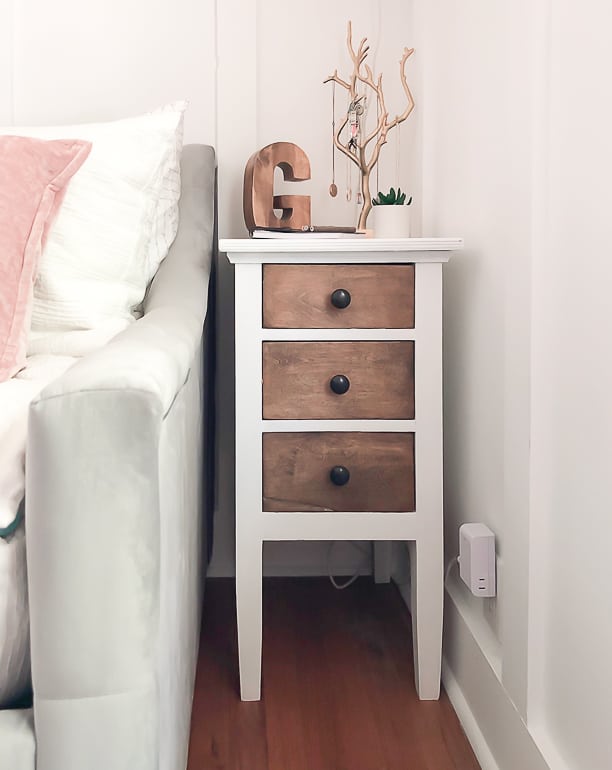
When we decided to make over Gabrielle’s bedroom, I knew a lot of furniture had to come out of the room and we would need some new pieces instead. I wanted to make conscious decisions about the furniture we chose and only choose things she really needed and would use in the space. This DIY nightstand makeover is one of the projects we did to make her room very functional and yet, exactly the style she wanted. She is thirteen now, so I wanted her to have a lot of say on what we did to her room. She was happy to oblige. 🙂
(Affiliate links are used in this post. You can see my full disclosure HERE.)
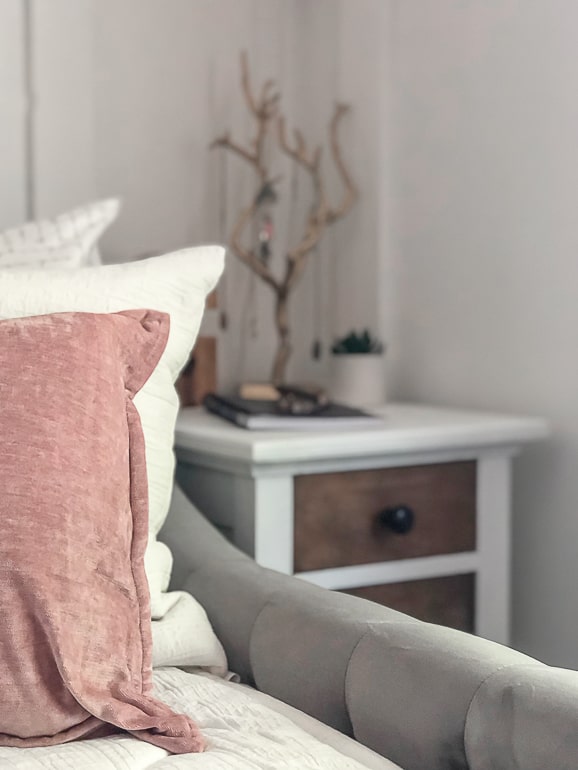
After we got her new bed assembled and put in the room, we got a better idea of the space we were working with and what was left for other furniture we needed to bring in. I knew Gabrielle needed some kind of nightstand next to her bed because she reads at night, so a surface to hold books, her clock and other things was important. I also wanted the nightstand to have drawer storage because this teenager has a lot of things that mom doesn’t want to see all the time. Closed drawer storage was a must.
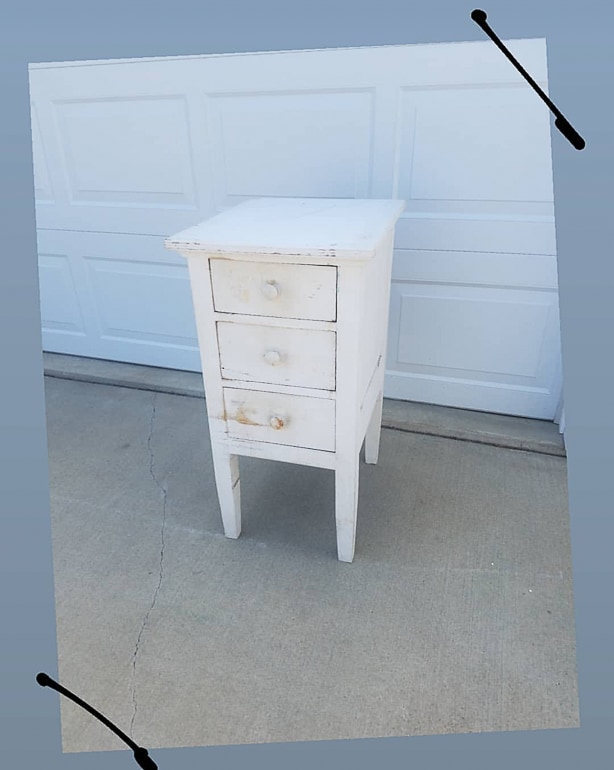
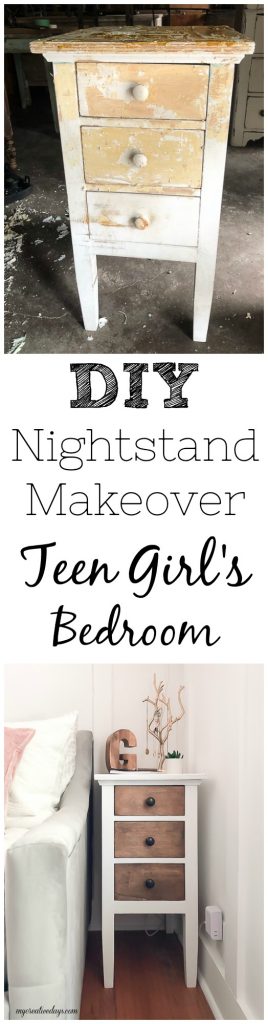
We ventured out to browse some stores for a nightstand but didn’t really find anything that fit the bill in the price range I wanted to spend. Then, I saw the photo above on a friend’s Instagram page. She was selling this end table! I immediately thought it would be perfect for Gabrielle’s nightstand. I went to pick it up that day and started the makeover right away.
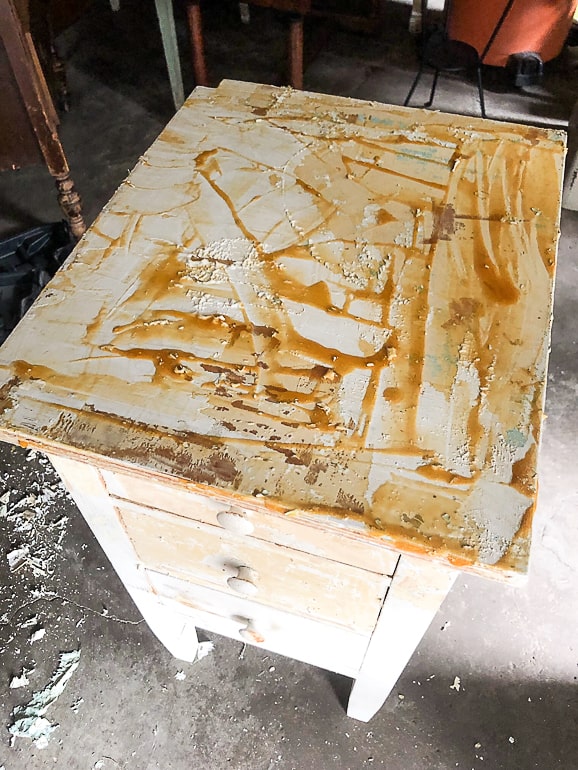
The paint wasn’t in great condition and it had a sheen that I didn’t want to paint over. I didn’t think the paint would stick to it very well, so I wanted to strip it to see what was underneath. I put paint stripper all over the table and let it sit for about an hour.
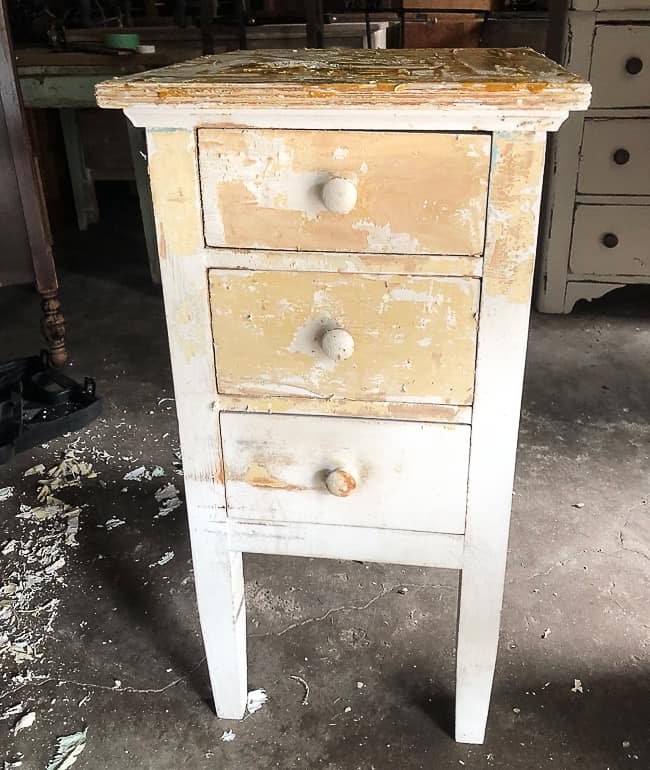
The stripper took the white layer of paint right off, but there was a tough coat of yellow paint underneath that the stripper didn’t budge. I used 40 grit sandpaper and my orbital sander to see if it would take the yellow paint off. It did. Now, I don’t use 40 grit sandpaper a lot because it is so rough and it can leave the wood marked up and give it a rough surface, but I wanted to get the yellow layer off the nightstand.
Once I got the yellow paint off, I used a 320 grit sandpaper to smooth the surface.
The wood was pretty, but there were some areas that didn’t sand out very well. At this point, we had the wallpaper done in Gabrielle’s room, the bottom portion of her walls had a fresh coat of paint on them and her new bed was put together. I was planning on staining the nightstand, but I was so glad it didn’t work out because after seeing the room come together, the nightstand needed something different.
Supply Recap Used In This DIY Nightstand Makeover:
Paint Stripper
Small Scraper
Paint – “Cotton” Dixie Belle Paint
Orbital Sander
Plastic Gloves
40 Grit Sandpaper
320 Grit Sandpaper
Dark Walnut Stain
New Knobs
My Favorite Paint Brush
How To Apply Paint Stripper:
The first thing you need to do when working with paint stripper is put on a pair of gloves. There are many different kinds of paint stripper on the market and this stuff is strong. Make sure to wear gloves when handling it.
When I use paint stripper, I pour it out of the can onto the piece of furniture. Then, I spread it around with a small scraper. I am not going to ruin any of my good paint brushes with the paint stripper so the scraper is a good tool to use to spread it all around and then wipe it off when you are done. I usually put a pretty thick layer of paint stripper on the piece of furniture. A thin layer usually doesn’t pull the paint off the surface. All furniture pieces will be different so play around with the amount to figure out what you need to pull up the paint.
Once I have the paint stripper spread around, I let it sit at least an hour and then, I will check on it. Sometimes, the paint will come up than that and other times, it takes longer. Sometimes, it doesn’t work at all. It will all depend on the piece of furniture, the type of paint on it and if there is a top coat or something else over the paint. You can’t mess this up. You just have to try it and see how it goes. Try it on a small section of the furniture first to get a good idea of what you are working with.
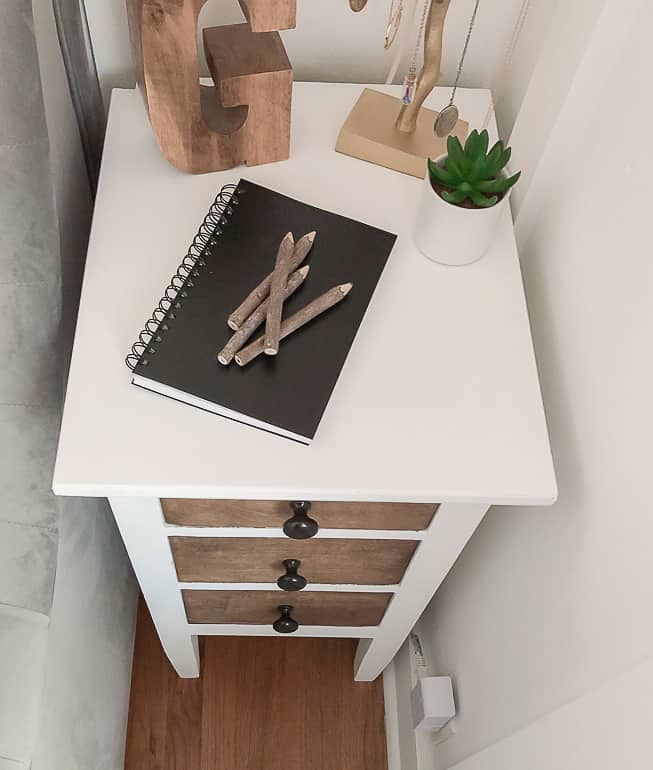
For this project, once I got the piece stripped, I decided to paint the outer shell in “Cotton” from Dixie Belle Paint. Then, I stained the drawer front with Dark Walnut Stain. I am a huge fan of stained and painted pieces. You can see more projects I did like this painted desk makeover and this dresser makeover.
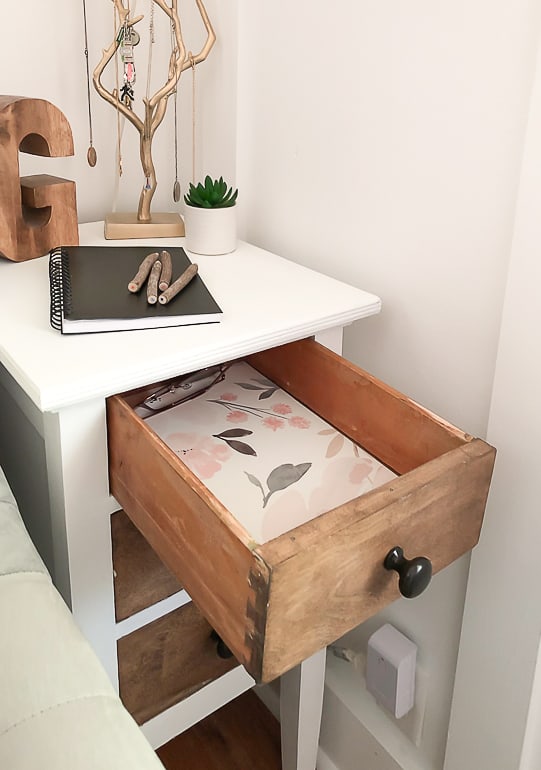
After the paint and stain were done, it was time for new hardware. I looked through the stash of hardware. I found cute black knobs that were the perfect size and color. We added some of the left over wallpaper from her walls to the inside of the drawers. They weren’t very pretty. This was an easy way to make them look better. It added a pop of “happy” with Gabrielle opens the drawers.
This DIY nightstand makeover has come a long way.
It is the perfect addition to Gabrielle’s bedroom makeover. I tried to find something that would work in stores. In the end, I went with something that wasn’t perfect. But, it had tons of potential and was the right size. It was exactly what we needed. DIY and thrifting pieces is such a fun and frugal way to get a custom look. You can get a lot of charm without spending a lot of money to get it.
I hope this project inspires you to try a project in your own home. We would love for you to share it with us so we can cheer you on in our private Frugal DIY & Decor Facebook group HERE!
PIN THIS POST!
If you liked this DIY nightstand makeover, you will love these transformations:
How To Paint And Distress A Wood Table
DIY Glazed Blue Dresser Makeover
Hello Lindsay! Your post covers valuable tips to give girl’s bedroom a new look. Great job!
Thanks!