The beginner’s guide on how to wallpaper. Wallpaper is becoming more and more popular and I wanted to try it somewhere in our house. When I started researching how to hang wallpaper, I didn’t find a place where all of my “newbie” questions were answered. That was a good thing and a bad thing. Bad because we needed some questions answered and good because it meant I needed to write this post to help the next person who is in our shoes and hanging wallpaper for the first time.
Our wallpaper adventure started because I wanted to try it and Gabrielle wanted a bedroom makeover.
I told her we would make over her room after we finished the flip house and she was down with adding wallpaper to the makeover! WIN-WIN! I thought her room was a great room to try hanging wallpaper for the first time because we added a board and batten design to the bottom 2/3 of her walls when she was a baby. That meant that we would only have to wallpaper the top 1/3 of her walls. That made the “first time wallpaper” jitters a little less scary.
My mom has had extensive experience with hanging wallpaper. Back in the day when wallpaper was all the rage, she was the person family and friends would call to help them hang it. She was a great resource to have on our side, but she said wallpaper has really changed since she had done it last. We learned some tips from her and so much more in our first wallpaper experience and I am excited to share it all with you here.
First, we need to cover the supplies you will need.
(Affiliate links are used in this post. You can see my full disclosure HERE.)
Supplies Needed To Hang Wallpaper:
Wallpaper (we got ours HERE)
Large Sponge
Level (this one worked so well)
Utility Knife (with plenty of extra sharp blades)
Paint Tray
Paint Roller
Paint Roller Frame
Large Square
Water
Taping Knife
Wallpaper Seam Roller
Tape Measure
Scissors
Towel (to clean up excess glue that will end up on your table when you roll the water over it)
Long Table
Steps To Hanging Wallpaper:
-
Measure your walls with a tape measure. Take into account the excess you won’t be able to use in each roll. Spoonflower has a great resource to help you with that HERE.
-
Order/Pick up the wallpaper.
-
Pick the corner of the room you are going to start on and measure your first piece with a tape measure. Give yourself a couple of inches at the top and bottom to make sure you cover the area. You will get in a groove as you go for measuring and making sure you have enough wallpaper to cover measuring errors or not-so-level walls.
-
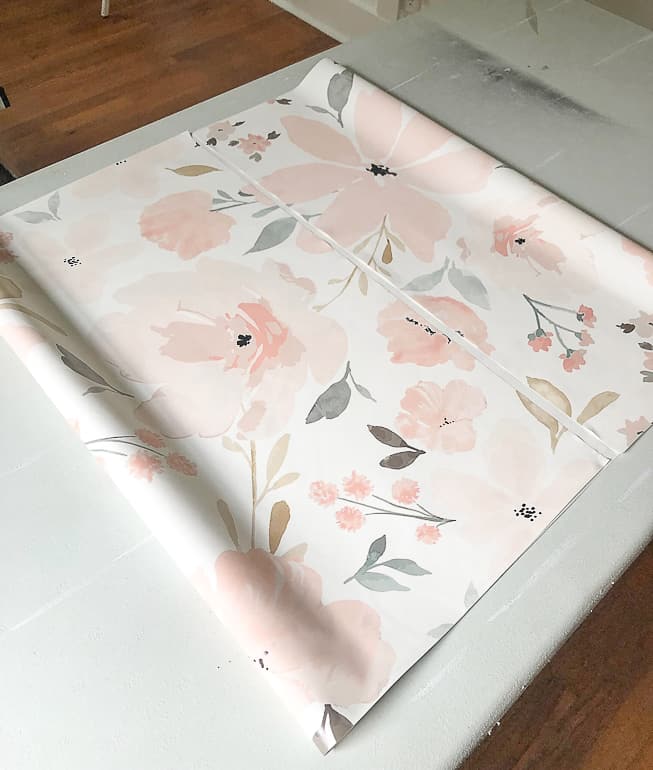
Lay the wallpaper face down on a long table. If you have a pattern, make sure you know which end is the top and which one is the bottom. Once you start hanging the pattern, you will get the hang of it and know which end is right because of the way the pattern goes.
-
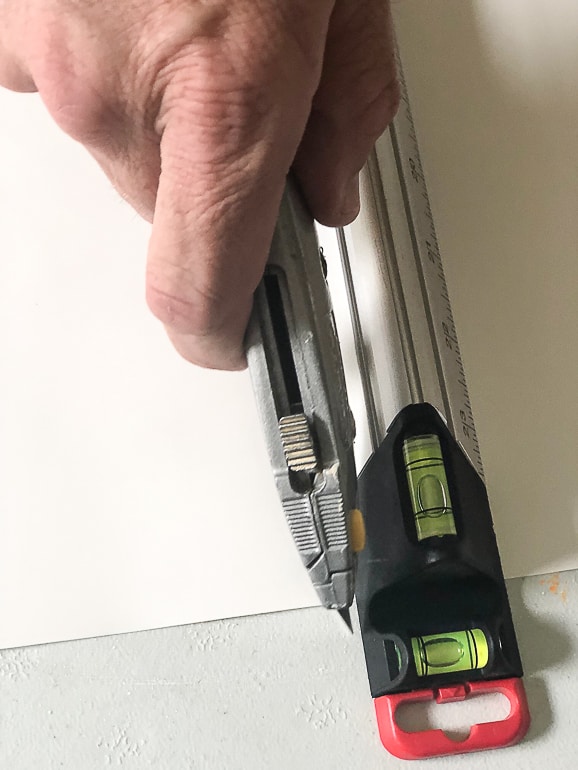
Use a level or large square as a guide to cut the wallpaper to size with a sharp utility knife.
-
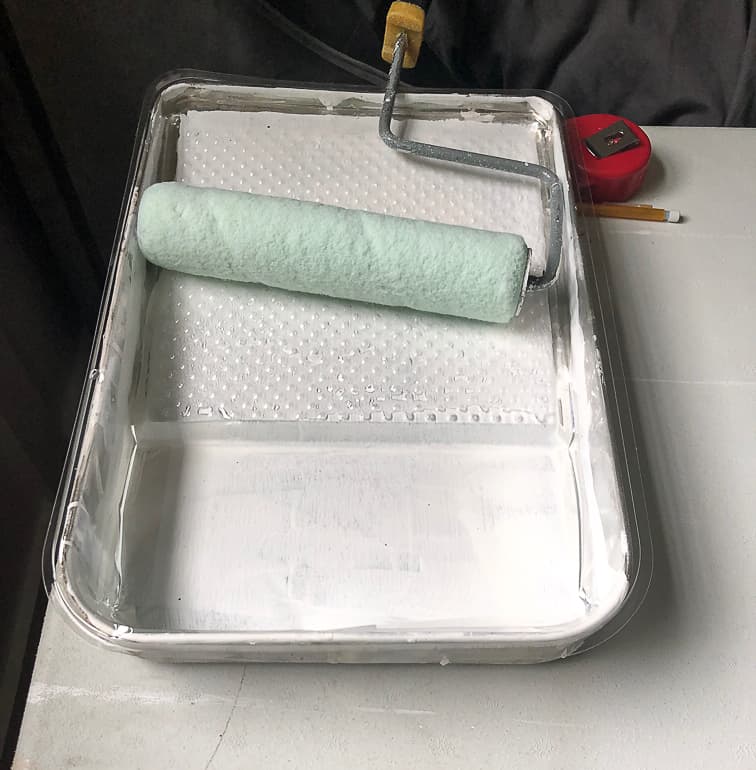
Put water in a paint tray.
-
Use a paint roller and dip it into the water in the paint tray. You don’t want the roller soaked, but you don’t want it just damp either. Right in the middle is best.
-
Roll the wet paint roller all over the back of the wallpaper piece you cut. Make sure to get all the edges and the corners wet.
-
Fold the wallpaper on itself on both sides. This is called “booking”.
-
Let the wallpaper sit for about 3 minutes while the glue activates.
-
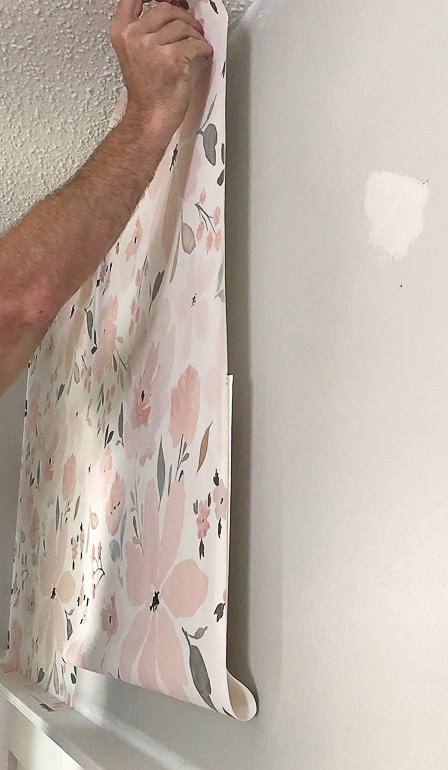
Open the top section of the wallpaper piece and leave the bottom part together until you get it to the wall. We found it easier to open the bottom portion right before we hung the top. We were working on 3′ sections so it was hard to put the top part on and then have to pull the piece away to open the bottom half.
-
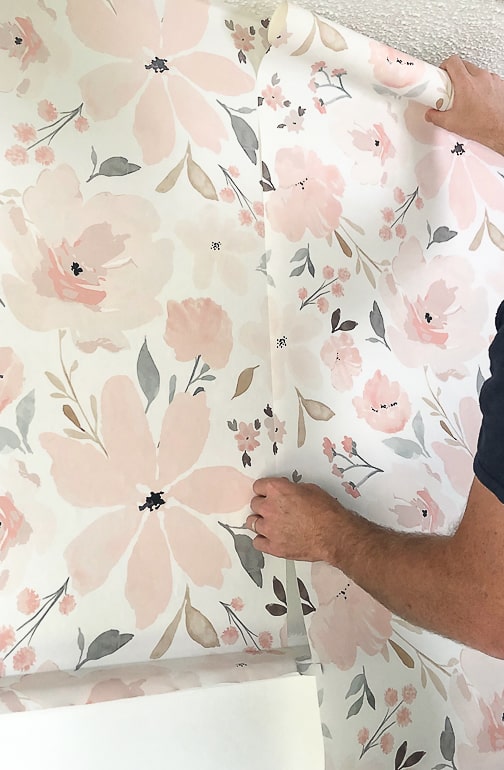
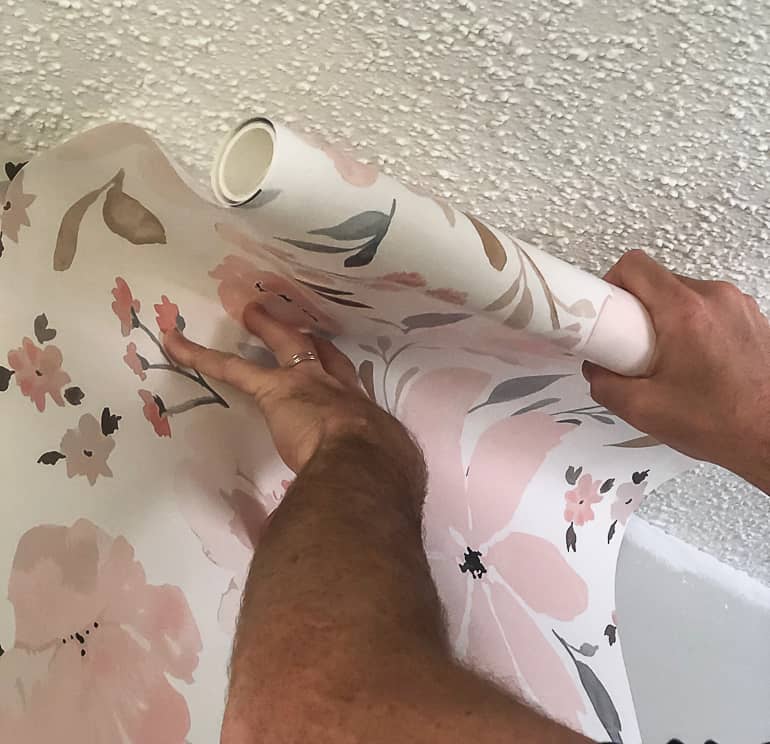
This is when two people are handy to have. Matt would line up the pattern and I would hold the other side of the paper away from the wall. When he got the pattern lined up, he would put the wallpaper down as he worked over to my side. Try to get any bubbles out as you lay the paper down. Lay from one side to the next so you are constantly pushing it down as you go across.
-
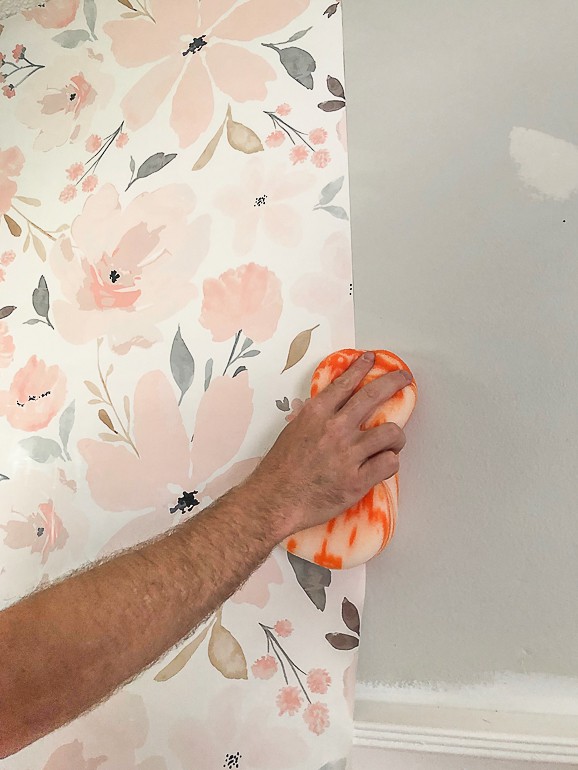
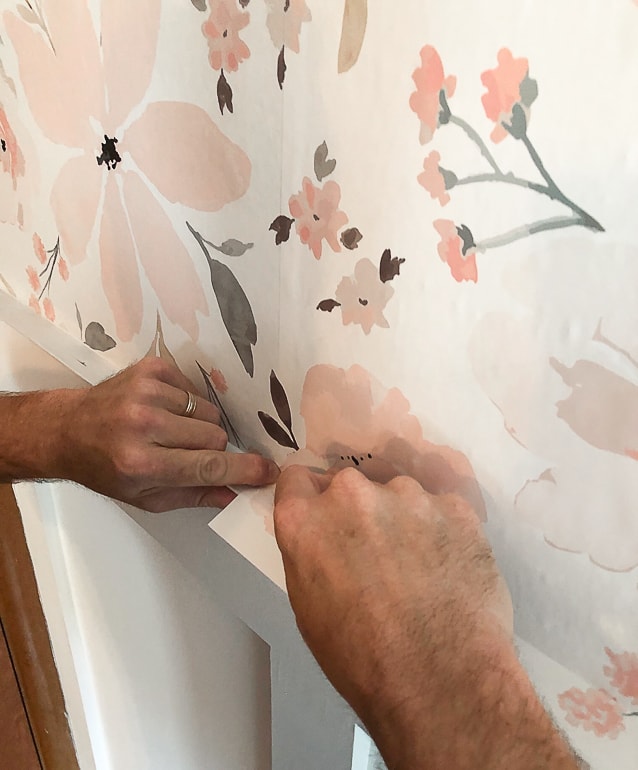
Once the piece is hung, go over it all with a damp sponge. You don’t want your sponge soaked at all. Damp is best. Use the sponge to smooth out any bumps or air bubbles. You can lift the paper if you need to pull it more taught but try not to do that too much because the glue may dry.
-
You can use a seam roller to get small bubbles out.
-
Once you are happy with the way it looks, it is time to measure for the next piece.
-
Continue this process as you work your way around the room. When we came to a window, we just measured the piece like there wasn’t a window and cut around it after it was up. That was so much easier than trying to measure around the window. We couldn’t use the rest of that piece anyway so it wasn’t wasting more wallpaper either.
-
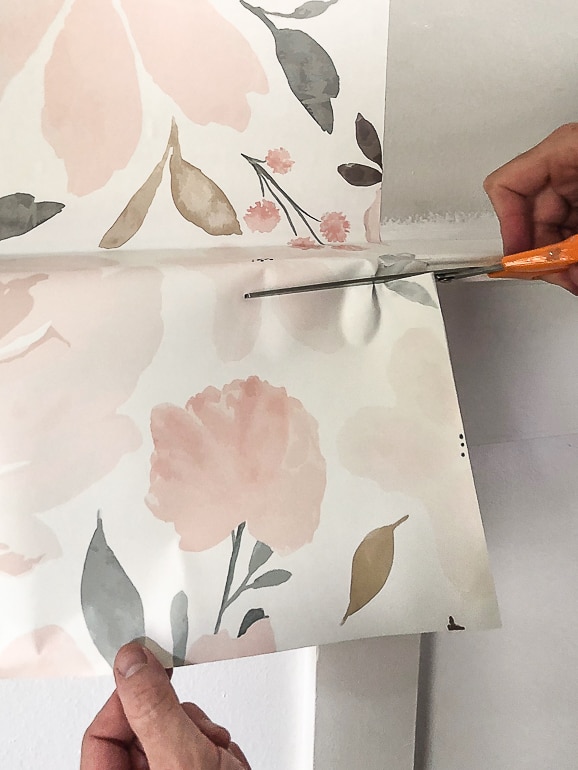
Once the wallpaper is all up and dry, it is time to cut off the excess. Or, if you find that it is working to cut as soon as you put it up, do it that way. My mom used to cut each piece as she hung it and when it wasn’t fully dry. The directions on the wallpaper we got said to wait until it was dry. Check the instructions with your wallpaper.
-
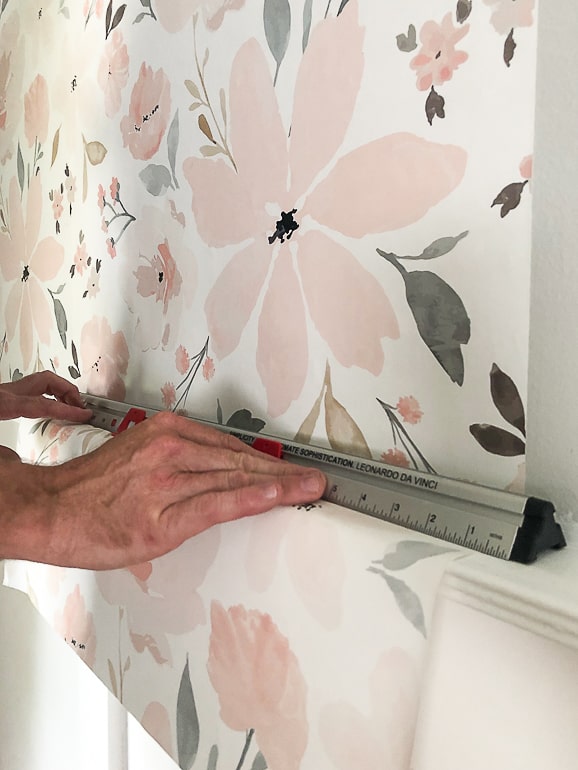
Use this level or a taping knife against the wall to guide your utility knife as you cut off the excess.
-
Stand back and celebrate your work!
I learn better when I can see something being done. I recorded the process of hanging the wallpaper and what we learned along the way:
Make sure you are subscribed to my YouTube channel HERE for more how-to videos, DIY projects and easy crafts.
Here are some other questions I had and I know other beginner’s will have when hanging wallpaper for the first time:
How Do I Cut The Wallpaper?
It is very important that you have a sharp razor in your utility knife and that you have plenty of new razors on back up when the blades get dull. Do not cut wallpaper with a dull blade. We used this level and a utility knife to cut the wallpaper from the roll. After the wallpaper was up and dry, we used the taping knife and utility knife to cut the excess off. We also used scissors if we had a lot of excess wallpaper to cut off.
How Do I Measure For Wallpaper?
This is a big one and one I wish we would have known. We ran out of wallpaper and had to wait for more to come to finish the job. That was not fun because the entire room makeover was at a standstill. When measuring for wallpaper, you have to take into account that you will probably be lining up a pattern and that means you will have parts of the roll that you won’t be able to use. For us, we couldn’t use about 12″-16″ from each piece we were putting up.
You should definitely take that into account when measuring. We got the wallpaper from Spoonflower and they have a resource page HERE that will help with measuring and patterns. I obviously didn’t even look at that page and didn’t order enough. Don’t make that mistake. If you are getting the wallpaper from Spoonflower, read through that page to make sure you have enough paper.
Where Do I Start The Wallpaper On The Wall?
Choose a corner on a wall that won’t have many cuts. The first piece you put up is the most important. Not all walls are level and perfectly square so getting the first piece up and level is a must. We chose to start in the corner in Gabrielle’s room that didn’t have a window to cut around and was pretty straight across. Once we had the first piece up and level, we worked with the pattern and measurement from that piece as we moved forward. One thing my mom told me we should do is wrap the paper around the corner about an inch on the first piece. That way, when you come around to that piece in the end, your last piece will overlap the first piece.
Do I Overlap The Wallpaper?
Yes! We used Spoonflower wallpaper and the rolls come with instructions about overlapping. If your wallpaper comes with instructions, READ THEM before you do anything. We overlapped each sheet of wallpaper about 3/4″. If you are working with a pattern that you need to match up, you will see where you have to overlap so the pattern lines up perfectly. It will make sense once you do it.
What Is “Booking”?
I had no idea what this meant, but when I was showing my mom what the instructions told us to do, she said that part is called “booking”. Booking is when you fold the paper on itself after you get it wet so the glue activates.
Should I Use Peel & Stick Wallpaper or Water-Activated?
When I first thought about putting wallpaper on Gabrielle’s walls, I thought the peel and stick would be easier. I quickly learned that if you have any kind of texture on your walls that you should not use the peel and stick. I don’t know if I have ever seen perfectly smooth walls so not sure what the sticky wallpaper would work on. If you have any kind of texture on your walls, use water-activated wallpaper. The one good thing about Spoonflower’s water-activated wallpaper is that we felt like we could maneuver it well and it was pretty forgiving. We nave not used the peel and stick kind, but I don’t think it would be as forgiving. Once it is stuck on, I don’t think you would be able to move it much, but that is just my opinion.
Should I Wait Until The Wallpaper Dries To Cut Off The Excess?
Again, this might depend on the kind of wallpaper you get. My mom said that she always cut the excess off as soon as she got the sheet of wallpaper hung. The instructions for the Spoonflower wallpaper said to wait for it to dry. I can see both working. Sometimes, when you cut wet paper, it tears and you don’t get a good cut. But, if you are using the water-activated kind and the excess is sticking to a part of the wall you don’t want it on, you may want to cut it off sooner so it doesn’t stick.
We didn’t have a problem and we tried both ways. We had excess on the ceiling and on the board and batten. We didn’t feel like it stuck to them so much that we couldn’t cut it when it dried. The wallpaper we were using was so thick so it didn’t necessarily tear when we cut it wet, but it was easier to cut when it was dry. With all the said, see how your wallpaper is, what the instructions say and what you are comfortable with.
How Do You Measure Each Piece?
We lined up the pattern and then gave ourselves an extra inch or two at the top to make sure we had it covered. Matt would hold up the paper, get the pattern lined up and then he would crease the paper at the top where the wall meets the ceiling. When he laid the paper down on the table to cut it, he would add about an inch or two more to make sure it wasn’t short.
Should I Have Someone Helping Me Hang The Wallpaper?
Yes! It was so much easier to have both of us hanging the wallpaper. My mom used to hang it on her own and I know professionals hang it on their own. If it is your first time hanging wallpaper, I would highly recommend getting at least one person to help you.
Is This A DIY Project I Can Do?
Yes. Matt and I have done so many DIY projects and I am honest about every one. We have never done this before and we were really nervous to get started. It is not as easy as painting and it costs more, but it is definitely something you can do. If you are equipped with the right tools and all the information, you can tackle this project.
What Is The Cost Of Wallpaper?
When I was searching for wallpaper for Gabrielle’s room, there were different price points depending on the company, brand and type of wallpaper. Gabrielle and I searched for different options and we kept coming back to the Gracie Grace pattern from Spoonflower, so we got that one. If you do DIY projects, you probably have a lot of the supplies on hand. We had to buy a big sponge but that was only a couple of dollars.
We had the other supplies we needed so it didn’t cost us anything extra there. Once you start browsing for wallpaper, you will see the different price points and options. Gabrielle has a small room and we only did the top third of her walls. I used the coupon code that I found on their site to save what I could. Do your research. Wallpapering costs are all different. Search for coupon codes. If you can’t find any, reach out to the company and see if they can give you one.
I hope this post answered a lot of your questions and has given you more confidence to start your wallpaper project. Like I said, we were pretty nervous to try this because it was something totally new to us. But, once we got in the groove and kept going with it, it got easier and easier and wasn’t so scary at all.
If you have any other questions that I didn’t answer here, please leave them below and I will get to them. I want to equip you with all the right tools and information we learned so you don’t make the same mistakes and can have a better understanding going into it.
Happy Wallpapering! 🙂
PIN THIS POST!
Just curious – what did you do in the corners? is it two pieces that meet in the corner or is it one piece that is folded (if that makes sense?) Thanks!
We started in a corner with like 1″ over and then just continued with the wallpaper around. When we got to the next corner, we would lay the wallpaper around the corner so it went to the other wall (if that makes sense). We didnt’ cut it, just continued with it, but we did have to cut it at the top a bit so it would go around the corner if that makes sense.