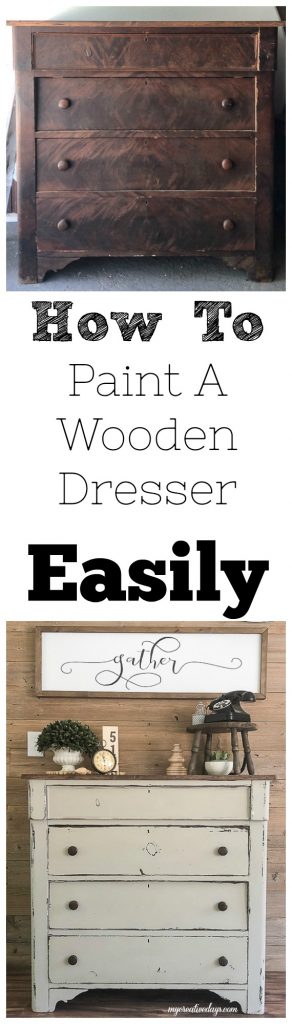
How to paint a wooden dresser in a few short steps. Painting wood furniture can be intimidating, but it doesn’t have to be. In a few short steps, you can create a piece that fits your style in a fraction of the cost it would be to buy new. 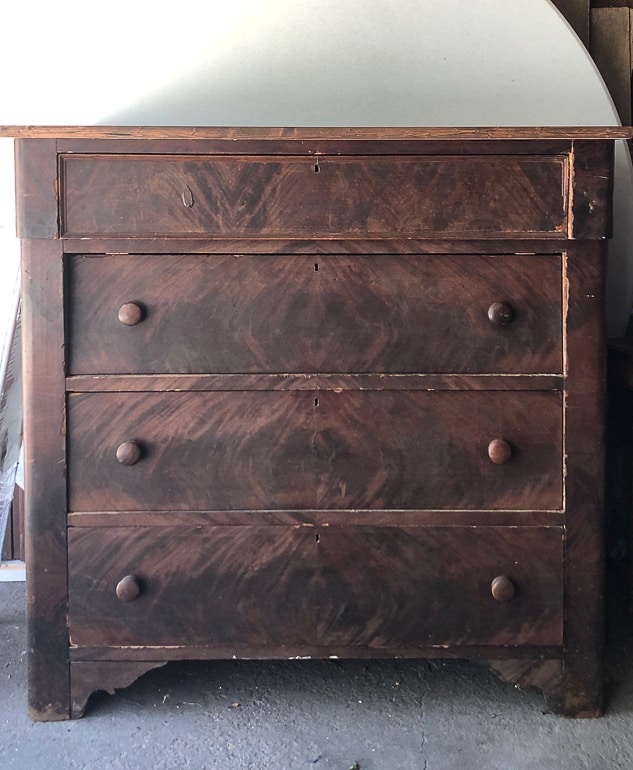
I will get to the easy steps I use to paint wooden dressers, but I always have a little story behind every piece I rescue and this one deserves a little story. 🙂
This dresser was found at a store I don’t usually buy from.
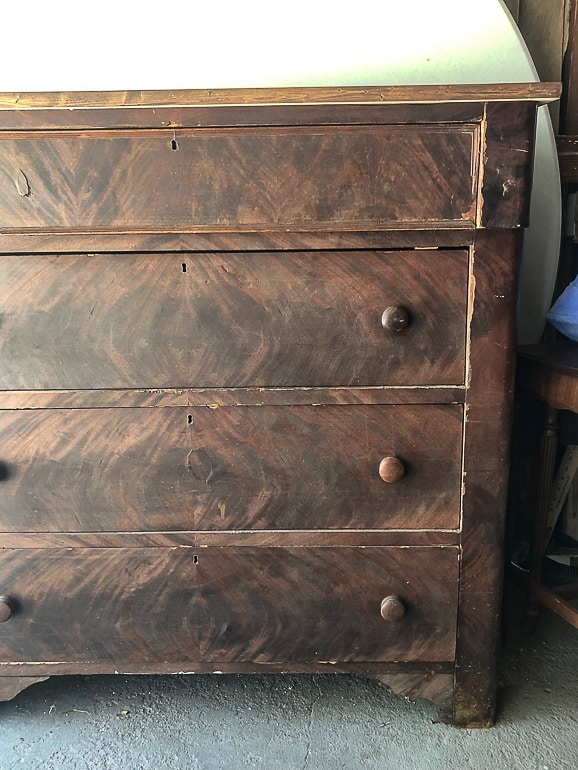
I love browsing the store, but the prices are usually way too expensive for what I am looking to spend. On this particular day, I went in with no intention of walking out with anything and when I turned the corner and saw this dresser and the price, I knew it was coming home with me. The reason it was priced lower was because it didn’t have a top and there was some dings on the front of it.
I didn’t take a photo of the dresser as soon as I got it home. Matt cut a nice board we had in the garage to create a top. I have always said that dings and things like missing tops will never deter me from buying an amazing piece. NEVER! They are easy fixes and the quality of older pieces can’t be beat. They don’t build furniture like they used to so when I can score an old, heavy wood piece like this for a great price because it needs some “fixin”, I am happy.
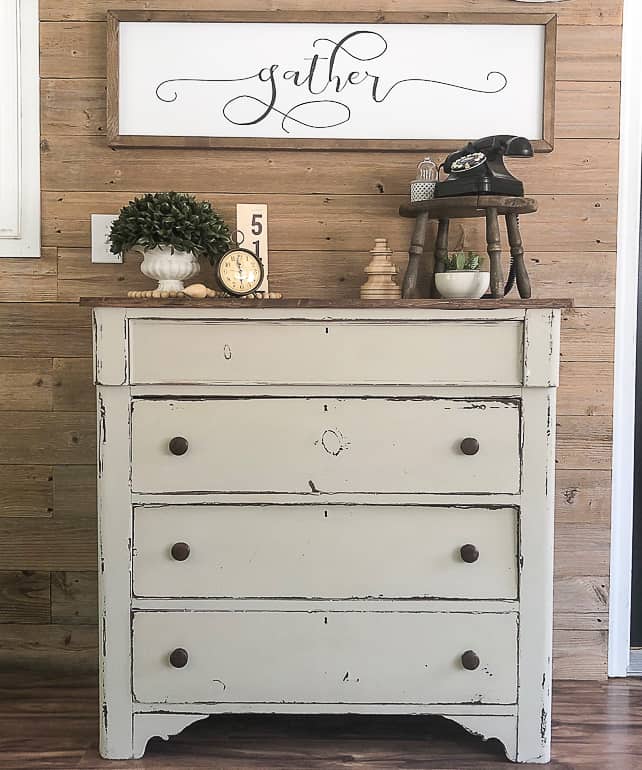
We think the dresser was from the late 1800’s. I know I will get some feedback about painting it, but it didn’t have a top and there were a lot of dings that needed repaired. This comes up a lot. I don’t ever feel like I need to explain myself, but since I get that question or “feedback” about painting furniture a lot, I want to address it upfront. I bought this dresser knowing I was going to use it to teach how to paint a wooden dresser.
My job is to share what I know and have learned to hopefully inspire others to look past the ugly and create a piece that is exactly what they want for their home. That is what I am passionate about. It is something we have done for so many years and it has really made a huge impact on our family budget and saving money. A lot of people don’t have endless funds to decorate their home and that leaves them discouraged. My job is to teach them that there is an easy way to decorate exactly how you want without going in debt to do so.
End rant.
Back to showing you how to paint a wooden dresser. 🙂
{Affiliate links are used in this post. You can read my disclosure HERE.}
Supplies Used In This Makeover:
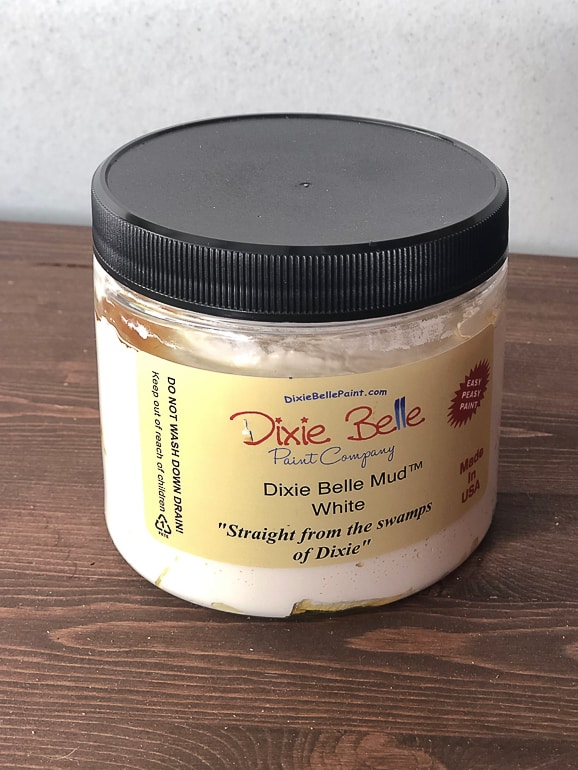
“Mud” – Dixie Belle Paint
“Palm Pro” Zibra Paint
“Sand Bar” – Dixie Belle Paint
Sandpaper
Narrow Putty Knife
Orbital Sander
Wood to Create The New Top (we had it in the garage)
Dark Walnut Stain
How To Paint A Wooden Dresser:
I want to start out and say that all dressers are different and you will have to adjust this process based on what your dresser needs. I use this process a lot on wooden dressers so it was a good one to share the steps I take.
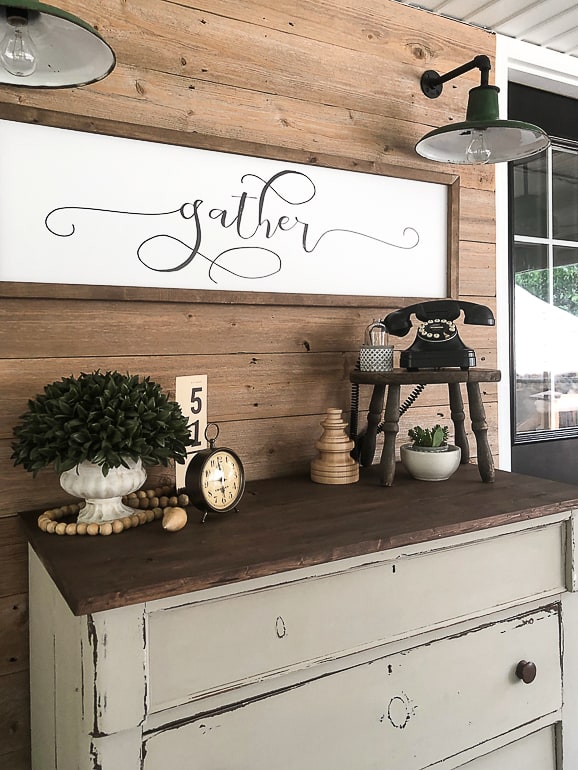
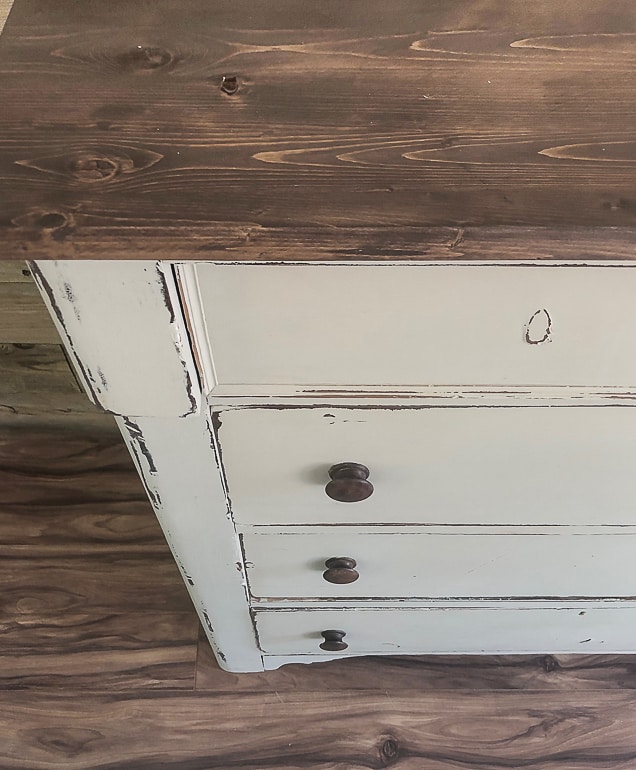
The first thing I always do when I bring a dresser home is clean it inside and out. I also take the drawers out and vacuum inside the dresser. Like I said earlier, this dresser did not have a top when I bought it so Matt measured and cut a piece of wood we had in the garage to fit it. I stained the top with a “Dark Walnut” stain. Most dressers you find should have a top, so you can skip this step. 😉
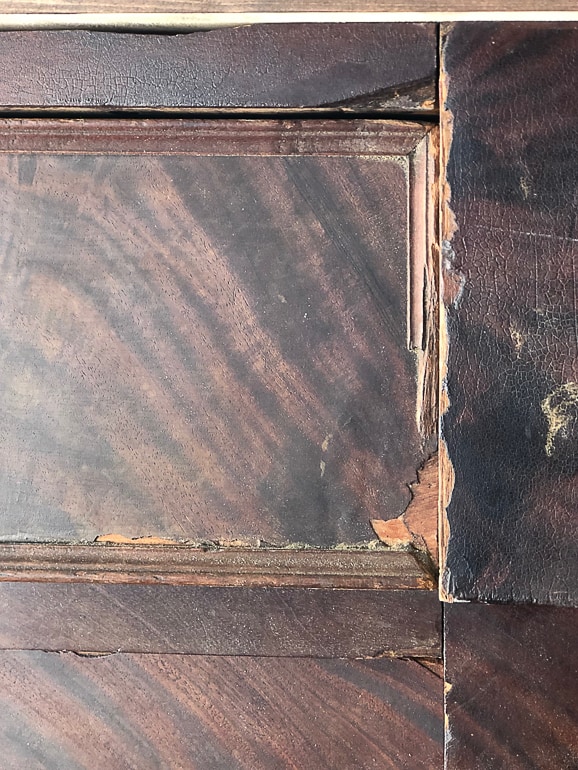
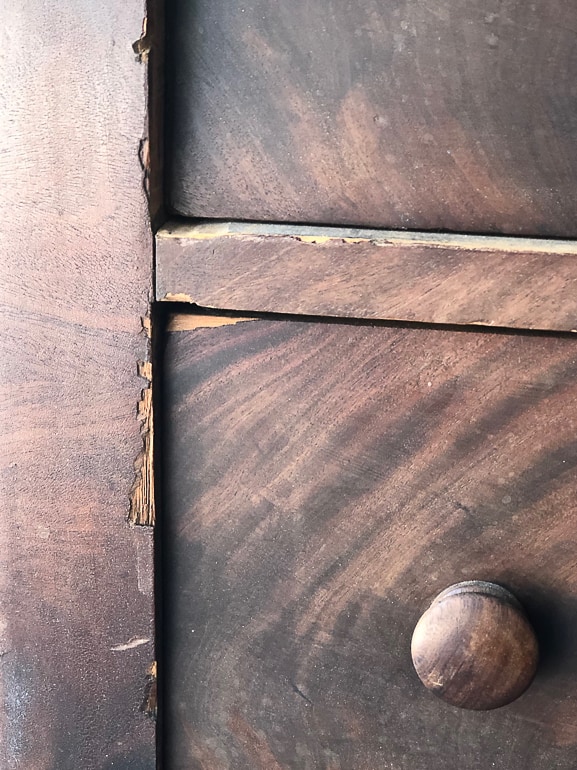
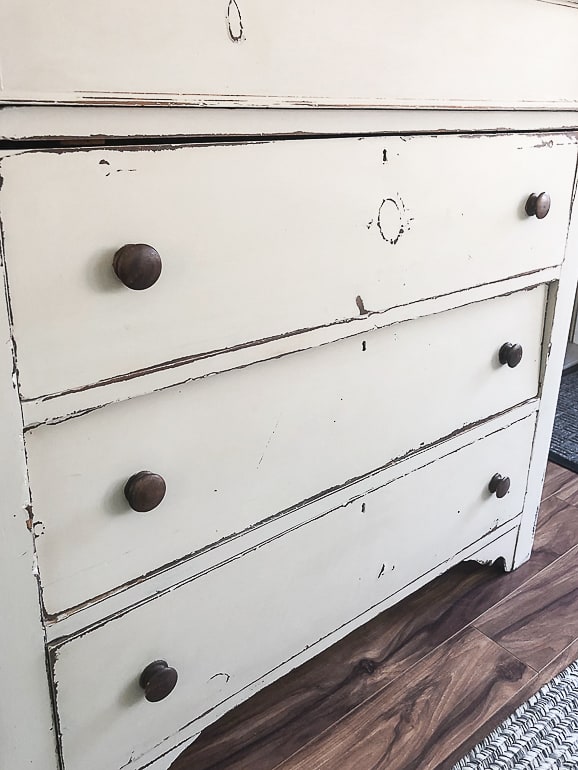
This dresser had a lot of dings in it and a lot of times when I pick up a dresser I have to deal with this. The dings in this dresser were in the wood and not part of any veneer laid over the wood. (If you want to see how to fix peeling veneer, I share my easy process in the post HERE).
Whenever I have to fill parts of wood dressers, I always grab my “Mud” from Dixie Belle Paint. This stuff is so easy to use. It comes in a few different colors, but if I am painting a piece, I always use the white because I always have that on hand. I use a narrow putty knife to apply the Mud to the dinged areas.
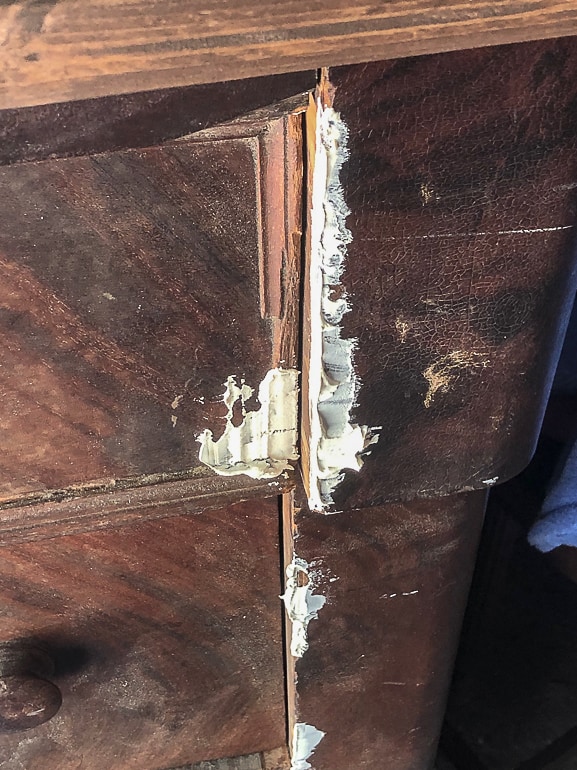
As you can see from the photo above, I am not dainty about it. I put the Mud on thick and just make sure to get all the crevices covered.

Once the Mud is dry (the time will depend on how much you used), I sand it all down so it is a smooth surface to paint.
I wipe away all the dust from sanding and then I am ready to paint. Then, I usually remove all the hardware from the dresser. I could not do that with this one because they were put in with square nails and I didn’t want to lose the integrity of how it was made so I painted around them. When you have the best paint brush to trim around things like this, you don’t sweat it. (More about the paint brush in a bit).
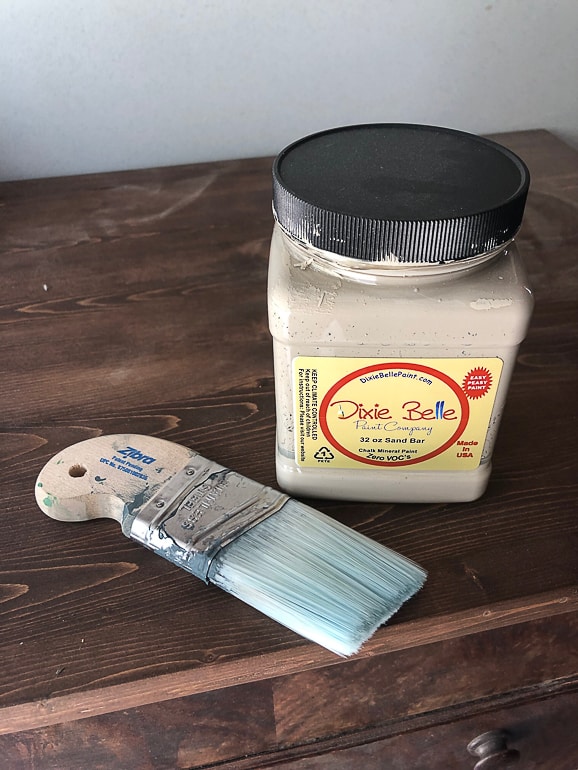
I chose “Sand Bar” from Dixie Belle Paint for this dresser. I often get asked if I use a primer before I paint. My favorite thing about Dixie Belle Paint is that you don’t need a primer. The paint covers so well. Now, if I have a really red-toned piece or something that is really orange, I might use Boss from Dixie Belle Paint. The Boss blocks odor and stains and stops bleed through. This dresser didn’t need it so I skipped that step.
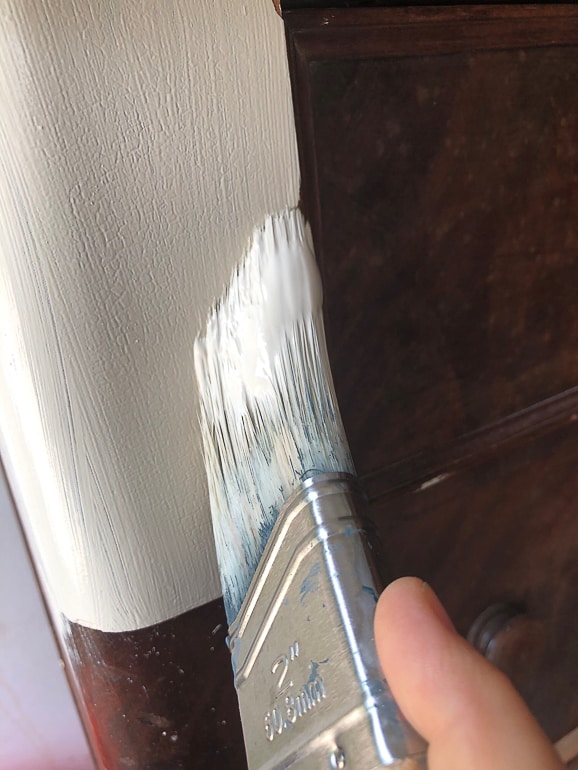
Now, this is probably the most important step of this process. The paint brush. Please learn from me. I have painted all kinds furniture pieces over the years without having paint brushes to match the job I was doing. When I discovered Zibra Paint Brushes, I was skeptical, but excited to give them a try.
THESE BRUSHES HAVE CHANGED THE PAINTING GAME FOR ME! My favorite brush, and the one I used on this dresser, is the Palm Pro.
This bush fits so well in my hands and I can maneuver it easily around curves and trimming. It is the brush I grab for first, but I use all of their brushes on so many projects. They have really thought about what DIYers like me need and they have executed it like a champion. Each brush is made for a purpose and to make the job easier and run more smoothly. If there is one thing you take away from this post, please get yourself one of these brushes. Then, come back and thank me for how amazing it was to use. 😉
I put two coats of paint on this dresser. Sometimes, they only need one coats and sometimes they need more than two. It will depend on your piece.
No matter how many coats a dresser needs, I make sure the previous coat has dried thoroughly before I put on another coat. If you don’t wait, you will be pulling semi-dry paint and seeing more brush strokes and it won’t give you a good look in the end.
When I have a dresser that has dark wood or has a lot of character, I usually want to bring that out. So, for this one I used my orbital sander around some of the edges to show that beautiful dark wood under the paint. This shouldn’t be labor or time intense. You can want to go over the edges lightly and give a little “wear” to them.
Skip the orbital sander part if you just want a solid paint color.
Another question I get asked a lot is if I use a top coat. My answer is, “Not all the time”.
Again, Dixie Belle Paint does not need a top coat when you are done with it. If you are worried about it or would feel better about adding a top coat, by all means go for it. I have done it on some of the pieces I have finished. If I am going to add a top coat, I always go with a matte finish. I don’t want a shiny finish on most of my pieces. Dixie Belle Paint has some amazing top coats and you can use any sheen you like. Find them all HERE.
So, to summarize how to paint a wooden dresser easily, here is the list of what I do every time:
-
Clean the dresser inside and out.
-
If there are dings missing in the veneer, head HERE to see how I handle that.
-
If there are dings in the wood, use Mud to fill them in.
-
Sand the Mud so it has a smooth finish.
-
Clean away all the dust from sanding the Mud.
-
Remove all hardware if you can.
-
You can use a primer, but if you are using Dixie Belle Paint, you shouldn’t need to.
-
Paint the dresser.
-
Let each coat dry before adding other coats.
-
If you are distressing, use a sander or sandpaper lightly around the edges where it would be worn naturally.
-
If you are adding a top coat, now is the time to apply it.
-
Once top coat is dry, install new or the old hardware.
-
Step back and admire the work you just did!
Painting a dresser (or any piece of wood furniture for that matter) does not have to be difficult.
I know it can be scary to try for the first time and that is why I always suggest picking up something small at a yard sale or thrift store that you can practice on (think magazine holder or stool). In the end, it is only paint. You can sand it and paint it again and again if you don’t like it. Just like with any DIY project, you get better the more you do it. I have had my fair share of fails, but I have learned something new with each one of them.
I hope this post has helped you get over the hurdle of being too scared to try it. If you have any questions, please leave them in the comments. I am here to help and cheer you on!
Us DIYers have to unite! 🙂
If you didn’t know, we started a DIY community on Facebook for projects just like this. It is a group that shares projects and ideas and who help each other out along the way. We would love to have you join. You can find us HERE.
PIN THIS POST!
If you liked this How To Paint A Wooden Dresser post, you will also enjoy these posts with easy tips:
How To Fix A Broken Dresser Drawer
Create Aged Copper Patina On Wood & Metal
How To Make A Faux Mantel Tutorial
No rant, just truth!!!! Great job as usual! I learn something every day and that plus inspiration and motivation are what it’s all about! Thank you.
Thank you so much!!
Love the way it turned out. Did the top draw ever have pulls? You distressed it great.
Nope. It has a lip under the drawer where you open it. So unique. I love it!
This turned out great! Beautiful job, Lindsay!
Thank you!!!