This DIY Painted Dresser Tutorial will give you the tips you need to paint furniture.
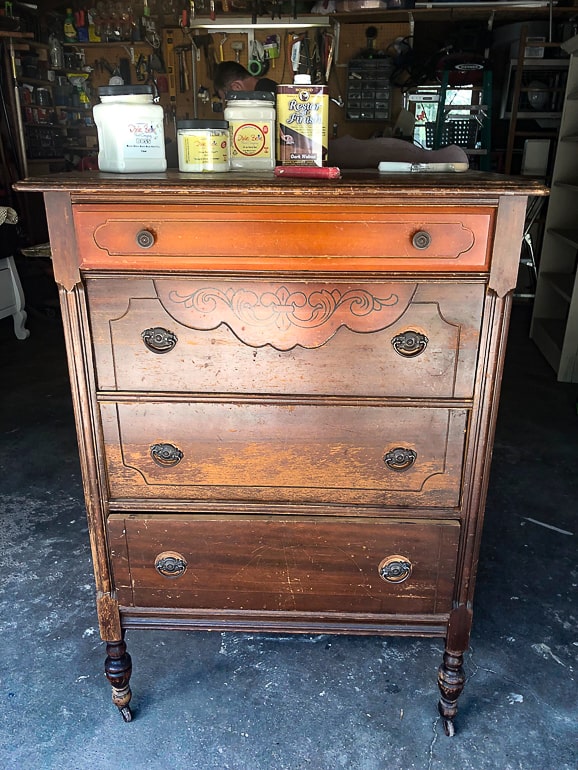
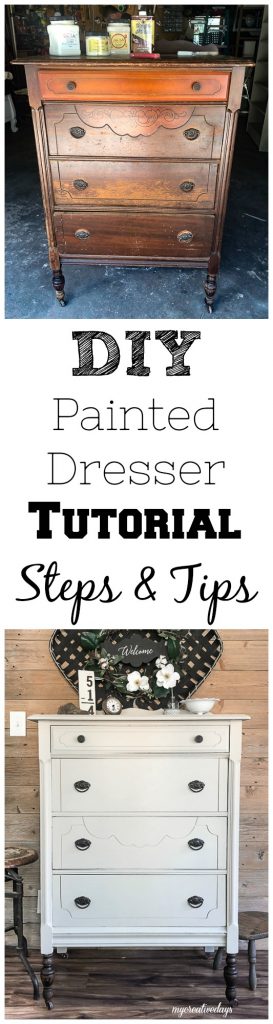
On one of my random trips to one of our local Goodwill stores, I found this dresser. I wasn’t planning on going to the thrift store, but Matt and I were in the neighborhood so we decided to stop in. When I walked in the front door, I saw this dresser immediately and walked up to it. This particular store usually puts high prices on pieces like this so I wasn’t too excited about the chances of buying it and bringing it home.
Once I saw the $15 price tag, I got excited. After further inspection (making sure the legs and drawers were in tact), I got Matt’s attention so he could carry it to the front of the store so we could buy it. Thank goodness he was with me that day because I would not have been able to put it in a cart. 🙂
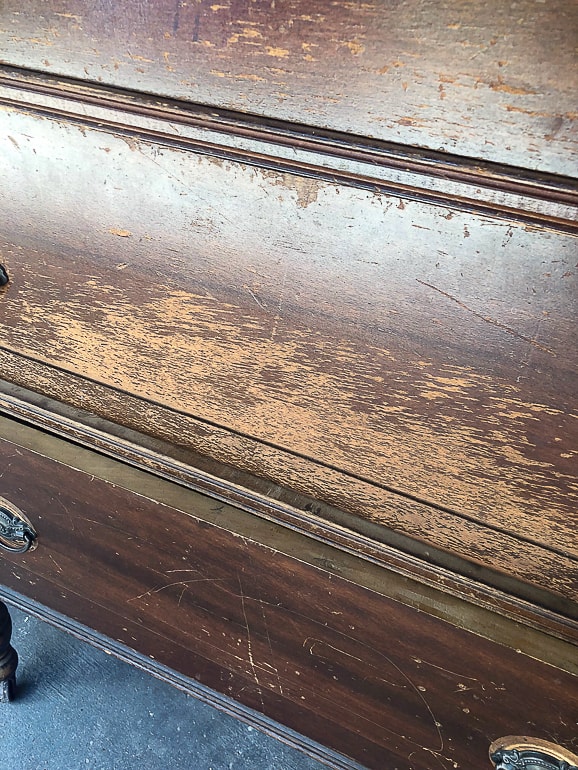
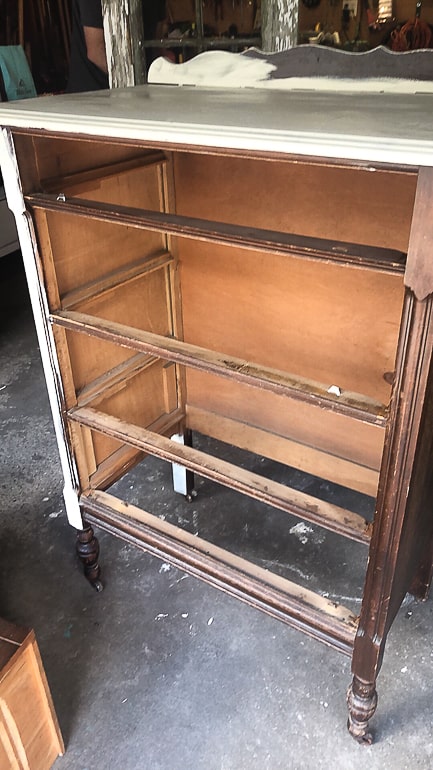
Like most furniture pieces I rescue, this dresser did not have the best finish. The front of the drawers were in rough shape, but the hardware was all there and the original wheels were all intact on the bottom of the legs. The drawers worked well and it is a solid wood dresser. These are all things I look for when I am looking for pieces to make over.
{Affiliate links are used in this post so you can easily find the products I used. You can read my disclosure here.}
How To Clean A Dresser Before Painting:
The first thing I did to begin this makeover (and every furniture makeover) is clean it. I always get asked what I use to clean furniture before I paint. To be honest? It depends. A lot of times, it is a damp rag because there is usually a lot of dust to remove. But, if I have a piece that needs a little more scrubbing, I may use Thieves cleaner and baking soda. If I am going to paint the piece and need something a little stronger or if a spot is not coming clean, I may use a Magic Eraser.
If all of those options don’t work, I will get out the orbital sander and see if I can get it cleaned that way. There is no “one size fits all” approach to cleaning a piece of furniture before you paint it. It depends on the piece, what you need to clean off and what you are planning to do to the piece in terms of paint, stain, etc.
This dresser needed a good cleaning with a damp rag. It was just dusty, so I needed to remove all of that before I could paint it.
How To Restore A Wood Finish Without Sanding or Stain:
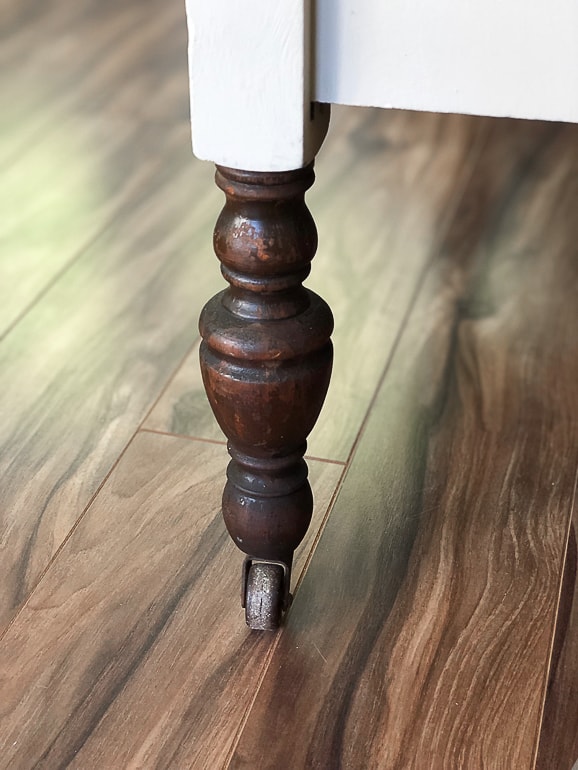
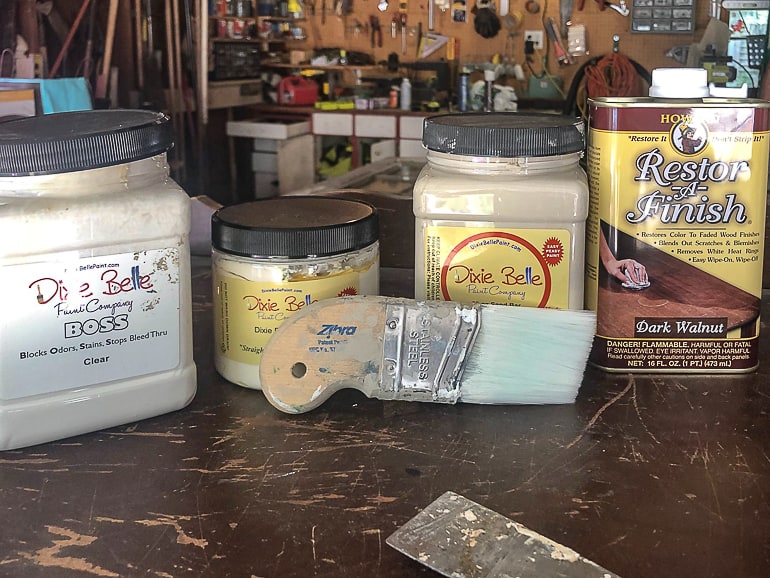
I LOVE the look of paint and wood together. I knew I wasn’t going to strip the dresser, but I thought I may be able to restore some of the scuffed-up wood with Restor-A-Finish. The only place it worked on was the legs. I was so happy because once I got it done, I loved the way it looked. The Restor-A-Finish is amazing! It restores wood back to its original state with its magic. I use an old rag to apply it. The legs of this dresser looked brand new once I got them all covered. I have used this product on cabinets, wood floors. furniture and trim. It is such a great product to have on hand.
How To Repair Small Pieces of Veneer That Are Missing:
After cleaning and getting the legs looking great, I needed to repair a small area on the side of the dresser where the top layer was missing. I love “Mud” from Dixie Belle Paint for patches like this!! It is so easy to use. It fills gaps easily and makes it look like part of the furniture. I apply the “Mud” with a small putty knife.
I am not perfect with it. You can’t mess it up. I put on a thick layer to make sure the spot is filled. Once it is dry, I sand it smooth with a sanding block and make sure it is level with the rest of the surface. Then, I use a damp cloth around the area to get rid of any dust left over from sanding. If this dresser had bigger areas of veneer peeling off, I would have used this easy way to remove veneer from wood furniture.
Now, the dresser is ready for paint.
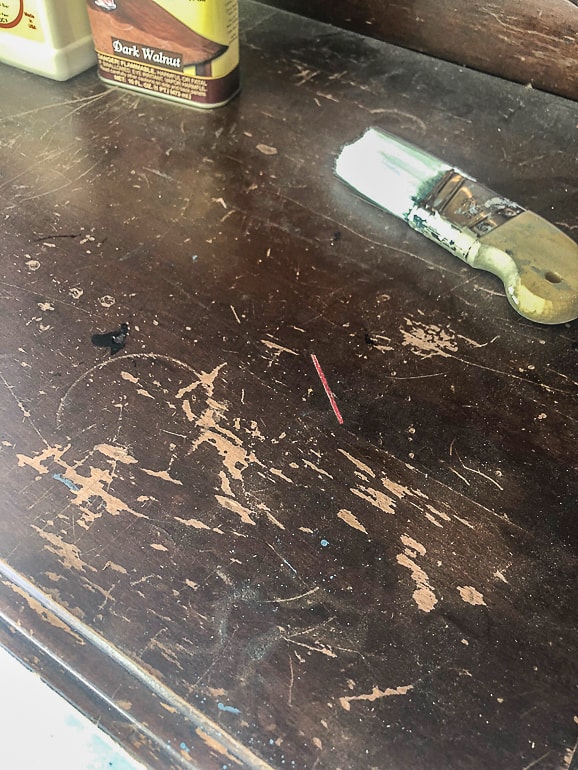
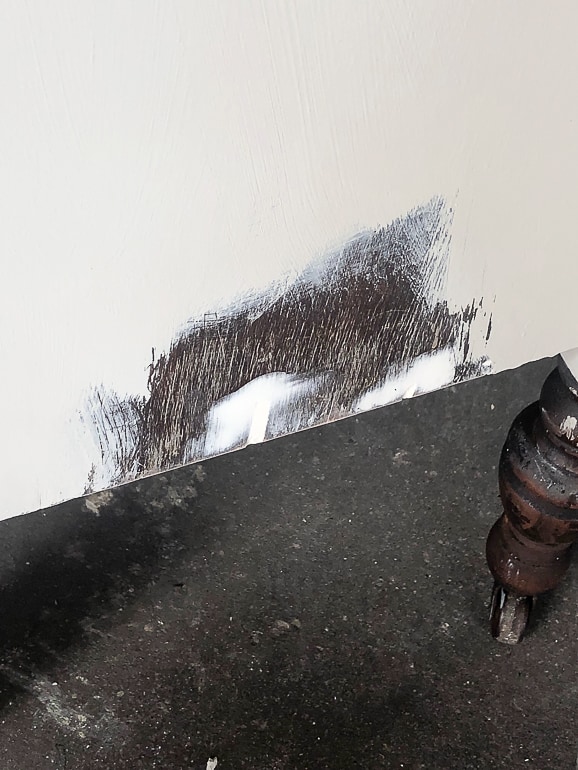
*Pro Tip: Sorry for the bad picture above, but I needed to share this tip. Whenever you are painting a piece of furniture that has drawers, remove the drawers before you paint. That allows you to get into all the nooks and crannies and it also ensures you won’t paint the drawers shut.
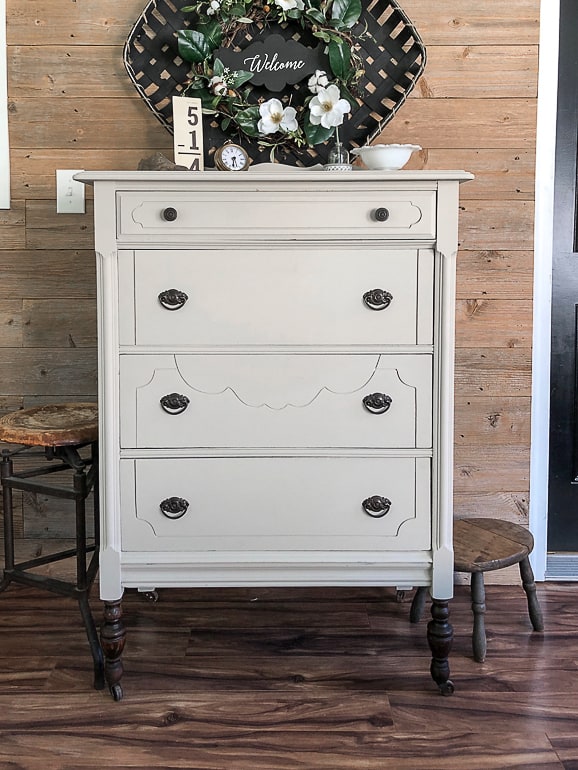
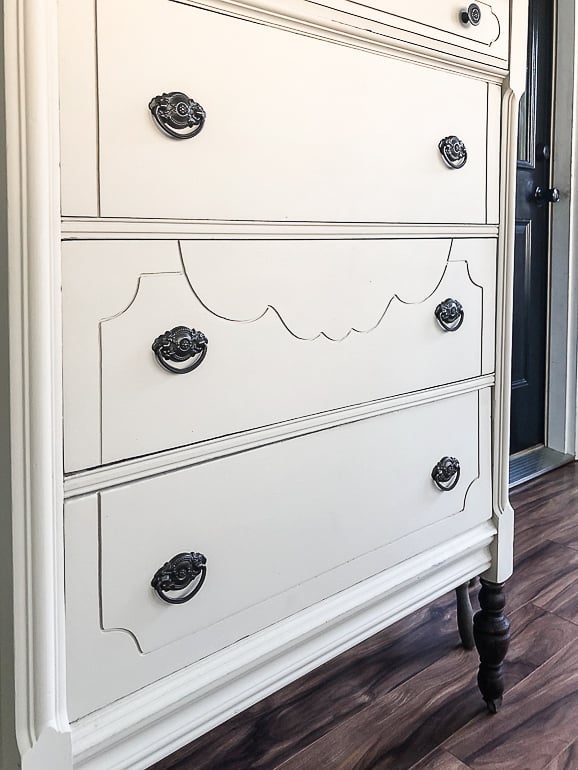
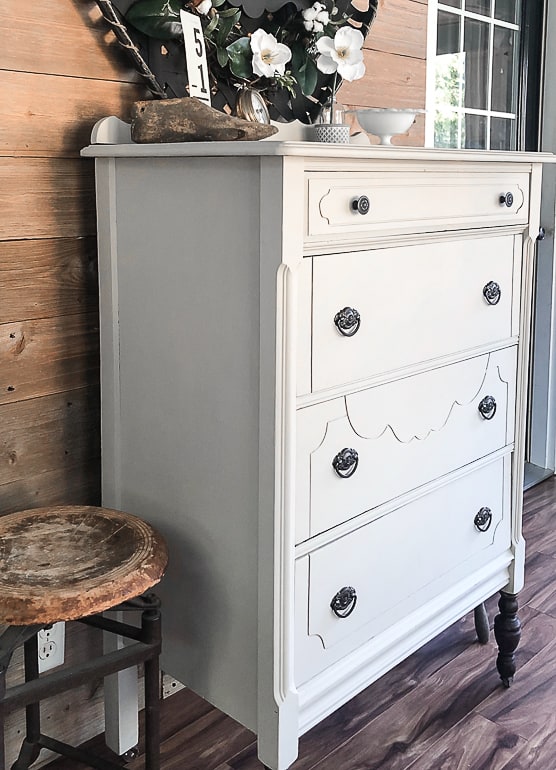
I wanted to do a light paint color against the darker wood of the legs, so I chose the color “Sand Bar” from Dixie Belle Paint.
Best Paint Brush For A Painted Dresser:
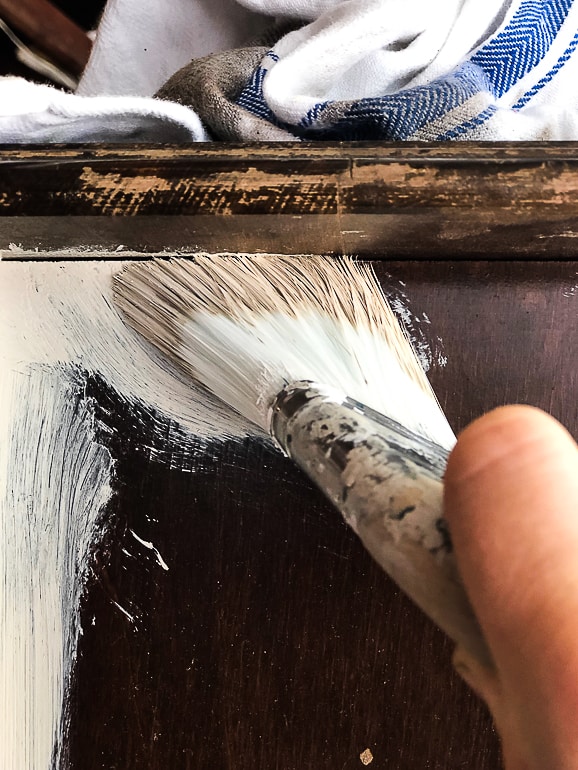
To apply the paint, I used my favorite brush from Zibra Paint – the Palm Pro. This paint brush makes all my painting dreams come true. If you do any kind of painting projects, this brush will make it so much easier. Its smaller size fits in my hand so well and I can maneuver it around anything I need to. I can’t say enough about the brushes from Zibra Paint. I share them all the time because I truly love them and am so thankful a company finally created paint brushes for people who paint! They have a brush for any paint job you can imagine. If you only invest in one thing for your DIY toolbox, let it be a paint brush from Zibra. You will be so glad you did.
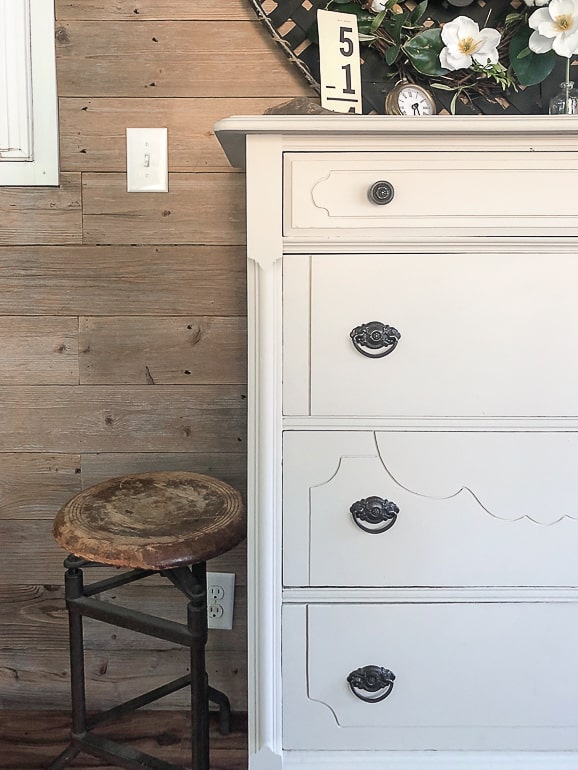
Look at the dresser now!!!! It is gorgeous.

Wood and paint together is so beautiful. You aren’t finding pieces like this in your local furniture store.
I can’t say it enough. You can have your home decorating just like you want without a large budget. It takes a little bit of hunting, elbow grease and some creativity. You have me to help you along the way and my blog posts, videos and social channels to give you all the tips and tricks I have learned along the way. Shopping thrift stores, yard sales and flea markets for pieces that aren’t yet at their full potential is the best way to save a ton of money getting the exact look you want while creating a home full of character, charm and stories to tell.
I went live on my Facebook page to share this painted dresser makeover. Make sure to follow along with me there and on YouTube to see all the behind-the-scenes action. If you missed it, here is the video:
Supply Recap Used In This Painted Dresser Makeover:
Old Rag
PIN THIS POST!
If you liked this DIY Painted Dresser Tutorial, you will also love these transformations:
How To Paint And Distress A Wood Table
DIY Nightstand Makeover For Teen Girl’s Bedroom
DIY Glazed Blue Dresser Makeover
This was such a find! Great job Lindsay :))))
Thank you so much!
Hi Lindsay, beautiful piece! May I ask? I went to dixie belle to look at their paints. The Sand Bar color you use in the project looks more white to me than a tan which is how it is categorized on their website. Could you maybe try to describe whether it is more on the white side or tan in color? Thank you!
I think it is more on the tan side, but so pretty. It isn’t an old fashioned beige at all. It is a tanish white color to me. I hope that helps.