I want to thank Zibra Paint for partnering with me on this Vintage Blue Dresser Makeover. All opinions of their amazing brushes are my own.
Have you ever been to an estate sale and thought the prices were so high that there is no way you are ever stopping at an estate sale again?
Yeah?
Me too!!!
This vintage blue dresser makeover was actually an estate sale find.

What?!
Yep!
Well… kind of an estate sale find.
You Can Find Amazing Furniture At Estate Sales & Yard Sales
Matt and I were on one of our Saturday morning coffee/tea dates and we saw a homemade “sale” sign. It looked like a yard sale so we decided to check it out. When we walked up the driveway, the people having the sale said everything was 90% off and there was more inside the house. We were the only people there. After walking through the house and talking with the owner, we found out that they had had an estate sale the previous week and all of the things we were looking at were leftover from that sale. THERE WAS STILL A LOT OF FUN STUFF THERE! I actually bought three dressers at the sale and some other goodies I found while browsing around.
This little guy came with a mirror, but I removed it. I will repurpose the mirror, but small dressers like this fit better into spaces without the mirror.
{Affiliate links are used in this post. Click on any of the underlined links to find the products I am talking about. You can read my disclosure HERE.}
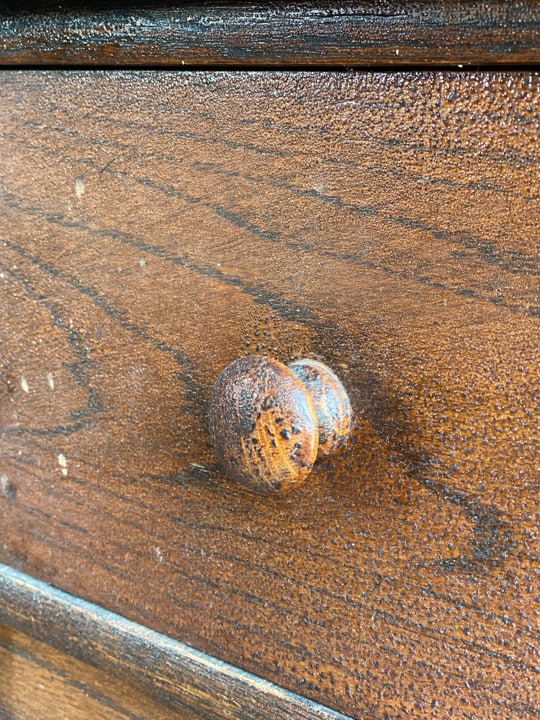
The good thing about this dresser was that it had all of the knobs still on it. But, there was this “raised patina” on the piece that I wasn’t so sure about.
I needed to give it all a good sanding before I could apply any paint to it.
Supplies Used In This Makeover:
“Vintage Duck Egg” Chalk Mineral Paint
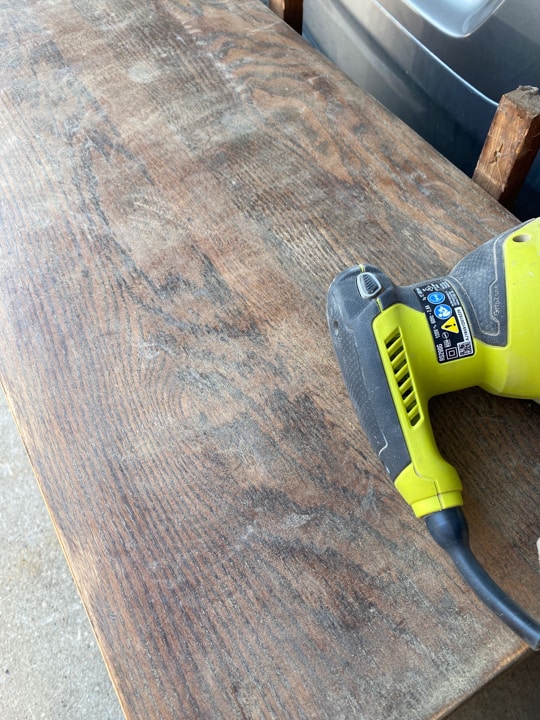
I used my orbital sander all over the dresser to get that weird “patina” smooth so the wood would take the paint better.
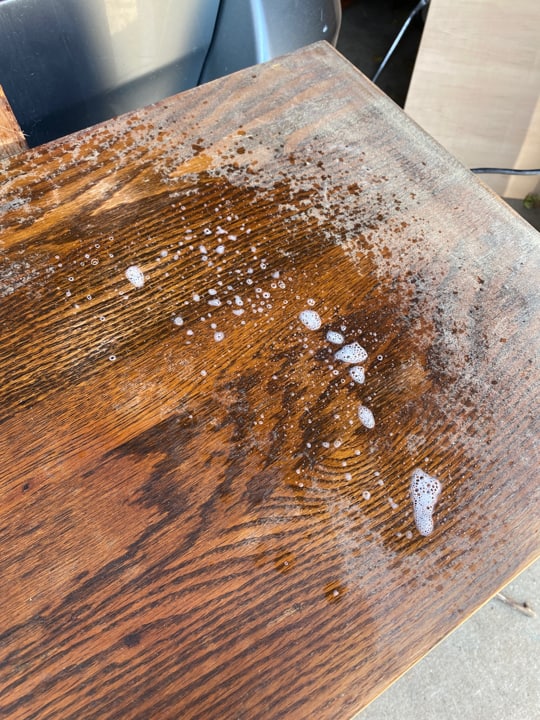
Once the sanding was done, I cleaned the dust off really well with Mrs. Meyers cleaner and a paper towel.
WOW! What a difference already! The dresser is ready for paint!
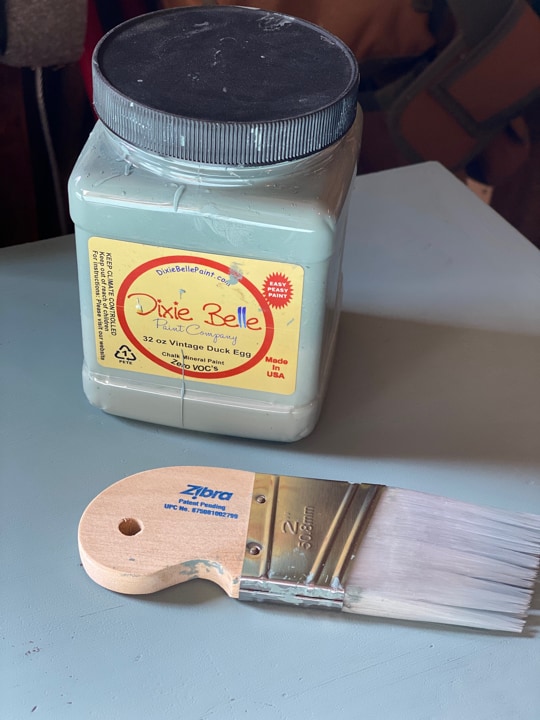
Of course, I am grabbing my favorite paintbrush . Zibra paint brushes are the absolute best for painting furniture. They have all kinds of styles and shapes to give you the best outcome in the end. I truly believe that good paintbrushes make all the difference when it comes to painting projects. If you are looking for a gift idea for yourself or someone else who paints, you will not go wrong with a set of these brushes. I have not bought any other paintbrushes since using them and that says a lot for me. 🙂
I wanted to try something a little different for this dresser makeover, so I chose “Vintage Duck Egg” for the paint color. It is a beautiful blue color, but I always like to deepen the color a bit. This time, I tried something different to do that. It is a product we always have on hand now and it was so easy to apply and I think it worked great at deepening the blue just a bit.
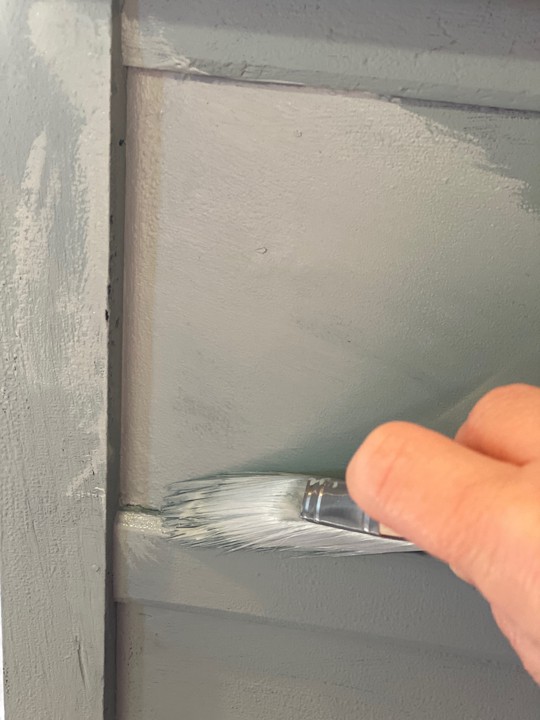
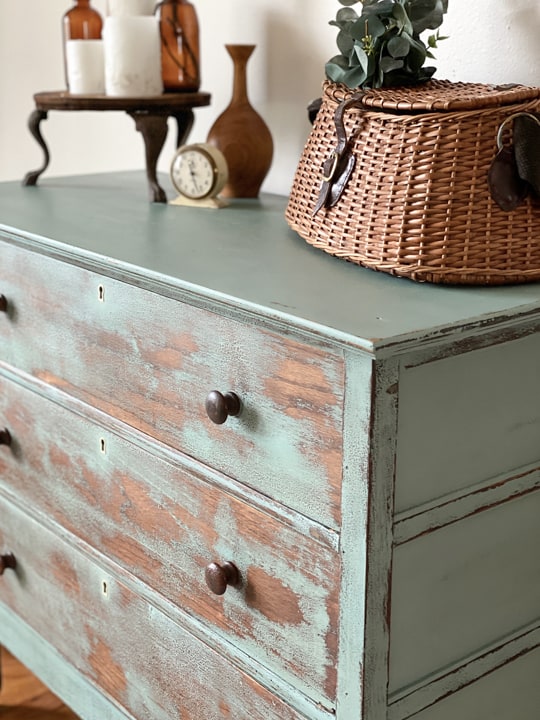
After I put two coats of paint all over the dresser, it was time to distress it.
How do you choose to distress or not to distress?
I get this question a lot and my honest answer is – it depends on the piece I am painting. When I start cleaning the piece and get a good feeling about what condition the wood is in and how it is going to take paint, I will know if I am going to distress or not. Most of the time, if I am not painting a portion of a dresser like in this Creamy White Boho Buffet Makeover , I usually won’t distress the areas I am painting. If a piece of furniture doesn’t have a great finish or is a really dark color, I will usually distress. The dark wood tones peeking through the paint after being distressed are really pretty and give an authentic look that is full of character and charm.
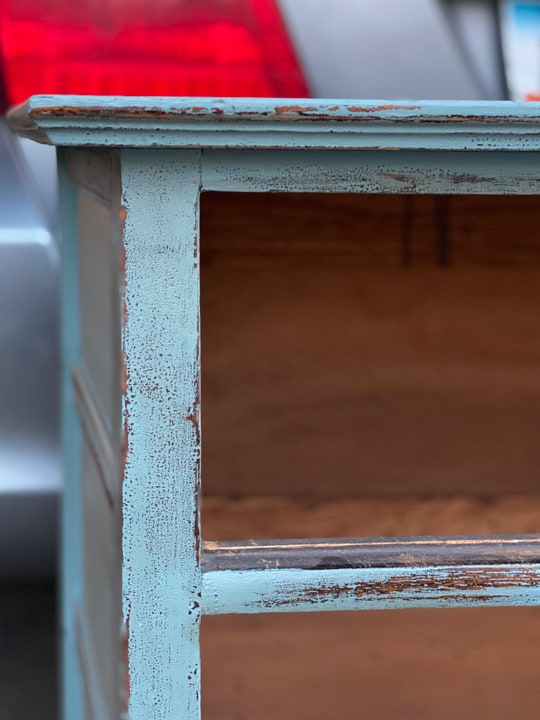
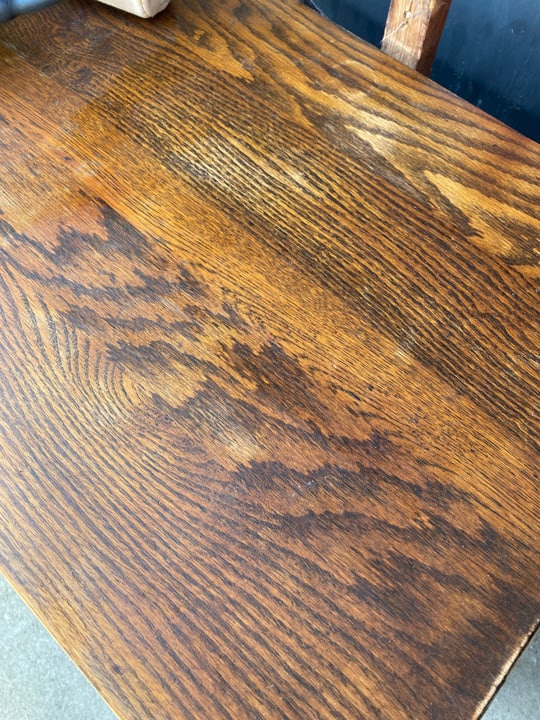
Distressing is easy. Don’t overcomplicate it. You are basically just trying to remove some of the paint where it would come off naturally over the years. Distressing is usually heavier around the edges of a piece of furniture – the edge around the top, the edges around the legs, the edges down the sides, etc.. Then, I usually spend some time distressing any areas that are raised more than the inset areas of the piece.
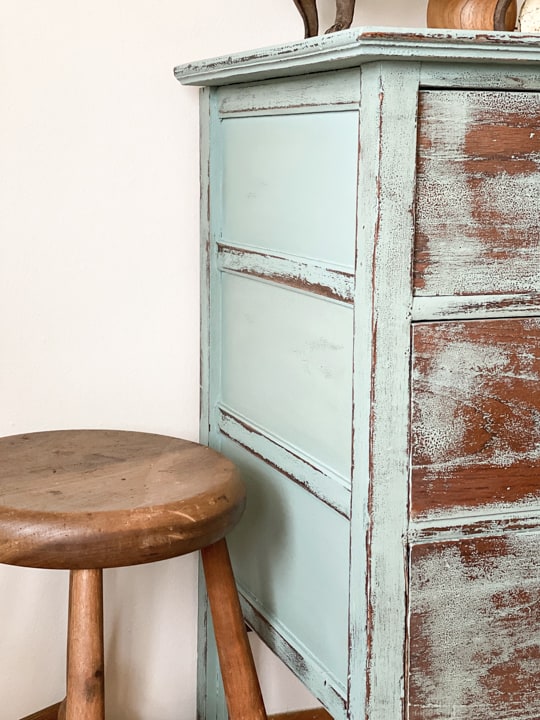
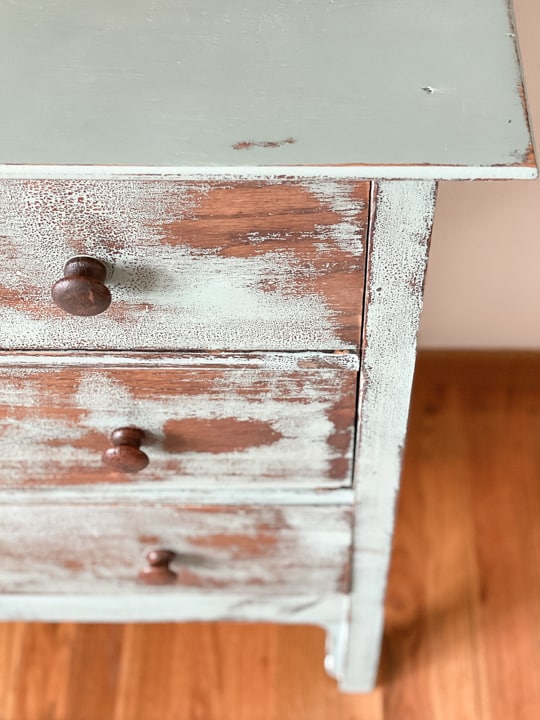
*The photo below shows how the raised areas on the sides are distressed, but the inset areas aren’t. This is naturally where this piece would be distressed from moving it, bumping into walls, wear over time, etc.
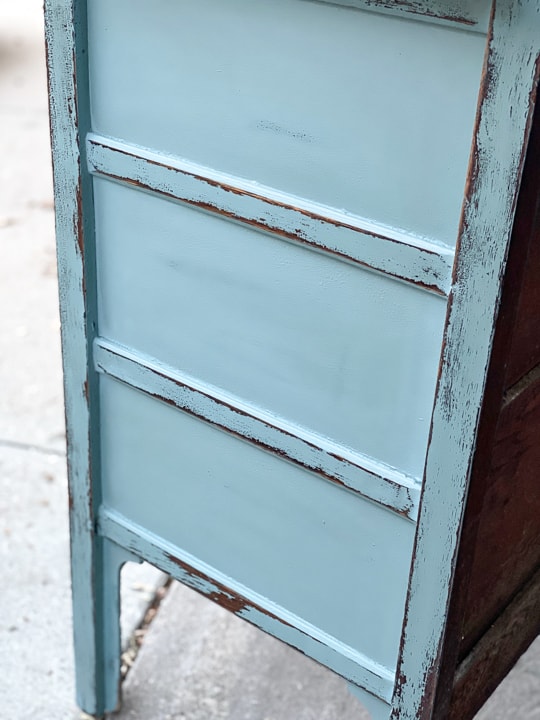
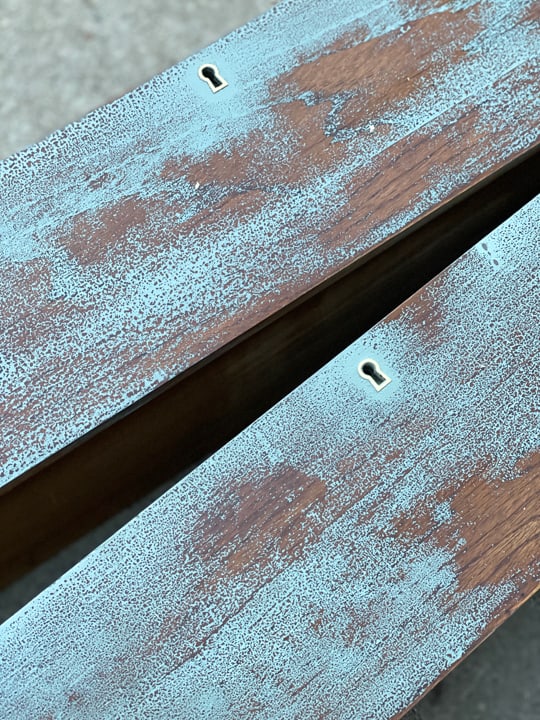
For this dresser, I used my orbital sander to do the distressing. Some pieces will only require a hand sander to do the distressing. This dresser needed a little more power for me to get the look I wanted. As you can see from the photos, the paint came off more on the drawers. The other areas were more subtle.
After I had all the sanding/distressing done, I needed to deepen and darken the paint color. I wanted this piece to look old and like it has been around for a long time.
This is why I love picking up real wood pieces that have been around for some time. A makeover like this fits it. I wouldn’t get the same effect on a dresser that is made now or a wood veneer piece. If you are wanting to flip furniture, I highly recommend that real wood pieces are part of your “picking criteria”.
Add Glazes And Waxes To Furniture
I have tried all kinds of glazes and antique waxes to deepen the color of furniture, but this time I wanted to try one of my favorite products of all time. I used Restor-A-Finish all over this piece. The color “Dark Walnut” made this dresser that much better. It deepened the paint color which made it look older and it enriched the wood tones that were showing through so beautifully. Not to mention, the application was a breeze! I just used an old rag and rubbed the finish all over. It took minutes.
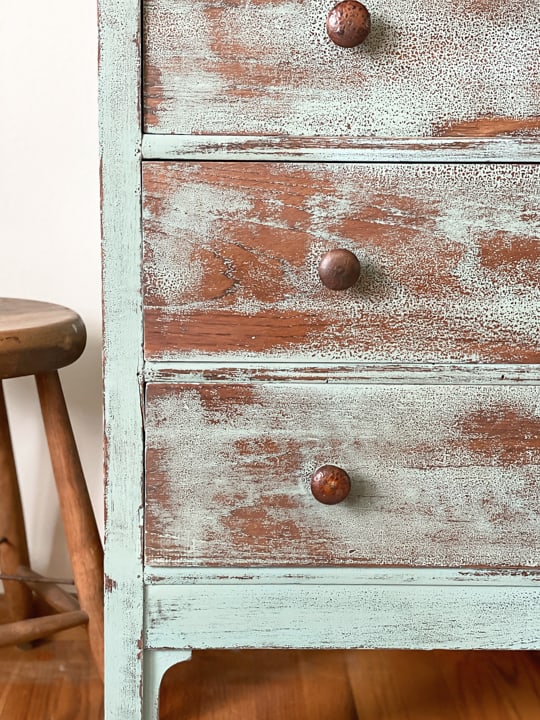
I let it dry for a few hours and then I put the original wood knobs back on it.
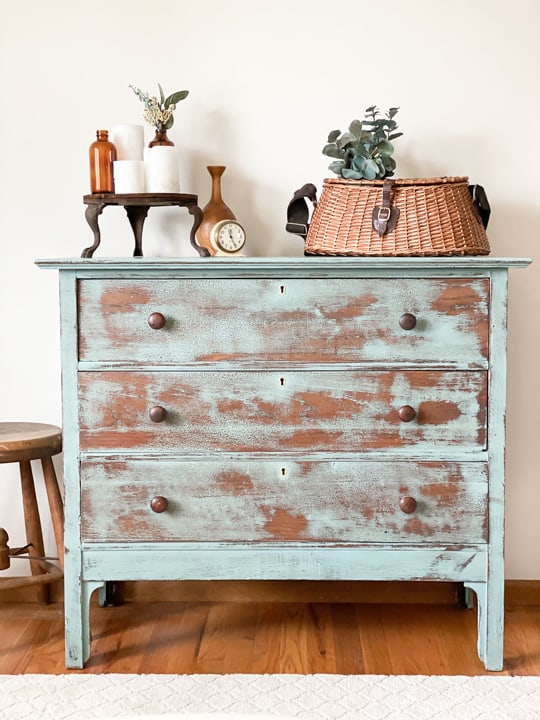
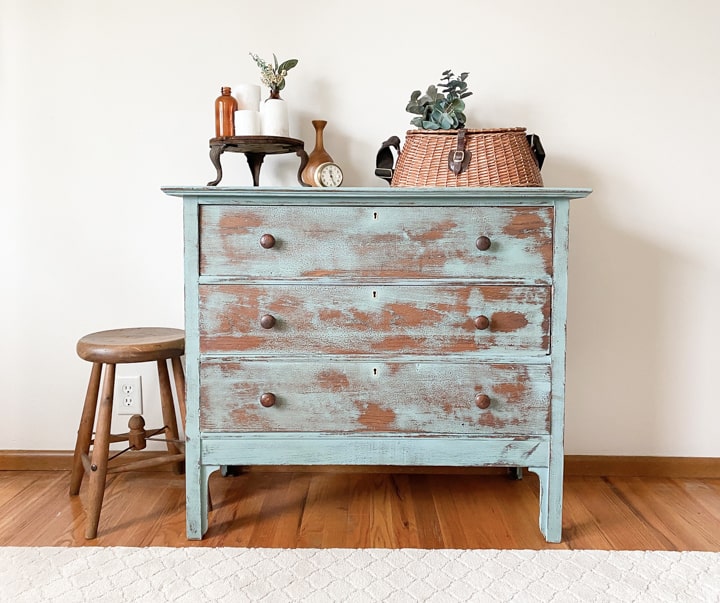
I LOVE THE END RESULT!
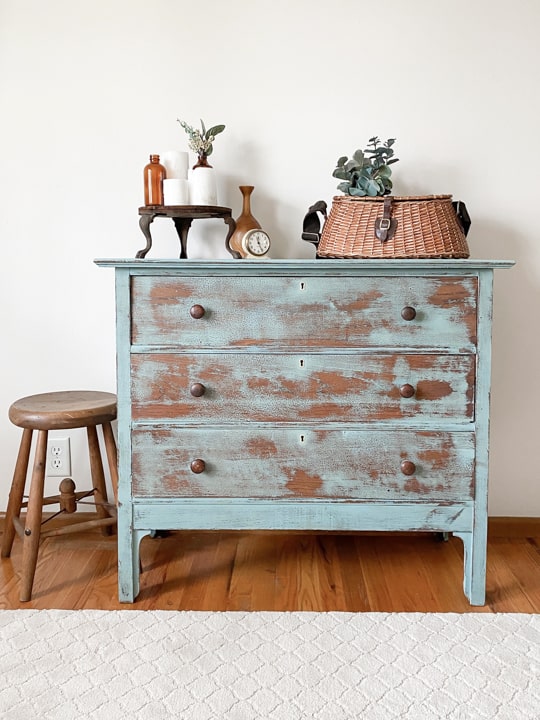
This vintage blue dresser makeover has come a long way. It wasn’t a great-looking dresser when I brought it home, but now it has a ton of personality and charm. This is a piece that I would use in other rooms besides a bedroom to store clothes. I have used dressers in almost every space in our home over the years. When you find the older ones, they come in all shapes and sizes which makes them the perfect piece to use for other things than clothes in your bedroom.
These photos were taken on a bright day in front of a window so you can’t really appreciate the deeper paint color. It is so much better in person.
Do you have dressers in other rooms in your home or just in bedrooms?
PIN THIS POST!

If you liked this Vintage Blue Dresser Makeover, you will love these transformations:
3 Drawer Dresser Makeover With Paint & Hardware
DIY Nightstand Makeover For Teen Girl’s Bedroom
Mid-Century Modern Dresser Makeover