This Painted Oak Dresser Makeover is a project that came about in an interesting way.
This Painted Oak Dresser Makeover has a fun story.
I remember watching my mom make over pieces of furniture. My dad was in fire restoration for a bit and he would find pieces of furniture that were still salvageable and bring them home to my mom, who was always up for a project (I wonder where I get it 🙂 ). The hutch in our living room is one of her projects and this oak dresser was another project she did. My sister had this dresser in storage and wanted to get rid of it, so I said I would take it home and bring it back to life.
My mom was more into stripping and refinishing projects. Her projects took FOREVER! That may be part of the reason why I don’t love stripping pieces and refinishing them. I am not as patient and like to see instant satisfaction in projects. I have stripped and stained pieces, but it is a heck of a lot more work.
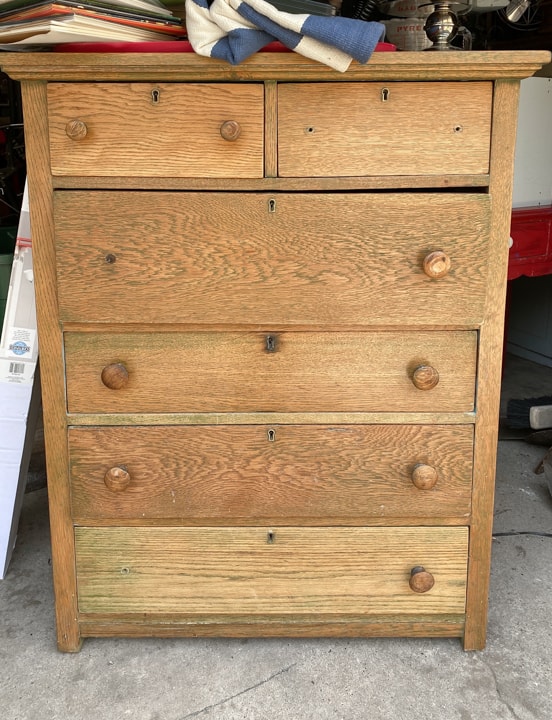
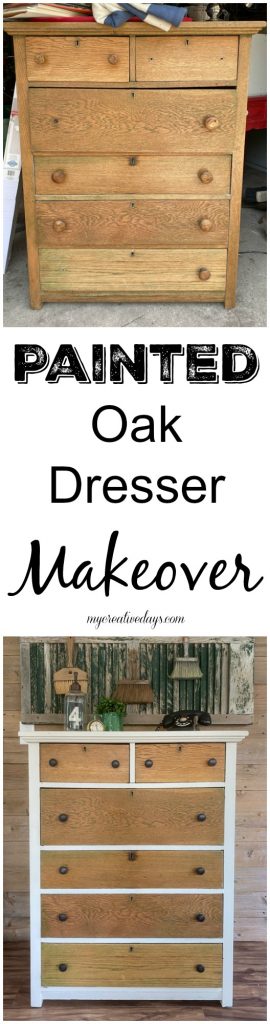
This dresser was bright blue when she got it.
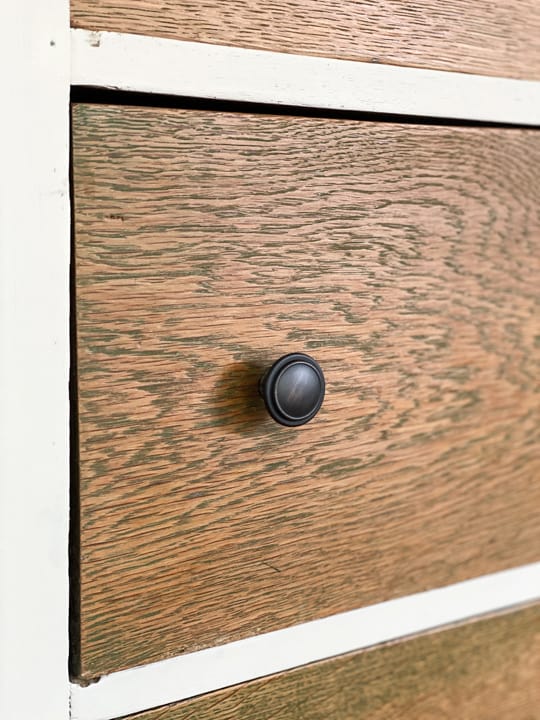
She stripped it down and added a finishing coat to it. She told me that she could never get the green out some of the grain. I told her that I liked that about it. You know me and green: can never have too much. 🙂
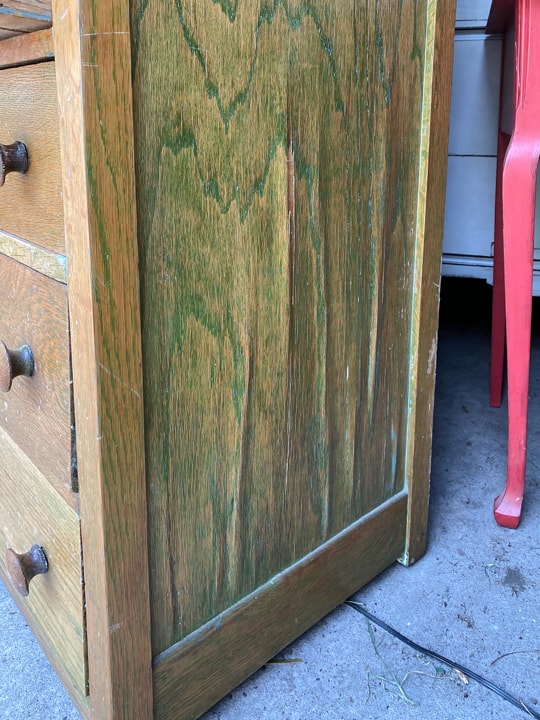
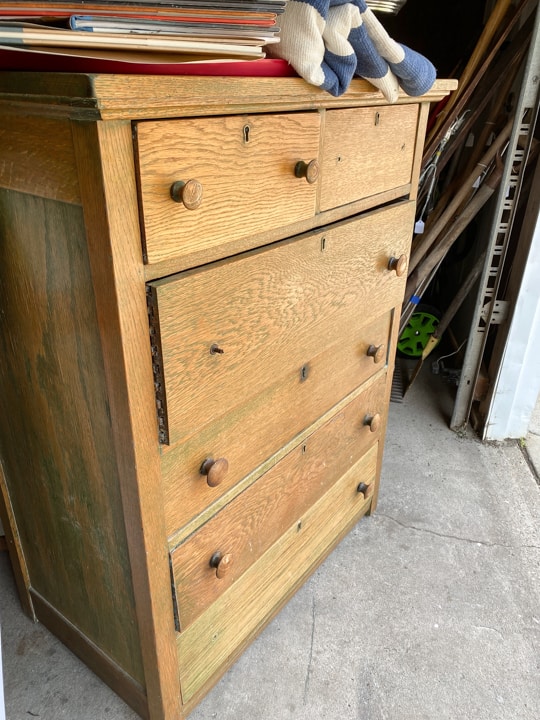
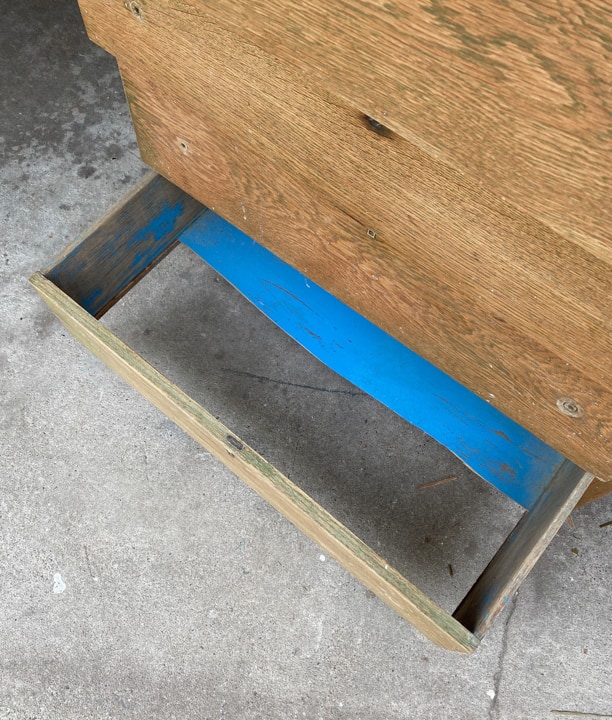
It has been sitting in my sister’s storage room for some time. The side had some bubbly veneer, some knobs were missing and a drawer was missing its bottom.
These were all things I knew we could fix, so I was excited to get it home to make it over.
You can see the color of the original dresser when my mom got it in the photo below. BRIGHT BLUE!
{Affiliate links are used in this post. Click on any of the underlined links to find the products I am talking about. You can read my disclosure HERE.}
Supplies Used In This Painted Oak Dresser Makeover:
Dixie Belle Paint – “Drop Cloth”
How This Makeover Happened
First, I removed the veneer that was rippled on the side. I did not have to use a heat gun or my towel technique to get it off. I used a small putty knife to get under it and it all came off very easily.
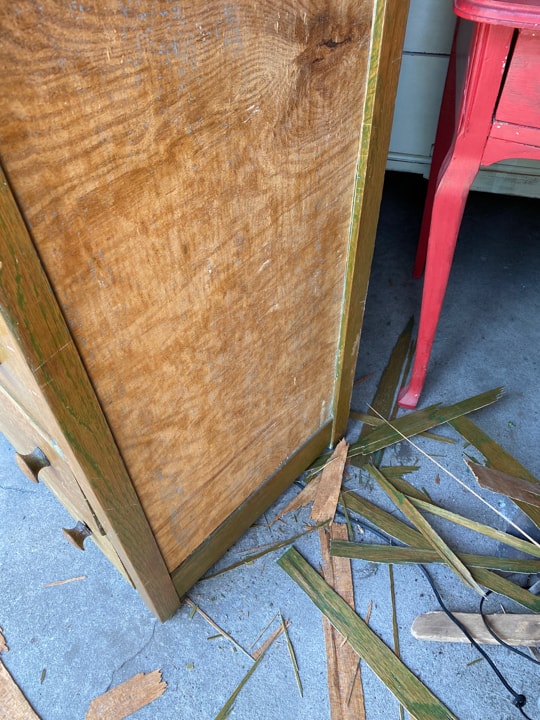
Once I had all of the veneer off, I used my orbital sander and sanded that area smooth. You can always get a new piece of veneer from your local home improvement store and add that to an area like this, but this dresser didn’t need it. I was painting this side, so a good sanding was all it needed.
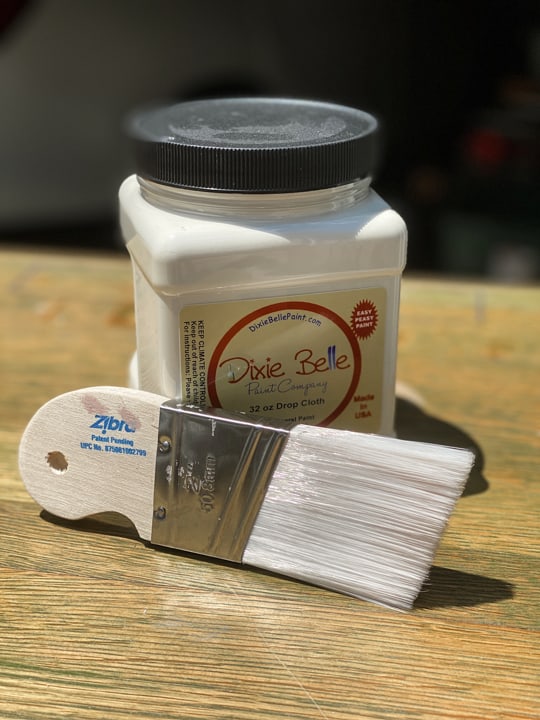
You know I am not doing any paint project without my favorite paintbrush.
The Palm Pro from Zibra Paint is MY FAVORITE PAINTBRUSH! If you do any kind of painting… ANY PAINTING, check out the brushes from Zibra Paint. They have many styles and shapes that will fit every one of your painting projects.
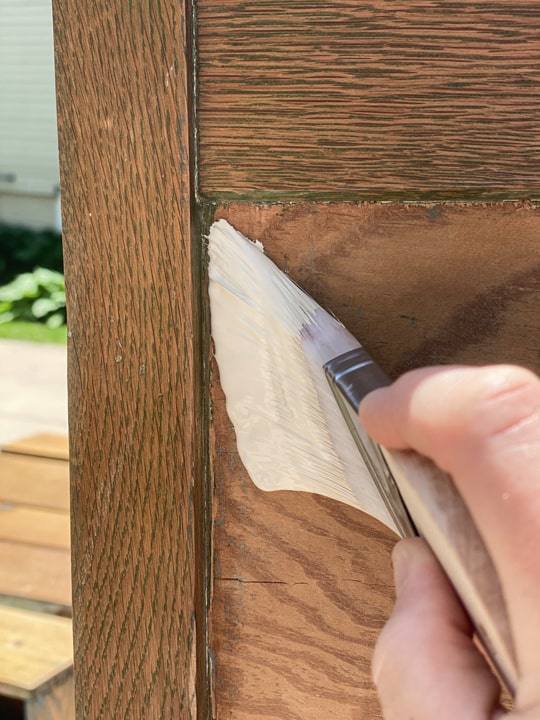
This paint brush gets in all the nooks and crannies and makes the paint slide on super well.
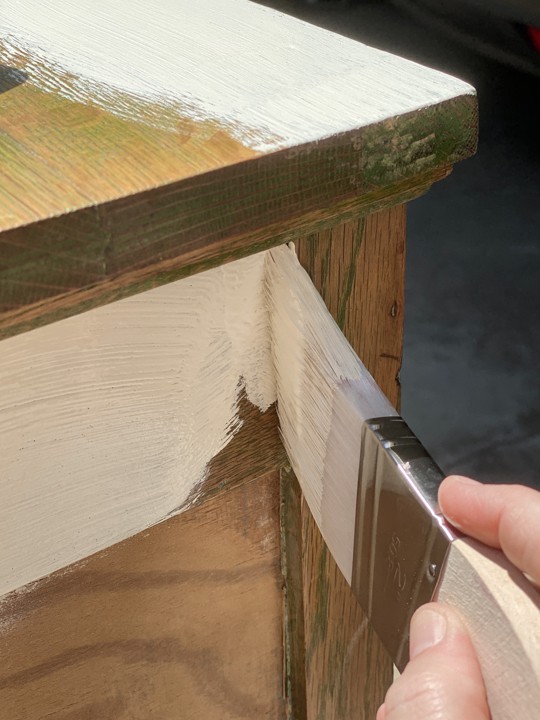
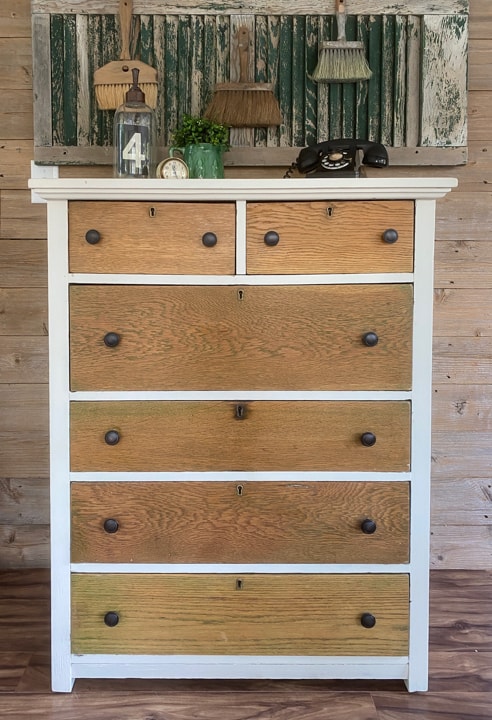
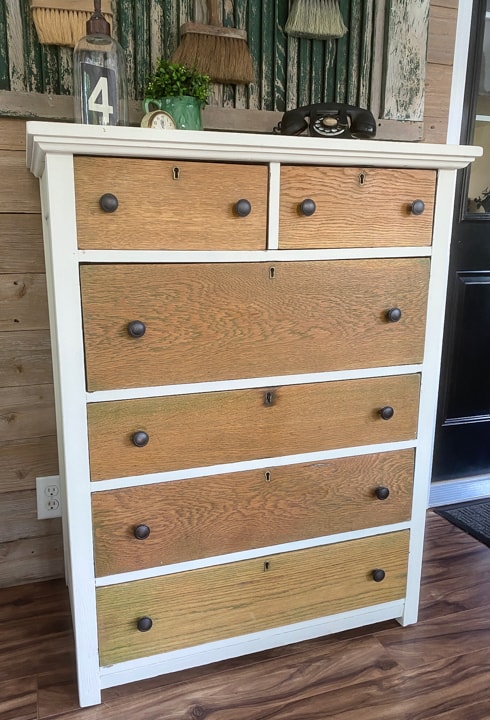
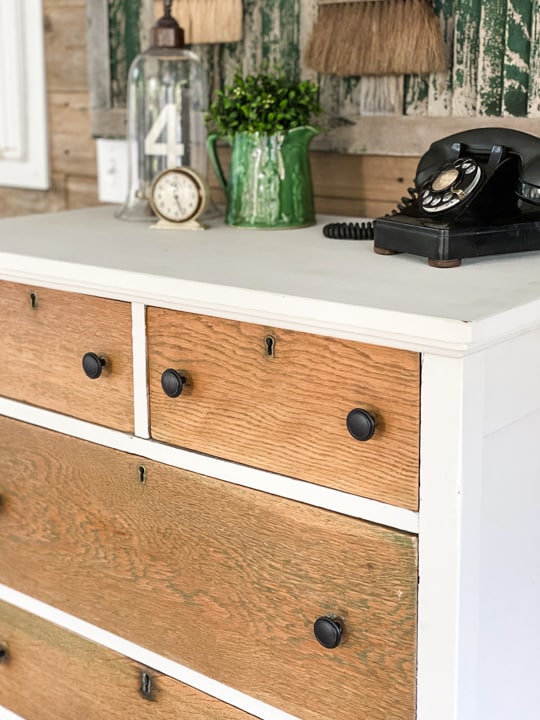
I chose one of my favorite paint colors from Dixie Belle Paint. “Drop Cloth” is so pretty! It is a creamy white color and since I was going to leave the drawer fronts unpainted, I thought this color would compliment it perfectly.
It did!
This dresser looks like a new piece.
Matt fixed the broken drawer the same way he has fixed many before. I have a blog post sharing how to fix a broken dresser drawer, so I won’t bore you with that here.
I didn’t have any knobs in my stash to add to the drawers, so I bought these.
They fit the piece nicely and they weren’t that expensive.
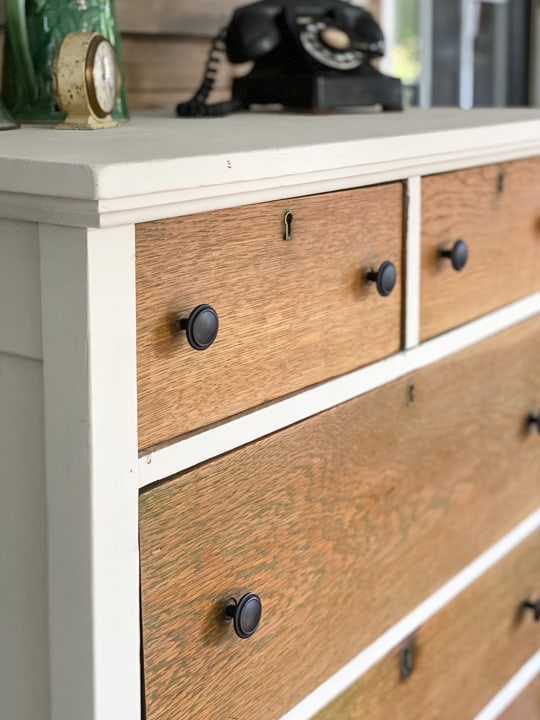
I think that hardware can make or break a piece. These knobs are fairly universal so I will be able to use the rest of them on another project.
I did remove what was left of the wood knobs on the dresser. I will definitely use them on another piece.
NEVER THROW OUT GOOD HARDWARE!
Even if you can’t use the hardware on the piece you are working on, keep them. Even if there are only a few of the knobs on the piece, keep them. Your stash of amazing hardware will just grow and you can repurpose them on other projects and save a ton of money in the process.
This dresser has had a long journey. It was kind of special to be working on a piece of furniture that my mom did years ago. It needed a little TLC from being in storage for many years, but it was nothing too extensive and totally worth putting the time and effort into.
This will be another piece that will be off to a new home. I am always excited to see these pieces go to a new home that will love them as much as we have.
What color would you have painted this piece?
PIN THIS POST!
If you liked this makeover, you will love these transformations:
Bird’s Eye Maple Dresser Makeover
Love the combo look and these old dressers will easily laser another 50years
Yes they will!
First, I love your old phone and the paint brushes hanging up. Everything looks perfectly lovely. The only thing I would do if that dresser was mine is have a different pull knob. Which means ALL 12 knobs unique as a point of interest. Plus so much fun picking them out. I totally enjoy what you post <3
Thank you so much! It is fun picking them out!
I love the new look Lindsay!
Thank you!