• Home
  • About
    • Disclosure
      • Terms And Conditions
      • Cancellation Policy
      • Refund Policy
      • Shipping Policy
    • Contact Me
    • My Favorites
      • Our Toolbox
      • Paint Colors
      • My Amazon Store
  • Categories
    • Seasonal
      • Easter
      • Mother’s Day
      • Spring
      • Fall
      • Halloween
      • Thanksgiving
      • Christmas
      • Valentine’s Day
    • DIY
      • Repurposed
      • Furniture
      • Crafts
    • Our Home
    • Recipes
    • Crafts
      • Party Planning Ideas
      • Kids Activities
  • Resources
    • Furniture Flipping
      • Furniture Flipping Academy
      • The Furniture Flippers Social Media Planner
      • Furniture Flipping Assessment
      • Furniture Flippers E-Book
      • Mini Courses
      • Quick Guide To Painting Furniture
      • Types Of Paint For Furniture
    • Organization Tools
      • Organization Challenge
      • 5-Day Organization Challenge
      • 12 Monthly Purge Checklists
      • Sentimental Purge Guide
    • Thrifting | Decorating
      • 105 Things To Throw Away | Recylce | Sell | Donate For Instant Decluttering
      • 50 Things To Donate For Instant Decluttering
      • 50 Things To Throw Away For Instant Decluttering
      • How To Decorate Your Home On A Yard Sale Budget
      • 11 Quick Tips To Organize A Profitable Yard Sale
    • Consultations
    • Join My Newsletter
    • Become An Affiliate
  • Podcast
  • Learn With Me
  • Furniture Flipping Academy
    • Facebook
    • Instagram
    • Pinterest
    • RSS
    • Twitter
    • YouTube

My Creative Days

DIY blog sharing our home, budget decorating tips with repurposed farmhouse decor.

DIY Wooden Christmas Ornaments

November 20, 2015 37 Comments

This holiday season, I have been lucky enough to collaborate with so many bloggers on different tours. This time around, we are sharing homemade ornament ideas. I love the natural and rustic look of wood so I decided to make some DIY Wooden Christmas Ornaments for this hop.

I don’t know about your family, but for us, the holiday season is all about homemade gifts and decorations. We do everything from baking to crafting. It would not be the holiday season if we weren’t making some kind of thing around here. 🙂

For this homemade ornament, I really wanted to make it simple, natural and rustic. I wanted to use things we already had on hand and something the kids could make as well.

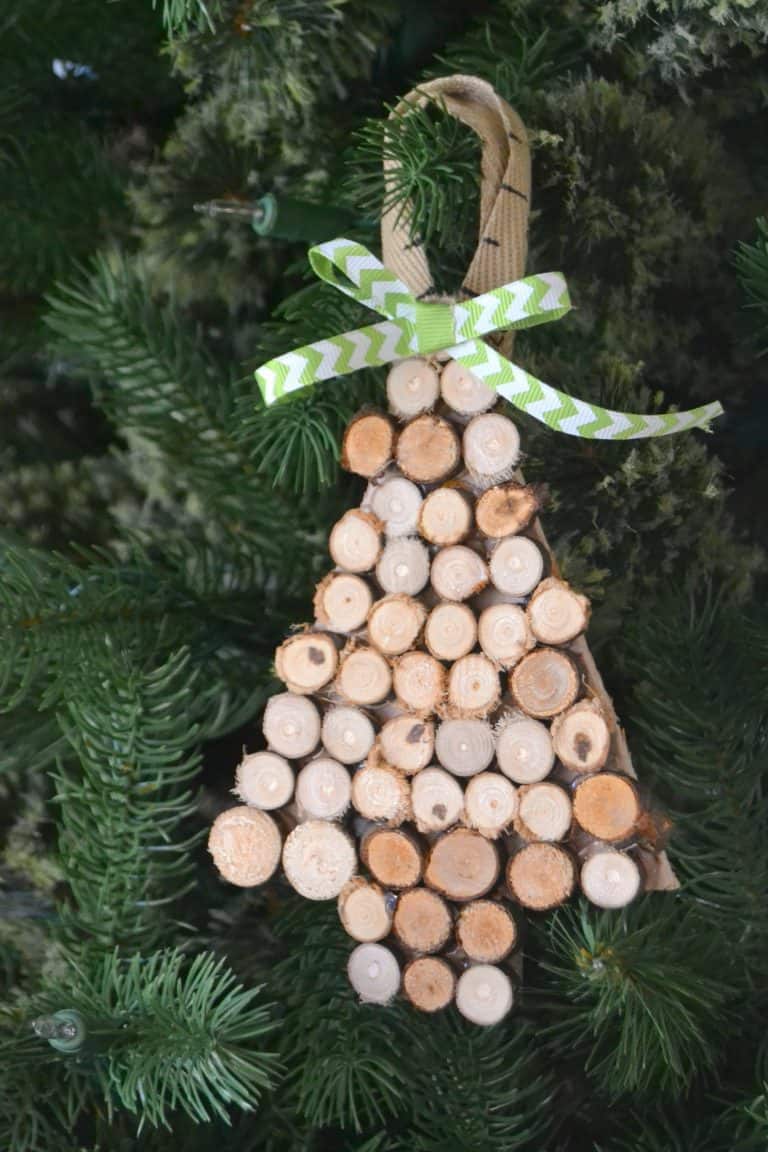
We came up with these Woodland Christmas Tree Ornaments.

If you are looking for wooden Christmas ornaments, click over to find out how easy these wooden trees were to make!

{Affiliate links are used in this post. You can read my disclosure HERE.}

Supplies Used To Make These Wooden Christmas Ornaments:

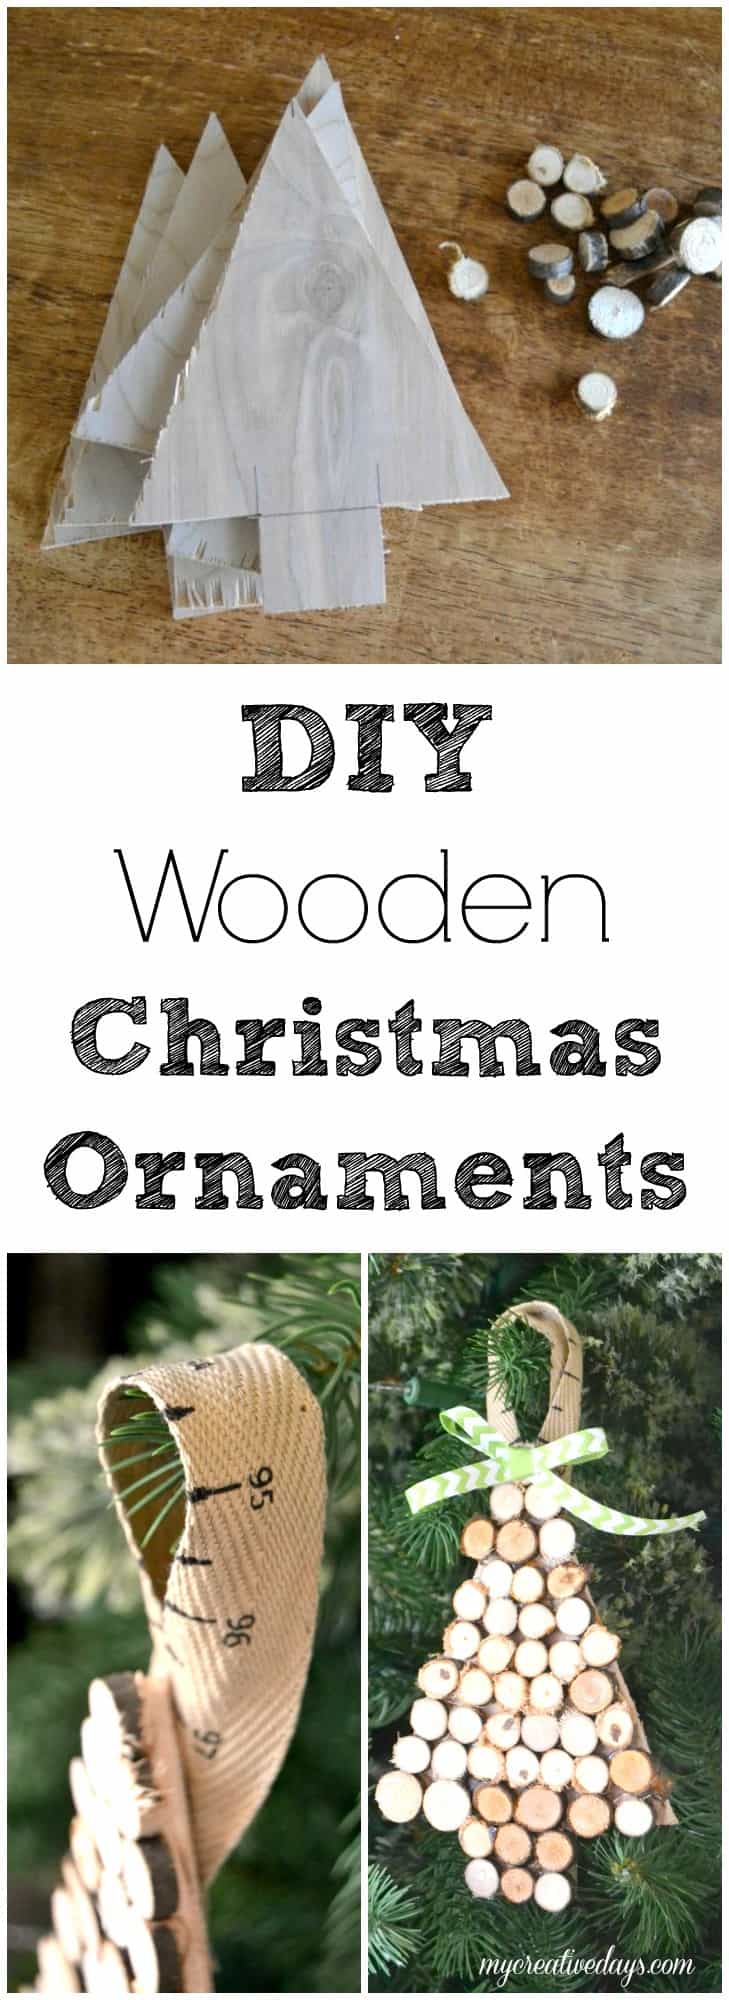
Wooden Christmas Tree Cutouts

Tacky Glue

Ruler Ribbon

Tiny Wood Slices


If you are looking for wooden Christmas ornaments, click over to find out how easy these wooden trees were to make!

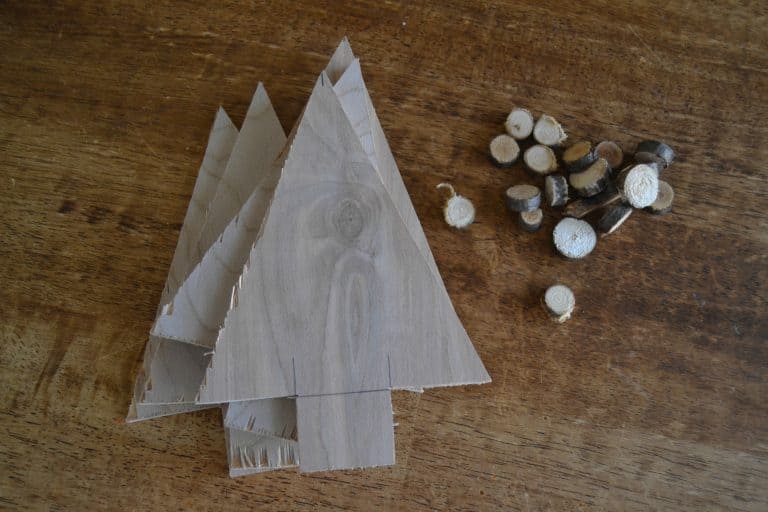
To make these wooden Christmas ornaments, Matt cut small Christmas tree shapes from thin plywood (you can buy them as well).

Then, the kids and I hunted for some small branches and twigs that Matt cut up in little discs.

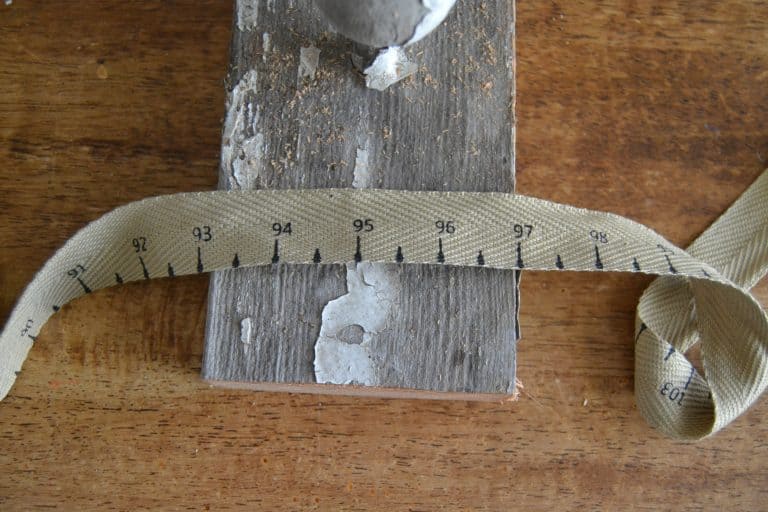
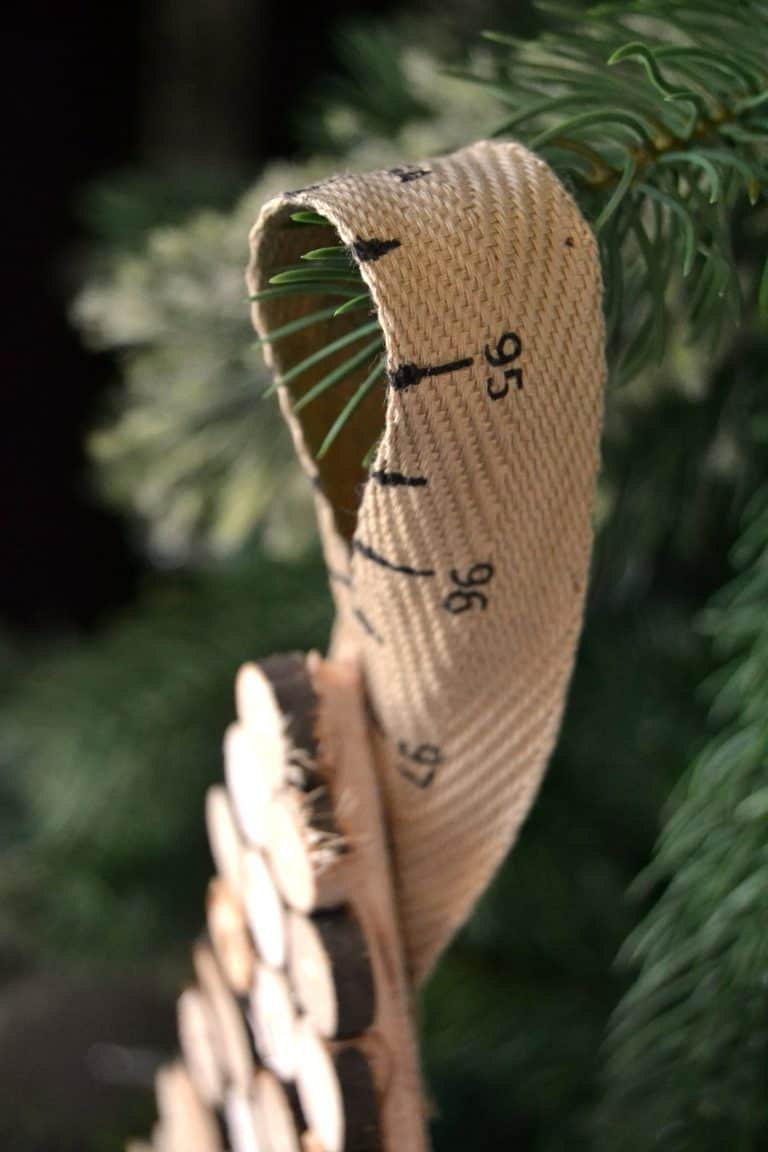
When I was thinking about what we would use to hang these ornaments, I came across some tape measure ribbon I found in the Dollar Spot at Target months ago. This ribbon was perfect for the “woodsy” vibe these ornaments have.

If you are looking for wooden Christmas ornaments, click over to find out how easy these wooden trees were to make!

I hot glued the wood discs to my Christmas tree ornament and I had the kids use If you are looking for wooden Christmas ornaments, click over to find out how easy these wooden trees were to make!

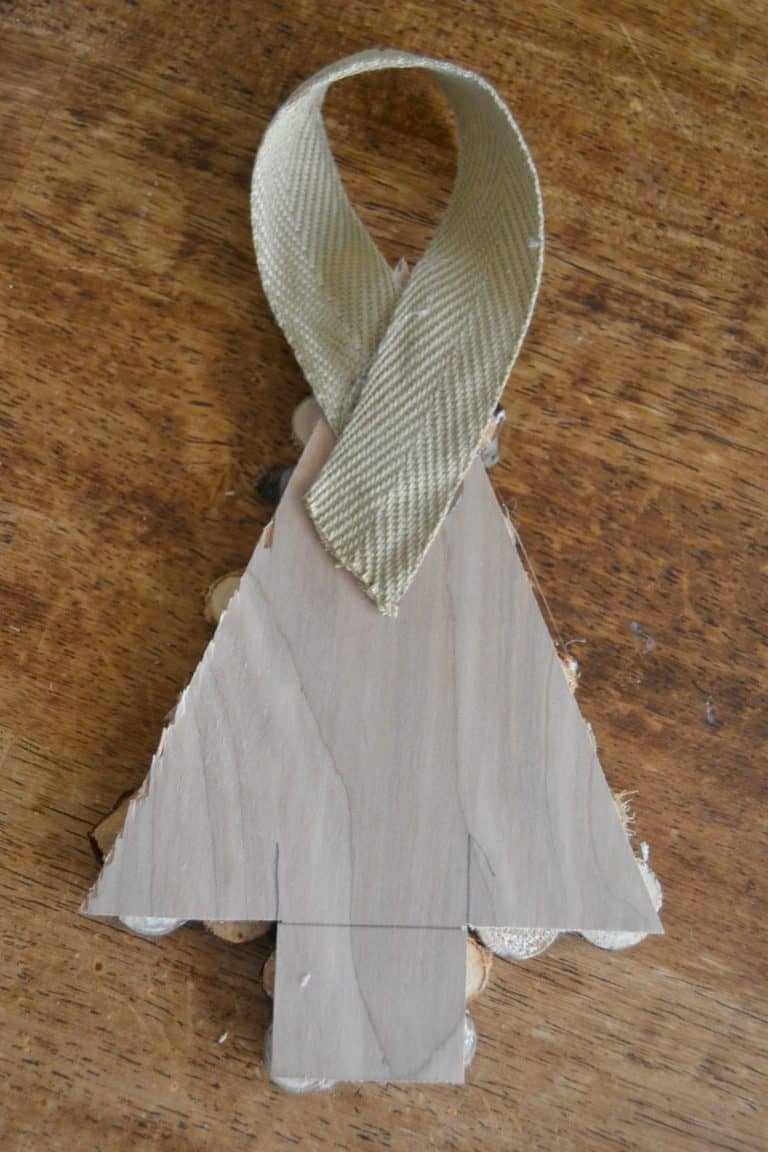
We glued the ribbon to the back of the trees like this:

If you are looking for wooden Christmas ornaments, click over to find out how easy these wooden trees were to make!

Some of the trees were given green chevron bows and others were left without.

If you are looking for wooden Christmas ornaments, click over to find out how easy these wooden trees were to make!

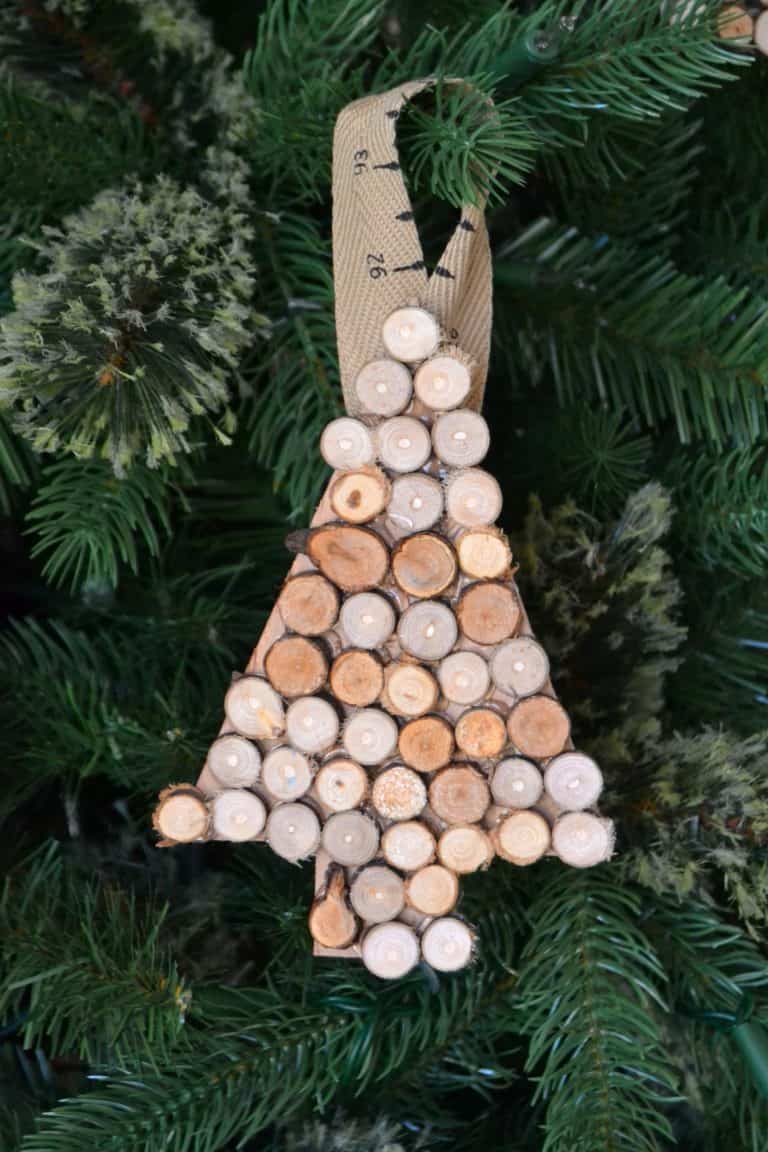
The tape measure ribbon couldn’t be more perfect.

I love the added detail it gives these ornaments!

If you are looking for wooden Christmas ornaments, click over to find out how easy these wooden trees were to make!

These Wooden Christmas Ornaments came out just like we wanted; rustic, natural, simple and so pretty on our tree! The entire family got involved in creating them. The kids and I had a blast hunting for different branches and twigs to use. I hope this craft has inspired you to add some homemade’ness’ to your holiday season this year.

PIN THIS POST!

If you are looking for wooden Christmas ornaments, click over to find out how easy these wooden trees were to make!

Make sure to head over and check out all the other amazing ornaments. You will have so many ideas to keep your holiday season busy!

Thursday, November 19th

2 Bees in a Pod

Karen’s Up On the Hill

Pocketful of Posies

Green with Decor

The Resourceful Mama

Somewhat Quirky Design

It All Started with Paint

Around The Watts House


Friday, November 20th

My Creative Days

Patina Paradise

Leaves and Stitches

The Flamingo Chronicals

Reinvented

The Crowned Goat

Life on Deer Run

Lehman Lane

Eclectic Soapbox


Sharing is caring!

24 shares
  • Share

Filed Under: Christmas, Seasonal, Uncategorized Tagged With: Christmas ornament, ornament, wooden Christmas ornament

Click HERE to Support My Creative Days

Connect with Me!


Join my newsletter for the latest project tutorials, DIY techniques, frugal decorating tips, and exclusive content.
SEND IT TO ME

« DIY Dresser Makeover
DIY Rustic Advent Calendar »

Comments

  1. CoCo says

    November 20, 2015 at 5:10 AM

    Lindsay this is so creative! I love your ornament and you are totally right that tape measure ribbon you added takes it to a whole other level 🙂 super cute! CoCo

    Reply
    • Lindsay says

      November 20, 2015 at 12:03 PM

      Thank you CoCo!

      Reply
  2. Kimm at Reinvented & Roadkill Rescue says

    November 20, 2015 at 6:47 AM

    Oh how I love these, Lindsay! they are so perfectly rustic. The tape measure ribbon is a perfect choice!

    Reply
    • Lindsay says

      November 20, 2015 at 12:03 PM

      Thanks Kimm. The ribbon is so much fun!

      Reply
  3. Vicki and Jennifer Fenton says

    November 20, 2015 at 7:06 AM

    Lindsay – your ornament is adorable!! We are crazy in love with wood slices and your tree is perfection! Thanks so much for sharing it with the DIY Ornament Hop!

    Reply
    • Lindsay says

      November 20, 2015 at 12:02 PM

      Thank you so much!!!

      Reply
  4. Tara @ Lehman Lane says

    November 20, 2015 at 10:51 AM

    Lindsay, your ornament is great. How fun to use wood slices and I really like your idea to use tape measure ribbon! So fun! Have a great weekend and take care, Tara

    Reply
    • Lindsay says

      November 20, 2015 at 12:02 PM

      Thank you Tara!

      Reply
  5. Jennifer Pierce says

    November 20, 2015 at 11:05 AM

    These little trees are so cute. I love that it is such a simple craft that you can do while involving your children. My little guys would love to go and hunt for branches. Thanks for the post.

    Reply
    • Lindsay says

      November 20, 2015 at 12:02 PM

      Thank you Jennifer!

      Reply
  6. Karen says

    November 21, 2015 at 3:53 PM

    These are so cool Lindsay! I love the rustic, woodland style. What a great project for kids.
    Happy Holidays!

    Reply
    • Lindsay says

      November 22, 2015 at 4:44 PM

      Thanks Karen! Hunting for the sticks was so much fun with the kids!

      Reply
  7. Lucy @ Patina Paradise says

    November 22, 2015 at 1:17 PM

    What a great nature craft! And that tape measure ribbon is perfect for hanging them! I need to make some of these with my munchkin! ;o)

    Reply
    • Lindsay says

      November 22, 2015 at 4:44 PM

      Perfect seasonal craft to do with the kiddos!

      Reply
  8. Anita Scroggins says

    November 22, 2015 at 3:18 PM

    love your ornament – I have so many little branches falling in the backyard I need to put some of them to use!

    Reply
    • Lindsay says

      November 22, 2015 at 4:43 PM

      Thank you Anita!

      Reply
  9. Kimm at Reinvented & Roadkill Rescue says

    November 22, 2015 at 8:18 PM

    Still love this ornament, Lindsay, thanks for linking it up to Inspired By You! 🙂

    Reply
    • Lindsay says

      November 23, 2015 at 10:03 AM

      Thanks Kimm!

      Reply
  10. Cami says

    November 23, 2015 at 11:46 PM

    Oooo I love it! Such a unique way to do a tree. Thanks for linking up at Create – Share – Inspire. Hope we’ll get to see more of your lovely projects.

    Reply
    • Lindsay says

      November 27, 2015 at 1:58 PM

      Thanks Cami!

      Reply
  11. Iris Nacole says

    November 24, 2015 at 8:34 AM

    So cute and fun to make! I can’t wait to give them a go one year! Thanks for sharing!

    Reply
    • Lindsay says

      November 27, 2015 at 1:57 PM

      Thank you Iris!

      Reply
  12. Kim says

    November 26, 2015 at 9:04 PM

    That ribbon is perfect! I love when projects come together with fun stuff I have. I always find great things at the Target dollar spot.My son would love this ornanent. He loves collecting sticks.

    Reply
    • Lindsay says

      November 27, 2015 at 1:56 PM

      It was a lot of fun to make! The kids loved it too! Thanks for stopping by!

      Reply
  13. Chelc | Inside the Fox Den says

    November 28, 2015 at 9:55 AM

    Lindsay, I love this! Every element of the ornament is just right! Thanks so much for sharing at Merry Monday, you’re going to be my feature this week! I’ll be sharing on all my social media on Sunday so I’d love it if you’d follow me! Hope to see you again tomorrow night!

    Reply
    • Lindsay says

      November 30, 2015 at 12:32 PM

      Following right along! Thanks so much for the feature!

      Reply
  14. Tiffany says

    November 28, 2015 at 11:21 AM

    These are so cute, Lindsay! I love the rustic-ness of them and that ruler ribbon is so cute. Thanks for sharing with us at the Merry Monday Link Party! Hope to see you again on Sunday night!

    Reply
    • Lindsay says

      November 30, 2015 at 12:32 PM

      Thank you Tiffany!

      Reply
  15. Marie at The Interior Frugalista says

    December 2, 2015 at 5:16 PM

    Another clever and adorable idea!

    Reply
    • Lindsay says

      December 3, 2015 at 8:46 AM

      Thank you Marie!!!!

      Reply
  16. Ashley ~ 3 Little Greenwoods says

    November 24, 2016 at 8:29 AM

    Such a fun little ornament! Perfect for little fingers to make too!

    Reply
    • Lindsay says

      November 27, 2016 at 10:44 AM

      Yes!! Thank you!

      Reply

Leave a Reply Cancel reply

Your email address will not be published. Required fields are marked *


follow along

  • Facebook
  • Instagram
  • Pinterest
  • RSS
  • Twitter
  • YouTube

search the blog

Listen In!

CLICK TO DOWNLOAD FOR FREE

My Creative Days is a participant in the Amazon Services LLC Associates Program, an affiliate advertising program designed to provide a means for sites to earn advertising fees by advertising and linking to Amazon.com
If you are looking for the best paint brushes for furniture makeovers, you don't have to look any further. Click over to find the paint brushes that everyone needs in their toolbox when painting furniture or anything for that matter.

Best Paint Brushes For Furniture Makeovers

The Best Black Matte Furniture Paint

DIY Farmhouse Table - Want a farmhouse table? Make your own! Check out how to refinish one easily from My Creative Days.

Farmhouse Table DIY Made From A Dumpster Find

DIY Farmhouse Office Sign

DIY Office Sign

PO Box 11823, Cedar Rapids, Iowa, 52410
Copyright © 2023 · Design + Development by Grace + Vine Studios · Privacy Policy

24 shares