We love coming up with easy ways to make our home cozy for us and welcoming for guests. Repurposing has become one of our favorite ways to DIY things for our home and yard. We have saved a ton of money decorating this way and it makes the decor around our home that much more enjoyable because of the time and effort we put into it. These DIY toadstools for our yard were so much fun to make and they were a whimsical addition to our yard for years.

{Affiliate links are used in this post. You can read my disclosure HERE.}
Matt is the one that takes on all the yard work at our house. He LOVES it. I always give him ideas and he loves to be outside implementing them. When I came up with this idea, he got busy making it a reality.
Supplies For DIY Toadstools:
Logs From Yard
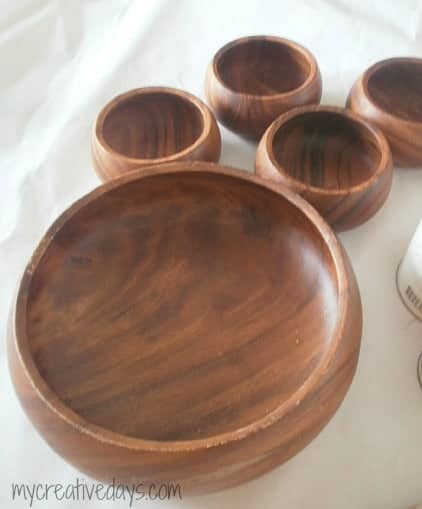
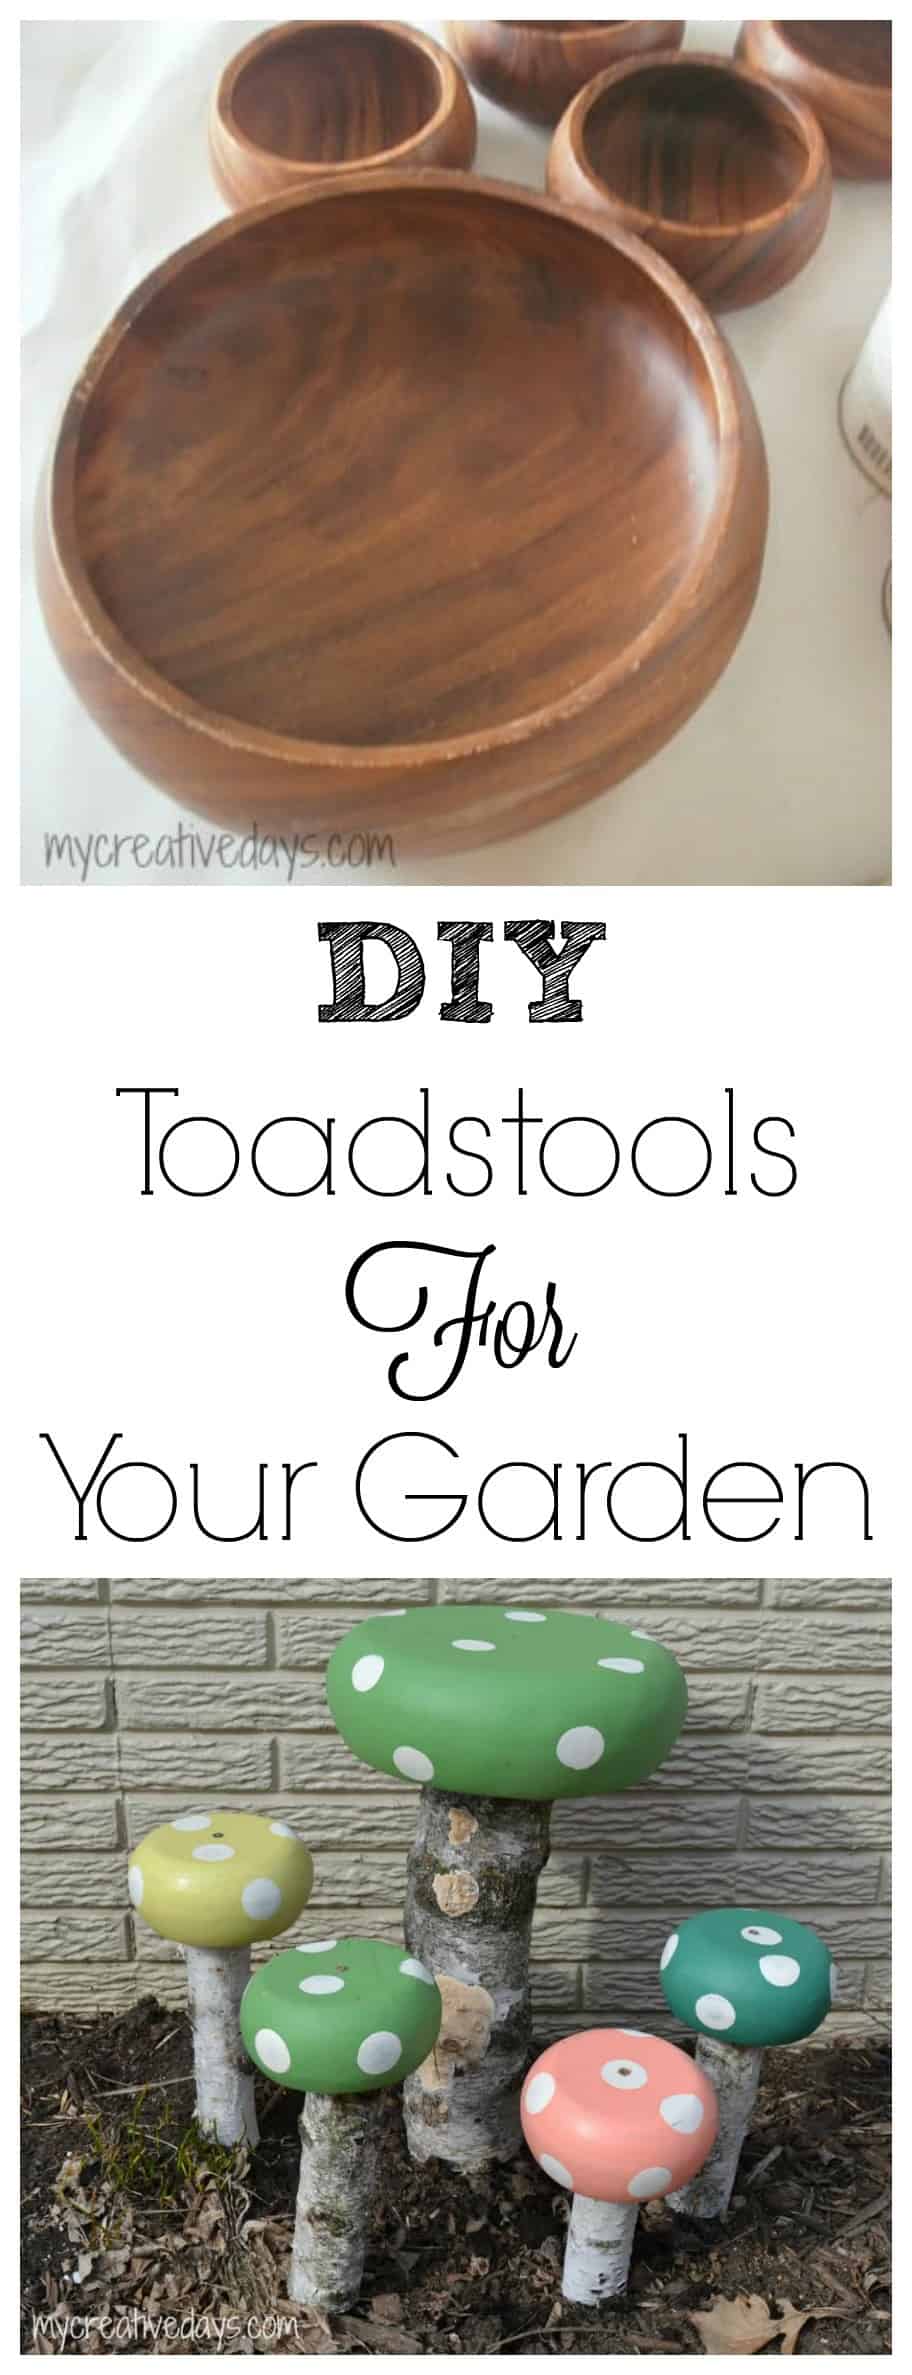
I found a set of wood bowls at the thrift store and thought they would be so much fun to make into DIY toadstools for the yard. When I turned them over, they looked exactly like the top of toadstools!
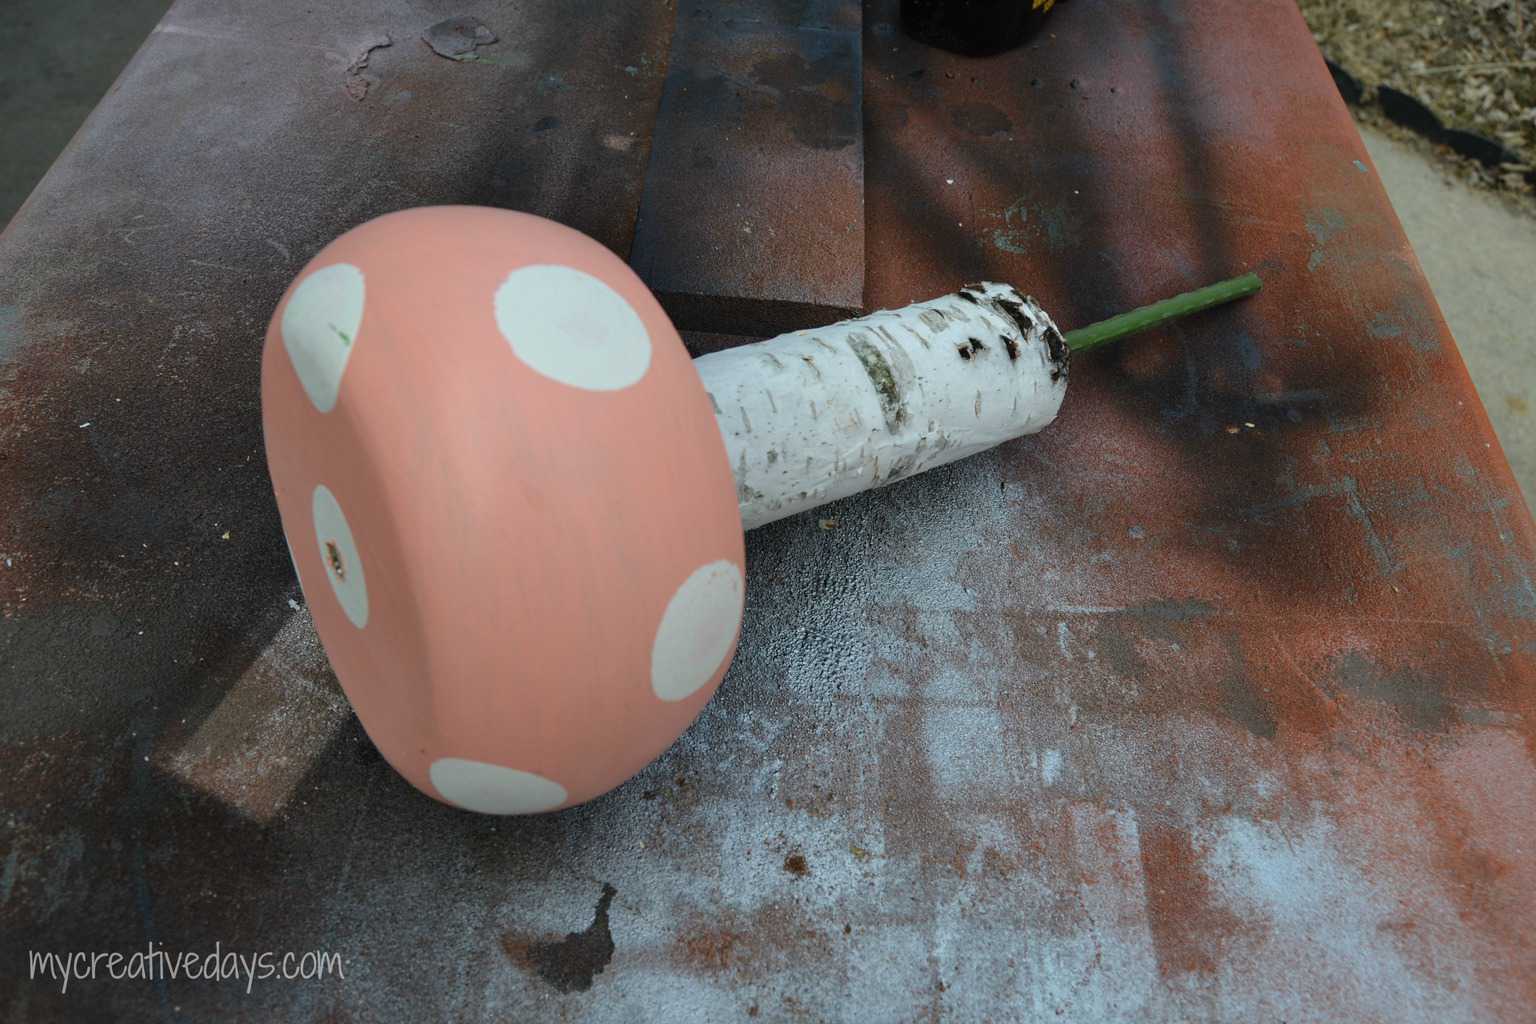
To turn the wood bowls into DIY Toadstools, I started with paint. I chose some craft paints that I already had on hand in fun colors.
After two coats of paint, I added the “spots” of the toadstools with pouncers and white paint.
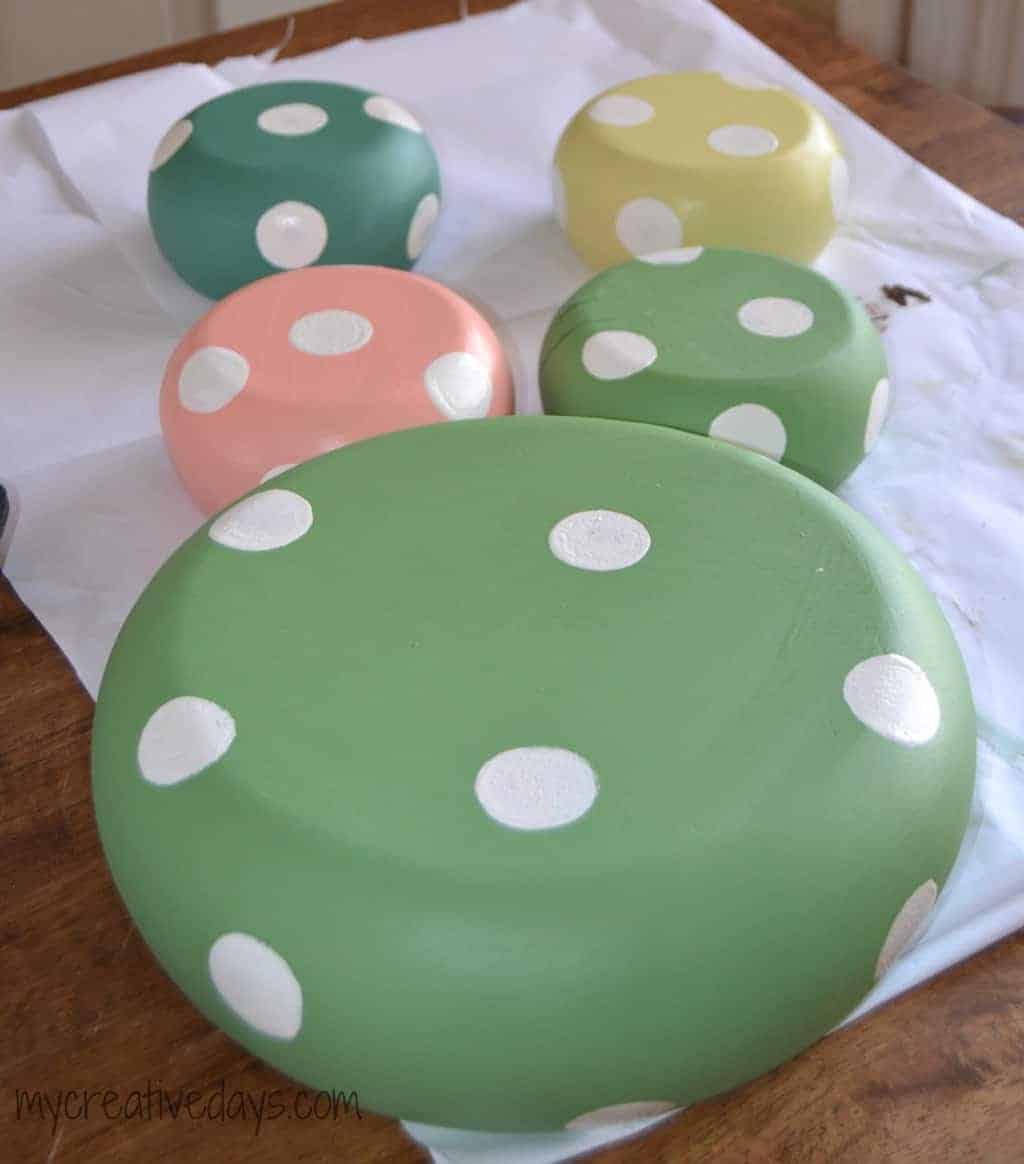
The DIY toadstools really start to come to life after the paint and spots.
To make them toadstools that would stand in the yard, Matt cut birch logs we had in the yard down to the size I wanted them. Then, he drilled holes in the top of the painted wood bowls.
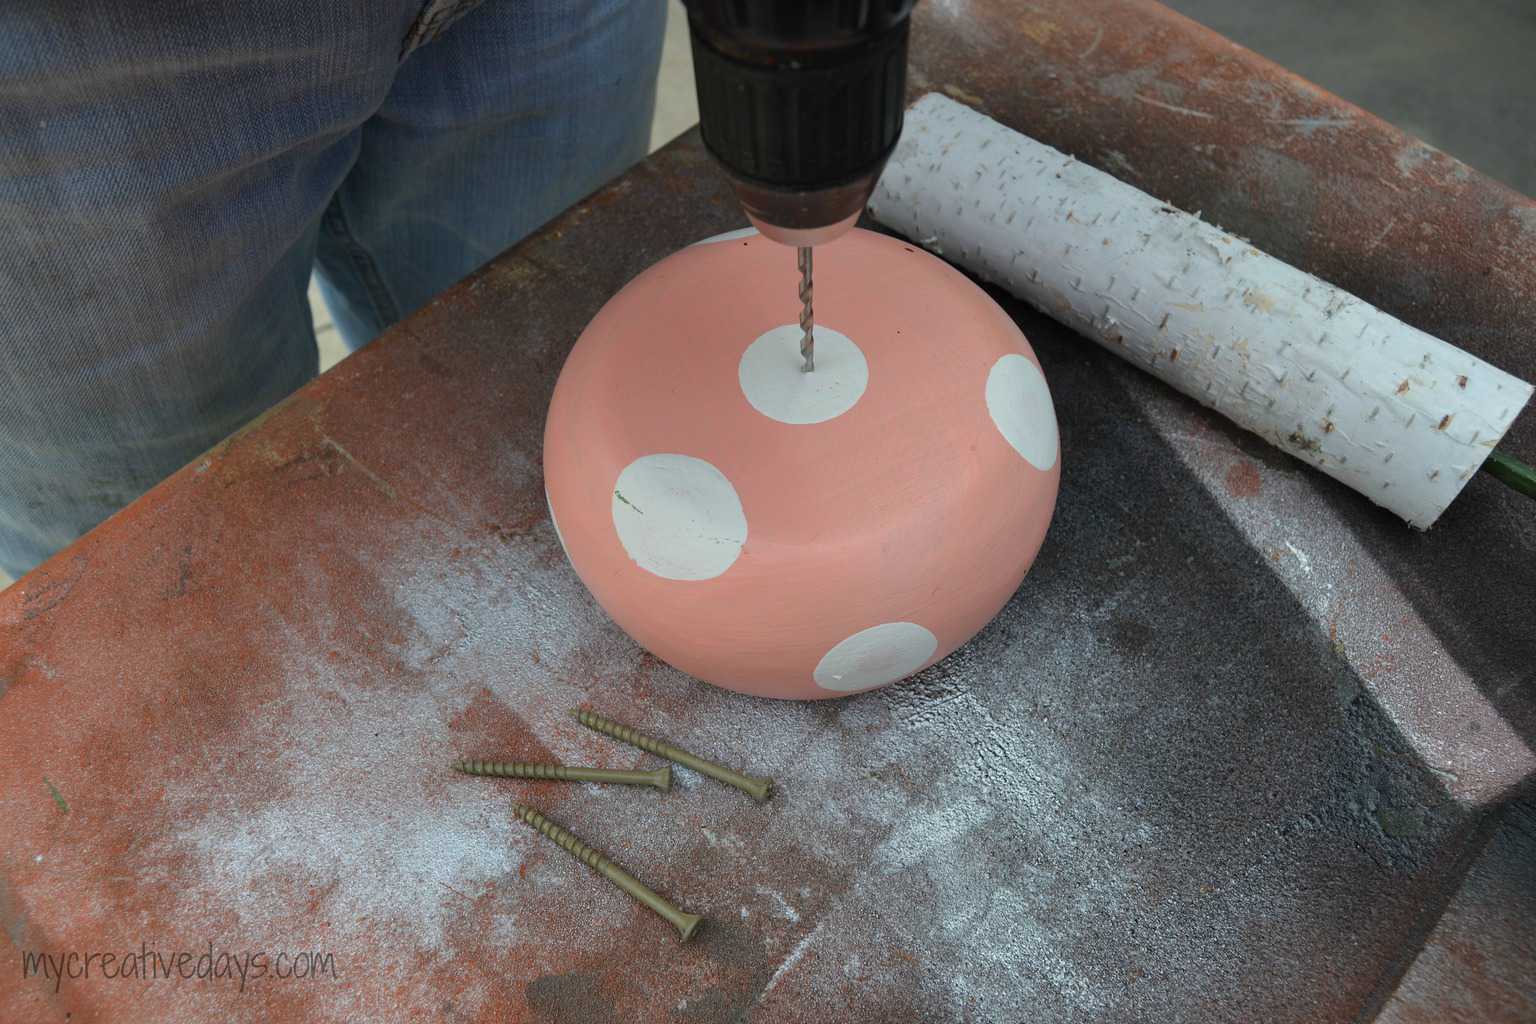
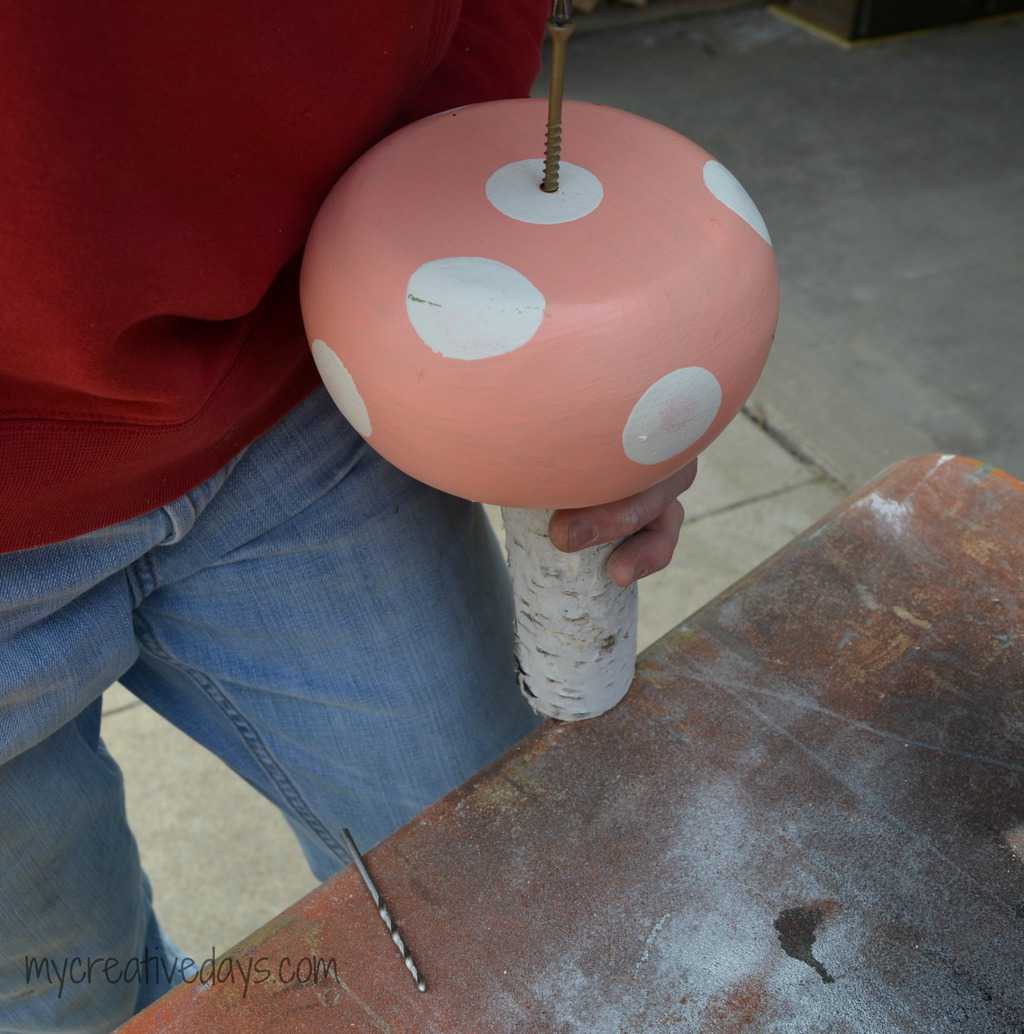
To attach the bowls to the logs, he drilled a screw down through the hole he made in the bowl and into the log he held underneath it.
The DIY toadstools would not stick into the ground this way so we had to add the garden stakes to the bottom of the birch logs.
Matt screwed a hole into the bottom of the logs and then hammered the stakes into the hole.
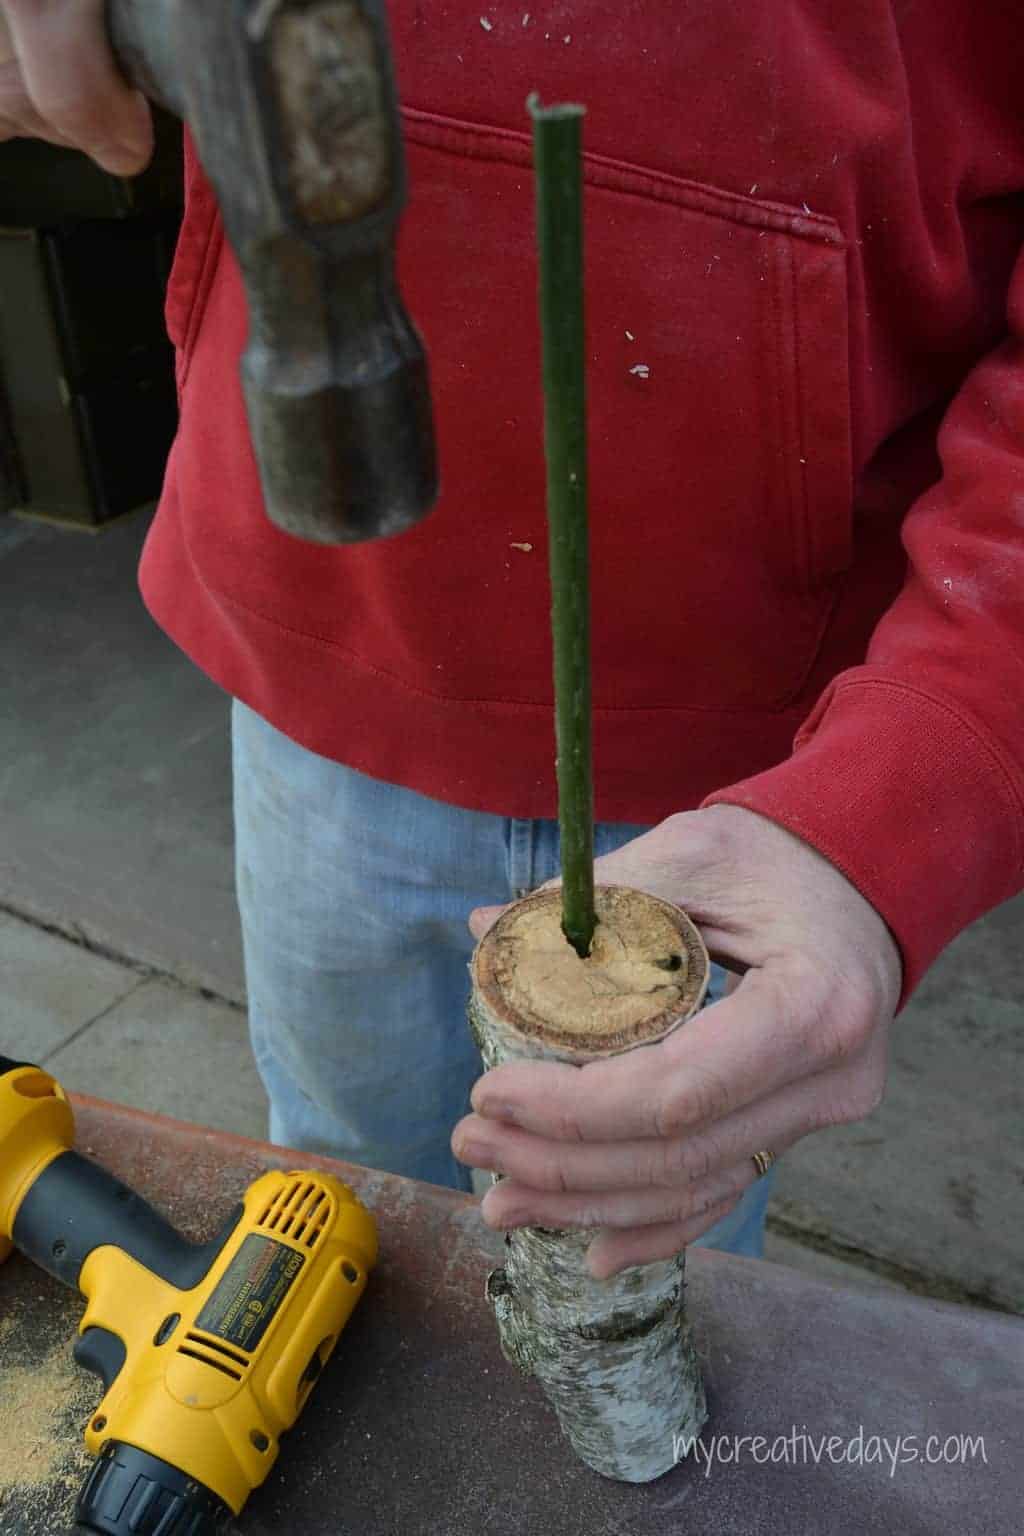
The stake is the part that will get pushed into the ground. We found that is was easiest to attach the bowls to the branches first and then add the stakes. That way, you can stand the branch up when you attach the bowl.

When everything was put together, I sprayed each DIY toadstool with Thompsons Water Seal. This helped the toadstools last over many years and through all weather elements.
These were a fun addition to our yard and they always start a conversation when people see them for the first time.
PIN THIS POST!
If you liked this DIY Toadstools post, make sure to check out these other outdoor DIY projects:
DIY Outdoor Furniture Makeover
Curbside Picnic Table Makeover
Those are really cute! Do you keep them out all year or are they just a spring decoration?
I kept my first set out all year. They have been out there for over two years now and they have held up well.
I love this. Found it on Pinterest. I’m sharing your post on my FB page today at 11:00am HST! http://www.facebook.com/ivyandcompany I may have to stop at Salvation Army today to get my hands on some salad bowls!
Thank you so much! You just made my day! Run to your local thrift store and hopefully you can find a set!
So totally cool! I love these! Great job Lindsay! You should make these and sell them =)
I would love to know how to sell some of the stuff I make. I see a lot of bloggers selling their stuff and I really want to start doing that! Thanks so much for your comment!
These are so cute!! Such a creative idea!
Thanks Michelle!
How cute and so creative! I love the colors, especially that green! But green is my favorite color. There are perfect for spring/Easter. I’m pinning these!
Navy Wifey Peters @ Submarine Sunday Link Party
Thank You!
These are absolutely adorable. What a great idea. I’ve got to make them too, they would look great in my yard. Thanks for sharing with us at Wake Up Wednesday Linky Party.
Angel
Your welcome!!!
How fun!
Thanks!
I love this idea! I am going to be on the look out now for some bowls!!!
Happy searching!
Absolutely darling! Gosh, I wish I had a creative eye for projects like this. So so cute!
Thank you Renae
Fun! I am imaging a fun Easter Egg theme at my house 🙂
Sounds fun!
These are adorable! I have actually had a couple of bowls for awhile now planning on making some of these. I love the pastel colors instead of red and white!
Tania
Thank you!
Very cute idea – very creative. It’d be fun to put them somewhere in your yard unexpected!
Exactly!
These are adorable! I can picture them in the landscaping around my little chicken house 🙂
That would be really cute!
Ok, these are downright awesome!
They are a lot of fun and easy to make.
I love the toadstool idea, Lindsay! Definitely a great 4-H project for kids and it is easy to do. I can’t wait to try and make your projects! Great job and I love being able to visually see each step being completed. 🙂
Thanks Megan!
The poly (not going to try and spell it) that you put over top…was that a spray paint? These are adorable.
You can do it with the spray kind or the brush kind. I have the can of it so I used that and brushed it on these.
I love the toadstools! I’m going to be on the lookout for wooden bowls!!!
Happy bowl hunting!!!
Hey Sweet Friend! I love the bright colors of your toadstool bowls! I bet everyone is going to be hunting up the Thrift Stores looking for wooden bowls! 😉
I’m so excited to see your project on Show-Licious Craft & Recipe Party! Thanks for linking up with us!
~ Ashley
Thanks Ashley. Thanks for hosting this fun party.
Great idea and I love the repurposing and thinking outside of the box 🙂 Pinned
Thanks Cindy!
Very cute and so simple. I think even I can handle this one. Thanks for sharing on Snickerdoodle Sunday!
Your welcome Kristina!
These are absolutely adorable! Thank you for sharing! Can’t wait to make my own set.
Thanks Cathryne!
YES. I want these in my yard! I hope you are on Hometalk, cause these would be popular there, too. Thank you for sharing these at Treasure Box Tuesday! It doesn’t look like you are on Google+, but I’m sharing over there! 🙂
Thanks Joy. I am on Hometalk and Google+ http://google.com/+lindsayeidahl.
I absolutely love this project – I am heading straight for the thrift store and gather up a bunch of those wooden bowls. Thanks for sharing.
tina
Good luck in your hunt Tina!
These are beyond cute!! Amazing creativity, girl!! I, too, will be on the thrift store salad bowl prowl! 😉 Thanks so much for sharing!!
Thank you Stefanie! Happy wood bowl hunting!
So cute and whimsical! I love it – thank you for the tutorial!
Your welcome Dawndee
Now that is adorable! SO creative! Thank you so much for linking up at Get Your DIY On: Thinking Spring! Happy Easter!
~Abby =)
Thank you!
Ok Lindsay! I am in love with these- so creative and adorable. I am featuring them on my blog today! Thank you so much for linking up to Get Your DIY On with your Spring Project!!
Mandy @ The Hankful House Blog
Thank you so much for the feature!
You are so creative! I have no idea how you came up with this but I love itttt! I’ll be looking for something similar in the thrift shop next time I go. My yard can use some decorating.
Thank you Zamara!
I love these so much, I featured them on my blog today! So creative and cute!
http://www.betterafter.net/2014/05/oddsandendsmakeovers.html
Thank you Lindsey!
I must say, these are pretty dang cute! Whimsy isn’t my ‘go to’ look, but I’m totally enamored by these 🙂 Cute idea!
Thank you Connie!
Love, love, love these toad stools! Absolutely adorable!
Stopping by from Work it Wednesday. OMG these are the cutest things ever! Now I want to do my daughters room in woodland theme just to make these. Do you think if the log was cut level and wide enough, it could work as a stool for smaller (lighter children)? Pinning!
I think it could work. I think you would just want a log that fits the inside of the bowl and shorter to the ground, but I think it could work.
These are just SO perfect. I have to make them :))