Unleash your creativity with this DIY guide on How To Transform A Closet Into An Art Nook. Discover tips, tricks, and inspiration to create a space that sparks imagination and artistic expression. Turn your unused storage into a haven for artistic exploration.
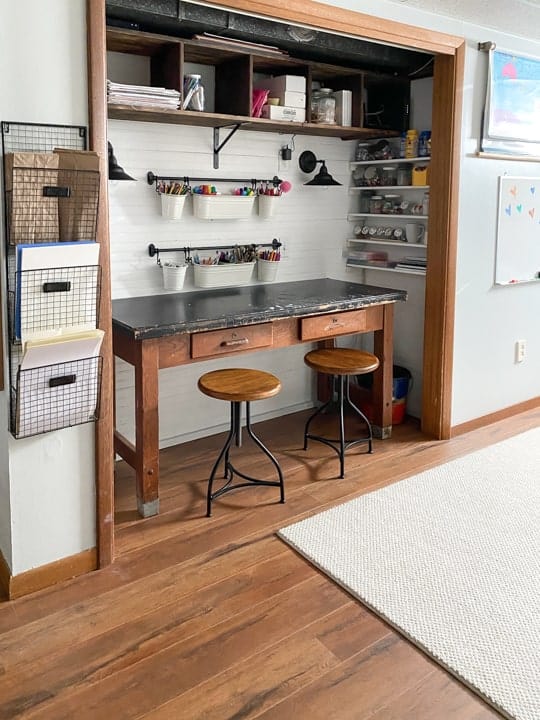
This was what our “old” art nook looked like. We have had it this way for many years but now that Gabrielle has grown up and has really become an amazing artist, she wanted to give it a little makeover to make it fit her now. I am always up for a makeover and something like this would not take that long or cost a lot of money. I will share what we did in this makeover and tips on how to turn one of your closets into an art nook!
6 Steps For Turning A Closet Into An Art Nook
- Assess and Clear Out: The first step in transforming your closet into an art nook is to assess the space and clear out any unnecessary items. Say goodbye to unused items to make room for your art supplies and tools.
- Design and Layout: Explore various layout options, taking into consideration the size and shape of your closet. Use clever storage solutions, shelving ideas, and innovative ways to optimize space.
- Lighting and Ambiance: Lighting plays a crucial role in any art nook. You need adequate lighting and the right lighting.
- Organization and Storage: Efficient organization is key to a functional art nook. From paintbrush holders to color-coded storage bins, come up with practical ideas to keep your materials organized and your creativity flowing.
- Personalization and Inspiration: Transform your art nook into a space that reflects your unique artistic style. Curate an environment that sparks creativity and fuels your artistic passion.
- Showcasing Your Creations: Finally, figure out how you want to showcase your artwork within your newly transformed art nook. It will become a mini-gallery that celebrates and inspires your artistic journey.
{Affiliate links are used in this post. Click on any of the underlined links to find the products I am talking about. You can read my disclosure HERE.}
Supplies Used For This Makeover
All-In-One Paint (Endless Shores)
New Wood For Desktop, Trim, and Shelves
Repurposed Desk
Steps To This Makeover
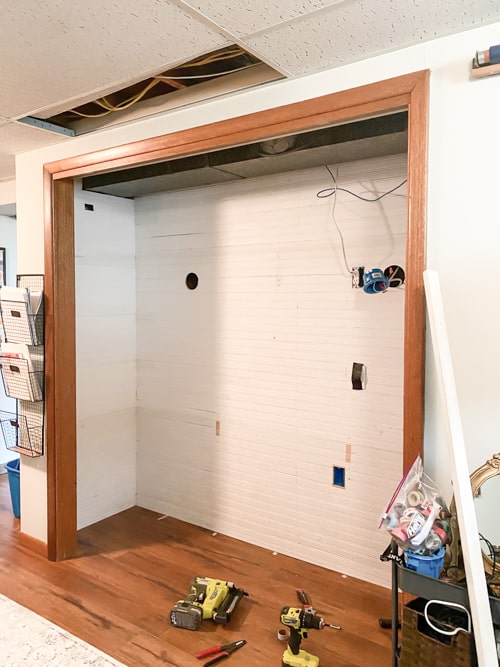
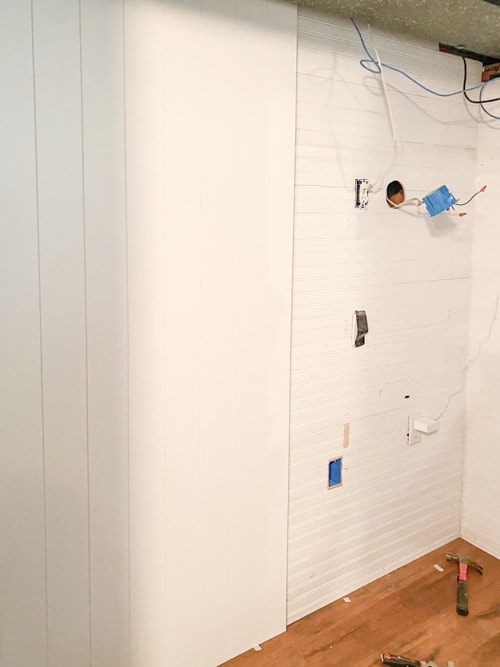
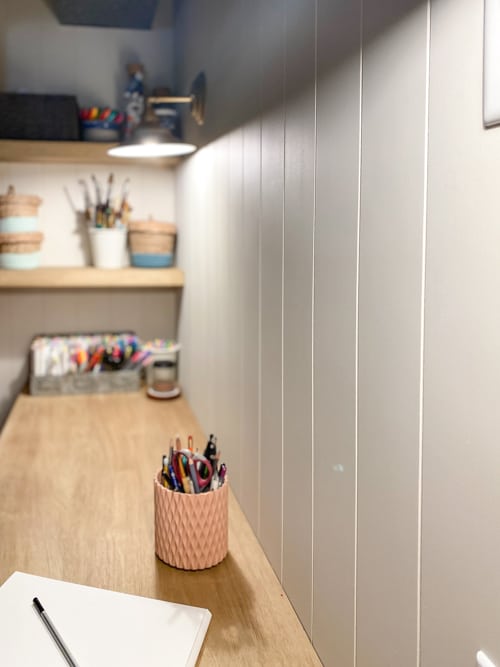
The first thing I wanted to do in this makeover was cover the horizontal wainscoting.
We picked up three panels from Home Depot and hung them vertically. That alone made a drastic difference in the look of this art nook.
I painted the vertical panels in a beautiful warm color. It is called Endless Shores and it is from Dixie Belle Paint.
I did want to move some of the electrical from the old nook and raise the lights. Instead of buying new light fixtures, I just covered them with Rub N Buff and they were perfect. In the photo above we were trying different light bulbs for the space. Lighting is an important aspect to consider – especially in an art nook.
![]()
Vintage Desk Makeover To Add To The Art Nook
To add more storage to this art nook and reduce the number of cubbies and shelves we had in the previous nook, I incorporated a vintage desk with tons of drawers.
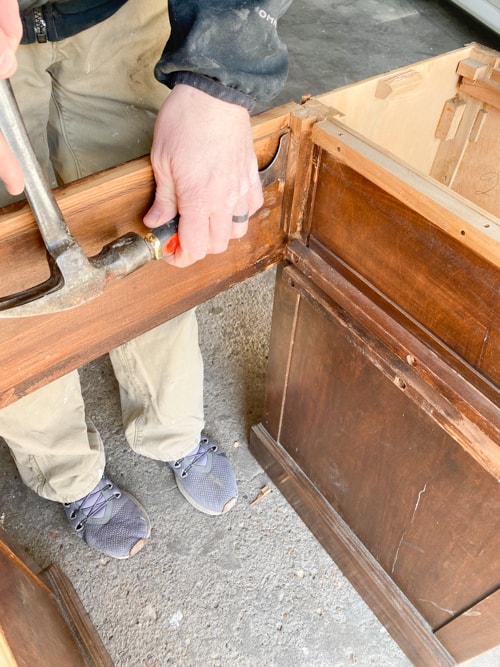
We removed the top of the desk and took the middle and back portion off.
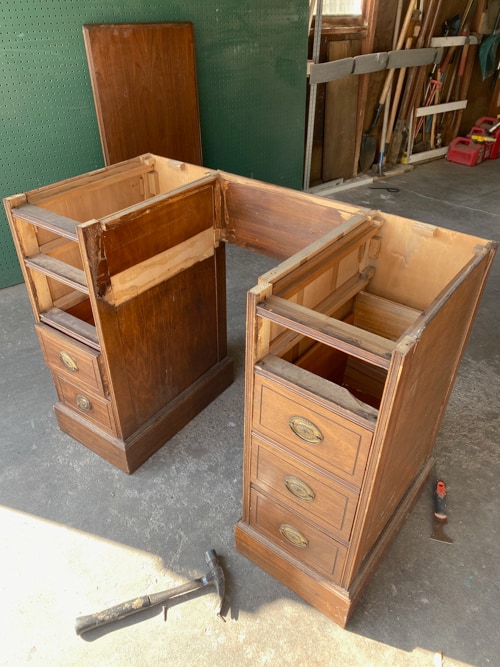
Once the desk was apart, I painted them both in one of my favorite green paint colors, Bayberry by Fusion Mineral Paint.
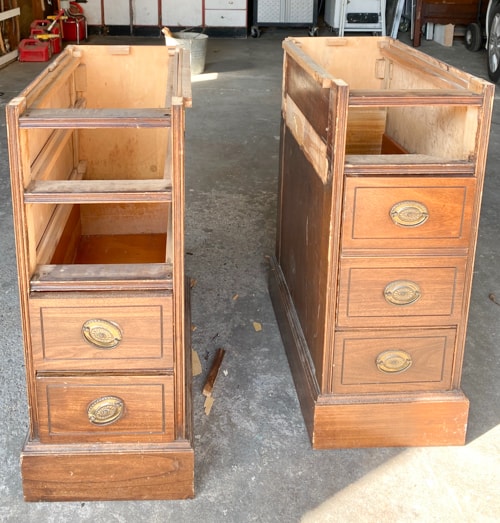
Once the paint dried, Matt took them inside and put them in place. I added the original hardware back on them.
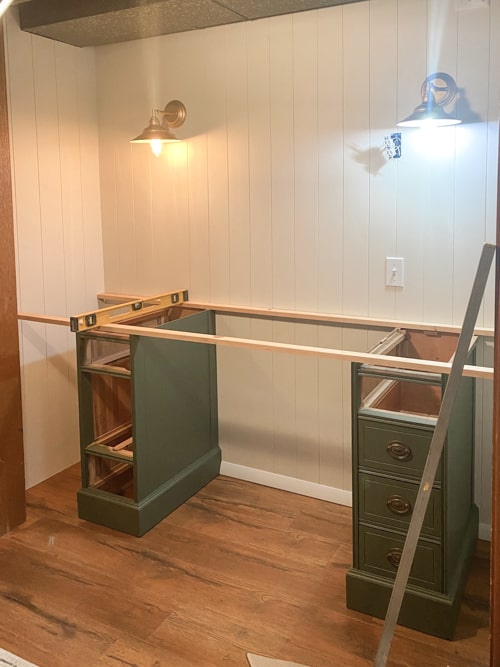
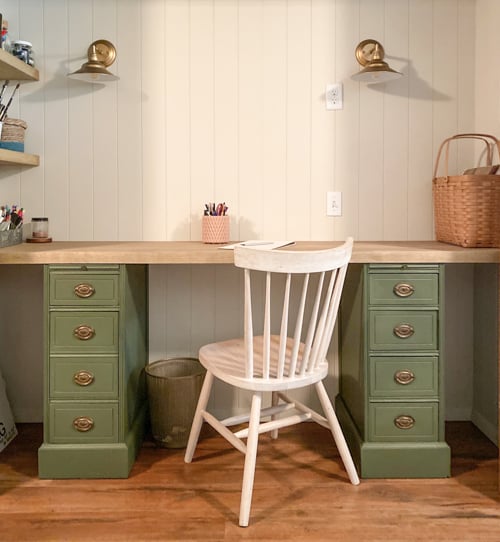
Then, Matt measured and cut the top for the desk. We bought a board at Home Depot for the top. It gave us enough for the top and the leftover piece was used to add shelves.
Matt braced the desktop with a wood piece on the wall and then added a piece of trim to the front to give it a finished look.
He added the same trim to the shelves on the left wall as well.
I stained the desktop and the shelves the same color.
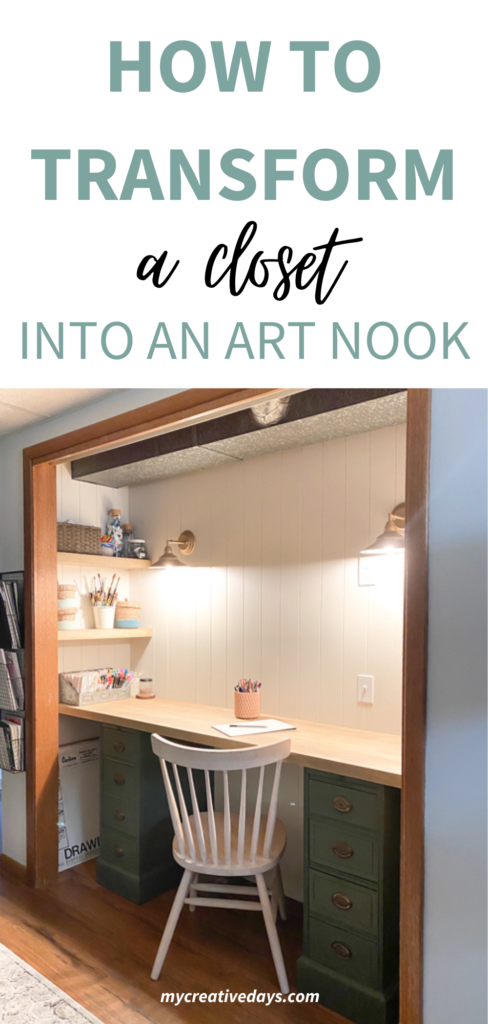
Unused Closets Can Become Usable Spaces In Your Home!
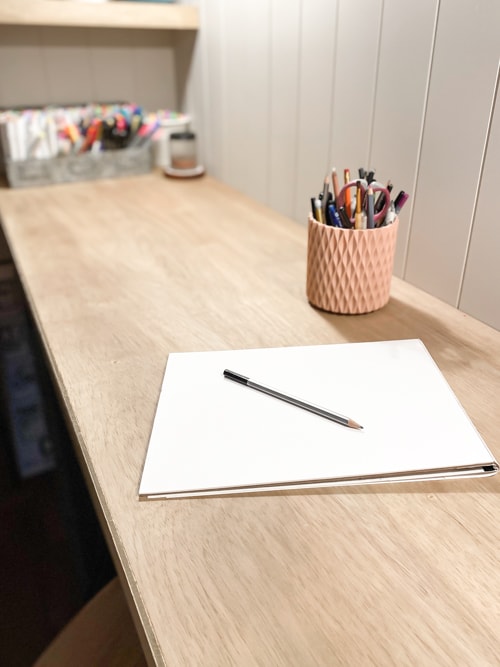
I love the way this turned out. The drawers give her a ton of storage space and getting to add the wood top gives her a huge surface to create on. It is much bigger than a regular desk would be.
The extra storage space in the drawers meant that we didn’t have to add a lot of shelves around the desk. We wanted to keep this space simple and clutter-free.
The shelves on the left have ample space for the things that don’t fit in the drawers. It’s the space she stores the things she uses all the time.
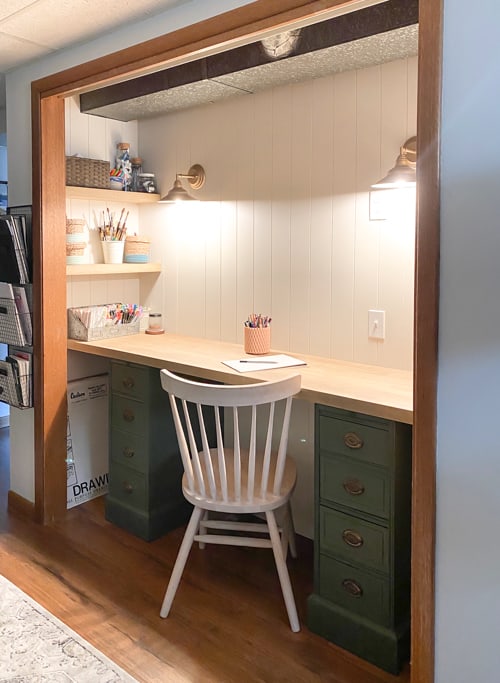
This makeover was simple and didn’t cost a lot of money. It represents her style so much more and just looks more “grown-up” for her to create in.
I can’t wait to see what creations come out of this updated space.
What did you think of this How To Transform A Closet Into An Art Nook?
Do you have a closet you aren’t using? Convert it into a nook for art, work, or just a creative space.
If you are looking for more DIY projects, I am sharing new DIY videos every week on my YouTube channel! Head HERE to find it and make sure to SUBSCRIBE so you don’t miss any of them!
PIN THIS POST!