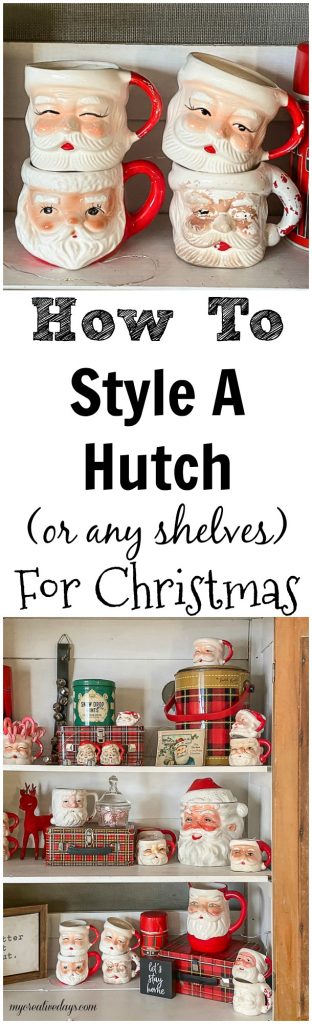
How To Style A Hutch For Christmas (you can use these tips for any shelves you are decorating).
I am sharing how to style a hutch for Christmas because I have been receiving a lot of questions about how I put together the hutch in our living room this year. I love receiving questions because it tells me what you want to see more of or what I need to elaborate on. Please, keep the questions coming!
The hutch in our living room is always the first place I start when I am redecorating for a new season. It is a small area that I can tackle in no time and it sets the tone for the rest of the decorating. Once I get the hutch done, I feel like I am geared up for the rest of the house.
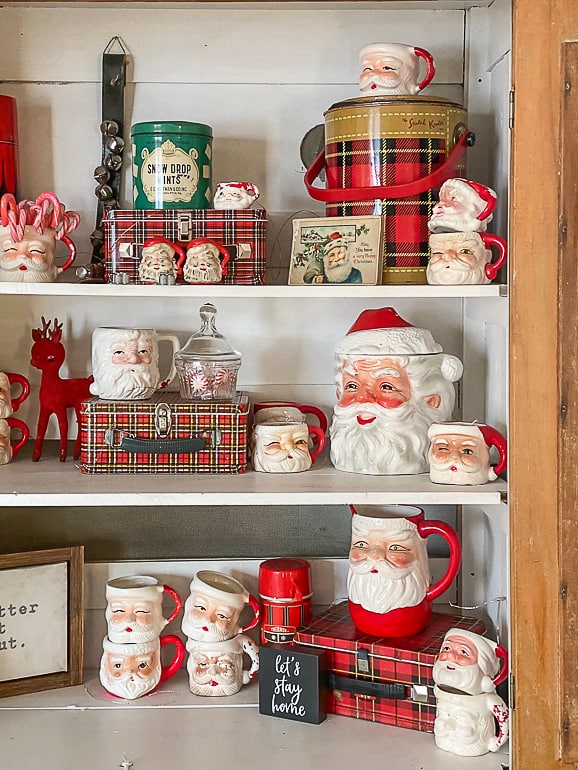
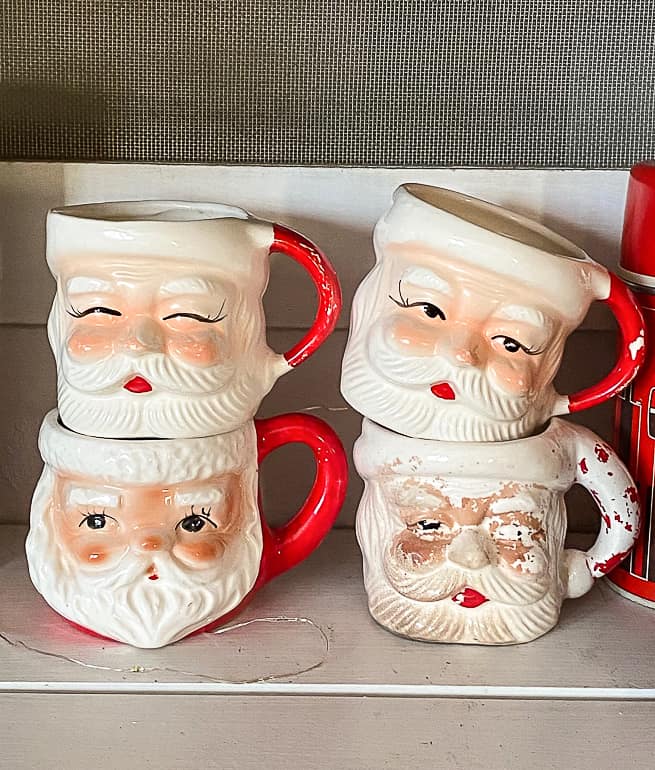
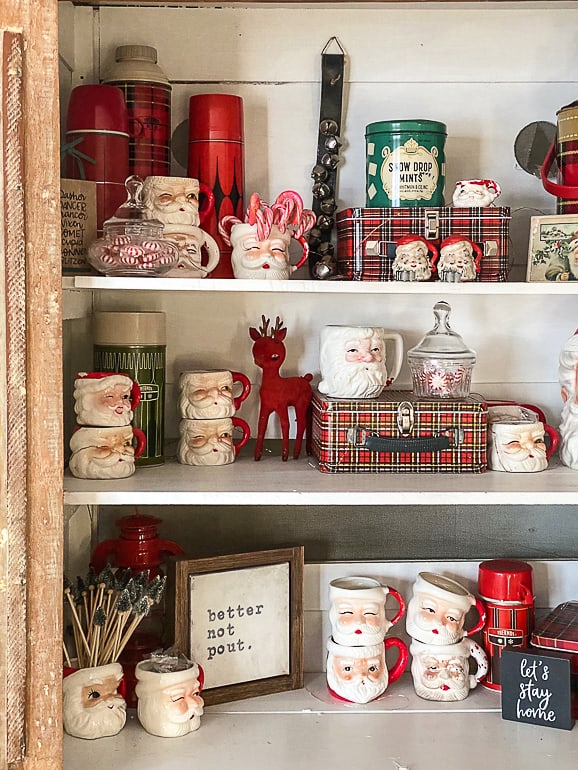
This Christmas season, I wanted to put all of my vintage Santa mugs and other vintage goodies in the hutch. I pick these items up whenever I see them. Having them all together is a great way to see how far my collection has come. I am not a collector of many things, but the few that I have make me so happy.
{Affiliate links are used in this post. You can read my disclosure HERE.}
I put this hutch together from scratch on a Facebook live video after getting a lot of questions about how I did it. You can see the video at the end of this post.
Tips For Styling A Hutch For Christmas
- Like with everything you are decorating, start with a blank slate. Remove everything from the hutch or shelves that you are redecorating.
- Next, decide what you want to highlight in the hutch or on the shelves. Do you have some favorite decor you want to put here? Are there family heirloom decorations you want to showcase? Do you have a Christmas collection that needs some extra attention? Whatever it is, decide on that first so you have a direction to go in. The direction can change, but it is easier if you start with some kind of plan so you don’t get overwhelmed halfway through. You don’t have to have a theme per say, but a general idea about what you want to put on the shelves is a good idea. In the past, I have gotten out all of the Christmas totes and decorated the hutch with my favorite decor that would fit inside. Nothing was a collection or a set, but it was some of my favorite things and it all looked great together inside the hutch.
-
If you would like to add twinkle lights to your shelves, lay them on the shelves before anything else. The video above will tell you why I do that. Spread the twinkle light strand out across the shelf so you can move it and arrange it after you put the decor in.
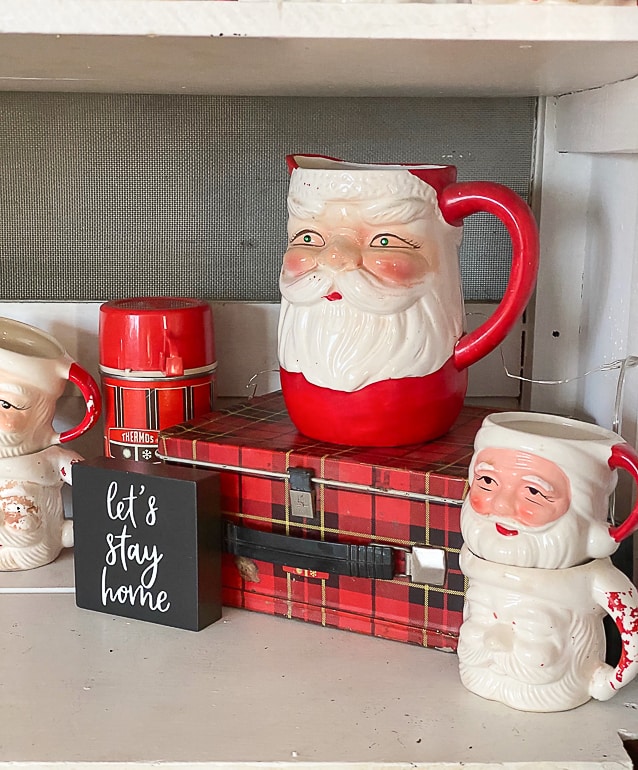
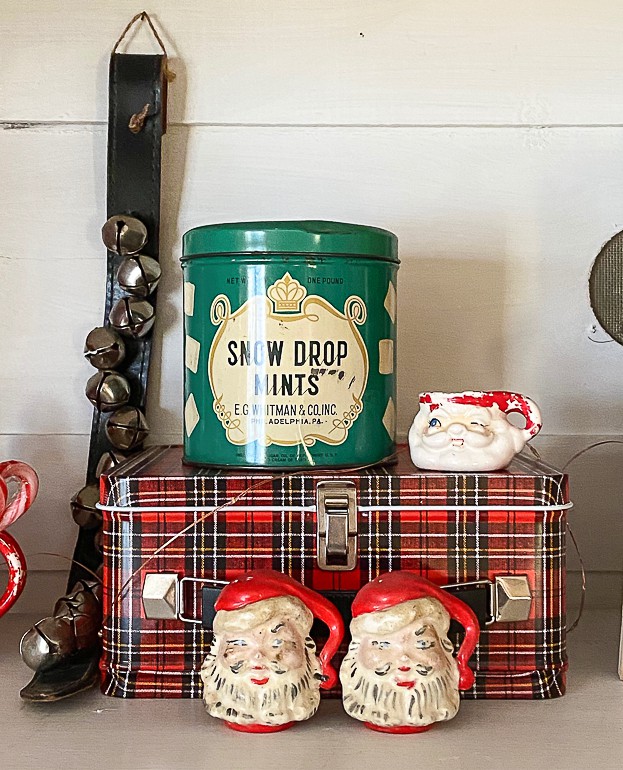
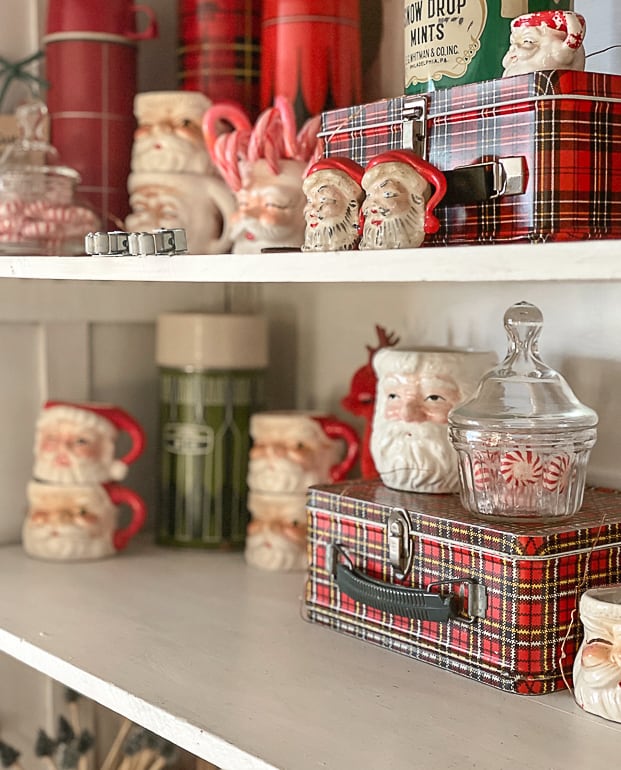
- Now, start with the bigger items first. Put those in the corners or ends of the shelves. If you have enough room, you can add a bigger item to the middle of the shelves as well. For me, the bigger items were the thermos’, lunch boxes and the Santa cookie jar.
- Once the bigger items are placed, fill in around them with smaller items. This is the point where most of the Santa mugs came in.
- Don’t forget to use the back of the shelves as a space to decorate. Hang things there or prop things up against the back.
- As you are filling the shelves, try to group things in odd numbers. It is more pleasing to the eye.
- Don’t feel like you have to fill every inch. More is not always better. You want the eye to be able to see everything easily. Too much can look cluttered and stressful. Less is more.
- If you have items on the shelves that you can fill, put Christmas-colored candies or candy canes inside. Make the hutch or shelves a spot people can stop at for a treat to truly enjoy what is inside.
-
Once you have everything where you want it, move the twinkle lights around the items in no perfect way. Twinkle lights look best when there isn’t a pattern to them. Bend them around things and under things. Lay them on top of items and inside glass jars. Have fun with them. They are the bling statement to your masterpiece
- Now, stand back and look at your masterpiece. You can’t get a clear idea without moving back to look at the full picture. If something doesn’t look right, move it. See a hole in the decor? Fill it. If you don’t like something together, take it out. This isn’t a science. This is supposed to be fun. You need to love it because you live there. You will be the one seeing it every day. The biggest tip is to keep messing with it until you love it. The more times you do things like this, the easier it will get. It is like anything, practice makes progress.
Similar Items Used In My Hutch
Vintage Santa Mugs or THESE or THESE
Plaid Lunch Box
Vintage Thermos
Twinkle Lights
The vintage mugs make me so happy and seeing it all come together makes this hutch festive and fun for the holidays.
I hope these tips on how to style a hutch for Christmas were useful and the video gives you a helpful glimpse into how I put it together. I learn best by watching someone do something so I am trying to add more videos and do more lives to share projects while I do them.
Here is the video showing you how this hutch came together.
You can find more of my how-to videos on my YouTube channel HERE.
Have you started decorating for the holidays yet?
PIN THIS POST!
If you liked this post about How To Style A Hutch For Christmas, you will love these tips:
DIY Christmas Gift In Under 5 Minutes
I love the Santa cookie jar. Is it vintage also? Do you know the maker? It reminds me of the vintage Kelvin’s Santa mugs.
It is vintage. I am not sure of the maker. It is one of my favorite Christmas items.