After stripping the orange patina and lightening the wood with an easy technique, this DIY wood wall organizer is now functional and so pretty.
I love a good thrift store makeover. I am always on the hunt for things I can make over. It is an easy way to decorate your home on a dime and each transformation brings about something new.
Let me set the stage for how I came about this piece.
I was inside the thrift store and this is what I saw from a distance:
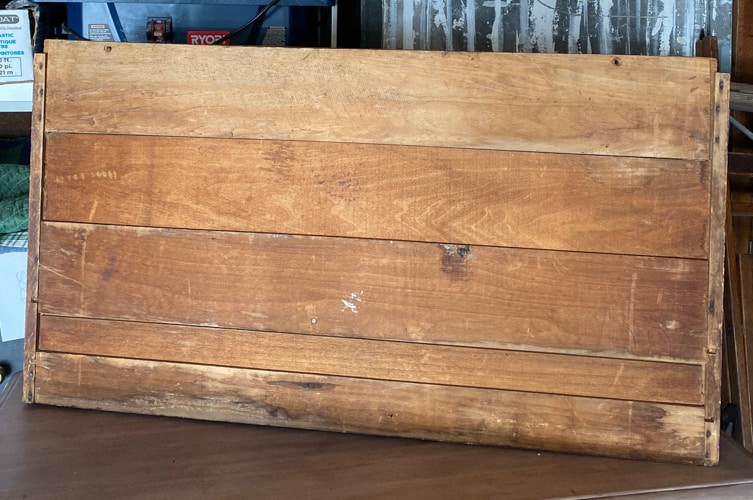
I got so excited.
Can you see why?
The old wood made me rush right over to investigate further.
When I got over there and turned it around, this is what I saw:
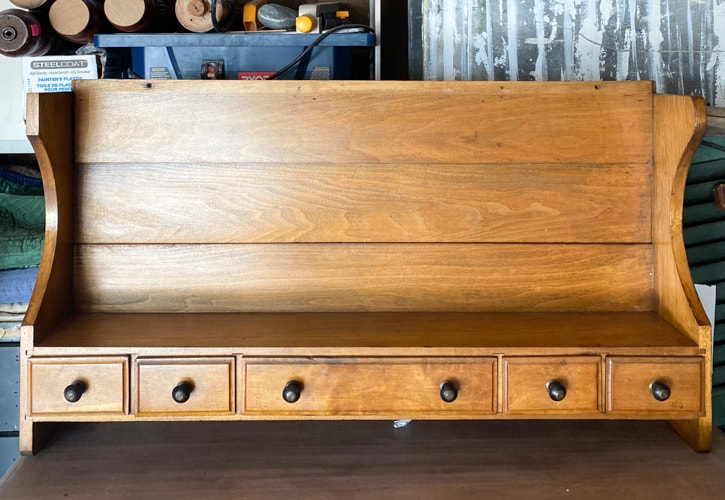
I was still intrigued but bummed because the front didn’t have the old wood like the back.
My mind started racing.
What could I do with this?
I LOVED the little drawers but the orange patina was not going to work. The way the piece was meant to be hung wasn’t exciting to me either. I thought it would be much better hung the other way – upside down.
Once I pictured that, I got more excited so in my cart, it went.
Any piece with tiny drawers makes me happy.
{Affiliate links are used in this post. Click on any of the underlined links to find the products I am talking about. You can read my disclosure HERE.}
Supplies Used In This Makeover
Water
Rag
Steps For This DIY Wood Wall Organizer
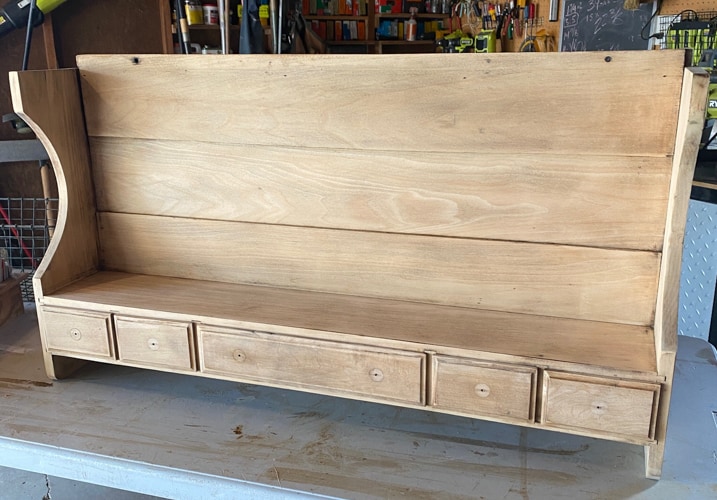
I really wanted to see if the wood underneath the orange stain would look like the wood on the back of the piece.
I used THIS STRIPPING TECHNIQUE. It worked great to get most of the patina off. Then, I used my favorite sander to take the rest off and see what I was left with.
I loved it but it wasn’t the same and the wood was a bit too yellow for my liking.
I wanted to make it lighter, but I didn’t want to make it bright white with this bleaching technique. The colors in our home are warmer so I wanted to lighten the wood in a warmer tone.
So, I decided to do the easiest technique ever. I think of it as a way to “stain” something in any custom color you want. All you have to do is water down your favorite paint color to create a stain-like consistency. I wanted to see some of the wood underneath so I didn’t want the paint to cover up too much. I wanted to give the piece a more “colored-stain” look.
PRO TIP: The trick to this technique is getting the paint and water mixture to the right consistency so that it doesn’t go on like paint and cover up more than you want.
The best way to see how I mix the paint and water and how I apply it is to head over to my YouTube video HERE.
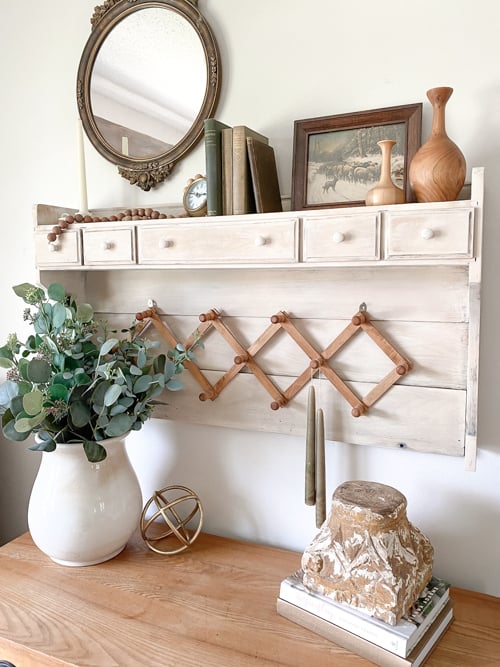
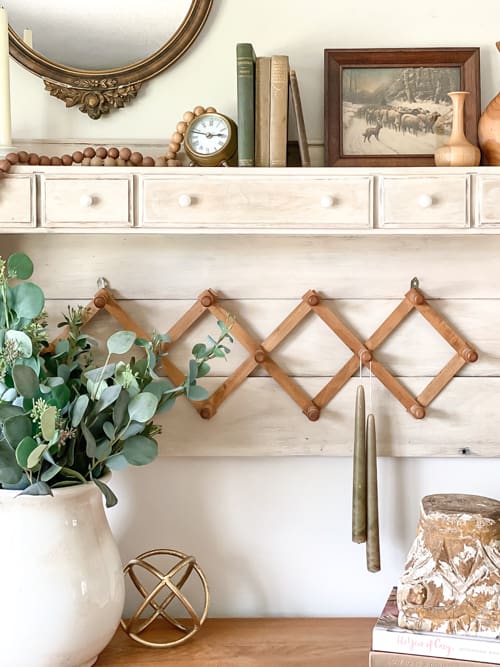
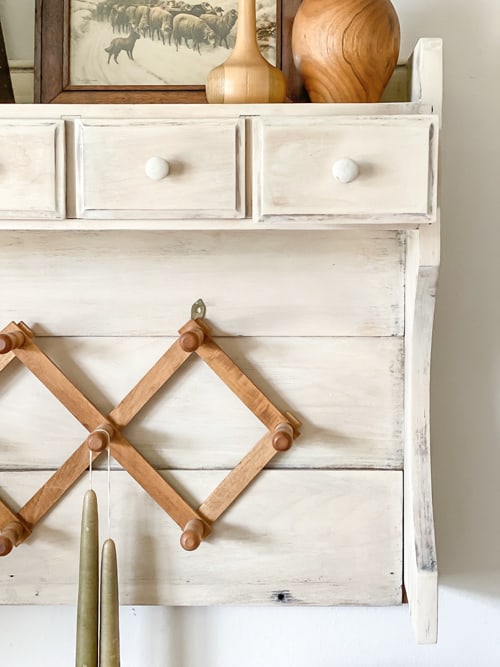
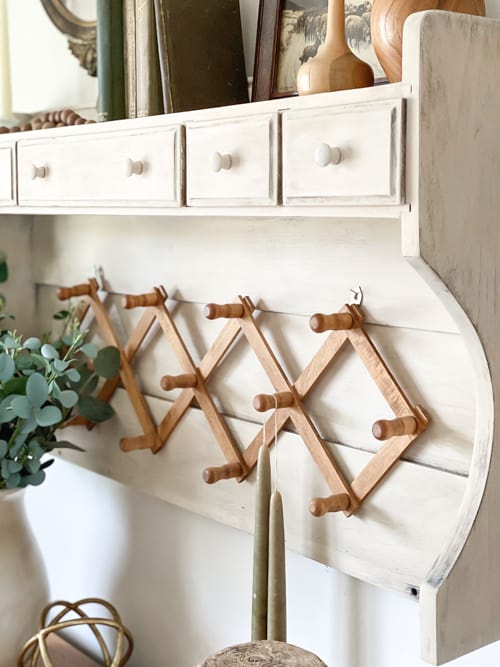
Look how well this turned out!
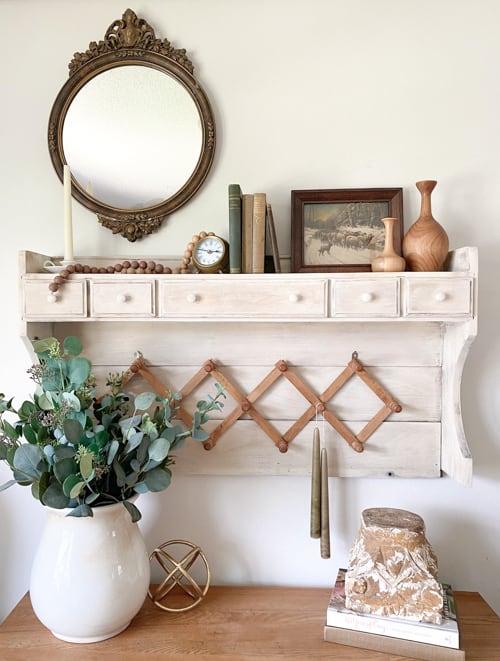
The color of the wood is more of a creamy color. It isn’t stark white. It matches our living room so well.
And, I love this piece so much better flipped the other way!

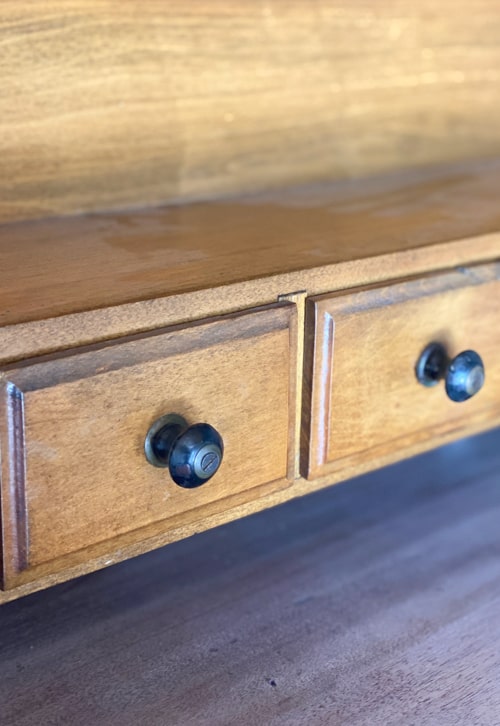
It still provides all the same storage. The drawers were easy to just flip around. There weren’t any rungs or anything on the drawers. They are just boxes with knobs so they can work with way.
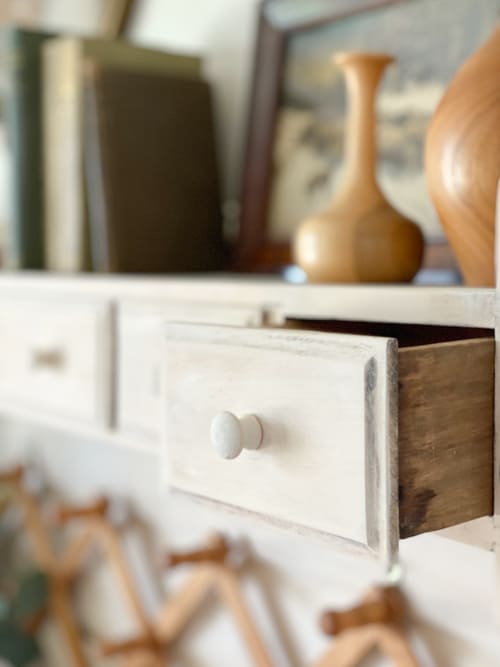
I didn’t love the stark black knobs after the makeover was done so I stashed them away for another project.
A simple wood knob was perfect for his DIY wood wall organizer.
You could use this piece in so many ways. I just styled it quick in our living room and I have to say… it hasn’t moved yet. I am kind of liking it there.
Reimagine pieces when you are shopping at the thrift store.
I was drawn to this from the back. When I saw the front, I wasn’t as excited. When I saw the way it was supposed to be hung, I was even less excited. Then, I started thinking. I knew the color could be changed. Then, when I pictured it flipped the other way, I was sold. Sometimes, it just takes a little creativity and finagling to get a piece just right for your home.
Would you have picked up this piece?
If you would like even more help with flipping pieces for your home, take my flipping assessment HERE.
I will be able to provide you with all the help you need based on your answers and what direction you want to go!
PIN THIS POST!
