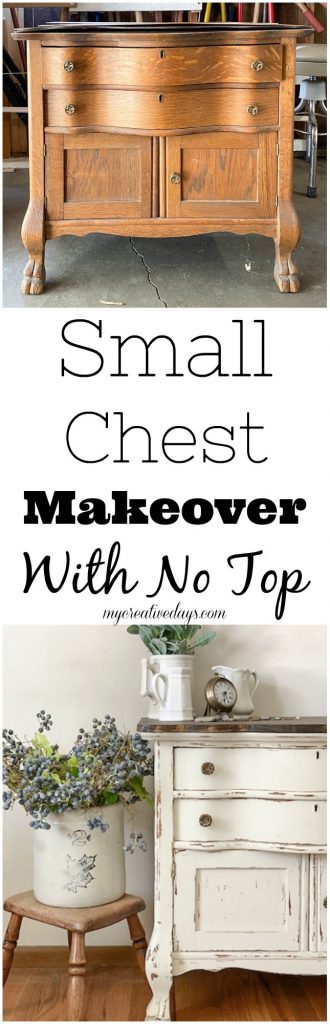
This small chest makeover was one that I thought was going to be a quick and easy project.
They don’t always work out like that and I like sharing those projects too. I have learned a lot over the years in all the makeovers we have done. My biggest piece of advice I give to people who reach out to me and want to start doing projects is to just start and be flexible. Just start. You won’t know until you try and you won’t learn a thing if you don’t try. Starting is the first step. Being flexible is the thing I wish I knew when I started. Things don’t always go as planned, but most of the time, there is a remedy.
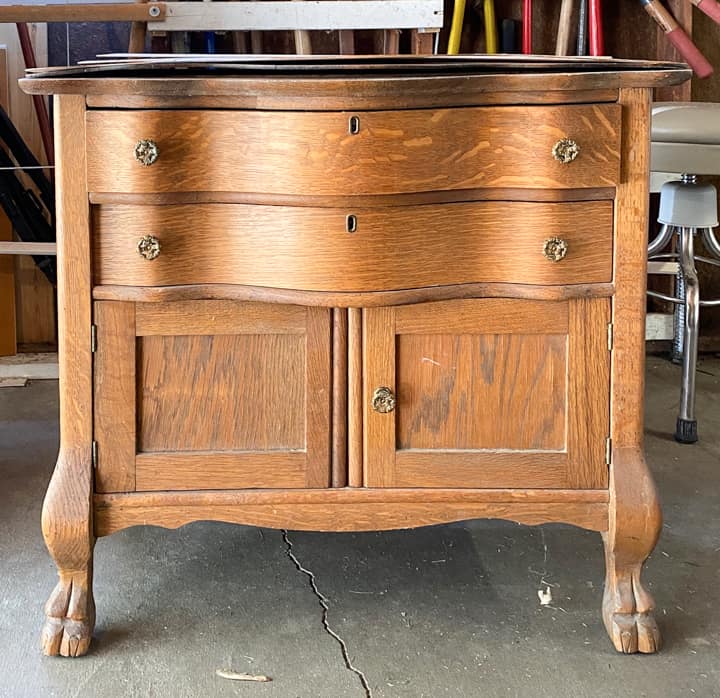
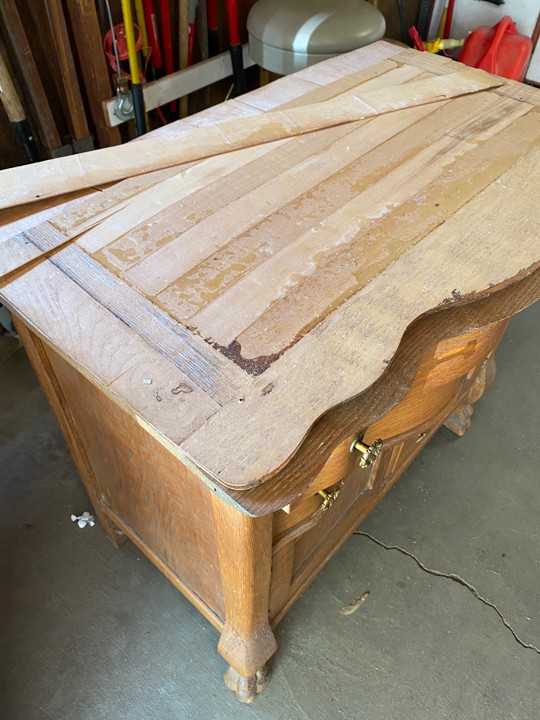
I found this small chest at an estate sale. The size was perfect and it was in great condition. The only problem was the top.
The top has some water stains and water damage. The veneer was peeling off.
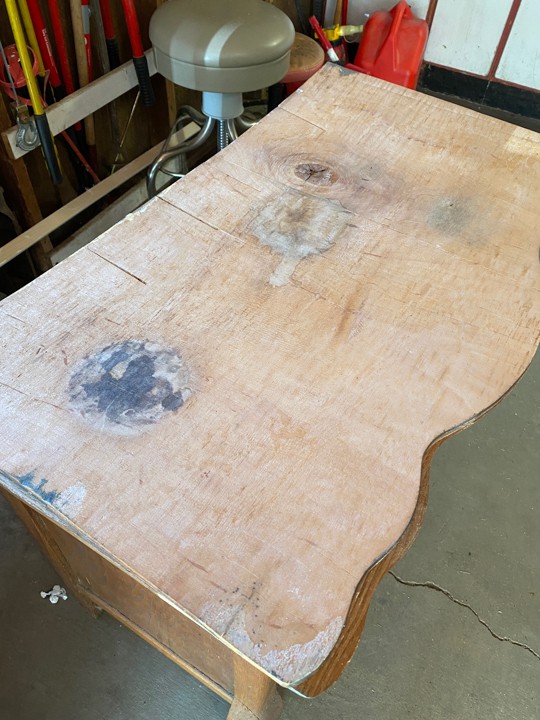
I took the first layer of veneer off the top with a small putty knife.
The photo above shows you what I was left with. (I took this photo after I had taken this layer off so that is why it doesn’t look like it is on the chest). I could have just sanded this layer down, filled in the lines at the back, and then painted it all and been done.
But, NO!
I can never leave well enough alone.
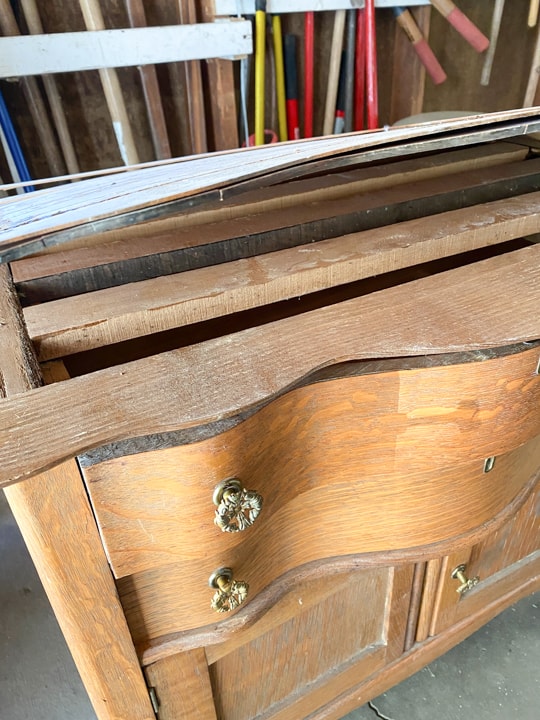
I thought I still had one more layer of veneer that I could peel off and still have a top on the piece.
NOPE!
What I thought was my last layer of veneer was actually the remaining top of the small chest. Oops!
Oh well, we have done many makeovers where we had to get creative with a new top. This was another one to add to the list.

{Affiliate links are used in this post. Click on any of the underlined links to find the products I am talking about. You can read my disclosure HERE.}
Supplies Used In This Small Chest Makeover:
“Drop Cloth” – Dixie Belle Paint
Edge Glued Pine Board (a size we could recreate the top with)
At the same estate sale, I got this old, wood table. The legs fold up underneath it.
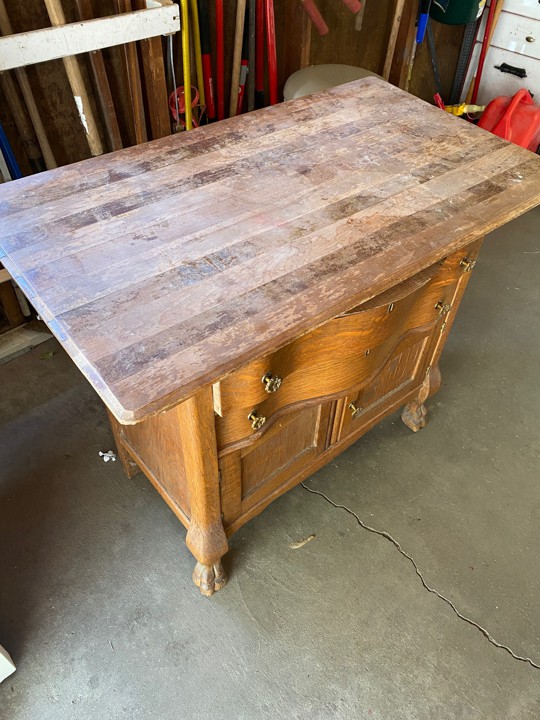
When Matt and I were talking about the new top of the small chest, we thought maybe we could take the table apart and use the top of it as the top of the small chest (after some cutting, of course). After some back and forth, we decided that it wasn’t going to be the best option for the chest.
So, this is how easy it was to remedy the fact that I had removed the old top completely and the top couldn’t be salvaged.
First, let me say that I was very lucky that the last layer of veneer came off in one piece. Having it intact gave us the exact size and shape we needed. There is no guessing, no measuring, no way to mess it up.
We bought a Edge Glued Pine Board a little bigger than the top so we could trace the top piece on it.
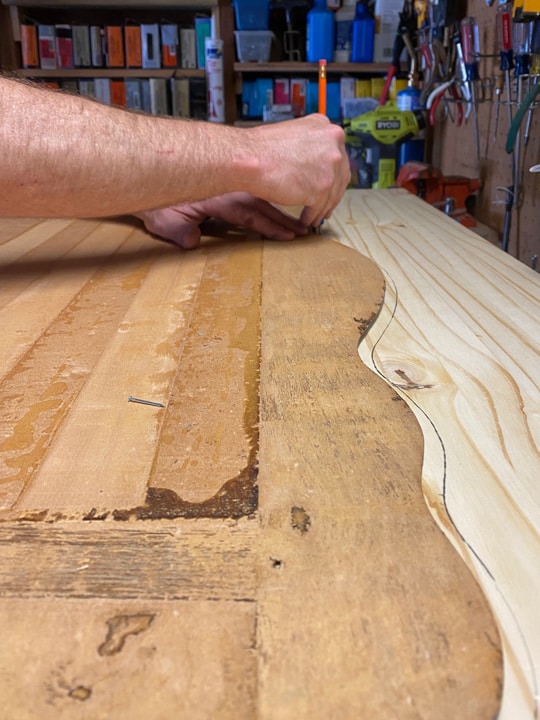
Matt laid the last layer of veneer from the original top on the new board.
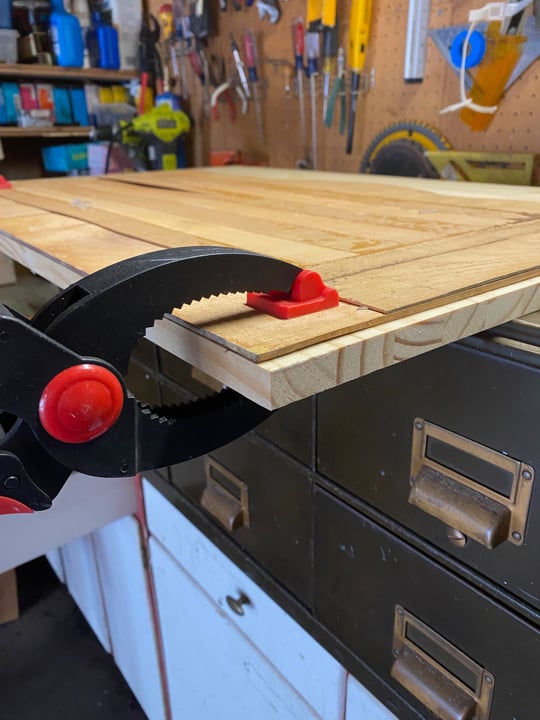
Then, he clamped down the sides and traced around the original piece.
It couldn’t be easier.
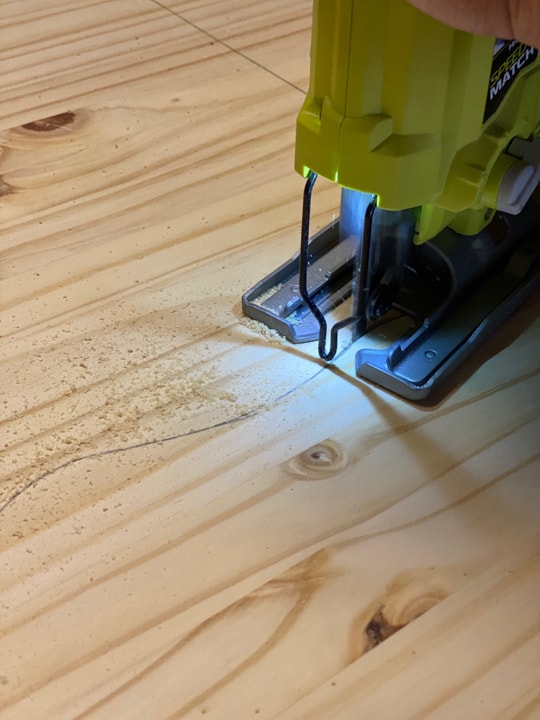
Once he had it all traced, he used the jigsaw to cut it out.
After he sanded the rough edges, I stained it with a “Dark Walnut” stain.
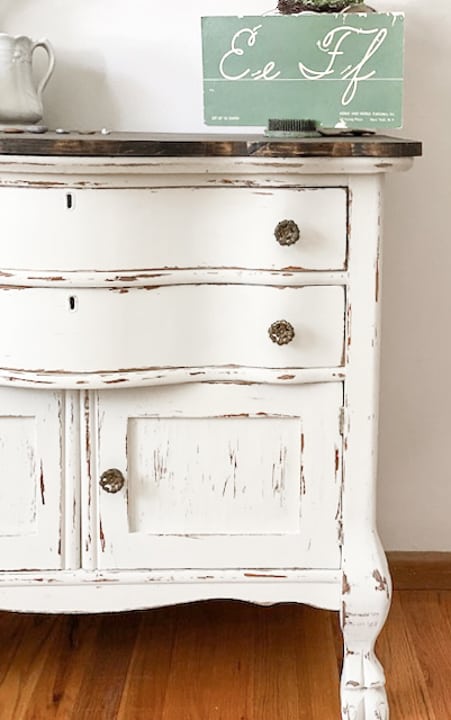
I painted the rest of the small chest in “Drop Cloth” from Dixie Belle Paint (one of my favorite colors from them) and put the original hardware back on it.
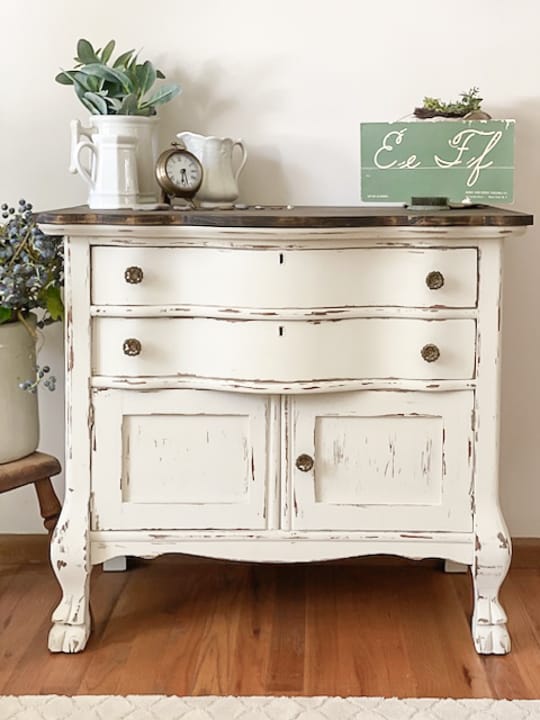
After the paint and the stain were dry, Matt put the new top on the small chest with the nail gun.
Again, I can’t leave well enough alone.
I thought it needed a little more character.
I used 120 grit sandpaper very lightly in some areas to remove some of the paint and make it look aged a bit.

Now, this small chest makeover has the charm and character it needed. 🙂
Don’t let mistakes or accidents throw you off during projects.
It is important to be flexible when you are DIYing anything because the odds are that your original plan will not go as you thought it would. Take a step back, do some thinking, and try a new approach. That usually does the trick. For me, the way things turn out after my original plan failed is always better. Knowing that takes a lot of the stress out of it and I never think “I am going to screw this up” anymore. There are always ways to fix things and you learn more and more about “fixing” with each project.
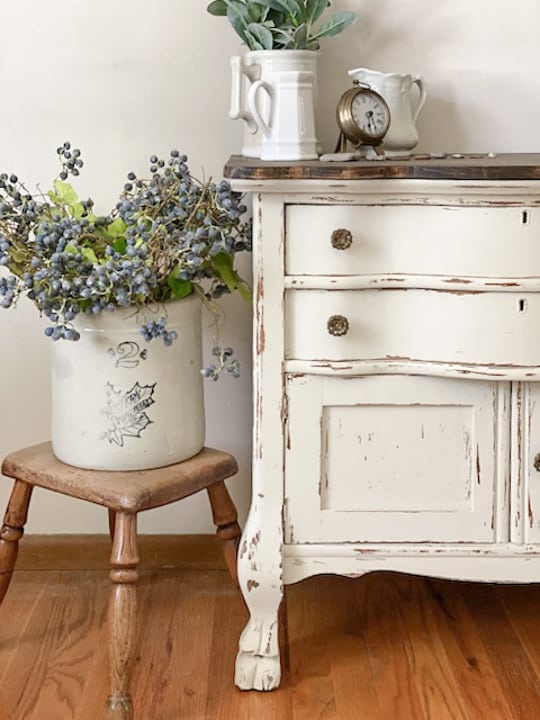
I love small pieces like this because they offer a ton of storage and don’t take up a lot of space in a room. My favorite kind of furniture.
What was the last project you worked on that didn’t go as planned?
PIN THIS POST!
If you liked this makeover, you will also love these transformations:
DIY Nightstand Makeover For Teen Girl’s Bedroom
DIY Glazed Blue Dresser Makeover
Bedroom Chest Makeover With Paint, Sandpaper & The Best Paint Brush