This DIY closet door came about when Matt and I started our bedroom makeover.
We have small bedrooms in our house and they all had bifold doors on them when we bought the house. Bifold doors take up so much space in the bedrooms because they swing out into the room when they are opened. I wanted a solution that would give us more space when the closet door is open and still have a door on the closet. A couple of years ago, we used DIY Sliding Closet Door Hardware to come up with a closet door option for Gabrielle’s closet in her room.
When we were planning our bedroom makeover, I wanted to add something similar to our room. We had a couple of things we wanted to change in our door. I wanted it to look different and Matt wanted it to be a lot lighter than Gabrielle’s door. After some back and forth, this is what we came up with.
{Affiliate links are used in this post. Click on any of the underlined links to find the products I am talking about. You can read my disclosure HERE.}
Supplies Used To Make This DIY Closet Door
3 packages – Tongue and Groove Boards
8′, 3″wide pine trim
“Cable Knit” Paint Color from Nautica (the same color we painted the walls in the bedroom)
It was cold outside and the garage floor was wet so we needed to bring this project onto our living room floor to get enough space to work on it. Our house and garage are always full of projects so this is normal as normal gets around here. 🙂
How We Made The DIY Closet Door
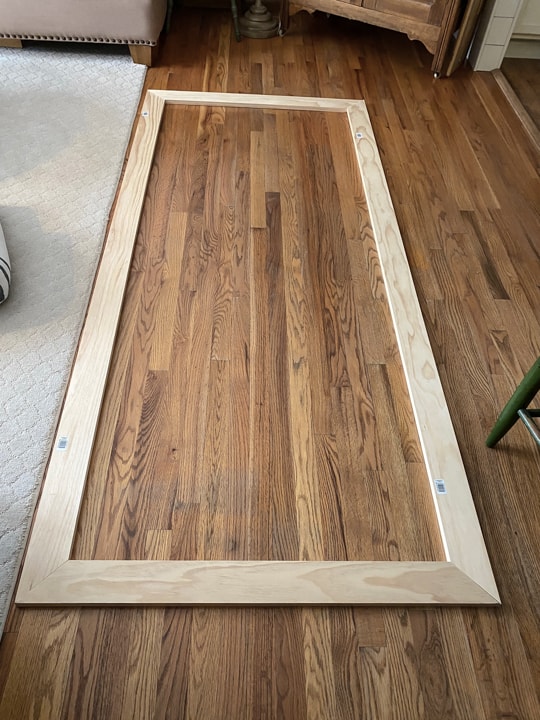
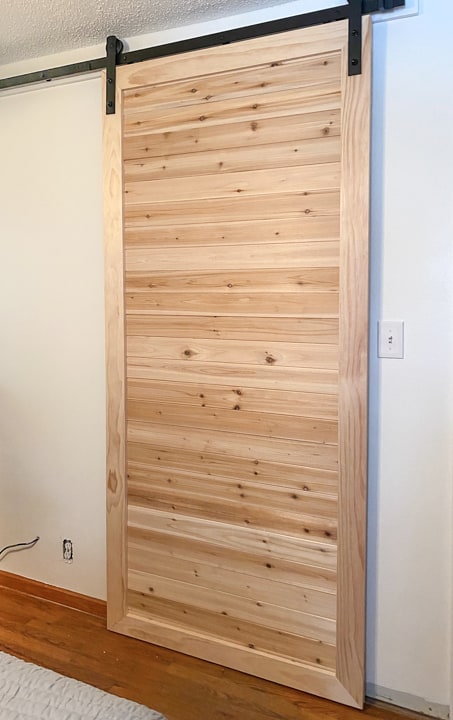
Once we got our bifold doors off the closet, we measured to see how big we needed the DIY closet door to be. We decided a 90×40″ door would be perfect.
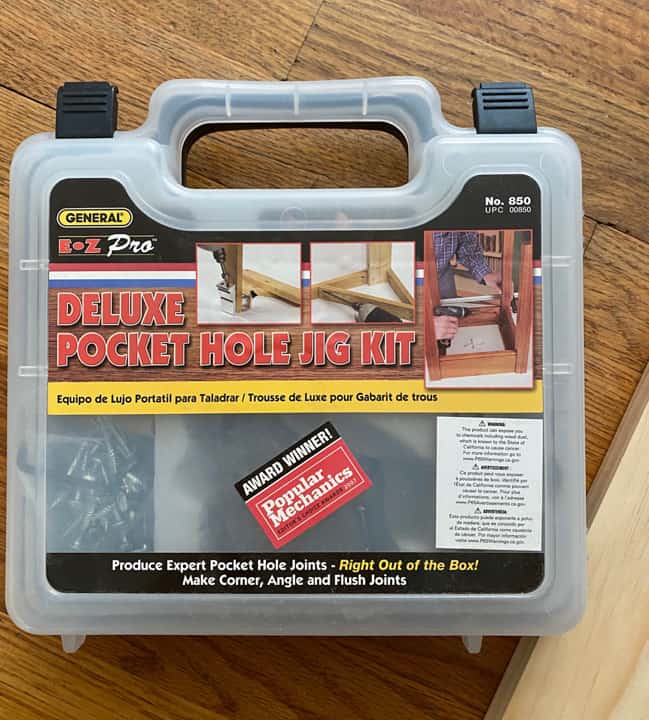
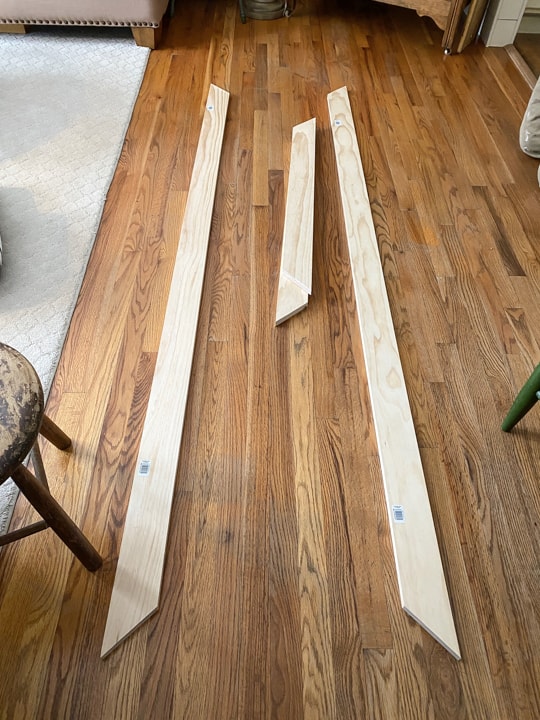
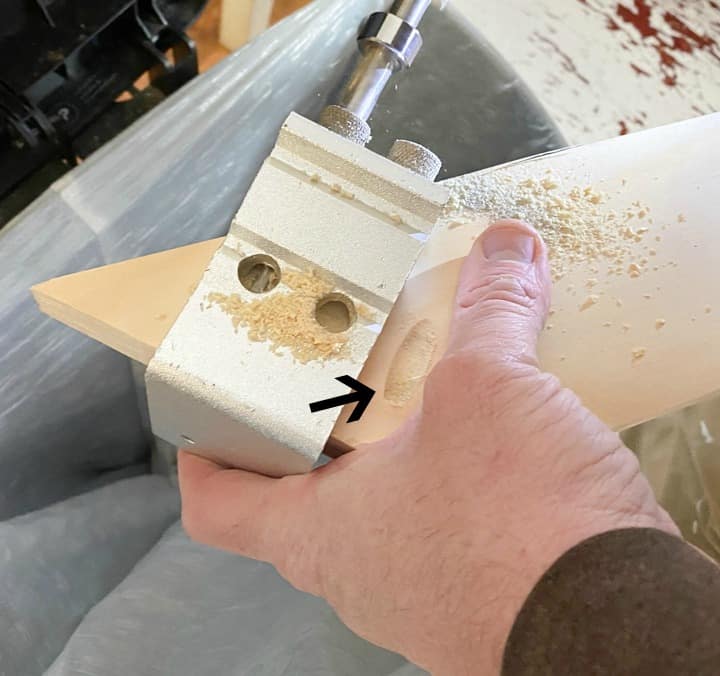
Matt created the “frame” for the door from 3, 10′ – 1×4 boards. He cut two of the boards to 90″ and one of them into two, 40″ pieces. Then, he used the miter saw to cut 45° angles all four corners. Next, he used the Deluxe Pocket Hole Jig Kit to connect all four sides together. This tool puts holes in the wood at an angle so when the screws are drilled in, they are inset in the wood. Matt put three holes in each corner of the frame.
{The arrow is pointing to what it looks like after using the tool.}
Once the holes were put in, Matt drilled screws in each one. Now, all the sides are together and the frame is complete.
When I was talking about what kind of door I wanted to have, I didn’t want a traditional “barn” door. I wanted something different. Matt wanted something lighter than the door we made for Gabrielle’s room. With those two goals in mind, we decided on tongue and groove boards. The planks come in 14 sq. ft. packages. We thought we would get by with only needing two packages but, we were short two planks!!! UGH!!! We had to open a third package for two boards. Oh well…. we have extra planks for a future project.
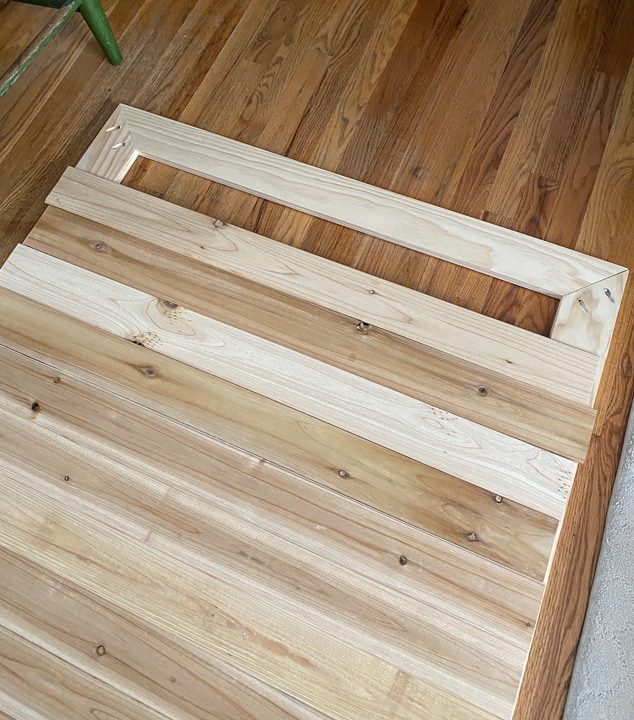
Matt cut the planks down to 40″ and laid them across the frame he created.
He used a nail gun to attach them to the frame.
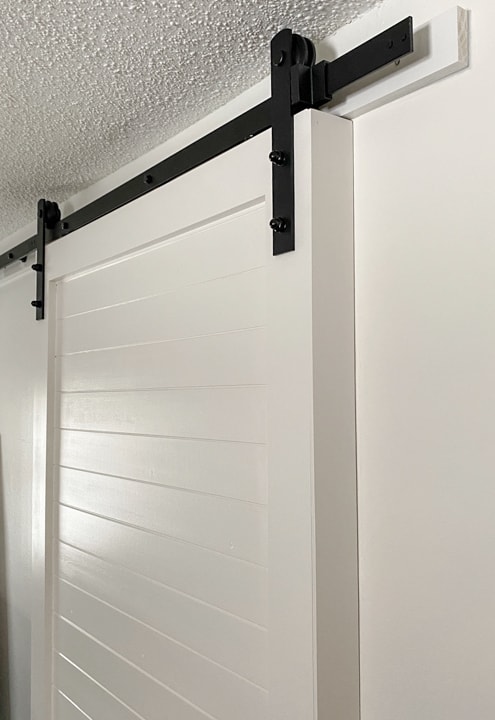
Once he had all the planks in place, it was time to add the sliding door hardware. When we were at Home Depot looking for the wood to use on this DIY closet door, we looked at the sliding door options they had. I was so surprised when I saw that the sliding door hardware kits were $200 in the store! I found this one for a lot less and am so happy with it.
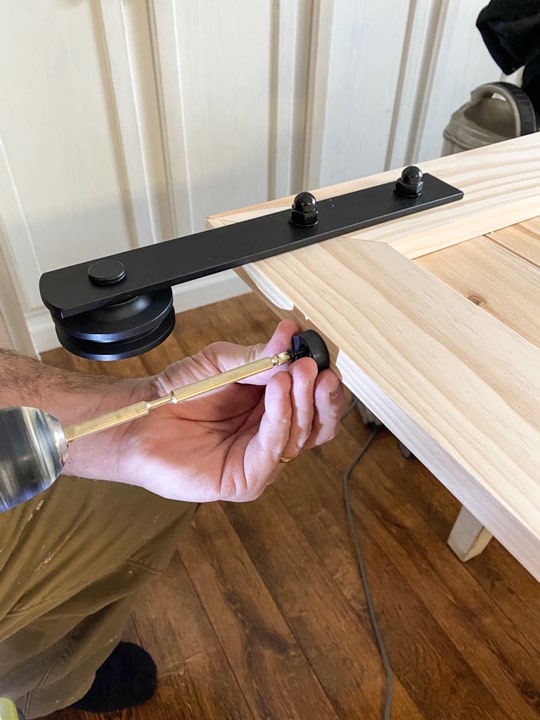
The hardware was easy to install and looked great against the door we made.

To hang the DIY closet door on the wall in front of the closet, Matt had to add some things to ensure it was sturdy and would hold the weight of the door (even though it was a lighter than the door we made for Gabrielle’s closet).
First, Matt added a scrap 2×4 board across the opening of the closet at the top because there was nothing there after we took the original closet door down. There was nothing there when we took the original door out so we needed to add a supporting board. We painted it the color of the walls and used caulk to give it a finishing look.
Then, Matt had to add a 1×3 board across the wall where the rail of the hardware was going to hang. You can see the board on the photo below.
Once the door was hung, we had a huge gap on each side.
The gap didn’t bother me in the left side because no one would ever see it and I could still hang something on the left wall and the closet door would slide right over it. The gap on the right side was not good. Matt came up with the best solution.
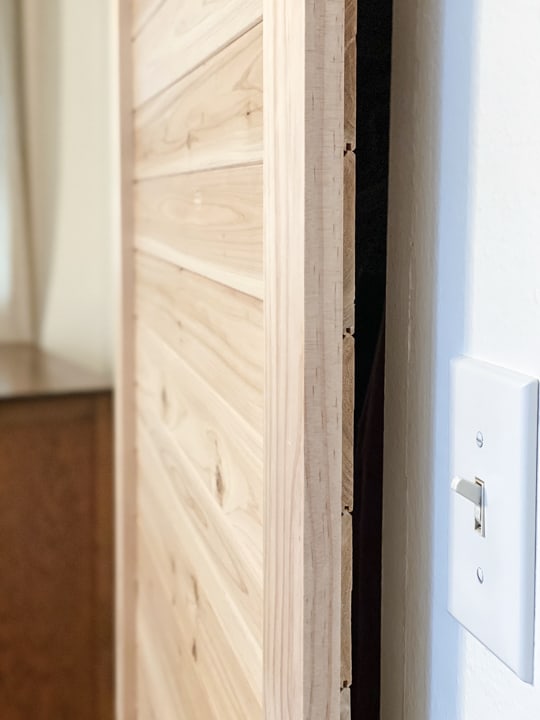
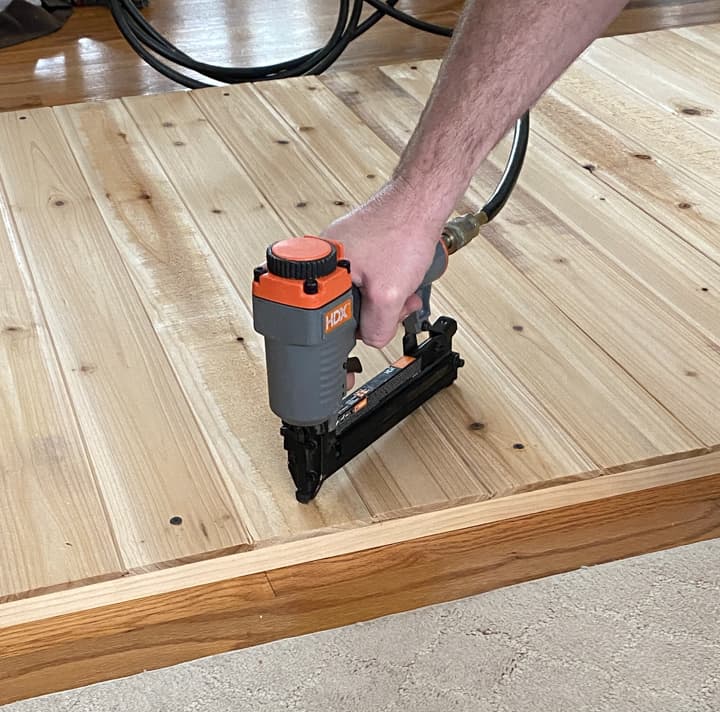
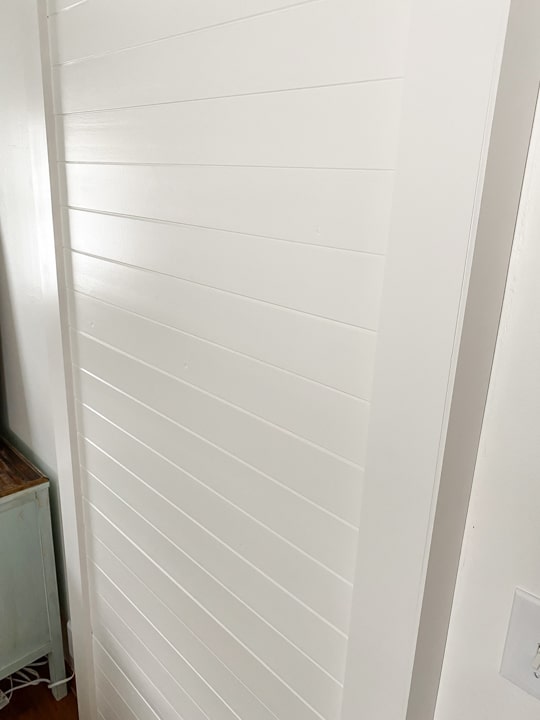
He bought a 8′, 3″ wide piece of pine trim, cut it down to size and used the nail gun to attach to the right side of the DIY closet door. The trim hid the gap and it made it look like the door was made from a chunkier board. It was such a smart solution.
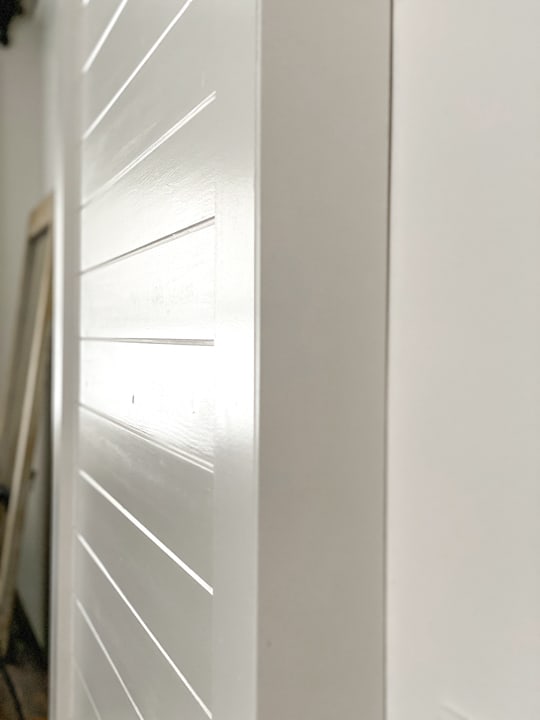
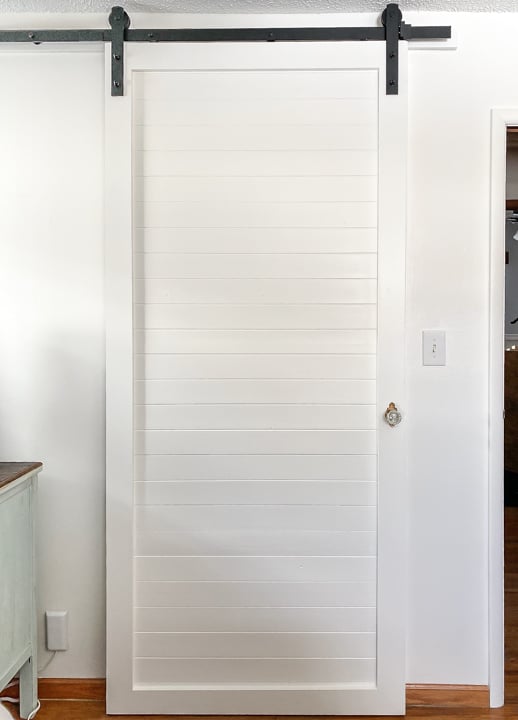
I loved the raw wood of the door, but since we have other wood tones in the room, I painted the door the same color as the wall
I LOVE IT PAINTED!
The trim board on the side even looks better painted.
We used a foam roller and my favorite paint brush to paint the door.
Painting the door makes it look so different and it will look great in the new room once we get it done.
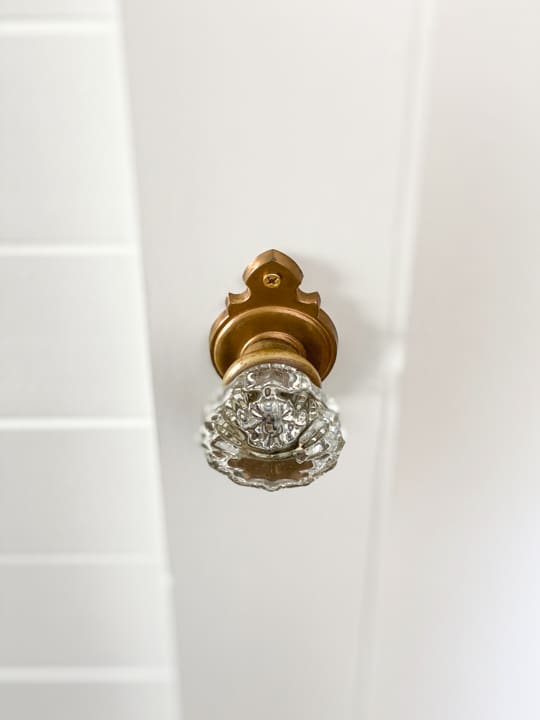
We needed to add some kind of handle to the door and I knew we had some vintage hardware in our stash. We brought in a lot of options and as soon as I saw the plate and knob together, I knew it was the one.
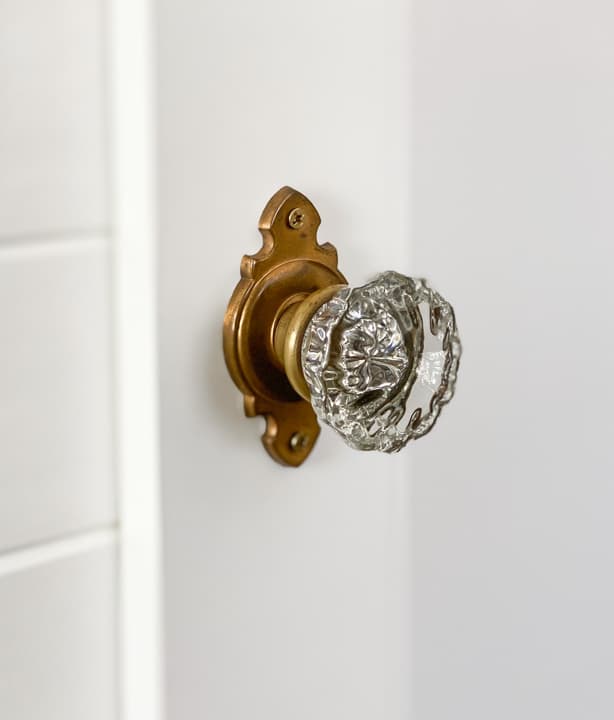
It is beautiful!
If you are looking for an easy way to add a sliding door to a spot in your home or if you want to gain more space in your bedrooms because bifold doors are space suckers, this is an easy DIY that produces a light-weight door that looks fantastic.
PIN THIS POST!

If you liked this project, you will also love these DIY’s:
How To Make A Wood Letter Board For Free
So perfect!! Love the colors the door the knob, it all came together awesome job
Thanks!