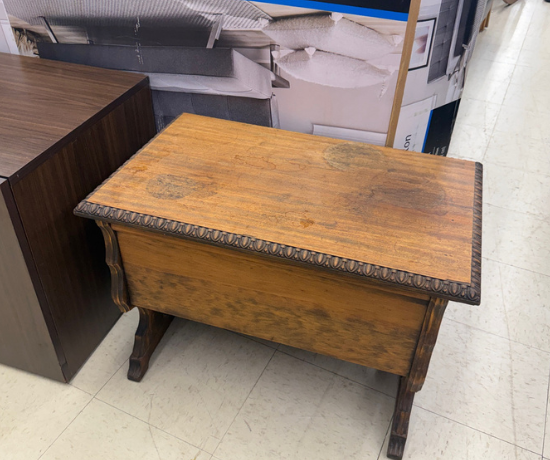
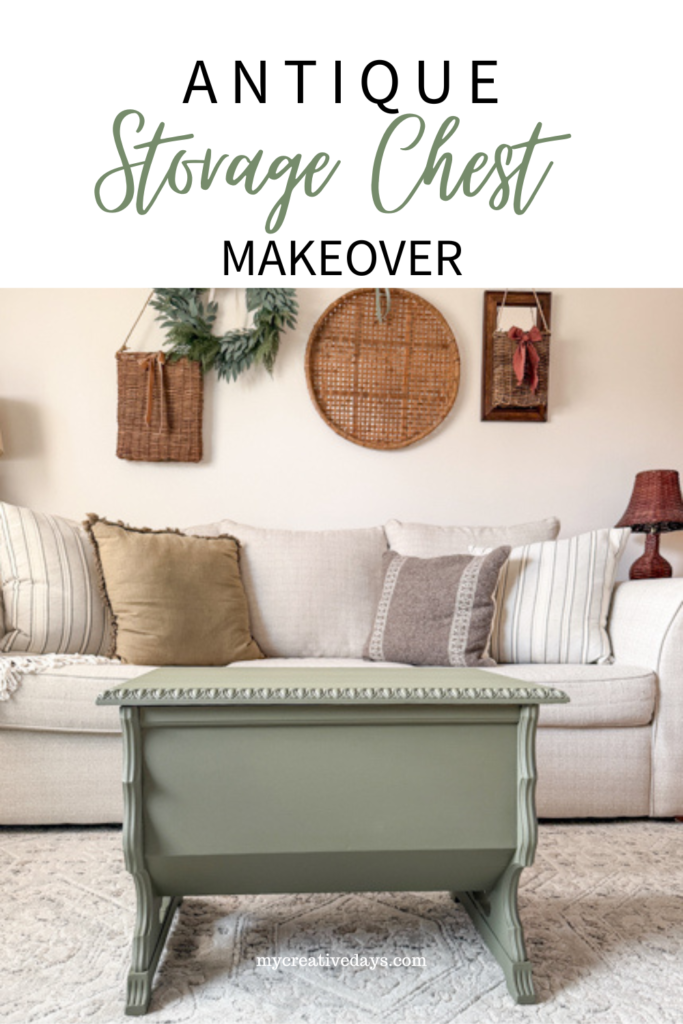
Is it a storage bench? Is it a storage chest? I am not sure. It is smaller than I think a bench should be, so that is why I went with a chest instead. Whatever it is, it is amazing. I have picked up so many pieces over the 20+ years I have been doing this, and I have never seen anything like this one. I couldn’t wait for this antique storage chest makeover.
First, can we just talk about this piece? I found it at a charity thrift shop. Their process is TRUE thrift prices. It is a new-to-me place that I stop at once a week now. Most of the time, I don’t find anything, but the times that I do find something, it is amazing. I stopped in shortly after they opened on a Wednesday morning, and this piece was just sitting right there as I walked in.
There was no price on it, so I asked. The guy came over ot me and said, ” This was just sitting out front of the doors when I came in. People aren’t supposed to do that, and it got a little rain on it because they did that. How does $6 sound?” UMMMMM. “Sounds like I am buying it.” 😂

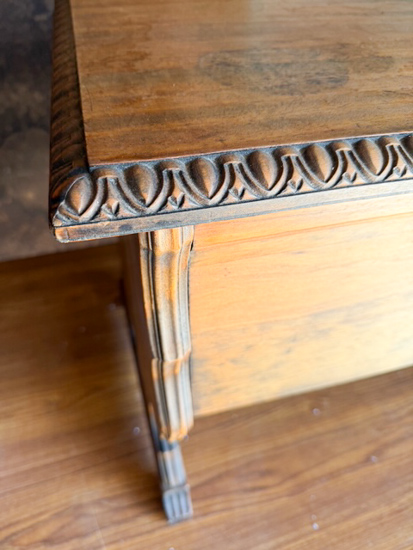
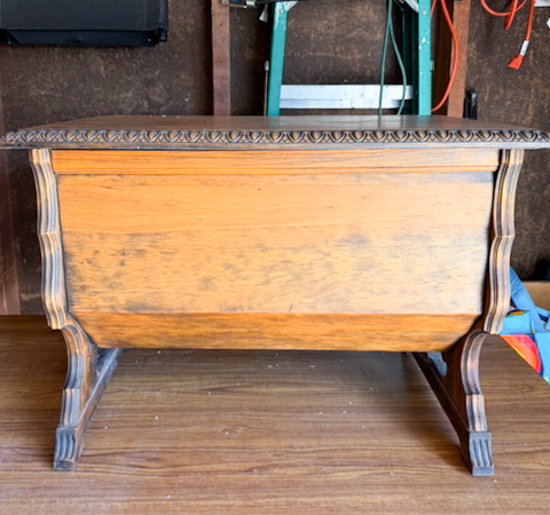
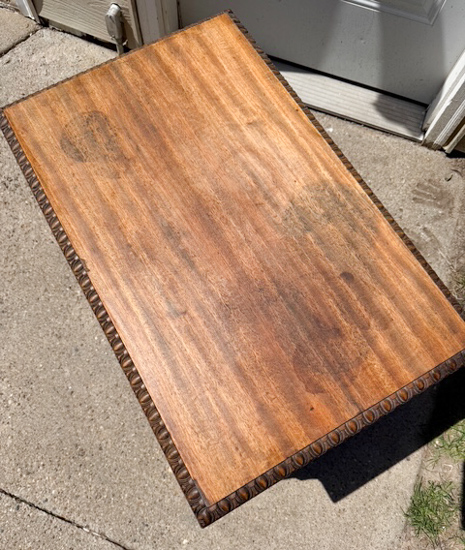
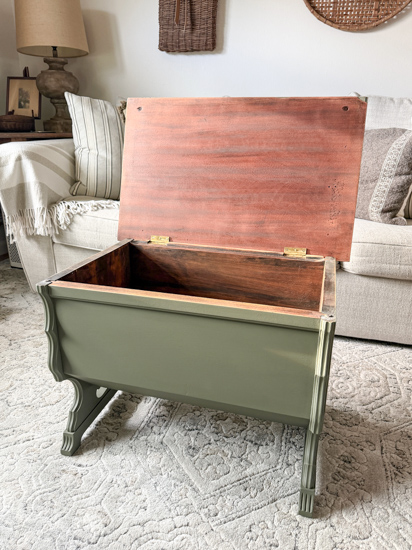
Can we just talk about the details around the edge? Also, it has a lot of storage inside. The button of it goes in like a triangle. It is not straight, which adds tons of character.
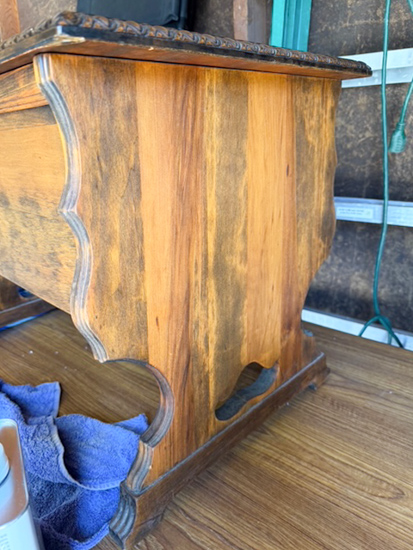
There is a cut-out detail on each side, too. This little piece is loaded with character.
I couldn’t wait to get started.
{Affiliate links are used in this post. Click on any of the underlined links to find the products I am talking about. You can read my disclosure HERE.}
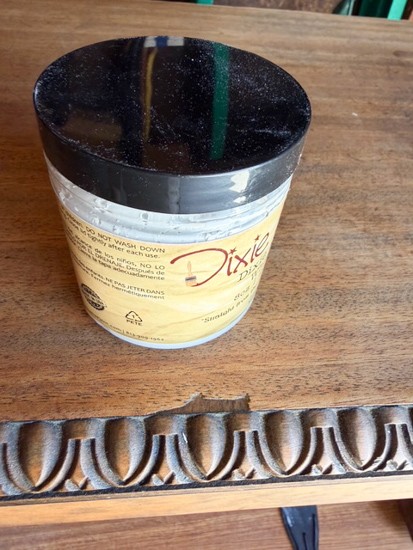
Supplies Used In This Antique Storage Chest Makeover
Step-by-Step Tutorial
This antique storage chest makeover took many different turns. I tried a few different things to see what would work.
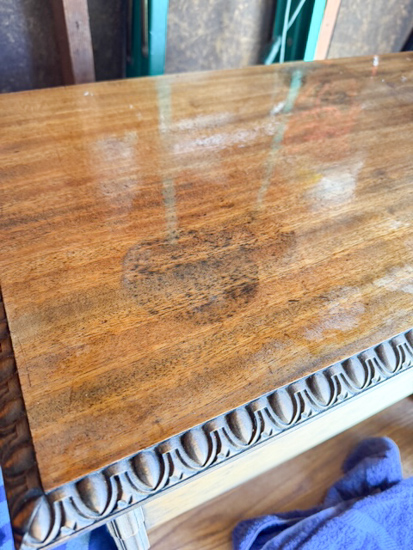
I started with the Acetone and steel wool method to see if that would remove the finish on this piece. It had so many dark water rings on the top that I wanted to see if we could remove the finish with this process. I have seen so many people do.
It did not work on this piece, but I am excited to try it on another one. That is the beauty of furniture projects – no two are the same, but it doesn’t mean they can’t work. It just isn’t the right piece.
So, I changed gears. The first thing I had to do was fill in a couple of areas with MUD.
Once that dried, I scuff-sanded the entire chest. You can read my tips for scuff-sanding in my post HERE.
I used a damp cloth to remove all the sanding dust and residue. Once it was completely dry, I was ready to paint.
I LOVE using this all-in-one paint because it takes out so many steps, saves me so much time and effort, and I don’t have to buy multiple products, so I am saving money on my projects too.
I can’t recommend this paint enough. It is perfect for beginners and those who have been doing this for years, as I have.
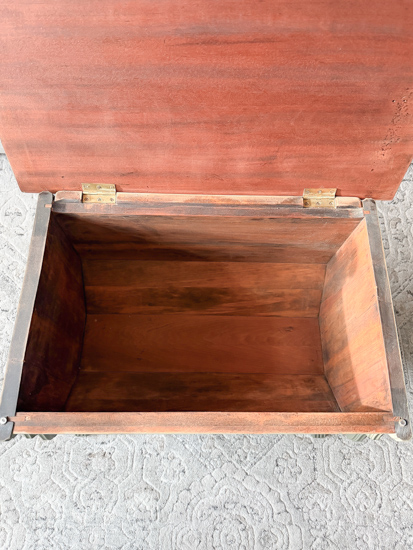
With all the water damage the top of this piece had, I couldn’t believe how good the inside was. I left it as it was. All I had to do was clean it.
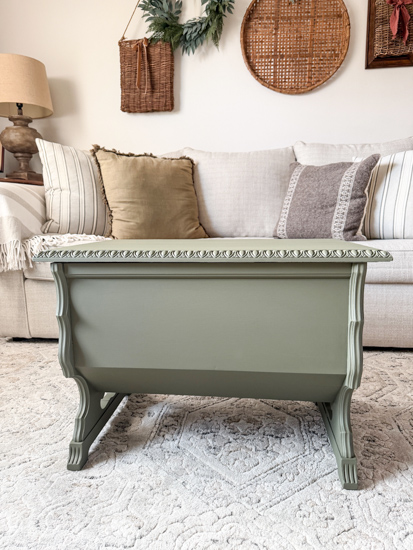
I have never seen a piece like this. It is so heavy, so you know it is made really well. It offers too much storage, and the size is bigger than you think.
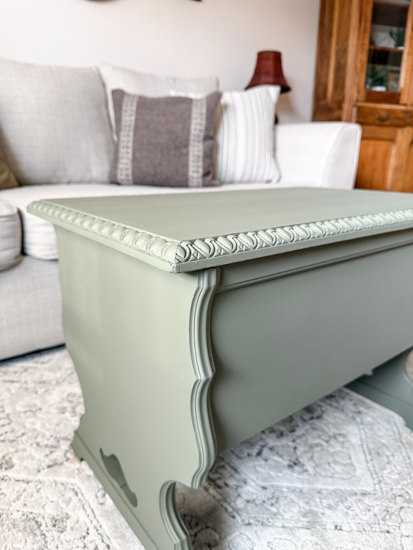
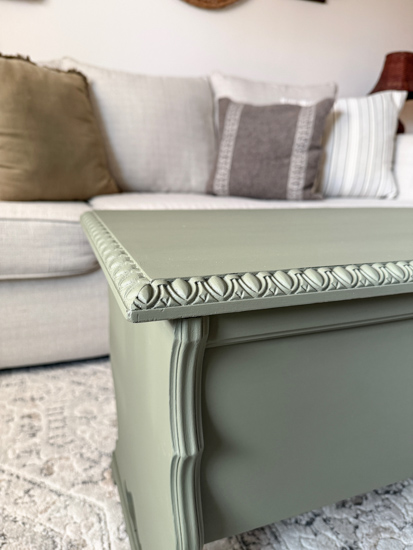
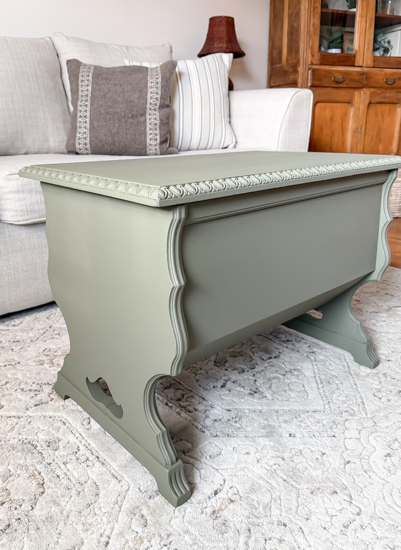
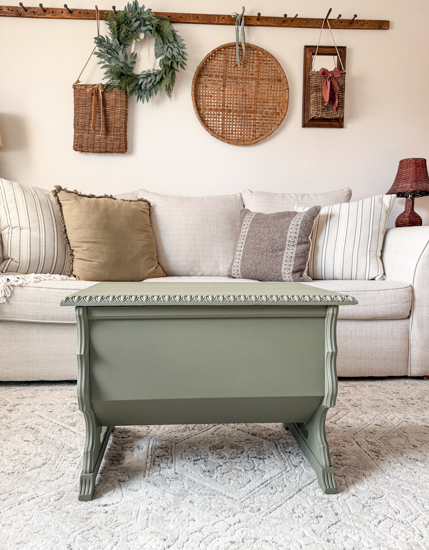
This green color was perfect for this piece. It brought everything together in a way that feels both subtle and intentional. I’m still deciding whether this one will stay with me or find a new home, but either way, I love how it turned out.
Curious About Flipping Furniture?
After more than twenty years of flipping furniture, I still pick up pieces whenever I can because I love the creative outlet. What started as a way to transform forgotten pieces has grown into something I now help others learn and enjoy, too.
That’s why I created The Furniture Flipping Academy. It is not just a course, but an all-in-one resource you can use at any stage of your journey.
Whether you want to try one project, flip occasionally for extra income, or grow it into something more over time, the Academy meets you where you are. Inside, you’ll find practical tools like worksheets, templates, guides, and real-life examples you can use when you need them. There is no pressure. No overwhelm. No requirement to turn it into a full-time business.
You don’t need experience or a huge following. You just need a starting point and a trusted resource to guide you.
Find all the details (and the new LOW PRICE) for the Furniture Flipping Academy HERE.
If you loved this makeover, I’m sharing more projects and behind-the-scenes videos over on my YouTube channel. You can check it out HERE.
PIN THIS POST!
If you liked this antique storage chest makeover, you will also love these:
Antique Side Table Makeover DIY
Thrifted Small Chest of Drawers Makeover
Round Table Makeover With Silk Paint