I want to thank Osborne Wood for supplying the Wood Corbels for our kitchen island makeover. All opinions of these beauties are my own.
Before I get into what we did to the island, I have to get something straight.
Since we have lived in our home, I have always called this piece in our kitchen “the bar”. The kids eat on it, I roll out cookies on it and we also use it as a dumping ground when we come in the back door. When I started researching kitchen ideas for our makeover, I was drooling over all of the islands I would love to have.
What was I thinking?
Our “bar” is an island! Get with the program, Lindsay! Because of this kitchen makeover, we have moved up in the kitchen world and graduated from bar to island.
Just like that.
Without measuring, DIYing or drills, we now have an “island”! 😉
So, what is the difference anyway? What constitutes a “bar” or an “island”? Maybe “bar” is the 1970’s word for island?? Whatever it is – from here on out I am going to be calling it an island.
Okay, now that that is out of the way, let me tell you how we made over our kitchen island.
When I first starting thinking about the scary task of painting our cabinets, I thought it would be best to start on our kitchen island. If painting that went downhill, I knew I would not be painting our cabinets, and since it is separate from the cabinets, I was fine with it looking totally different.
It started out like this:
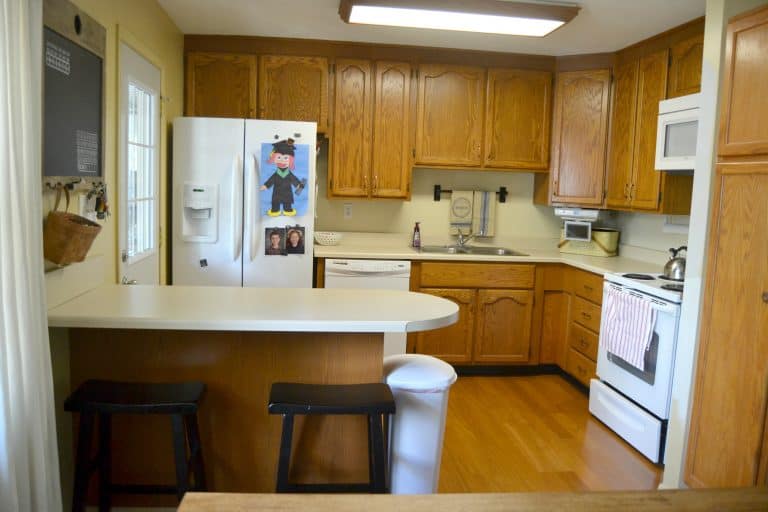
Here is a view of the other side.
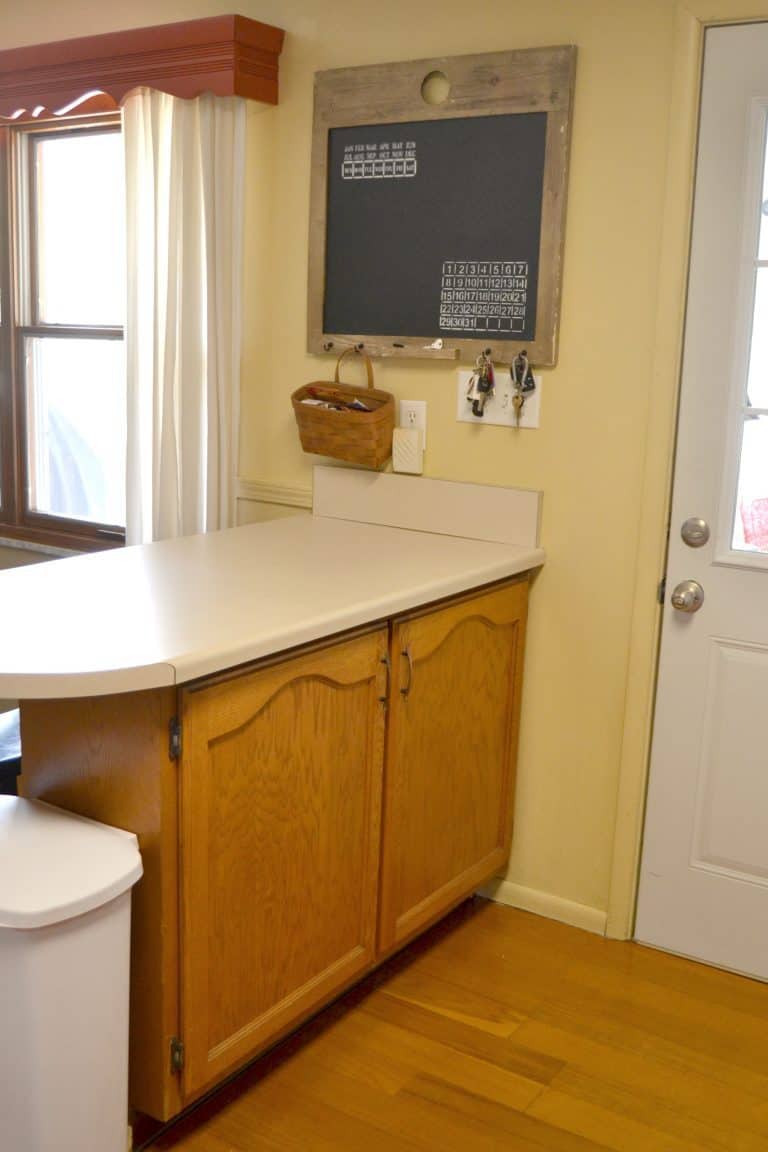
You guys, I can’t believe this used to be our kitchen! The countertops look so much better now and the new paint color on the walls has really helped brighten up the space.
When I was thinking about making over the island, I really wanted to (if budget and time weren’t an issue) find a farm piece that we could use for it. Something that was the same size and scale and gave us the same amount of storage. Since we didn’t have the time or budget to search for something, I decided to add wainscoting to the back and sides of the island.
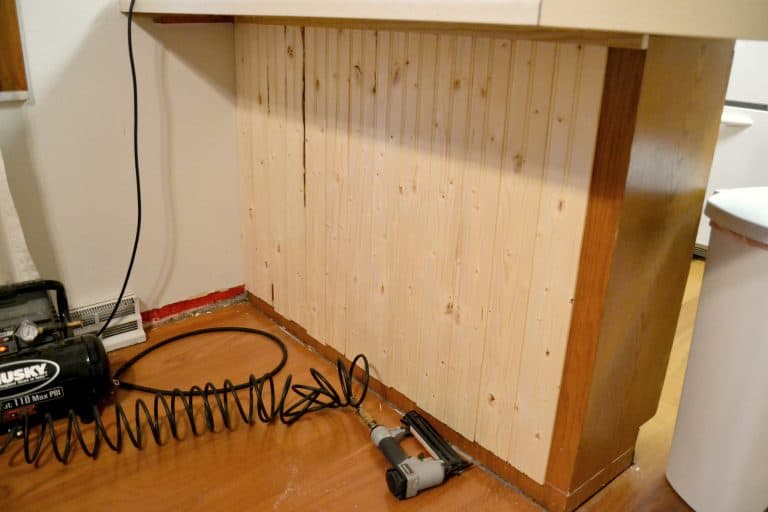
After the wainscoting was on, I painted the island with some left-over paint I had from a previous project.
The process wasn’t bad!
It gave me the confidence and “go-ahead” to paint the rest of our cabinets.
After we put down our new laminate floors, I started working on the island again. I knew I was not going to leave it the blue color I painted it (that was just the trial color I had to see how it would go). I did not want it the same color as our cabinets. It needed to be darker because the kids sit at the bar (this will take some getting used to) island and kick their feet or the bar stools get pushed up against it so I knew it had to be darker.
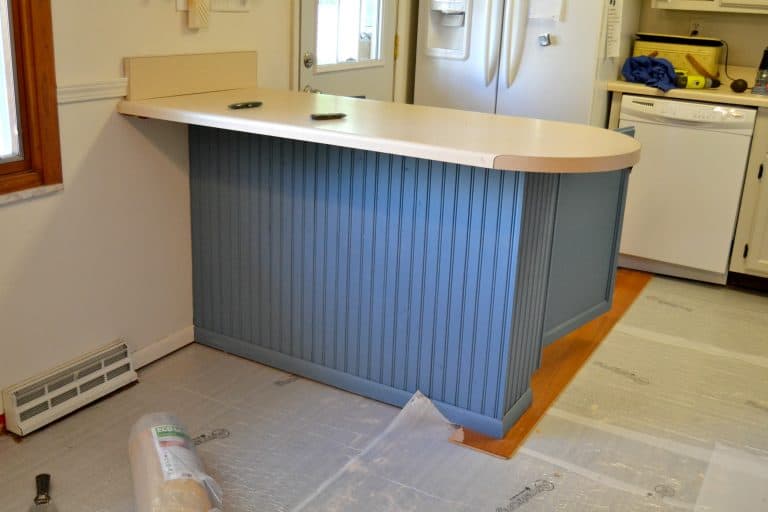
Charcoal gray and wood tones together make me so happy so that was the inspiration for the island color.
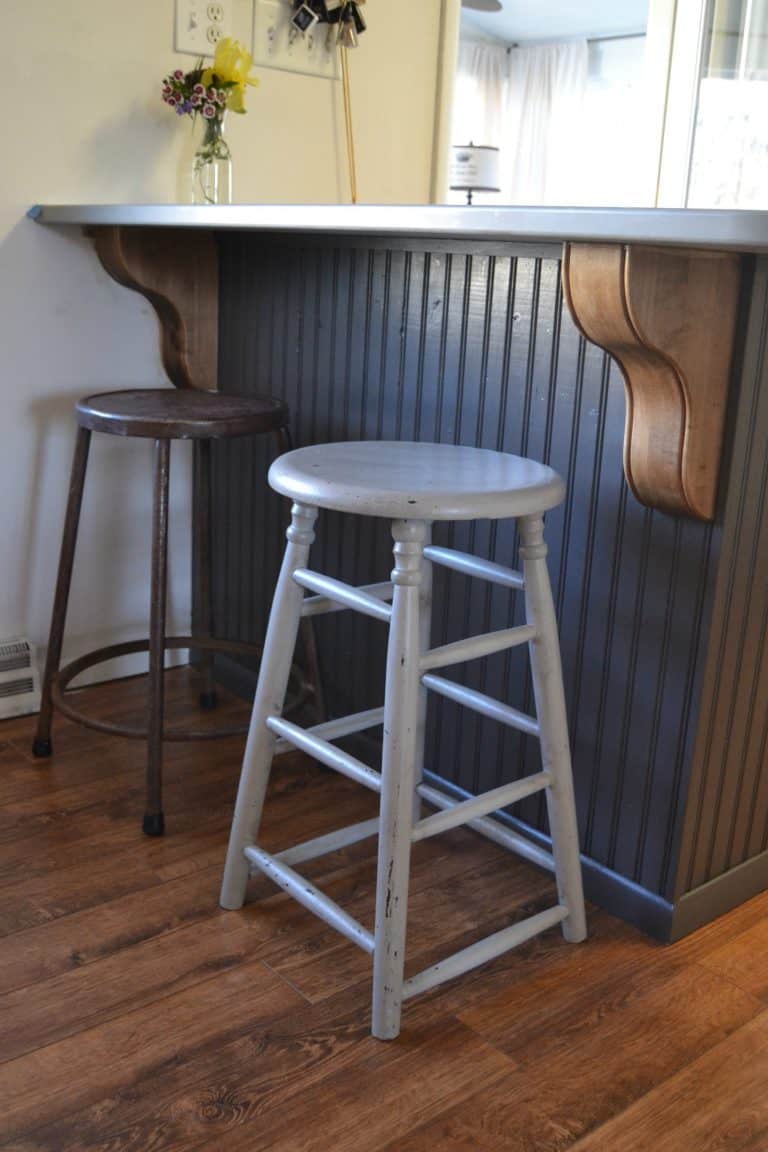
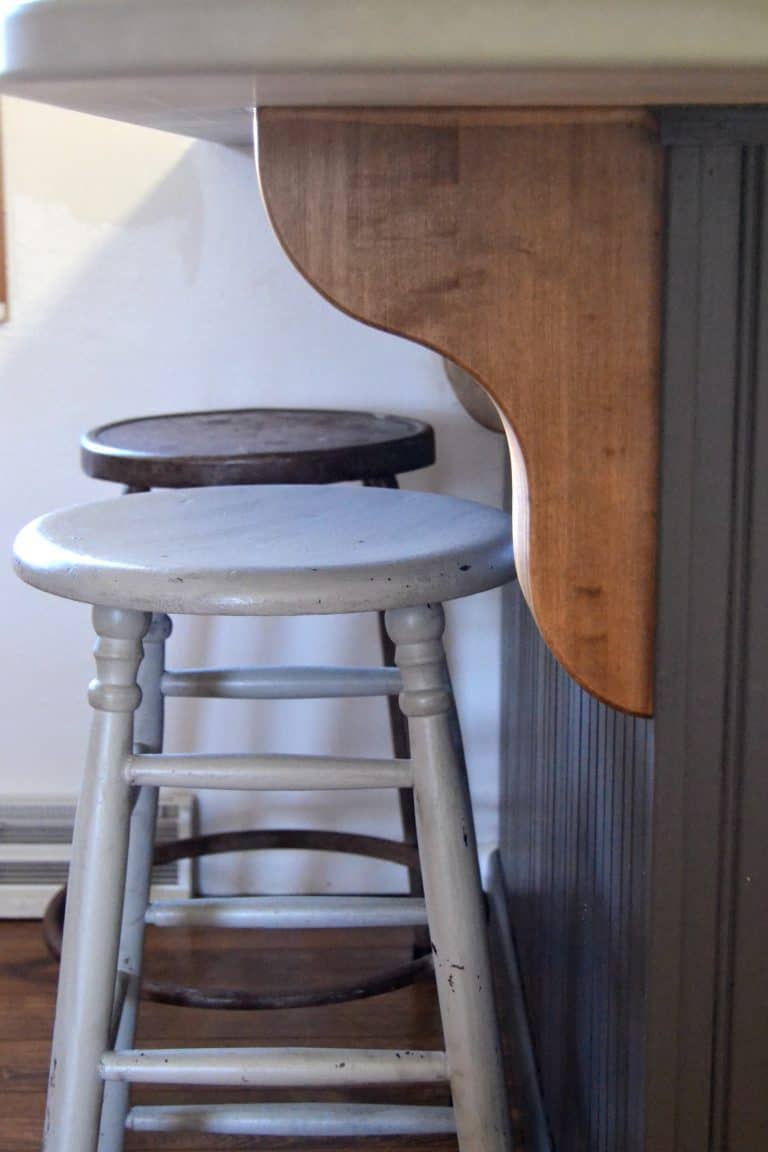
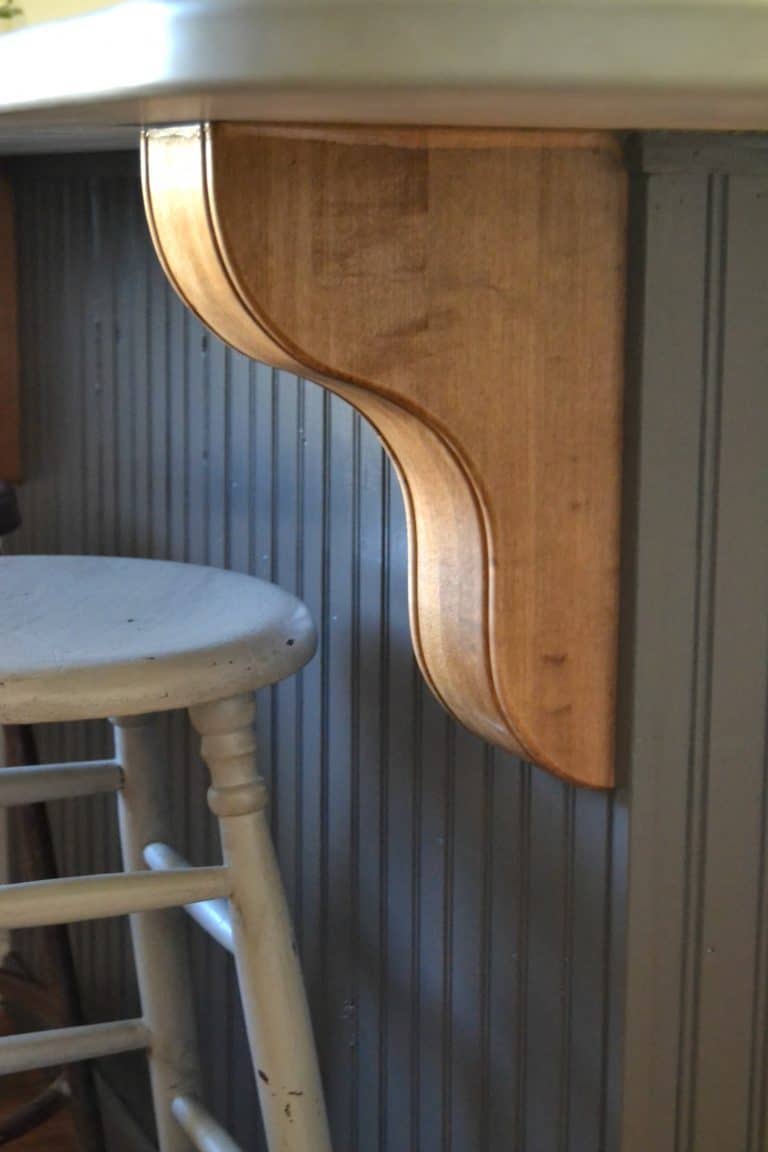
The darker gray looks great with our cabinet color and it’s dark enough to hide any marks until I can get to them. 😉 With all of my initial island research, I really feel in love with wood corbels. I desperately wanted to add a pair to our island.
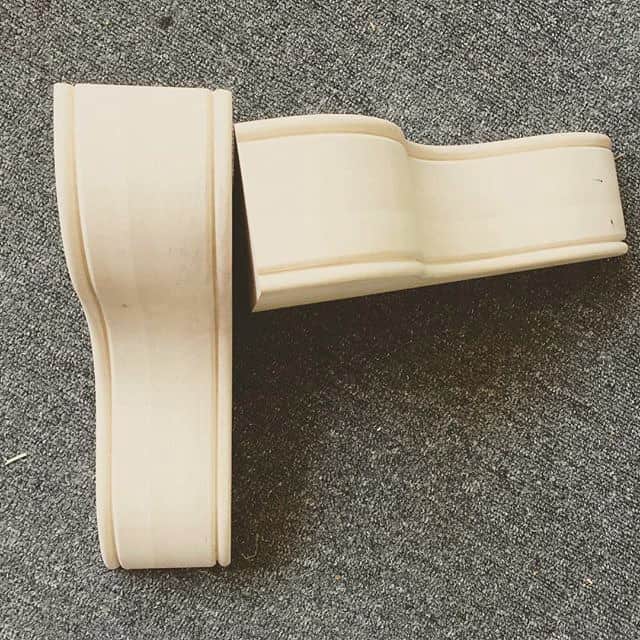
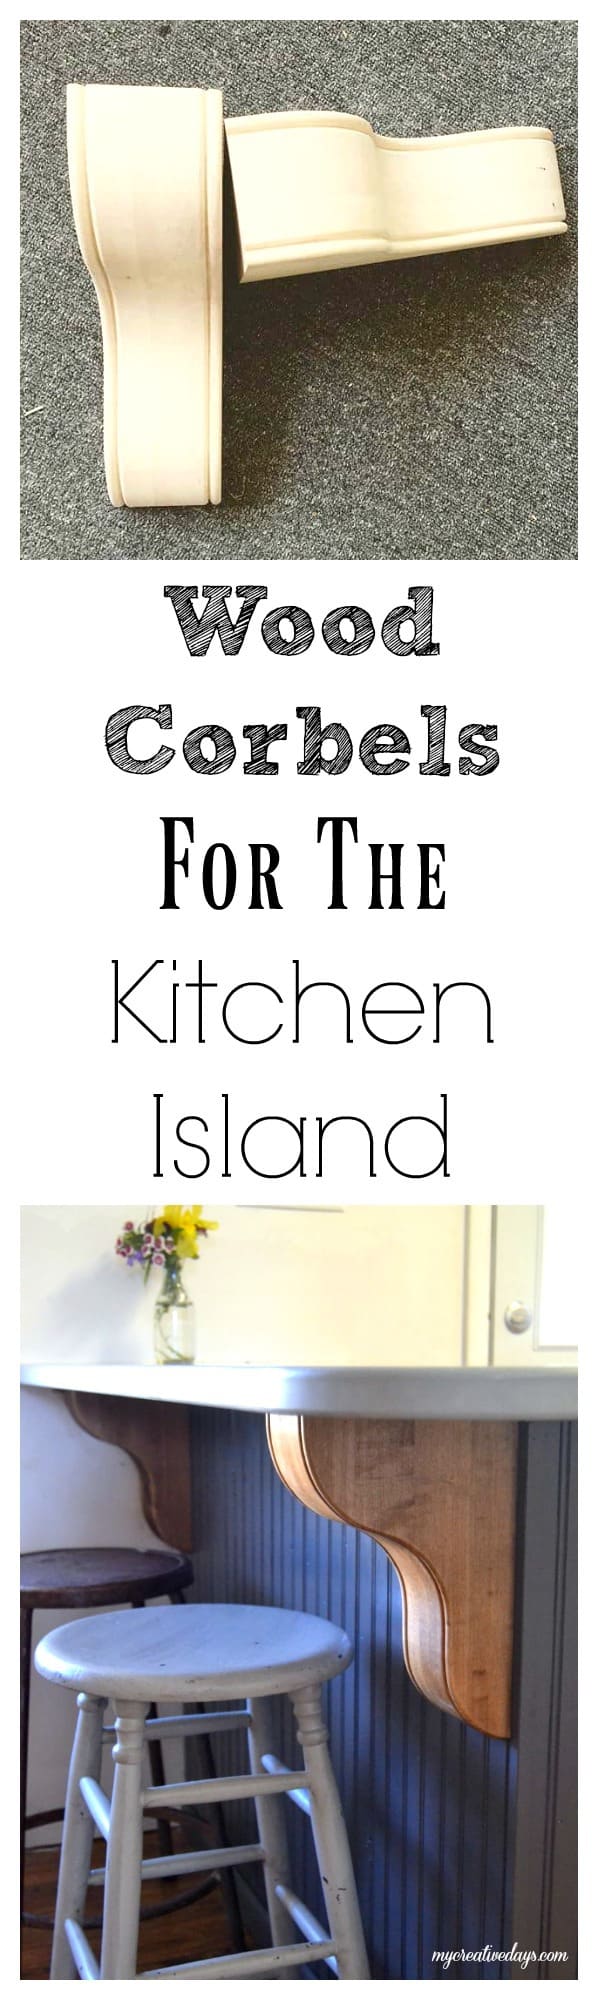
Osborne Wood has so many great wood corbel options! You can find any style and shape you need.
I decided to go with the Boston Bar Bracket. I liked the simple shape of them. I wasn’t sure if I was going to stain or paint them and the people at Osborne Wood were so helpful. They suggested I go with the Hard Maple Boston Bar Brackets because that wood was great for stain or paint.
When I received them, I was floored. They are super heavy and perfect for our island. They had such a smooth finish and were just waiting for me to transform them.
My initial wood corbel obsession was strictly for looks. I didn’t think they would give any function to our island. Then, when we were getting our countertops measured, the guys said the wood corbels would be very helpful and functional for holding the new countertops.
Form and function?!
I’ll take it.
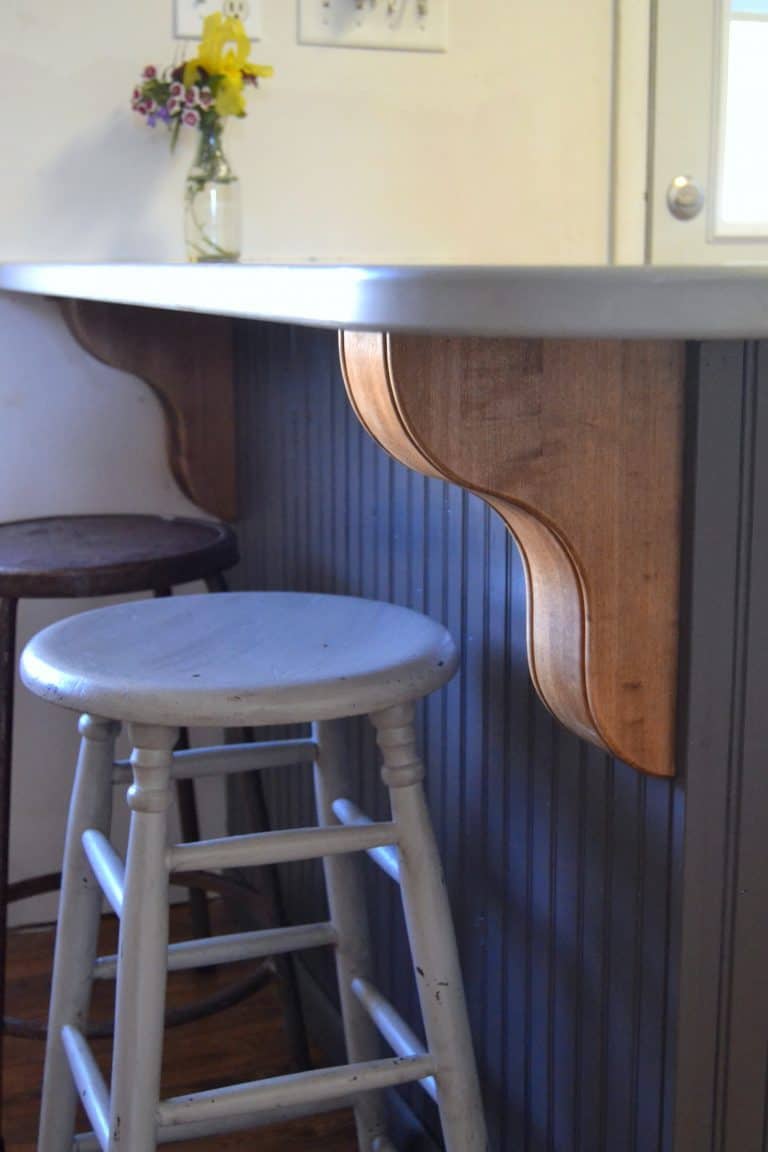
I knew I was going to stain the corbels a dark color first and see how I liked them. I thought if I didn’t like the stain, I could paint over them and then distress them a little bit.
Once the stain dried, I loved them.
And, I especially loved the wood against the charcoal color of the island.
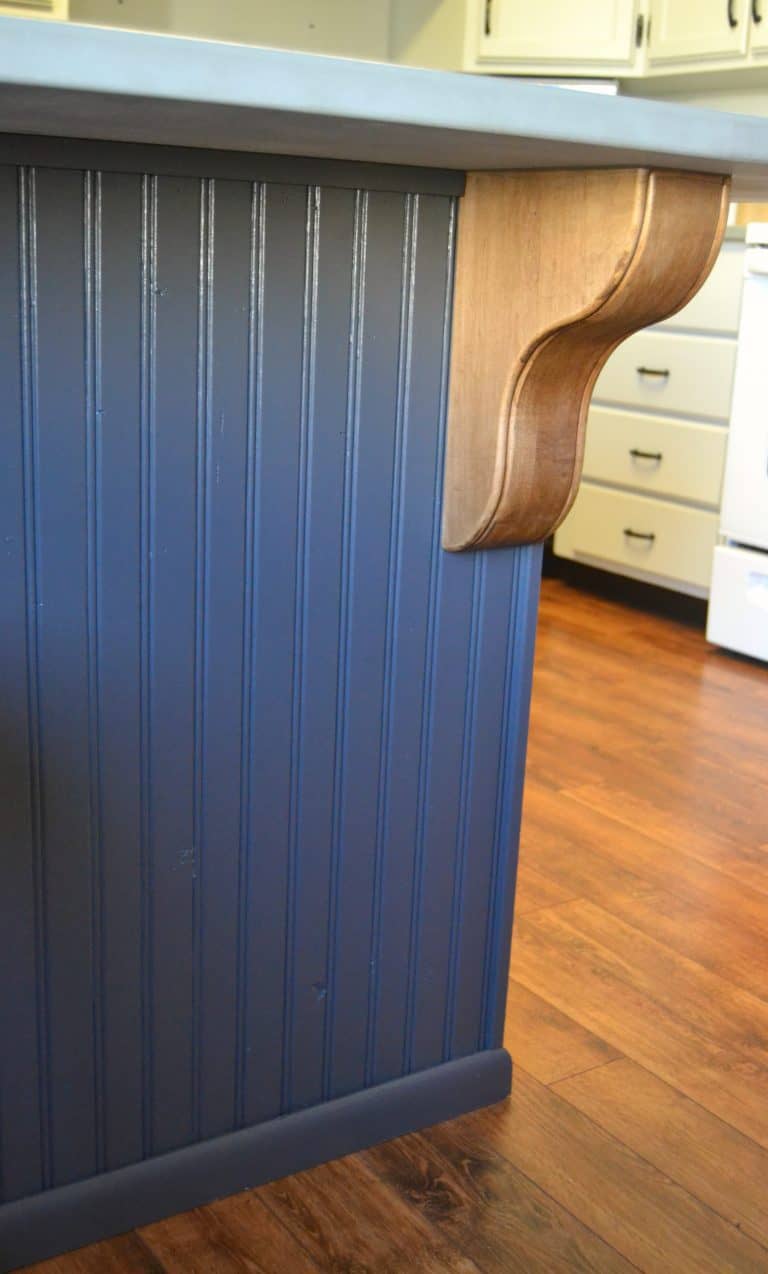
It is amazing what a pair of corbels can do.
The island looks more sophisticated, more official.
The Boston Bar Brackets fit our kitchen makeover perfectly! When I started shopping for corbels, I thought I would go with something a little more detailed. I am so glad I didn’t. I couldn’t be more happy with my choice.
{Affiliate links are used in this post. You can read my disclosure HERE.}
Our kitchen island looks great! It fits the character of our home, it blends nicely with our new kitchen and the wood corbels give it that finishing touch it needed. I am still struggling with calling it an island, but over time, the name shall stick. What do you think? Is it a bar or island?
This kitchen is coming together, slowly but surely. One project at a time we will see it through. I am hoping to be posting about our new backsplash soon.
Stay tuned.
I found some other wood corbels online to choose from. I can’t choose a favorite. They are all pretty!
PIN THIS POST!
If you liked this wood corbels post, you will also like these makeovers:
Do It Yourself Kitchen Makeover
Nice! I’m not sure what you’d call it…I always thought an island was out in the middle of a room while a bar was attached to the other cabinets. Yours does neither. Island is probably closer description for yours since its separate. I love those corbels! They look nice and hefty! Plus the wood and charcoal look stunning together!
Thanks Cecilia! Someone told me that what I have is a peninsula. That sounds better than bar too so I will go with island or peninsula! 😉
I love that charcoal color and the wood with the charcoal does really look nice. I would not have guessed those colors would work well together but they do. I’m not the biggest DIY or paint person though! What color did you paint your other cabinets? Visiting from Alder Collective
I love gray tones with wood! They look good together. Thanks so much for stopping by!
Just a terminology suggestion: What you installed on the back and end of the peninsula is called breadboard. It’s sometimes (now frequently) used for the area beneath a piece of millwork referred to as wainscoting or chair rail. For example, on your before picture, that line of molding that extends between the sidespash and that window, to the left, is wainscoting, if it continued around the room.
Thanks
Spell checker changed bead-board to breadboard. I’m hyphenating this time, to give spell checker a break.
You’ve done a stunning job with your kitchen transformation. It has so much character now, looks custom instead of builder grade, great job!
Just to clarify though your bar/island is technically a peninsula…… A kitchen peninsula is comparable in size and shape to a standard kitchen island, but the primary difference is that it is butted up against the end of a cabinet run or against a wall. An island floats in the middle.
Thanks for your comment. I thought island sounded better, but penninsula sounds great too! 😉
I love your choices for the paint and corbels, and especially that you worked with what you have. Who cares what it is called as long as it works for your purposes? Beautiful job!
Thank you Lorna!
Hi,
What you have is a peninsula. It is accessible on three sides, just as in geographic terms. I am wondering what you did to prep your wood/stained canon eats, and hat type of paint you used?
Great! Thanks!!! I used a cabinet paint. We sanded all the cabinets down before we painted them.
LOVE the color of the cabinets paired with the wood tone of the corbels! Such an awesome touch to your new kitchen! Pinning!
Thank you! I did a charcoal color on the pennisula. Lighter color on other cabinets.
This is fantastic! I LOVE how it looks, and I love your color choices! What a great way to spruce things up without spending a fortune.
Thanks so much for joining the Alder Collective! Pinning, and I hope you join us again this week after our long Christmas break!
Thanks Kayla!
I love what you’ve done with your island and I’m so glad you stained the corbels for a natural wood accent. Really pretty!
Thank you Barb!
I am rubbing my hands together and thinking, I can do this to my island. I have four sides where I would wainscot three sides and then paint those sides. I like how you changed your peninsula without spending lots of money. You gave me an idea and inspiration to research a project for my kitchen. Pinned your lovely work!
YAY! I love to hear that! You made my day!