• Home
  • About
    • Disclosure
      • Terms And Conditions
      • Cancellation Policy
      • Refund Policy
      • Shipping Policy
    • Contact Me
    • My Favorites
      • Our Toolbox
      • Paint Colors
      • My Amazon Store
  • Categories
    • Seasonal
      • Mother’s Day
      • Spring
      • Fall
      • Halloween
      • Thanksgiving
      • Christmas
      • Valentine’s Day
      • Easter
    • DIY
      • Repurposed
      • Furniture
      • Crafts
    • Our Home
    • Recipes
    • Crafts
      • Party Planning Ideas
      • Kids Activities
  • Resources
    • Organization Tools
      • Organization Challenge
      • 5-Day Organization Challenge
      • 12 Monthly Purge Checklists
      • Sentimental Purge Guide
    • Decorating & Thrifting
      • Thrifting & DIY Bundle
      • How To Decorate Your Home On A Yard Sale Budget
      • 11 Quick Tips To Organize A Profitable Yard Sale
    • Furniture Flipping
      • The Ultimate Furniture Flipping Program For Beginners
      • The Creative Squad
      • Quick Guide To Painting Furniture
      • The Best Paint Colors To Use When Flipping Furniture
      • Types Of Paint For Furniture
    • Join My Newsletter
    • Become An Affiliate
  • Podcast
  • Furniture Flipping Course ON SALE NOW!
  • Learn With Me
    • Facebook
    • Instagram
    • Pinterest
    • RSS
    • Twitter
    • YouTube

My Creative Days

DIY blog sharing our home, budget decorating tips with repurposed farmhouse decor.

Wall Bookshelves Makeover: Make Them Look Custom

February 3, 2017 10 Comments

I LOVE projects like this. Being able to take a plain piece of furniture and make it look more custom in only a few steps. When we started the office makeover, I knew I wanted to have some bookshelves in it for storage and “pretties”. Yes, “pretties”. Having extra shelves that I can redecorate over and over again are perfect for when inspiration strikes. I wanted to have two matching wall bookshelves on either side of one of the windows in the office.

As we looked at the window closer, we found out it wasn’t centered on the wall. UGH! Why do you build a home and not make things centered??? I don’t get it! So, now, I was looking for at least one bookshelf. Maybe we could make two work, but it would be pushing it. Like I preach over and over again, if you frequent your favorite spots, you will find pieces that will work exactly for what you need. On a regular stop to Restore, I found a pair of bookshelves that were perfect for the office! They weren’t deep and they were such a great price.

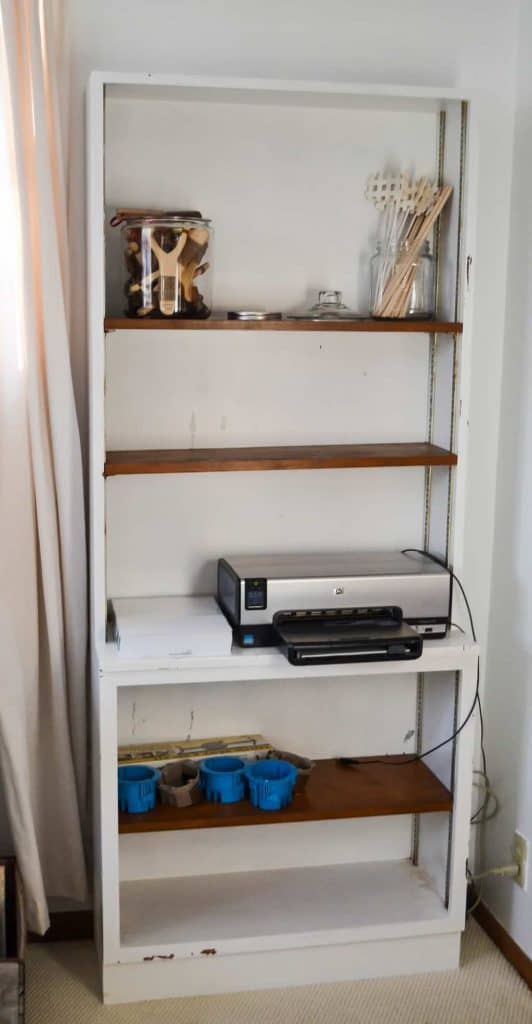
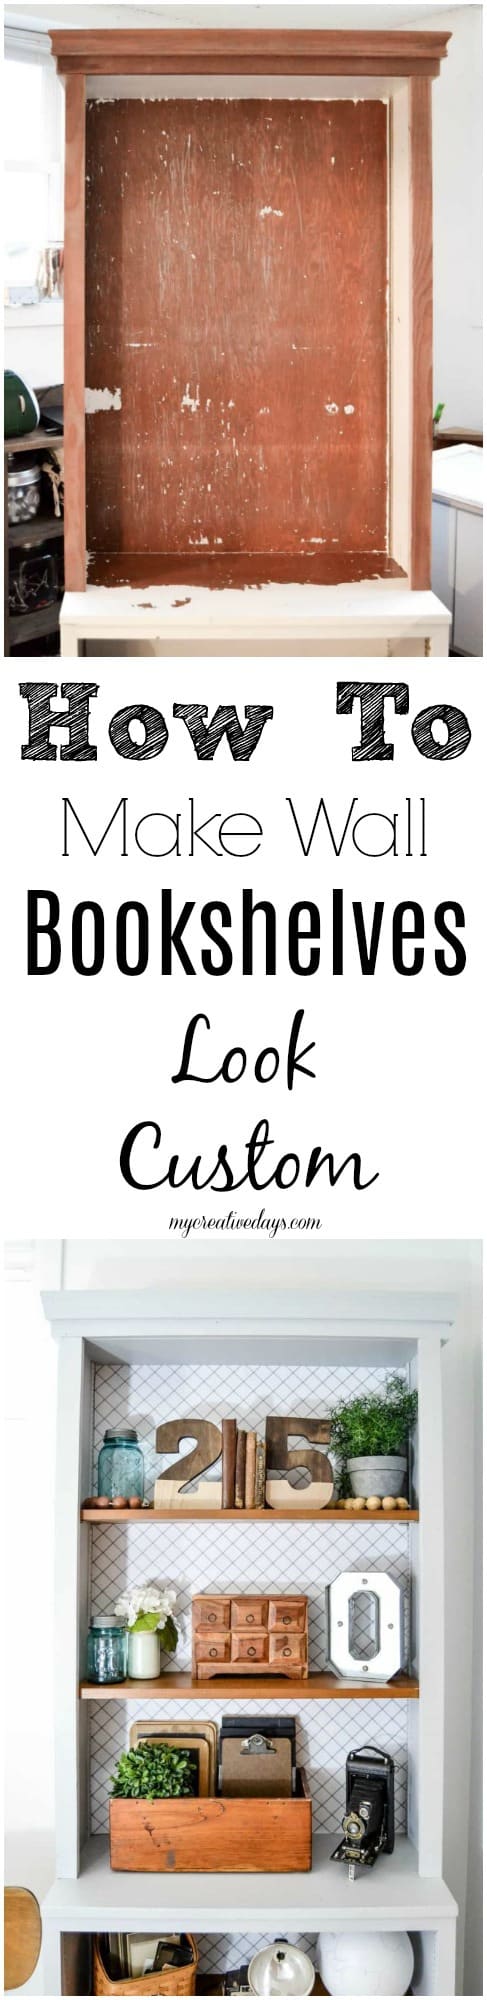
I bought them both hoping we could make them work. This Wall Bookshelves Makeover took plain bookshelves and made them look fabulously custom in only a few short steps! 

If you are looking for wall bookshelves for your home, click over to see how we took plain wall bookshelves and make them look custom in a few short steps.

When I bought the wall bookshelves, I loved that they had left the shelves unpainted. I knew I was going to keep them that way in the makeover.  

If you are looking for wall bookshelves for your home, click over to see how we took plain wall bookshelves and make them look custom in a few short steps.

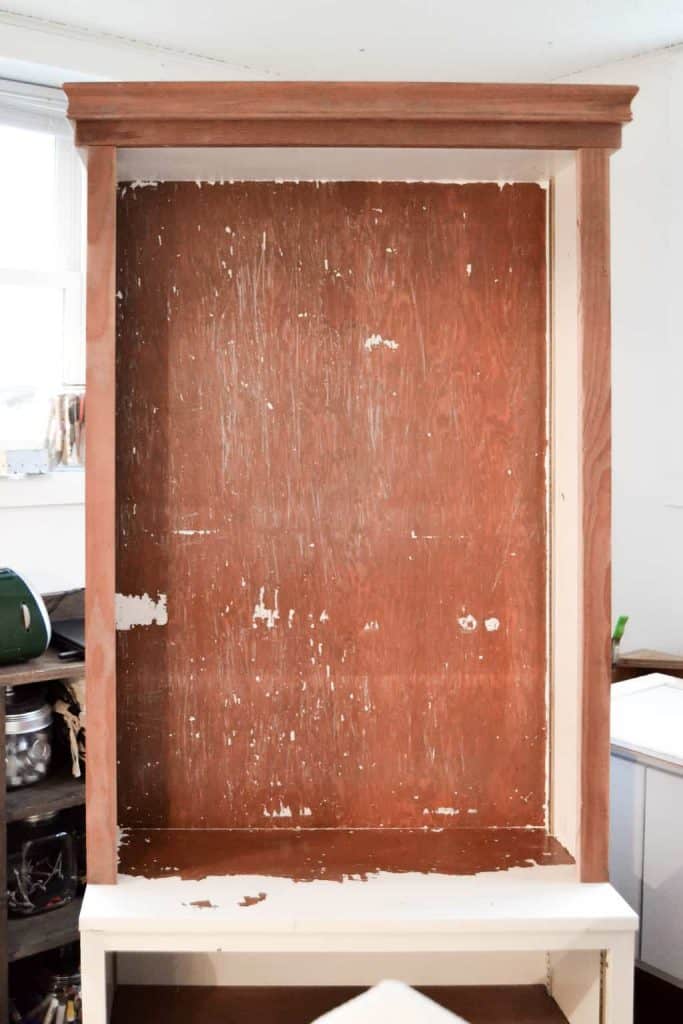
The custom makeover started with a few pieces of wood pieces on the front of each bookshelf. We used a 1×4 around the top and then added 1/2’s to each side of the upper portion of the bookshelves.

If you are looking for wall bookshelves for your home, click over to see how we took plain wall bookshelves and make them look custom in a few short steps.

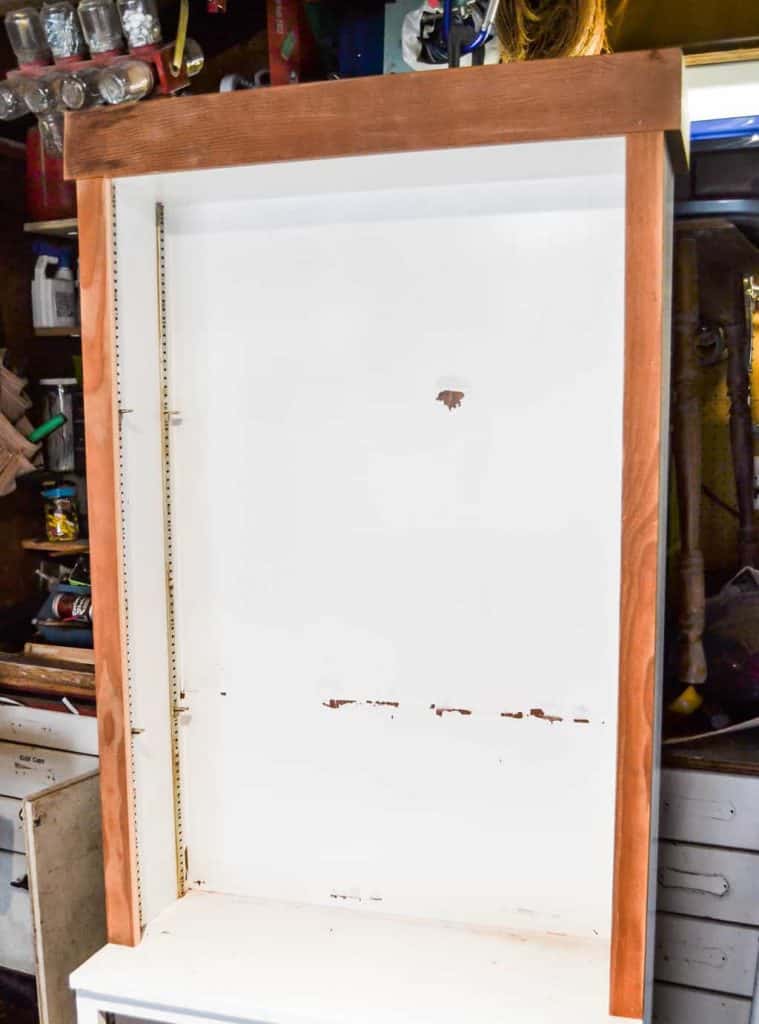
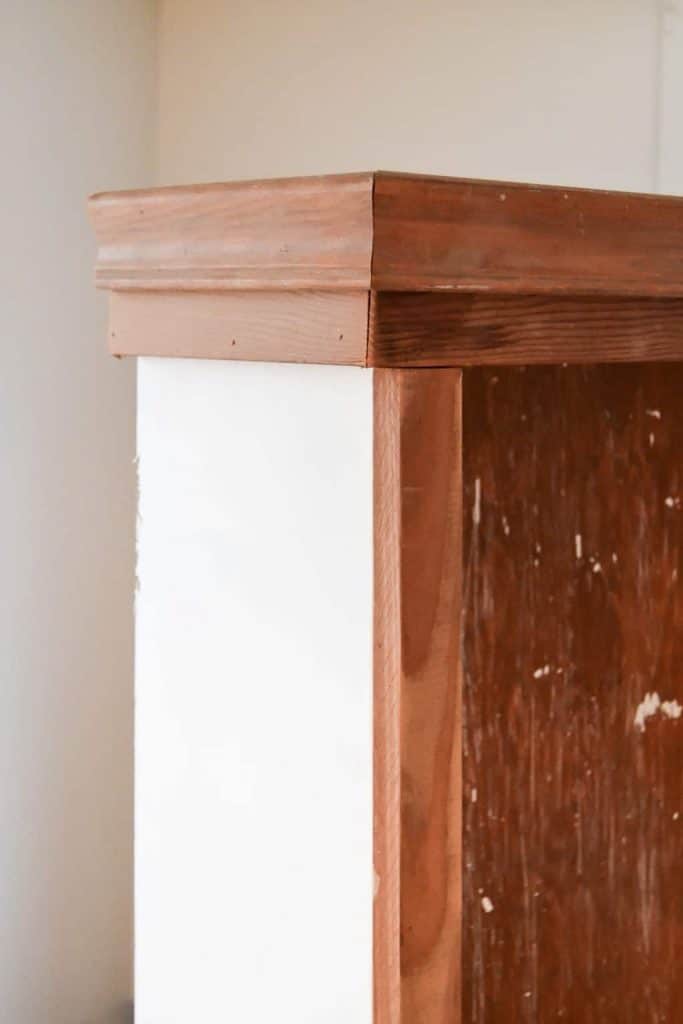
Now it was time to beef them up even more. We had some decorative trim pieces in the garage that we had picked up from other Restore stops. They were just what we needed for the top of these bookshelves. 

If you are looking for wall bookshelves for your home, click over to see how we took plain wall bookshelves and make them look custom in a few short steps.

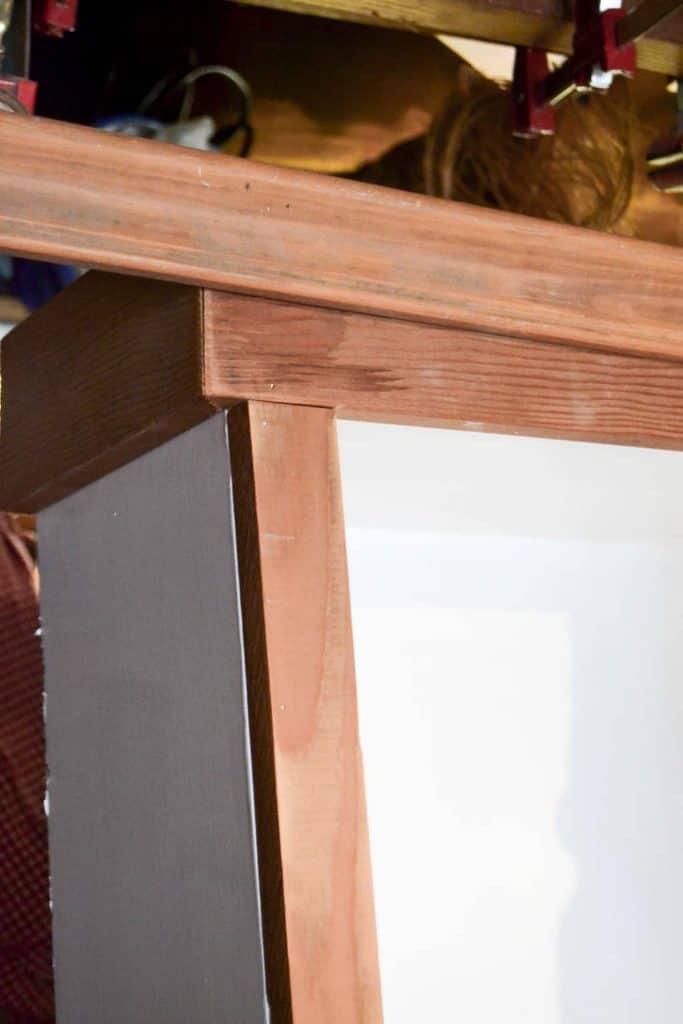
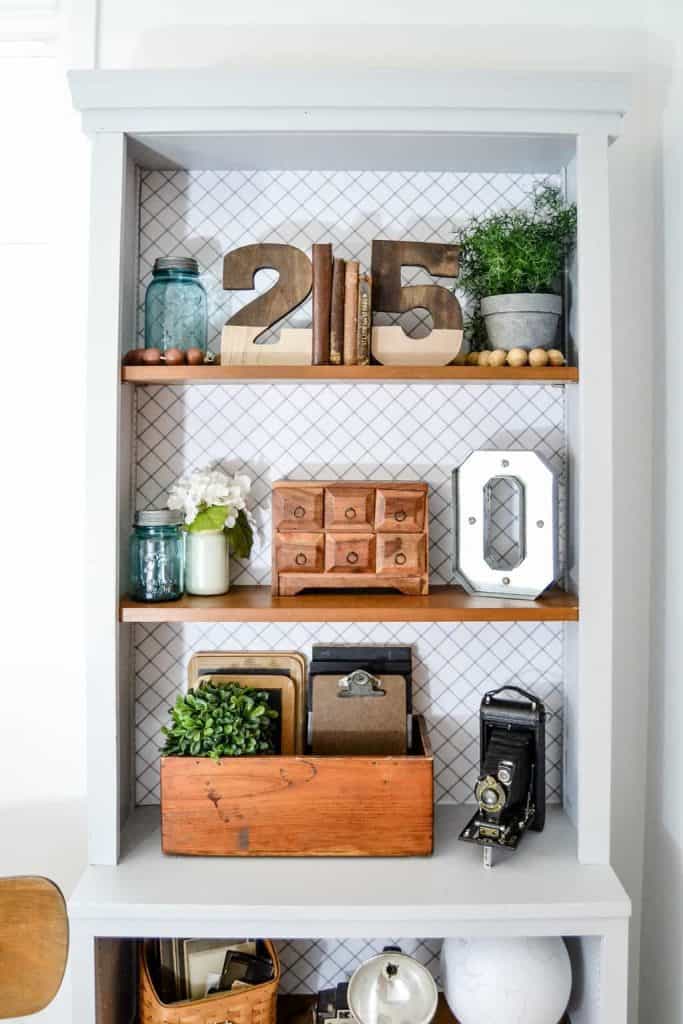
Look at them now! You wouldn’t even know they were plain bookshelves to start with. A little bit of trim goes a long way to make things look higher end.

When I brought the wall bookshelves in to paint, I found that the paint that was on them was just peeling off! It was one of those projects that you weren’t planning on doing, but it was coming off so easily, it became a mission. I could not stop once I started. My daughter even got in on the fun. We were both hooked. It is so much fun when the kids get involved with these projects. They learn so much. 

If you are looking for wall bookshelves for your home, click over to see how we took plain wall bookshelves and make them look custom in a few short steps.

Once we got to a stopping point, it was time to move forward with the bookshelf makeover.

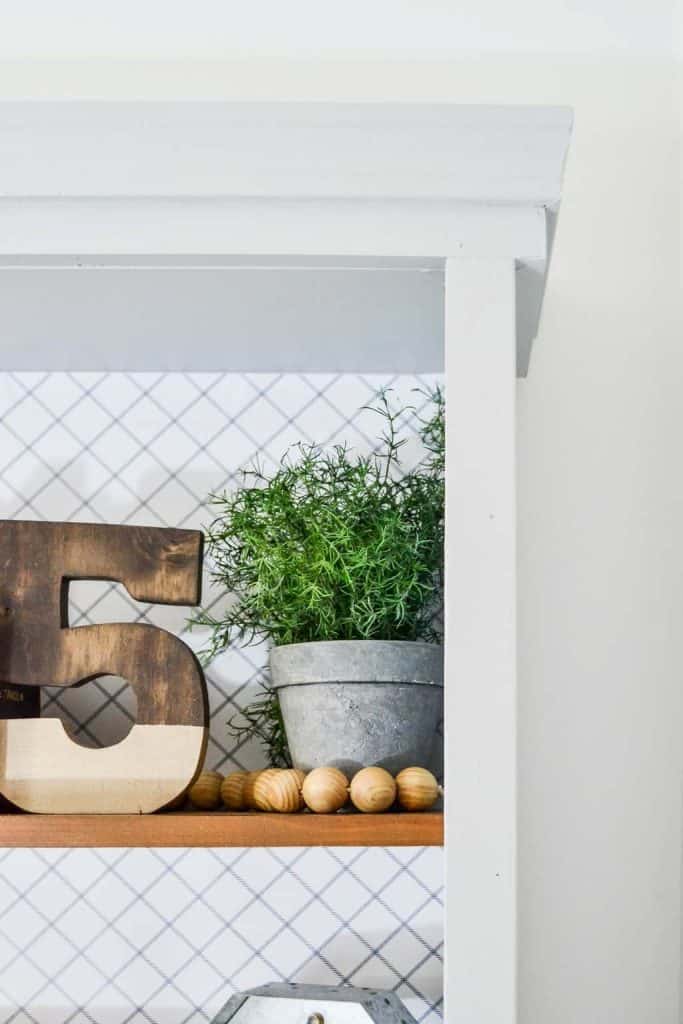
Even without the paint, the three pieces of trim we added make these wall bookshelves look more custom. 

If you are looking for wall bookshelves for your home, click over to see how we took plain wall bookshelves and make them look custom in a few short steps.

Before I painted, I thought it would be fun to add paper to the back of the bookshelves.

I searched through the wrapping paper I picked up after Christmas at Target for 70% off. 

(If I have said it once, I have said it a thousand times. Shopping after the holidays is so smart! Look for items that you can use all year-long. Pieces and products that are on a huge discount, but can be used in different ways.) 

If you are looking for wall bookshelves for your home, click over to see how we took plain wall bookshelves and make them look custom in a few short steps.

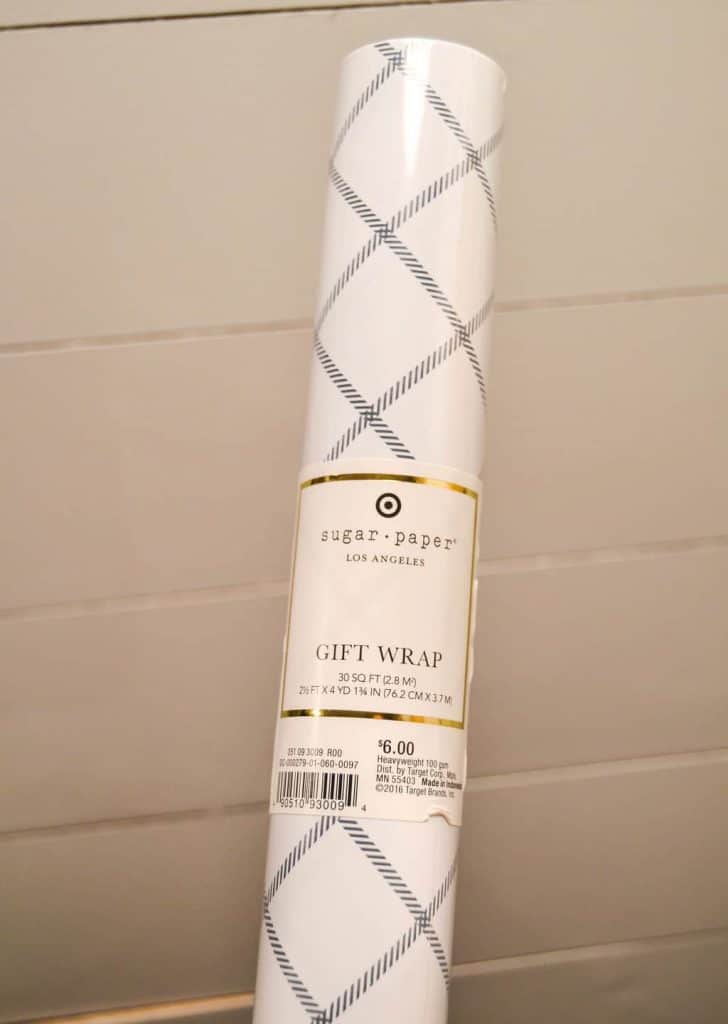
This paper was in the Christmas clearance and it doesn’t even look like Christmas! It was going to be the perfect addition to the bookshelves. Matt measured and cut the wrapping paper to fit the back of the bookshelves and I used spray adhesive to attach it. The wrapping paper was a thicker quality so it was perfect for this project. 

I mixed a few left over Fusion Mineral Paint gray colors together to get enough paint to cover both bookshelves.

If you are looking for wall bookshelves for your home, click over to see how we took plain wall bookshelves and make them look custom in a few short steps.

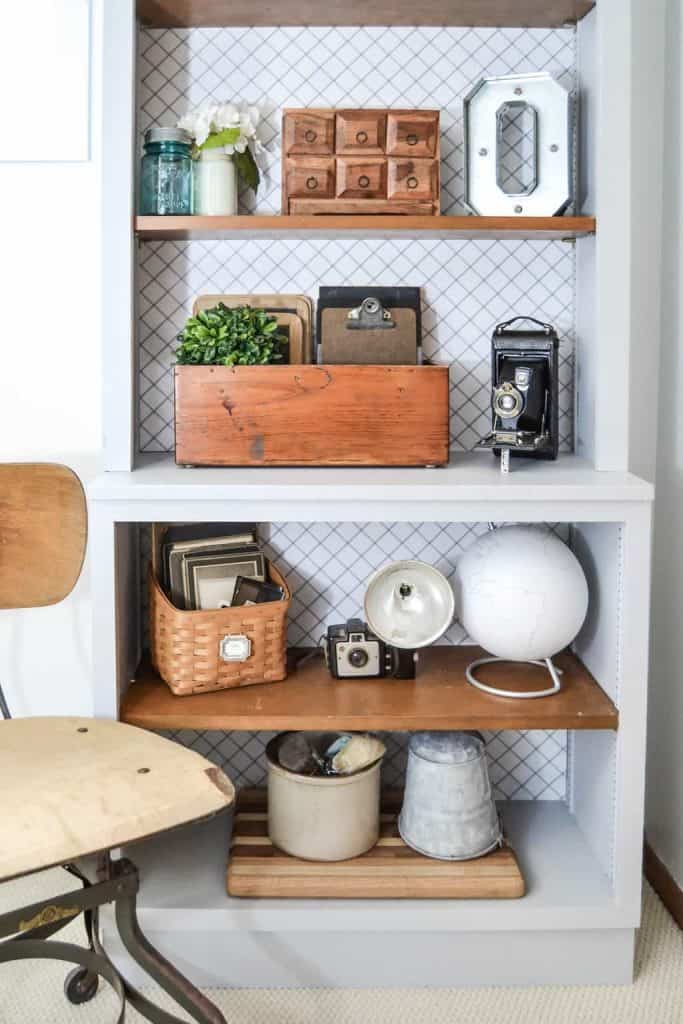
The tall bookcase doesn’t look plain anymore.

A few pieces of trim goes a long way! 

If you are looking for wall bookshelves for your home, click over to see how we took plain wall bookshelves and make them look custom in a few short steps.

Each tall bookcase has been so much fun to play around with and decorate. The office is still not done, but I am enjoying the process and each project as it gets done. 

If you are looking for wall bookshelves for your home, click over to see how we took plain wall bookshelves and make them look custom in a few short steps.

{Affiliate links are used in this post. You can read my disclosure HERE.}

What would you store in a tall bookcase? 

Supplies used in this Wall Bookshelves Makeover:

Spray Adhesive

Nail Gun

Miter Saw

Decorative Paper

Wood Trim Pieces

Fusion Mineral Paint

Don’t have wall bookshelves to make over right now? I found some beautiful options online:


PIN THIS POST!  

If you are looking for wall bookshelves for your home, click over to see how we took plain wall bookshelves and make them look custom in a few short steps.


If you liked this Wall Bookshelf Makeover post, you will also like my other easy, DIY projects: 

How To Paint Furniture Without Sanding

The Easy Way To Paint Paneling

DIY Painted Buffet Makeover

Sharing is caring!

412 shares
  • Share

Filed Under: DIY Projects, Furniture Tagged With: bookshelf makeover, bookshelves, DIY, wall bookshelves

Click HERE to Support My Creative Days


MY ULTIMATE FURNITURE FLIPPING COURSE IS NOW OPEN!


Click below to SAVE $100 today.
SAVE $100

« Reclaimed Barn Wood Mantel Makeover
30 Minute DIY Projects For Your Home »

Comments

  1. Lora B. says

    February 12, 2017 at 3:04 PM

    Great project improvement, Lindsay! And I love how you styled the shelves with so many different textures-looks great!

    Reply
    • Lindsay says

      February 14, 2017 at 12:25 PM

      Thank you Lora!

      Reply
  2. Jillian says

    February 13, 2017 at 11:57 AM

    That trim made such a difference!!! What a great idea.

    Reply
    • Lindsay says

      February 14, 2017 at 12:25 PM

      Thank you Jillian! It was so easy to do and did make a huge difference!

      Reply
  3. Kathy Porowski says

    February 18, 2017 at 11:48 AM

    I love it! Sure wish there was a pinterest icon, so I could pin it to my craft room makeover I am doing!

    Reply
  4. Pam says

    February 22, 2017 at 3:00 PM

    The trim made all the difference, but I really love the paper background! How did you apply the paper? I’m thinking of using some white print paper inside our bathroom vanity. Thanks for making me think I’m not crazy!

    Reply
    • Lindsay says

      February 24, 2017 at 9:35 AM

      I used a school glue and water mixture (basically Mod Podge) I didn’t have spray adhesive on hand. I would have used that instead if I wasn’t so impatient and just trying to get the project done. 😉

      Reply

Leave a Reply Cancel reply

Your email address will not be published. Required fields are marked *


follow along

  • Facebook
  • Instagram
  • Pinterest
  • RSS
  • Twitter
  • YouTube

search for a project

Listen In!

VIP Exclusive!

Get The FREE Ultimate Painting Furniture Guide Here!

“ultimate

My Creative Days is a participant in the Amazon Services LLC Associates Program, an affiliate advertising program designed to provide a means for sites to earn advertising fees by advertising and linking to Amazon.com
If you are looking for the best paint brushes for furniture makeovers, you don't have to look any further. Click over to find the paint brushes that everyone needs in their toolbox when painting furniture or anything for that matter.

Best Paint Brushes For Furniture Makeovers

The Best Black Matte Furniture Paint

DIY Farmhouse Table - Want a farmhouse table? Make your own! Check out how to refinish one easily from My Creative Days.

Farmhouse Table DIY Made From A Dumpster Find

DIY Farmhouse Office Sign

DIY Office Sign

PO Box 11823, Cedar Rapids, Iowa, 52410
Copyright © 2022 · Design + Development by Grace + Vine Studios · Privacy Policy

412 shares