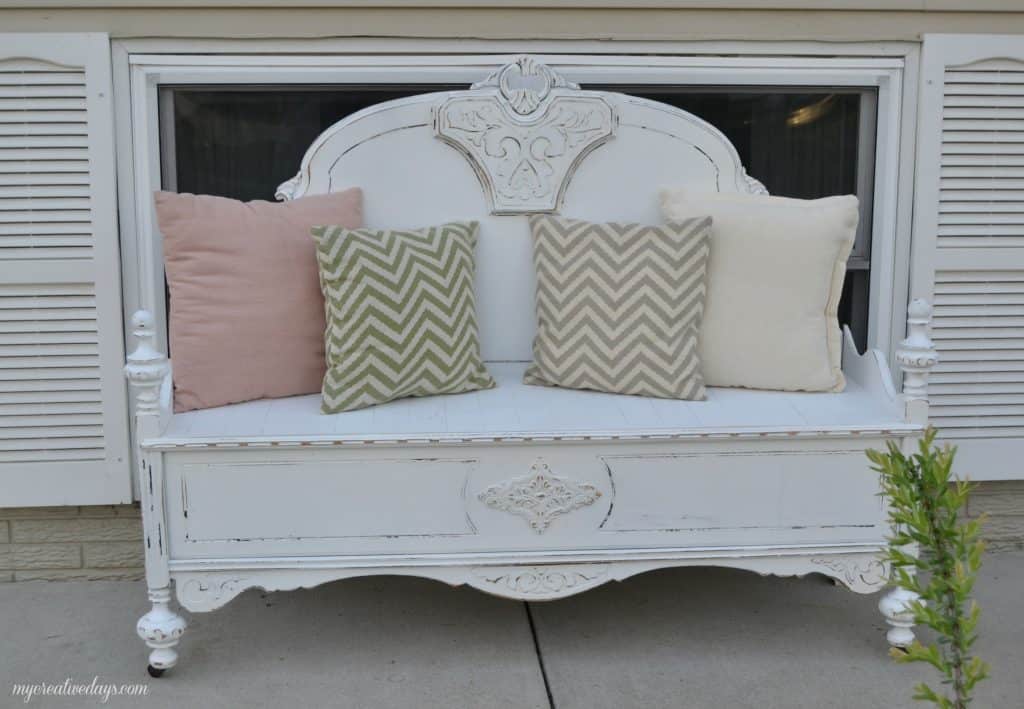
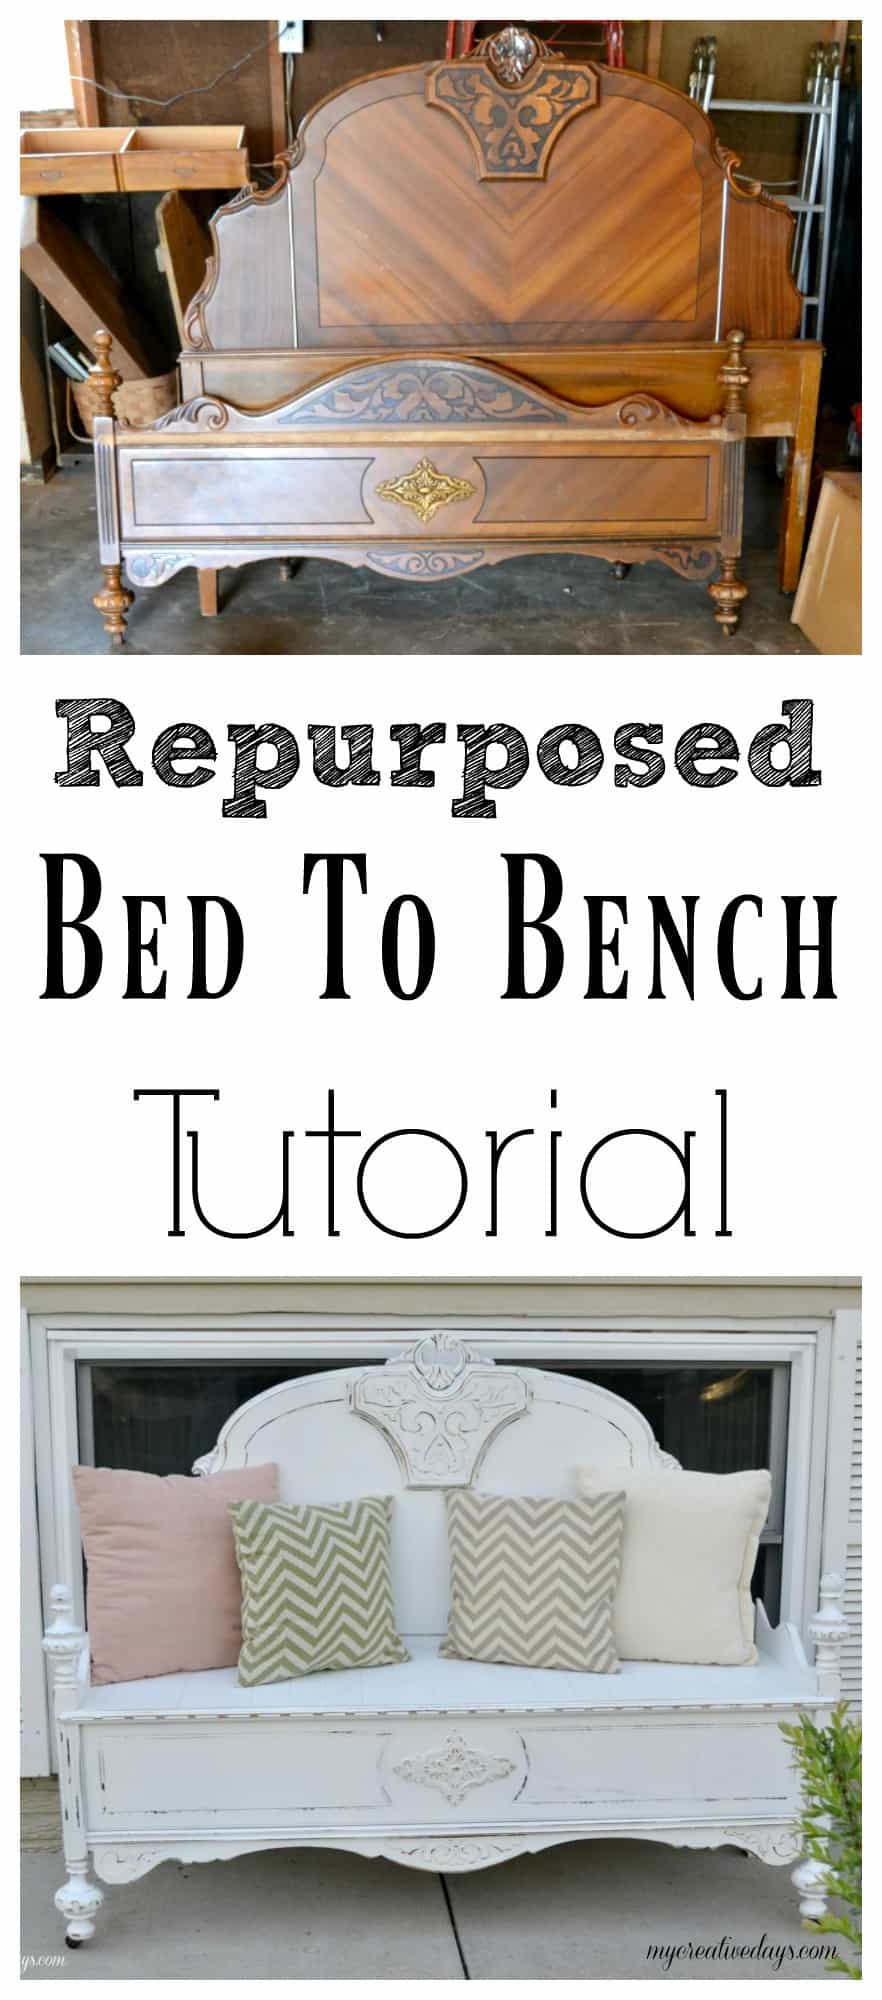
This project is a great example of repurposing one furniture piece to make an entirely different one. This Repurposed Bed To Bench Tutorial is going to share how to take the headboard and footboard of a bed and recreate it into a bench.
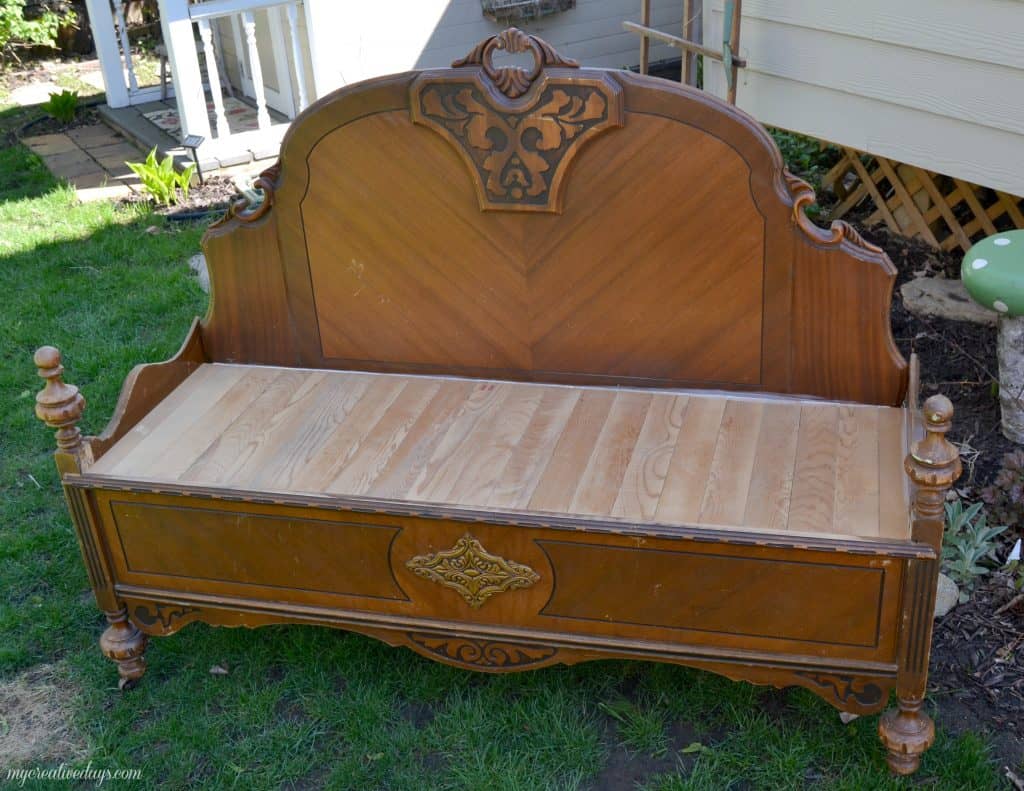
This bench started out as this bed:
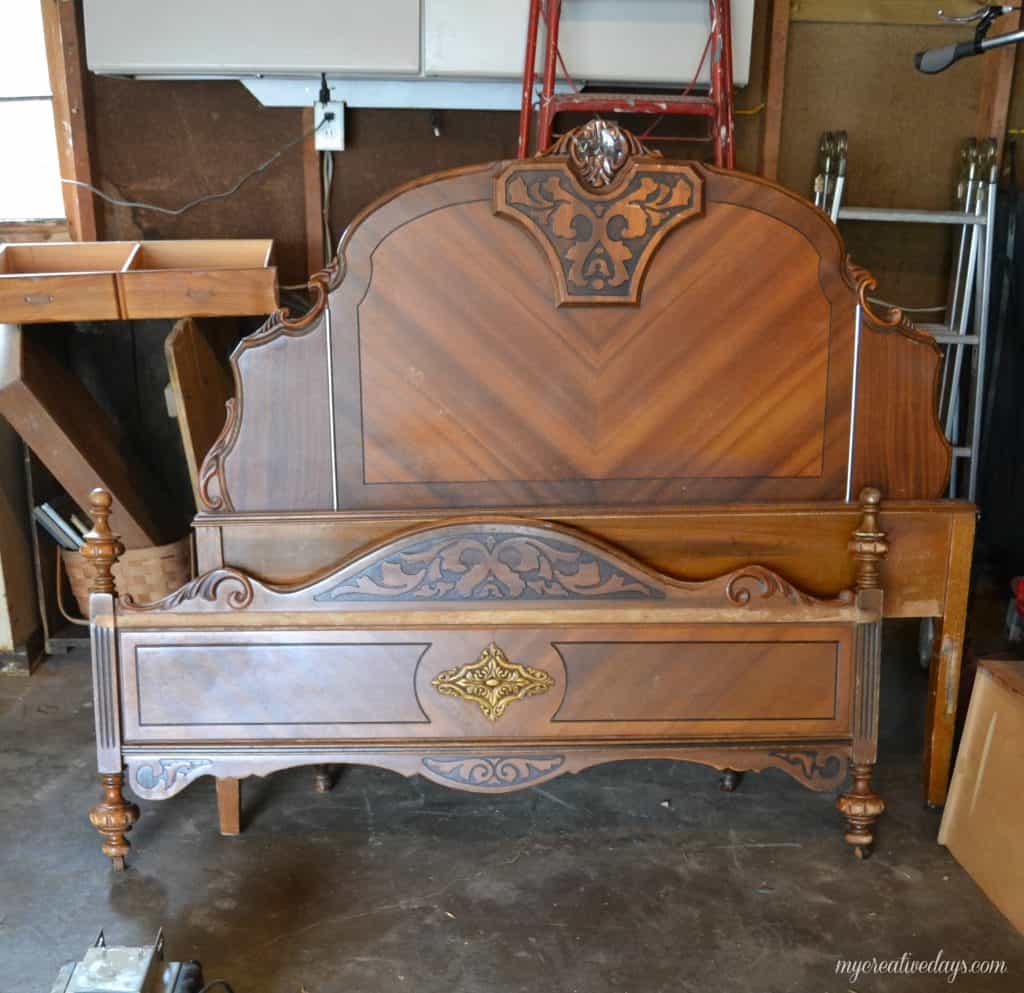
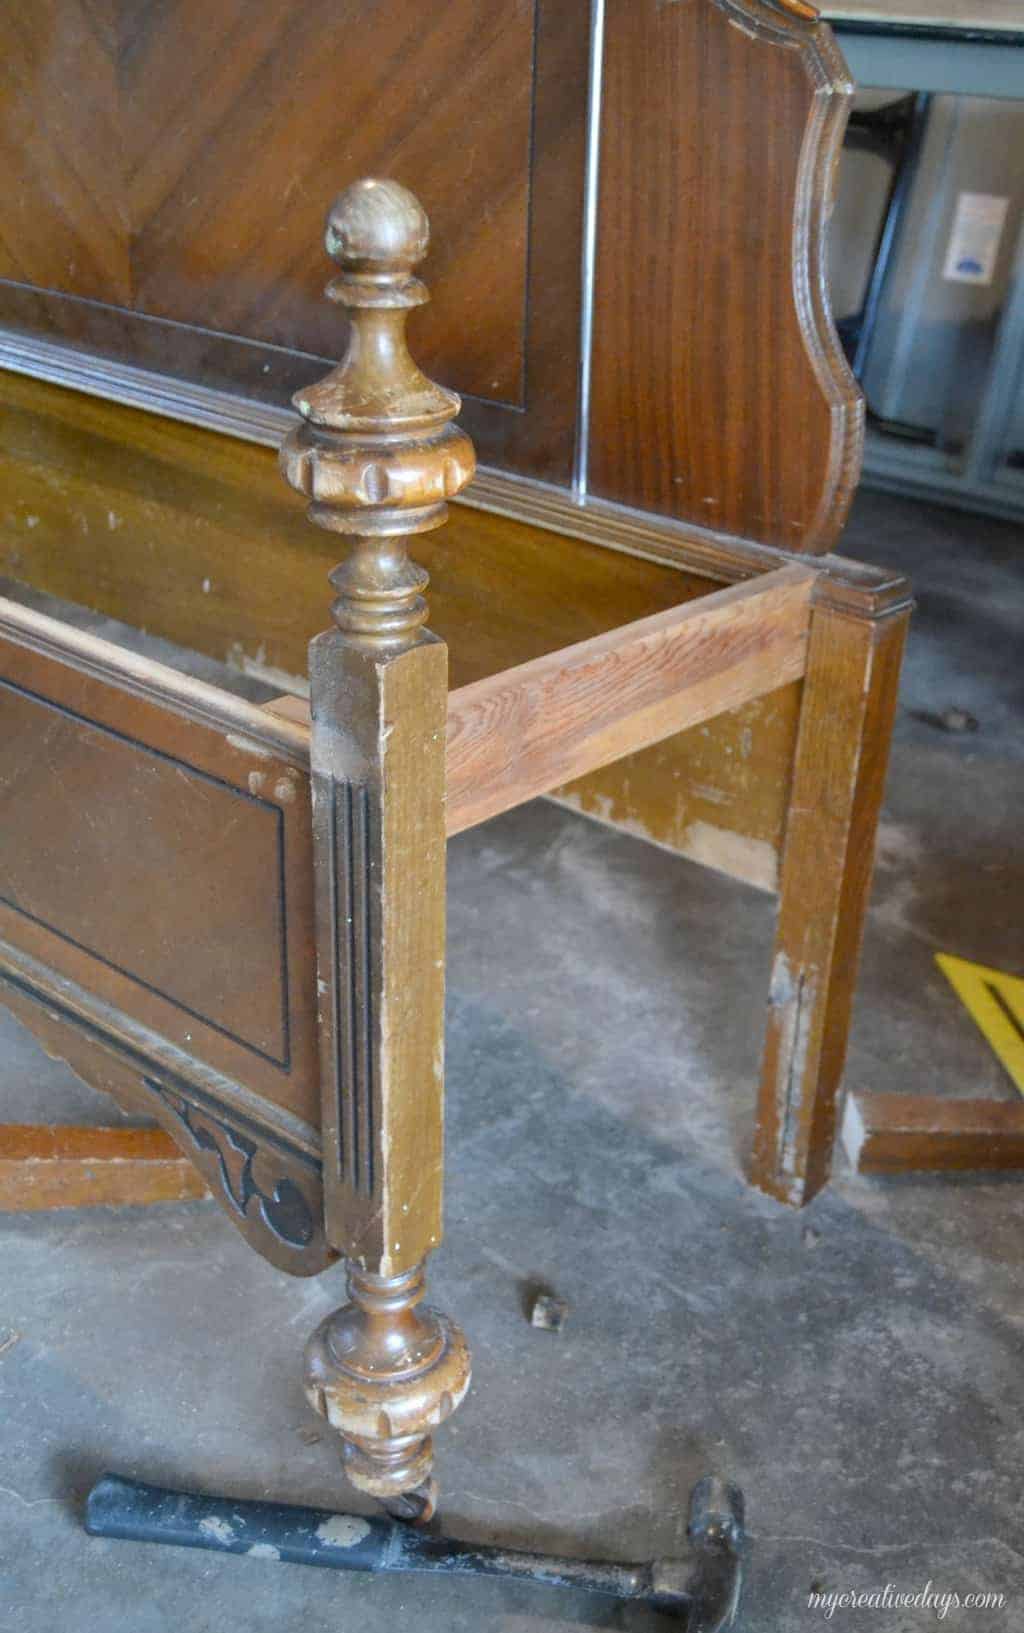
My mom scored this head-board and foot-board for 50% off at a thrift store. The details on the pieces caught her eye and she just couldn’t pass it up. I am glad she didn’t.
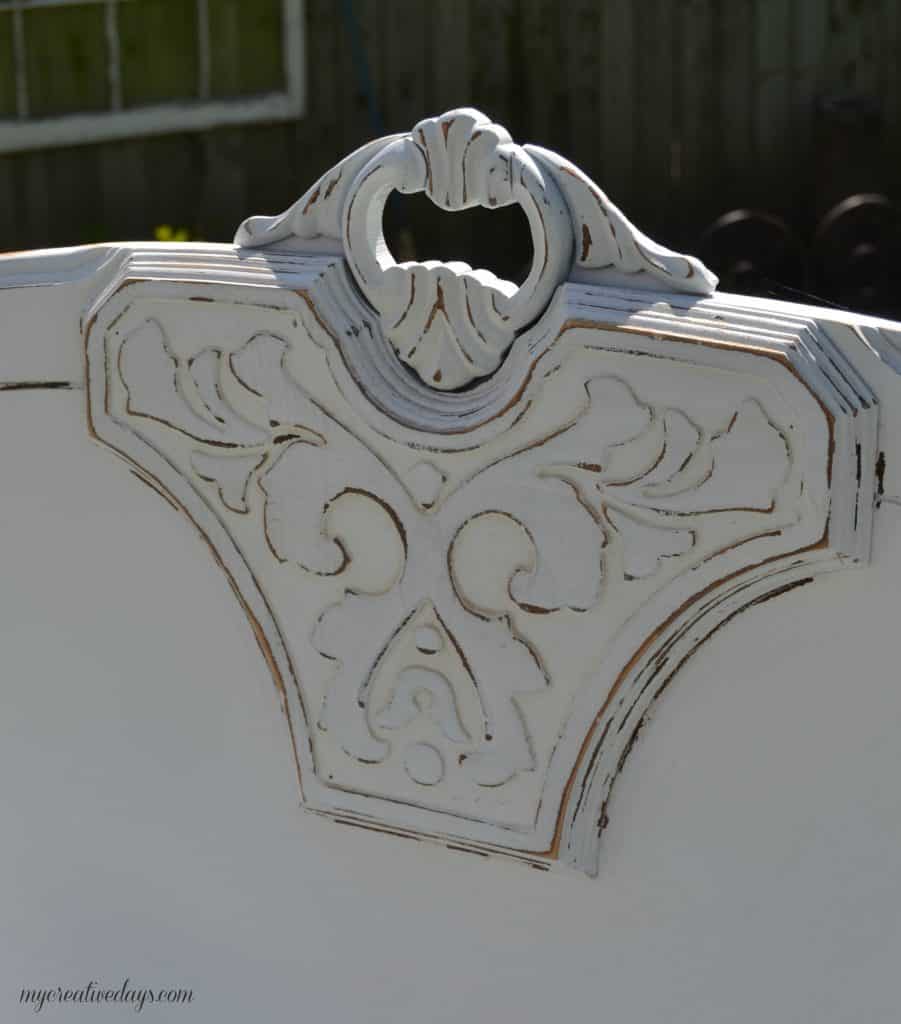
The bed had amazing detail, but it kind of gets lost with the dated finish on it. I knew this would look so much better painted white, but first we had to figure out how to make it a bench.
To make this bed a bench, the first thing Matt did was cut the top piece off of the foot-board and removed some of the trim pieces so we could add them back on after the bench was built.
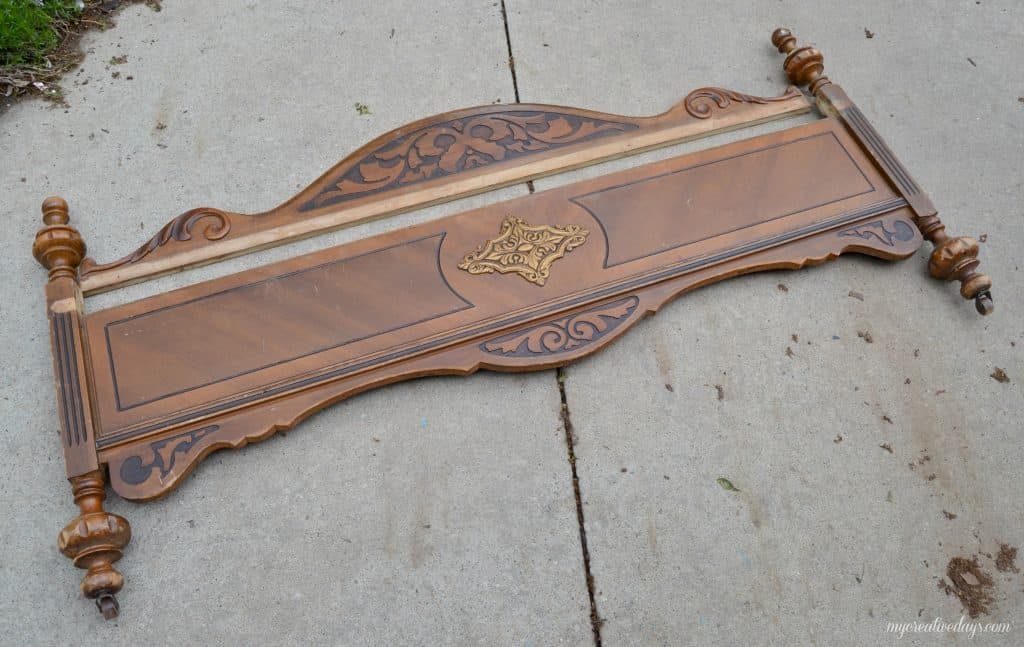
He cut the top piece off the foot-board for two reasons:
- The front of the bench needs to be flat to sit on it and that top piece made that impossible.
- For the sides of the bench we are going to use to foot – board
Next, he attached the foot-board to the head-board with some wood we had in the garage. To get the size of this bench right (height, depth), we measured a bench we had in the house.
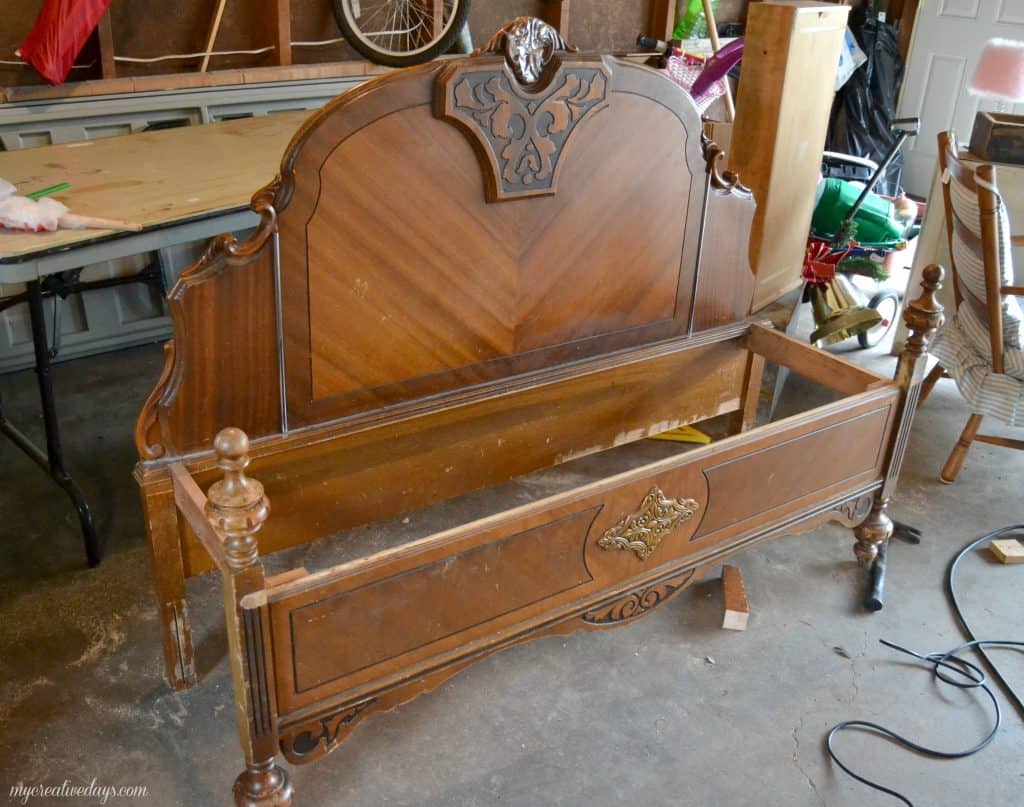
Hubby did add more of the wood pieces to the side of the bench to give it ample support.
Next, came the seat. Hubby used the same wood on the seat that he used for the supports. Then, he added the trim piece back on the front of the bench which covered up the ends of the seat boards perfectly.
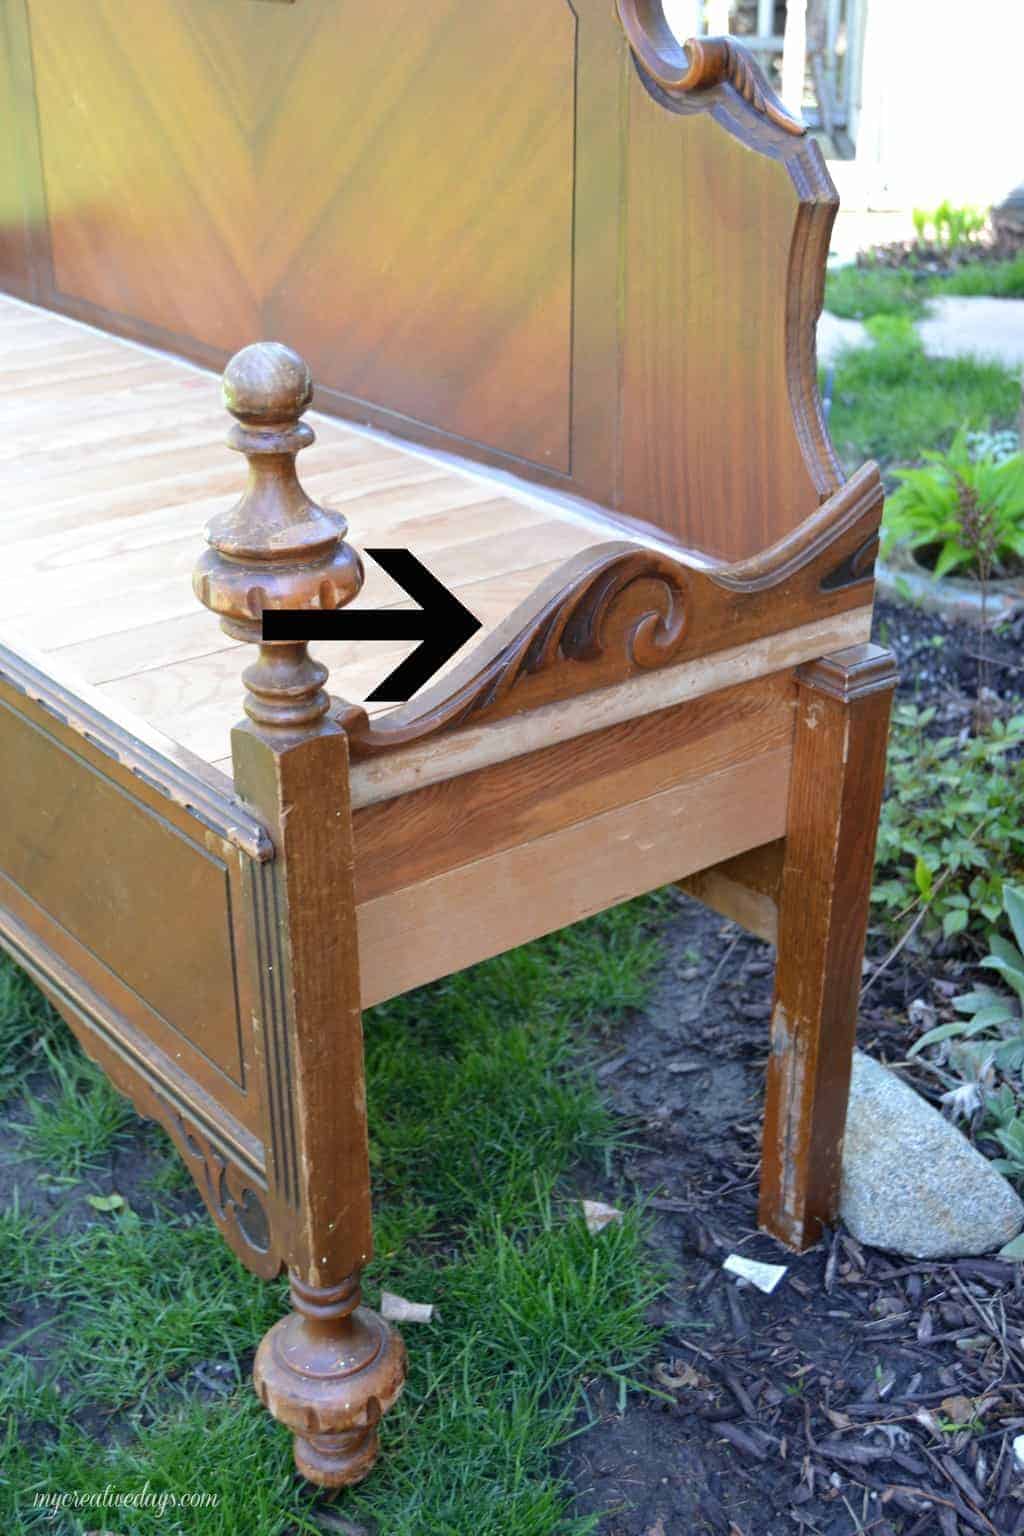
The picture below shows the side of the bench with the repurposed top piece that was cut off originally.
{You may find affiliate links in this post. You can read my disclosure HERE.}
To paint the bench, I used one of my favorite tools – the HomeRight paint sprayer.
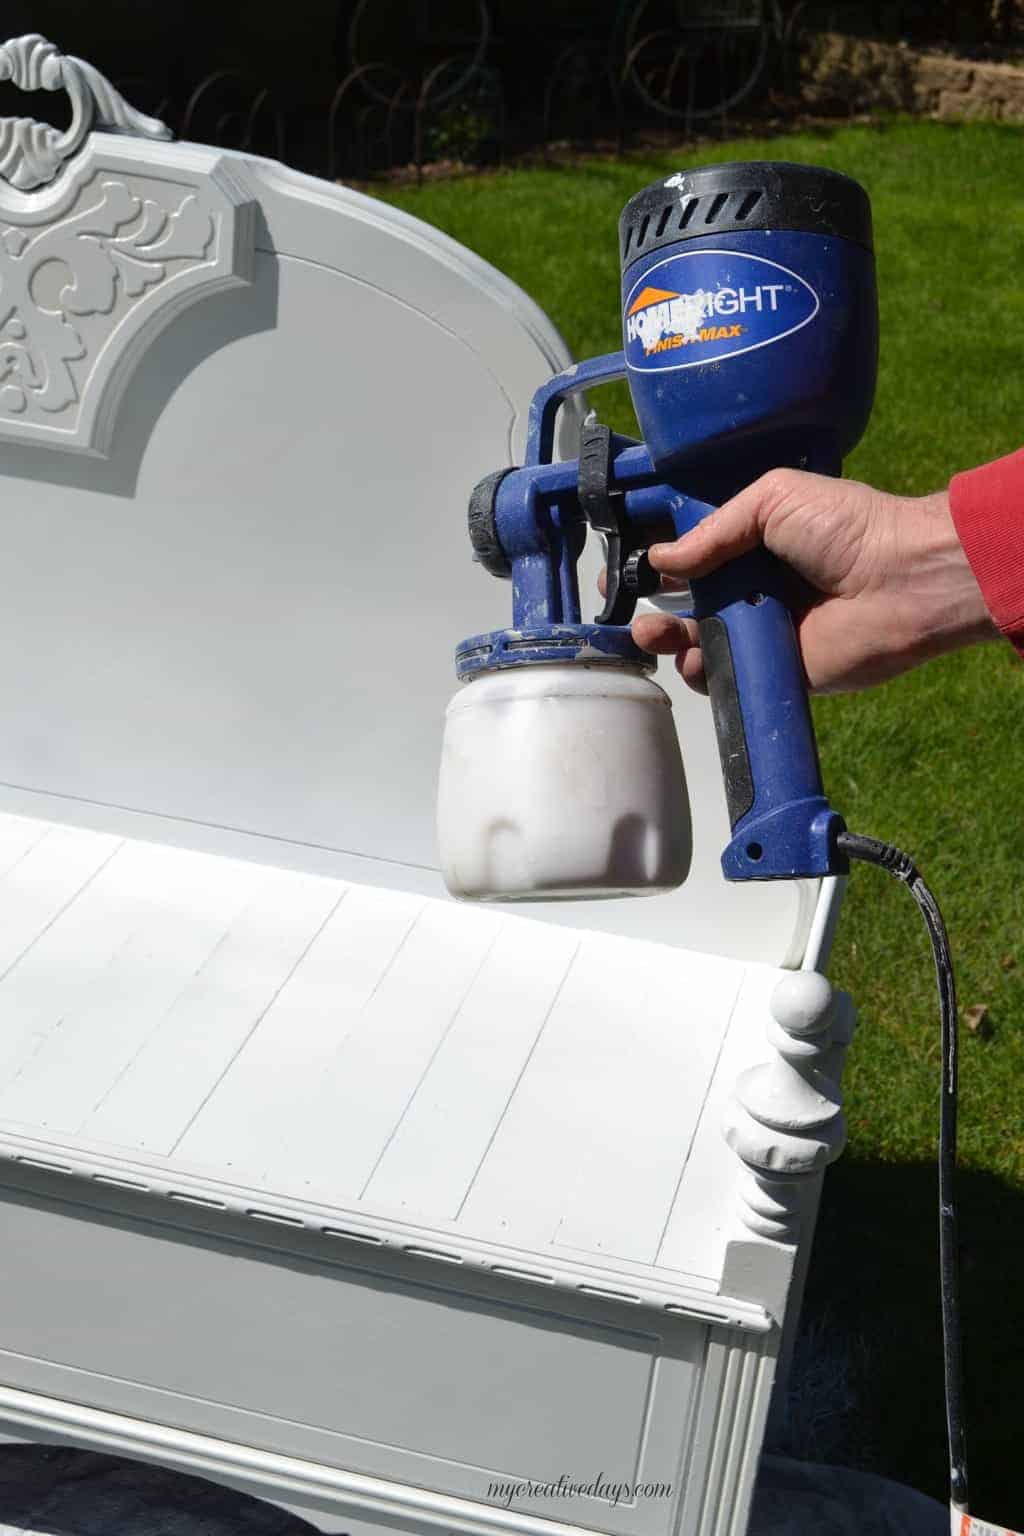
The white gives it a fresh, updated look.
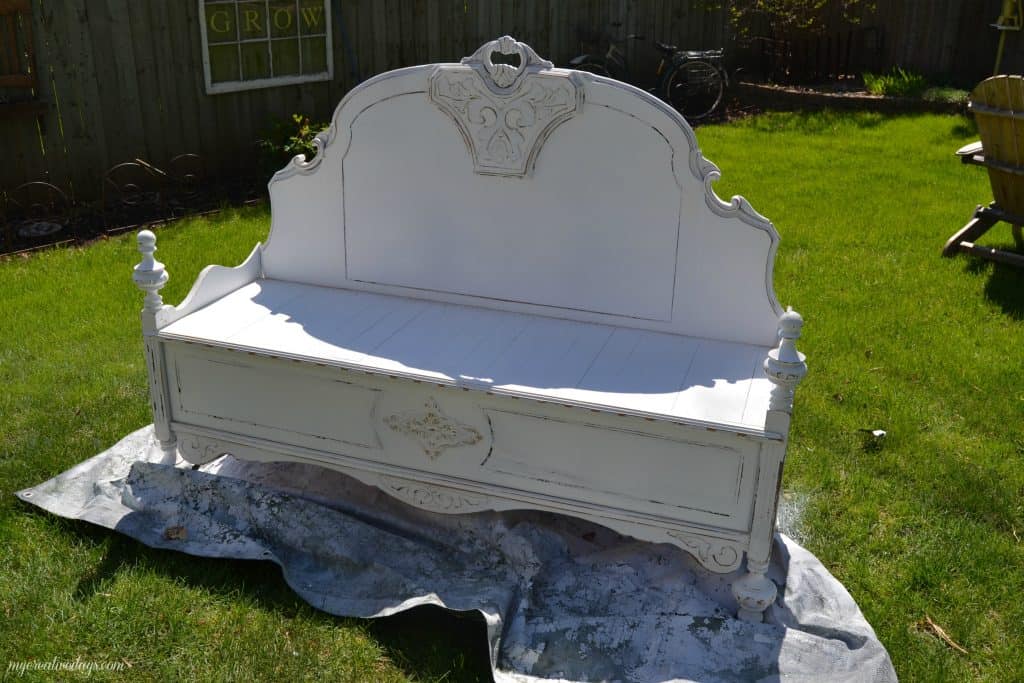
I distressed it all with some sand paper.
What a transformation!
Like most of you know, repurposed projects are some of my favorite projects to do. Looking beyond the original intention of a piece and seeing the potential in what it can be, is rewarding and makes this budget-minded girl happy. I decorate our entire home this way and hope to give you inspiration to change-up some of the pieces in your home that you don’t love anymore. Look around your home and reinvent what you already have.
If you don’t have the supplies or the time to make your own Repurposed Bed To Bench, I found some beautiful options online:
PIN THIS POST!
If you liked this repurposed bed to bench tutorial, you will love these other upcycled projects:
DIY Step Ladder Beverage Station
What a stunning headboard bench Lindsay! I love how you salvaged the top of the foot board and attached it to the sides – so smart. Definitely pinning this for inspiration as I have a headboard and footboard sitting in my shed waiting to be turned into a bench.
YAY! Glad you found some inspiration! Thanks for stopping by Marie!
I’m ready to get this project started! Only one question… I think lol…. What type of saw did your hubby use to cut off the top of the foot board?
Tara
A circular saw (aff): https://rstyle.me/+4vCcUeIgNpJHvRitrTyDjA
I simply love it! Can think of a creative headboard for a Round-shaped bed?
Thank you Marie!
So beautiful!! You did such a wonderful job explaining, thank you. Love it!!
Thank you Cheryl!
I have a headboard sitting in my garage that I keep saying I want to turn into a bench. This post is very inspiring to get out and actually do it.
Between this post and the cute little hand clay jewelry dishes, I am sold. New subscriber from EyeLoveKnots.
Thank you so much Alexandra!!! Go for it! You will be so happy you did.
Hi, Lindsay, lovely project! I’m finishing up my second piece made from a double bed headboard and footboard – which I pulled from a neighbor’s trash. I took the ends off the footboard to enlarge the headboard to queen-size (now gracing my bedroom!), and am combinng what’s left of the footboard (which was about 45″ wide) with an over-the-refrigerator cabinet and assorted bits and scraps of lumber in my ‘stash” to make a hall bench. I’m looking forward to retirement and more time to do my upcycling (furniture and other things that call to me from curbside, thrift stores, etc., and tell me they’d really like to be something else. I’ve just starting posting again on Hometalk, and want to start a blog – there are so many out there who need to see what we’ve done to encourage them to tune into their creative selves!
You are so right! It sounds like you and I are kindred spirits! You can find some amazing things on the side of the curb sometimes! Repurposing is so much fun! Good luck with all your projects!
This is a terrific idea, look thanks for sharing. Question with the type of white paint you used? as I have two wall units old style with the gold down the front sides, wood look sides and bottom cupboard. And the handles are the gold. They are both sturdy and would love to paint and change handles to give a total new look. wondering the best type of paint to use.
I just used white, latex paint on this one. Good luck with yours!
I wanted to write on the Hometalk page, but it’s gone ‘stupid’. No #s for going back to search, no ‘like’ or ‘reply’. Also, no way to open longer posts, or to reply to one. Is it just me, or do you have the same problems?
Anyway, as I write often, I don’t usually like the distressed look as most people seem to overdo it, or sand where in real life, it wouldn’t be worn or dinged, but I think yours is just right. The poster who said you should have left it alone. Sorry. She’s dotty! It looks like my ex husband’s childhood bed and he was born in 1942, when wood and artisans were scarce because of the war. Talk about old fashioned!
Thank you so much for your kind words Linda. A LOT of people aren’t happy that I painted it. It was not in great shape and was not an antique so I was okay with painting it! I loved the transformation.
What a beautiful makeover. Hope you are not going to leave it outside. The weather will ruin it and it is much to nice to have that happen. Good job.
Carol P-k
Bensenville, IL
I actually sold the bench to someone who is going to keep it in her porch!
You did an amazing job!! About how much do you think it cost to make it?
Depending on what you use will depend on the cost. Ours probably cost around $40 to make????
Love that you are trying to repurpose old furniture, however in this case you have taken a very old piece of history that could of been saved and brought back to life for generations to see and admire. You do not see all wood craftsmanship now in your furniture and if you do it does not go into detail as you saw in this piece of furniture. Sad to see it go. Hope the next project is a piece that does not hold so much value.
Thanks for your comment. This was not an antique and had many flaws. It was brought back to life in a new way and I didn’t need a bed frame at the time. I saved it from the landfill!! Yay for upcycling!
I am very impressed with this site. Can’t wait until I start getting it on a regular basis.
Thanks Joanne!
Great job! This looks amazing!
Thank you!