It is time for another update on our back porch makeover! I hope you aren’t getting tired of this little space we spend so much time in, but I am so excited with the outcome and want to share how we DIY’d our way through it all. I started the updates with the porch reveal and then I got more in depth with the barn lighting we added. Today, is all about the project that took the porch over the top. The reclaimed wood wall we did for free!
I can’t tell you how much I love the reclaimed wood wall. Every time I see it, I get happy. It gave the porch texture, character and pizzazz.
The best part…… it was FREE!
Yep. FREE!
Okay, I need to grab my composure and settle down so I can get this post done in a timely fashion and show you how easy this reclaimed wood wall was to install.
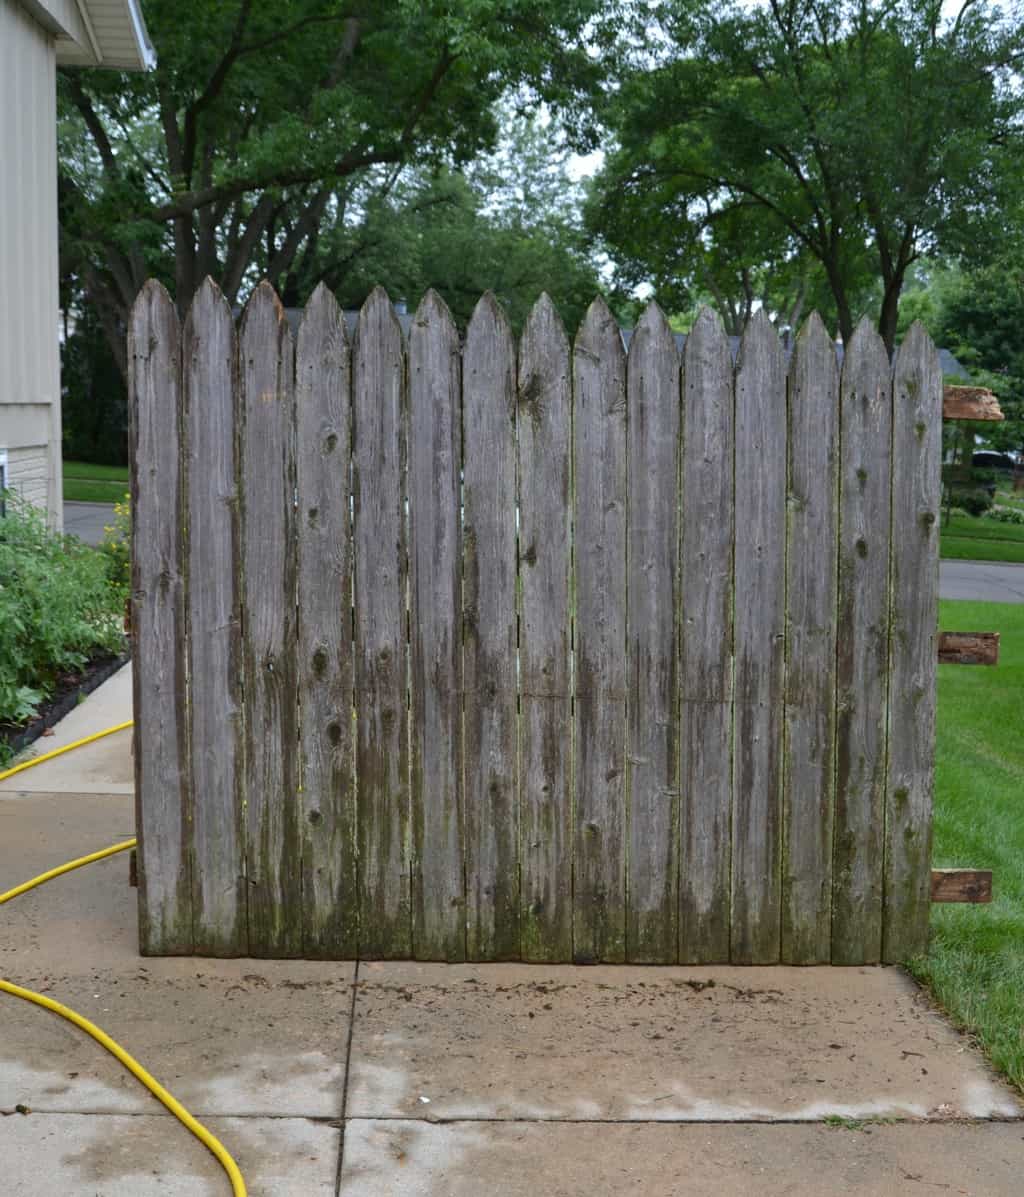
This is where the porch started.
We added the back porch to our home about five years ago. We don’t have a television in our living room so the porch gave us a space upstairs (we have a family room downstairs) to hang out in and watch TV. Matt lives in this porch. The kids love the porch. It has just become the family hang-out spot. Even though we spend so much time in it, I have not been inspired to do much to it for some time.
That all changed this past summer.
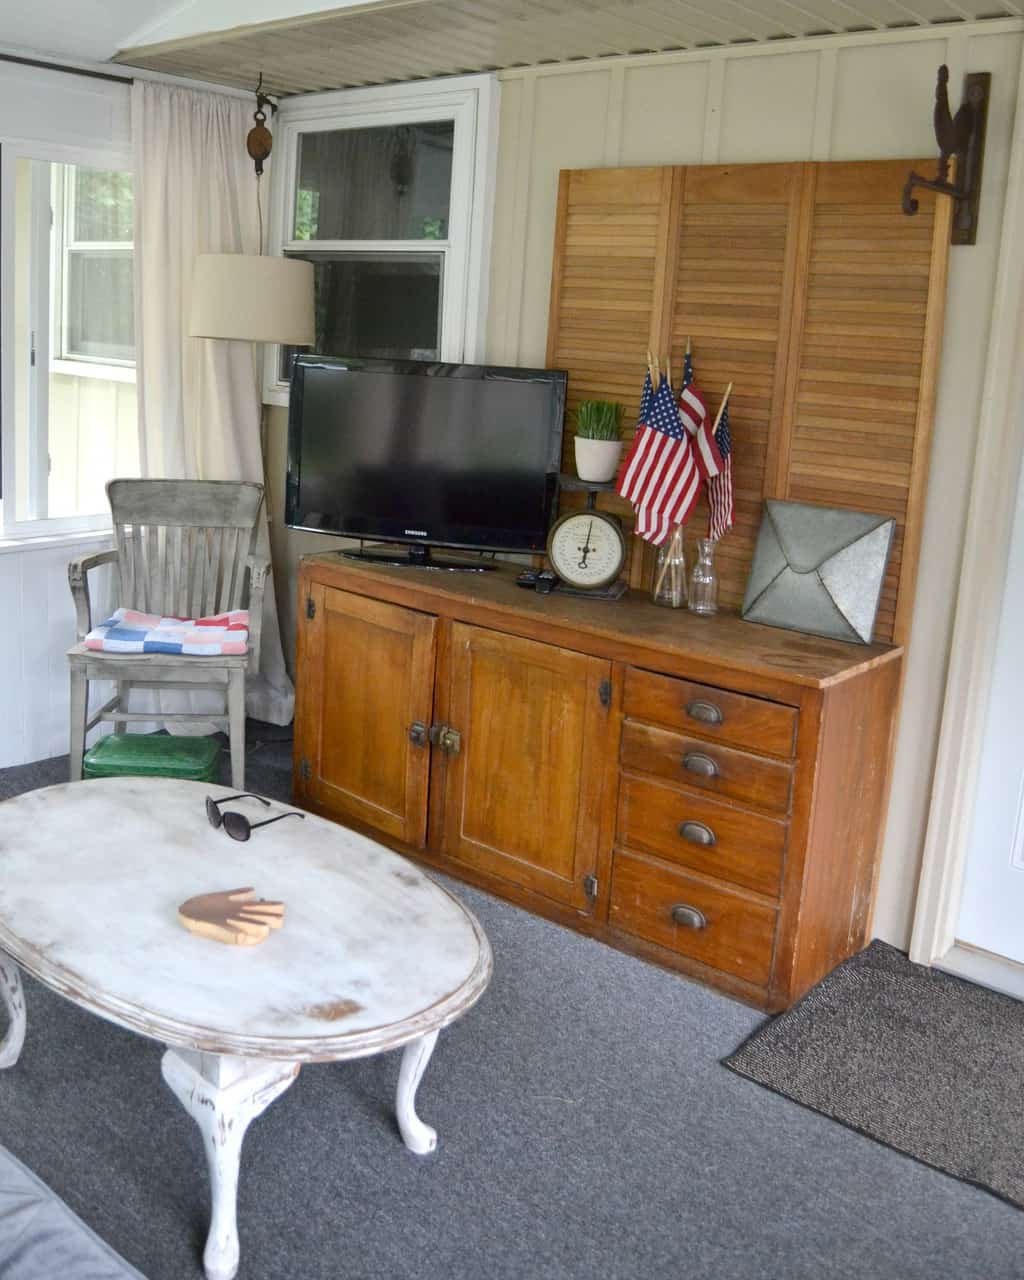
As I look at the before pictures, the porch looks dark. It is the brightest room in our home, but the gray carpet, dark furniture and siding color made all the natural light not so bright.
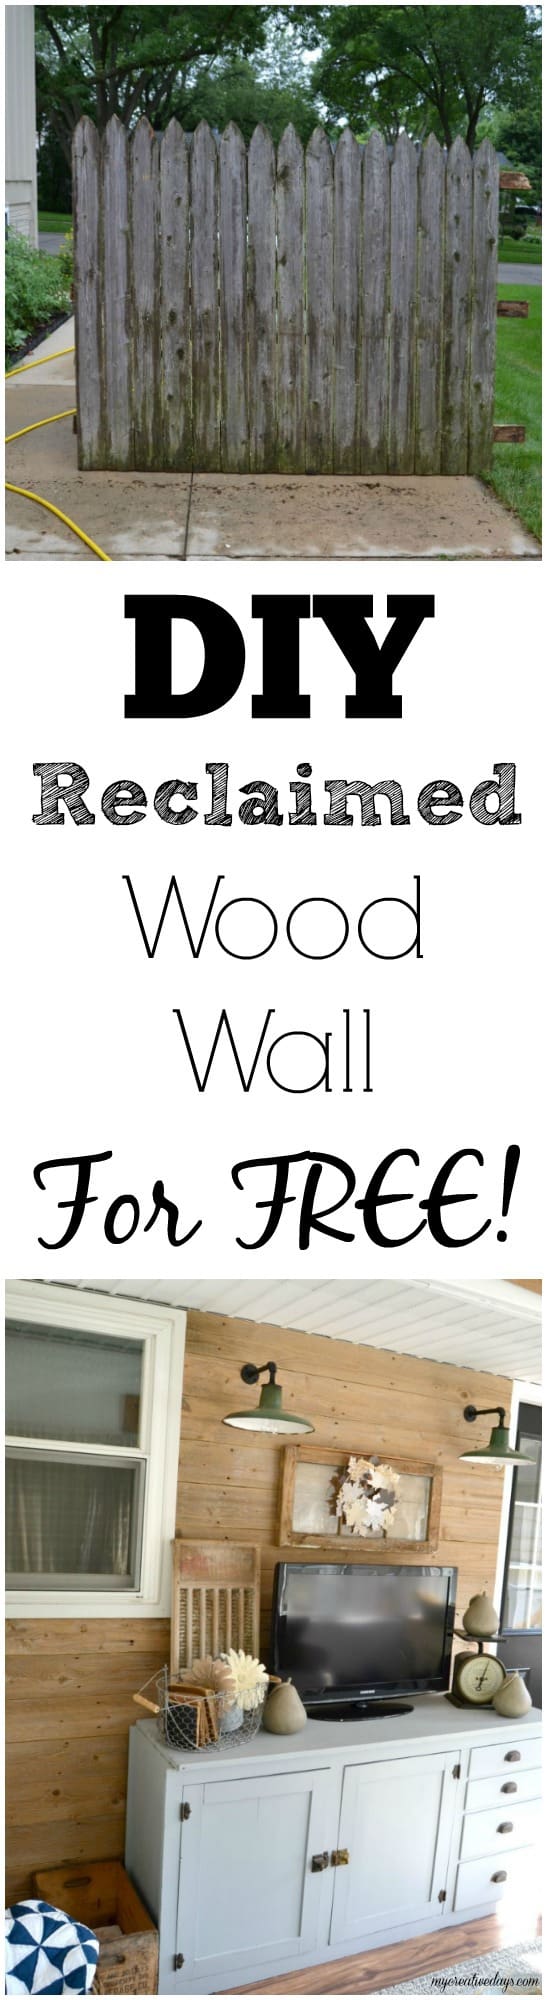
This past summer, it all changed. Inspiration hit me like a ton of bricks when my aunt was replacing her fencing around her pool. She asked us if we wanted the old fence and we couldn’t say “YES” fast enough.
She thought we were crazy, but I knew under the dirt and grime, that fence was weathered-wood gold. You all know how cheap frugal I am so when free, weathered wood comes knocking, I welcome it with open arms.
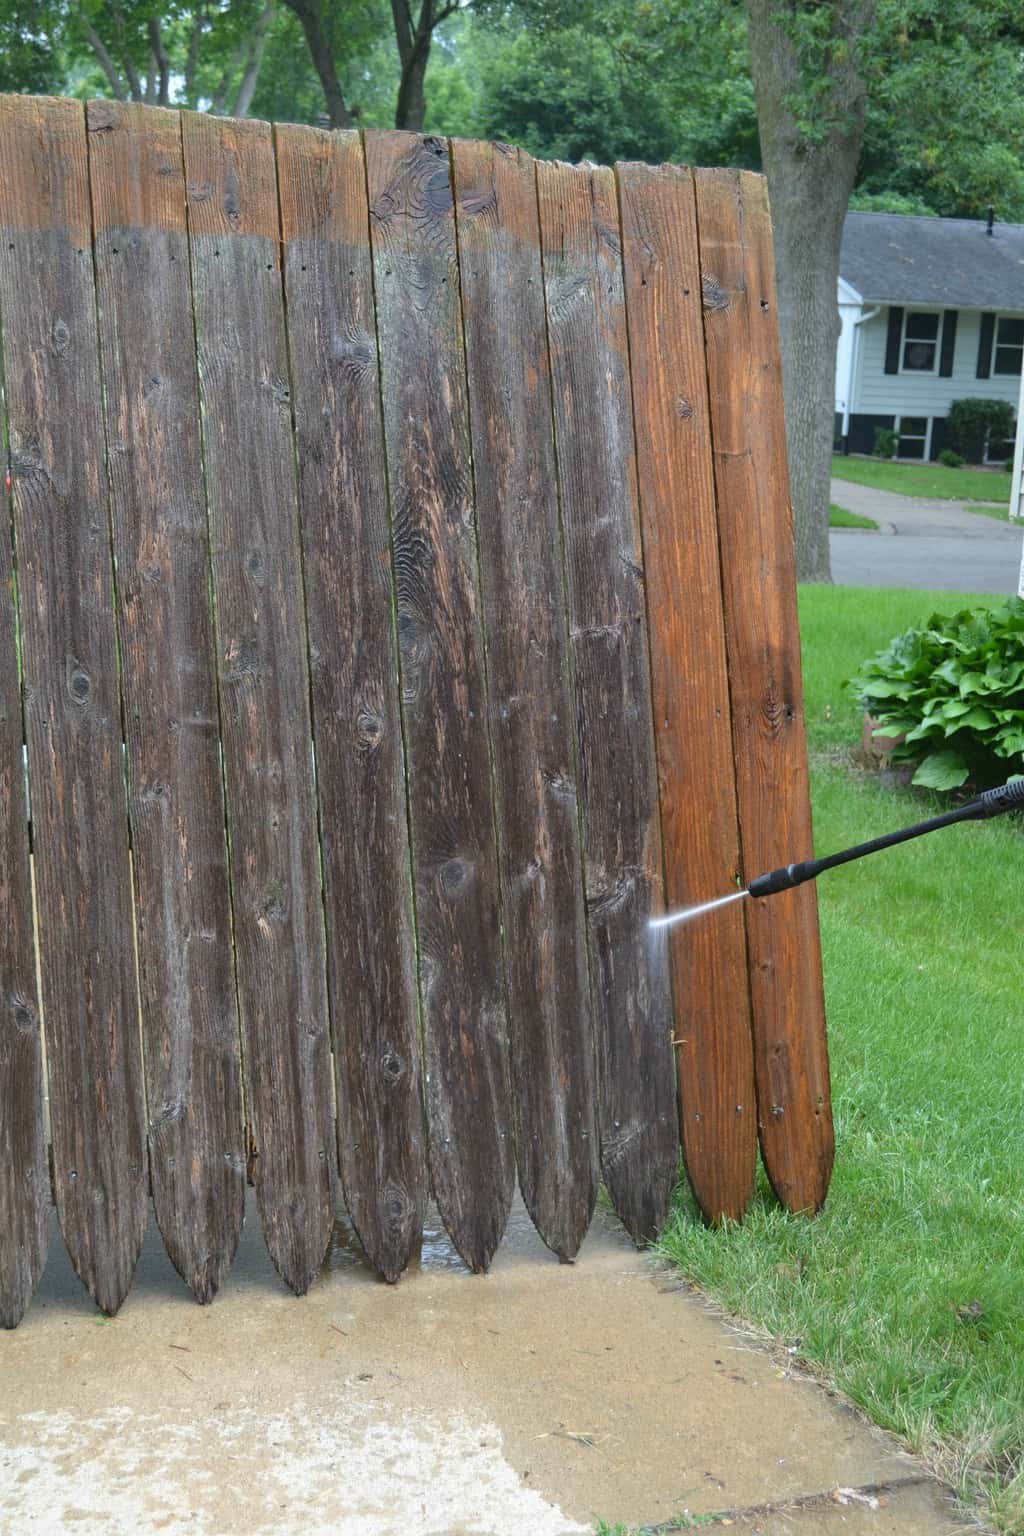
We brought the fence home in the sections they were taken off in. We power washed the heck out of it and laid it out to dry for a few days in the hot, summer sun.

I was so excited to get the wood on the wall that I noticed I didn’t take a ton of pictures of the process. Oops. It was so easy to install and the pictures I took for the barn lighting shows exactly how we did it.
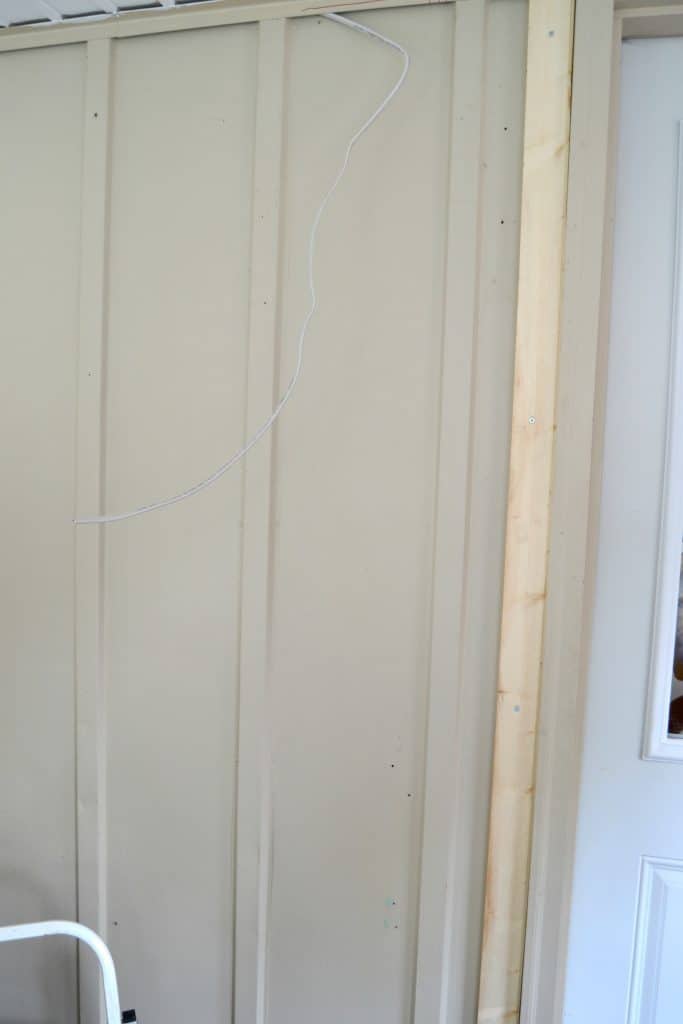
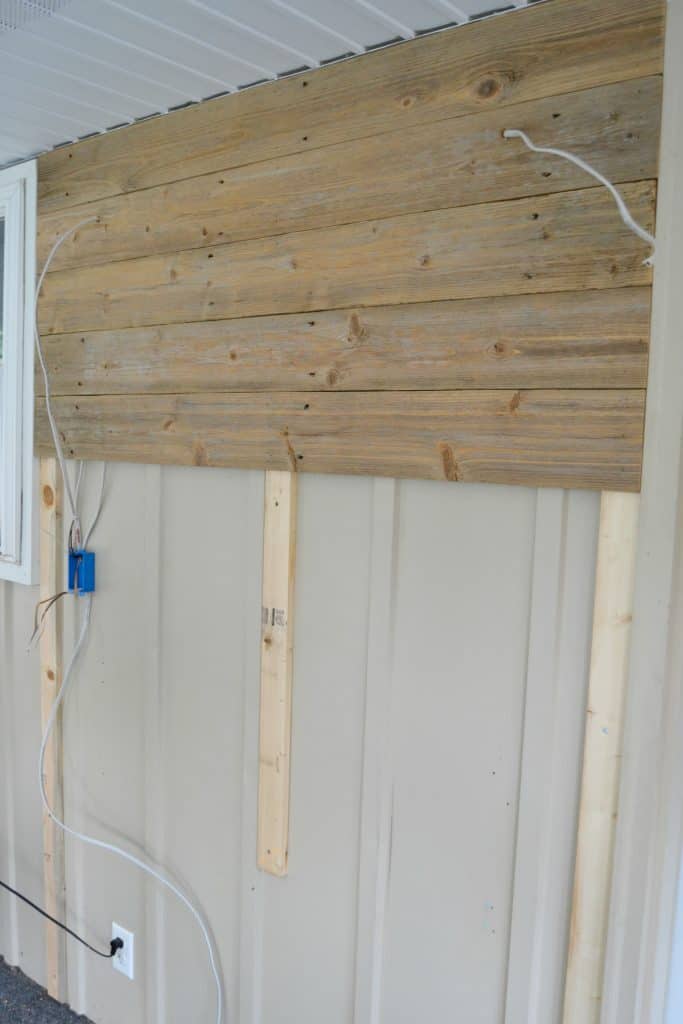
Matt added small boards (that we had in the garage) on the edge of the walls and down the middle of the wall so he could screw the fencing into that wood and not have to drill a bunch of screws into the siding itself.
He cut the fencing to fit and screwed it into place. That’s it. The longest part of this project was waiting for the fence to fully dry after we power washed it. When a project goes this smoothly, we always think we are doing something wrong, but we had the entire wall done in one afternoon (minus the lighting).
(We used 1.25″ screws on the brace boards and also 1.25″ nails to nail the fence pieces into the brace boards.)
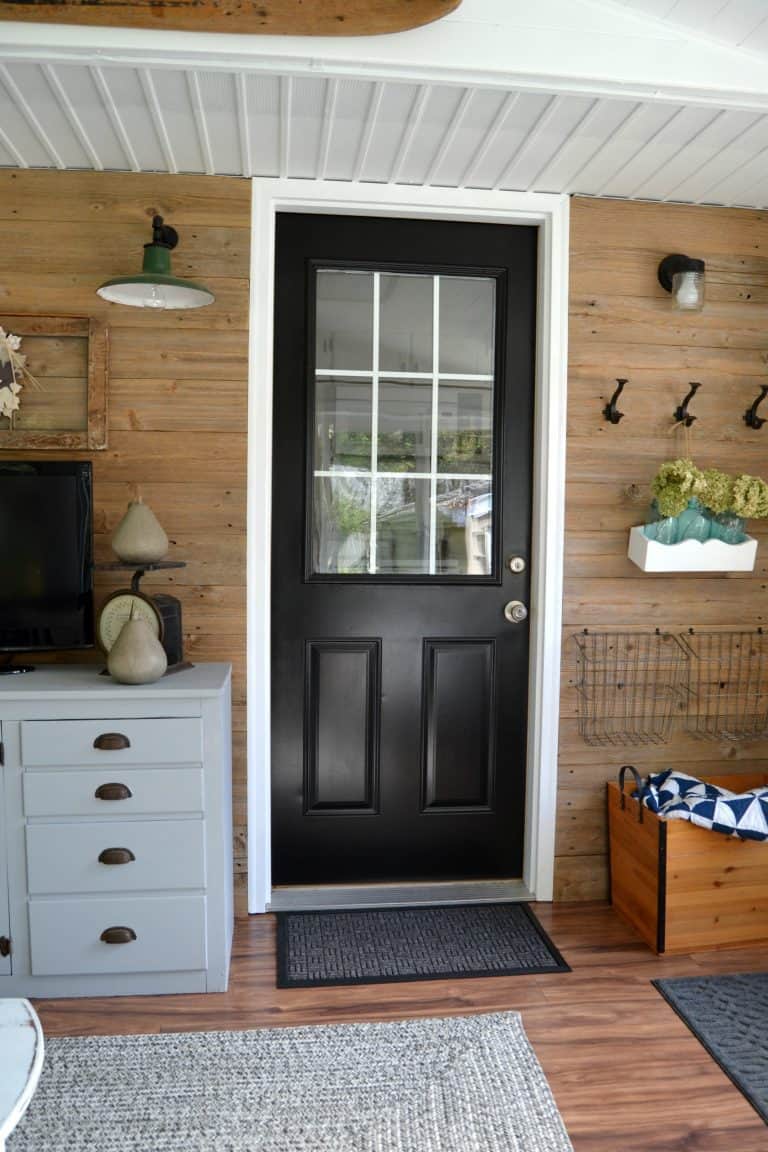
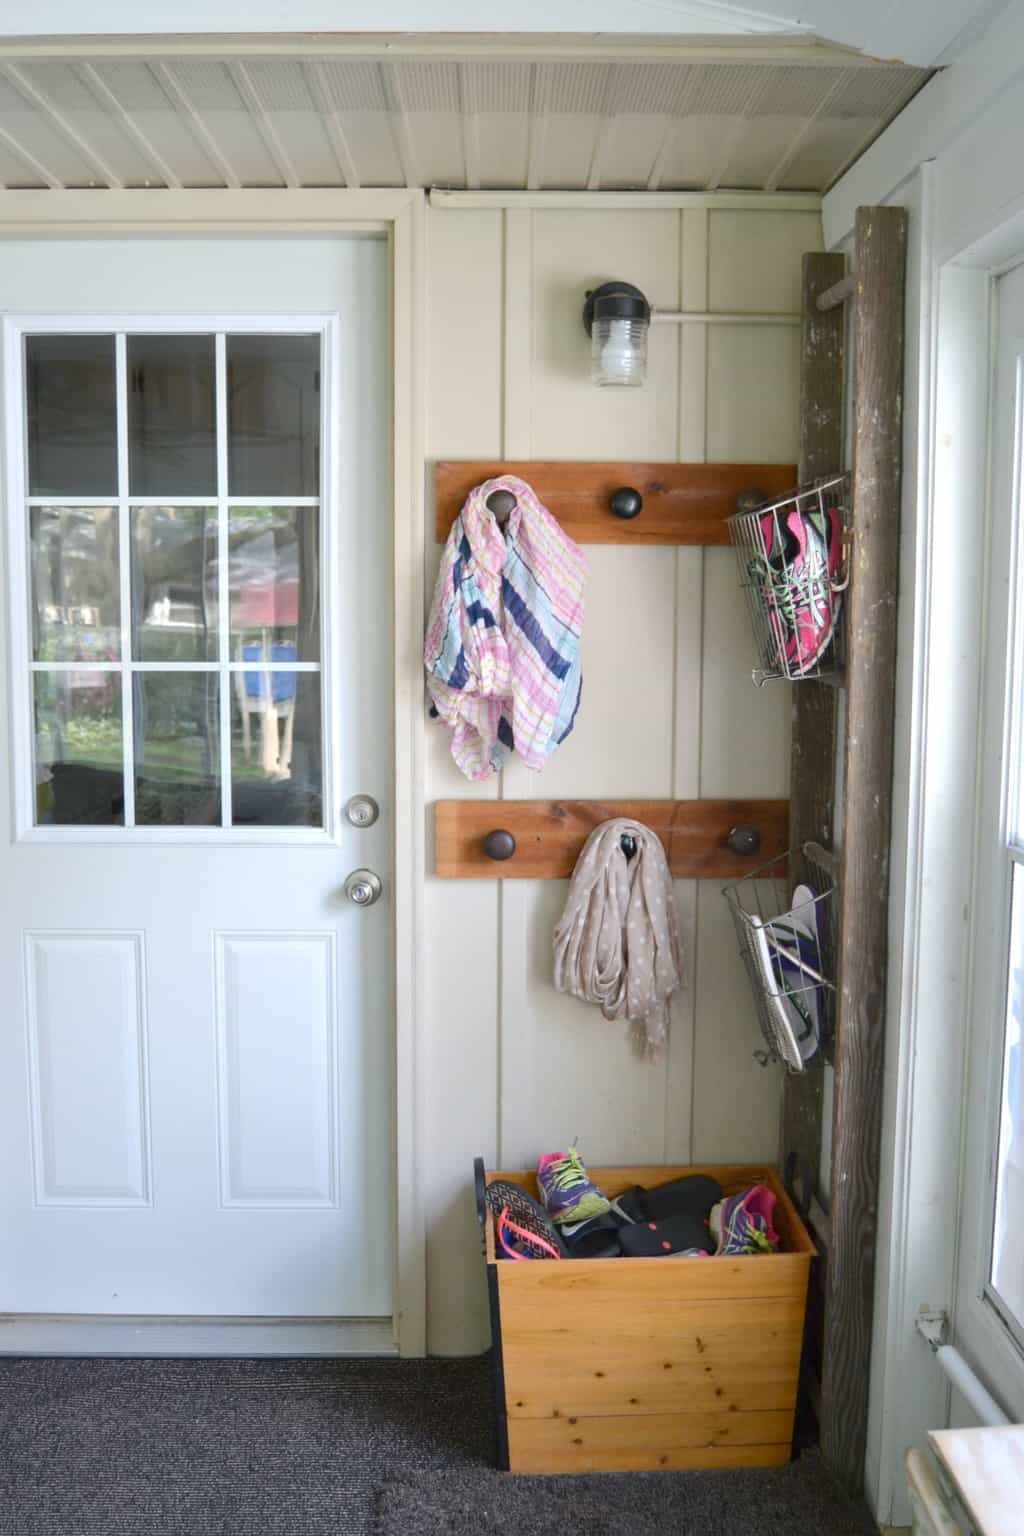
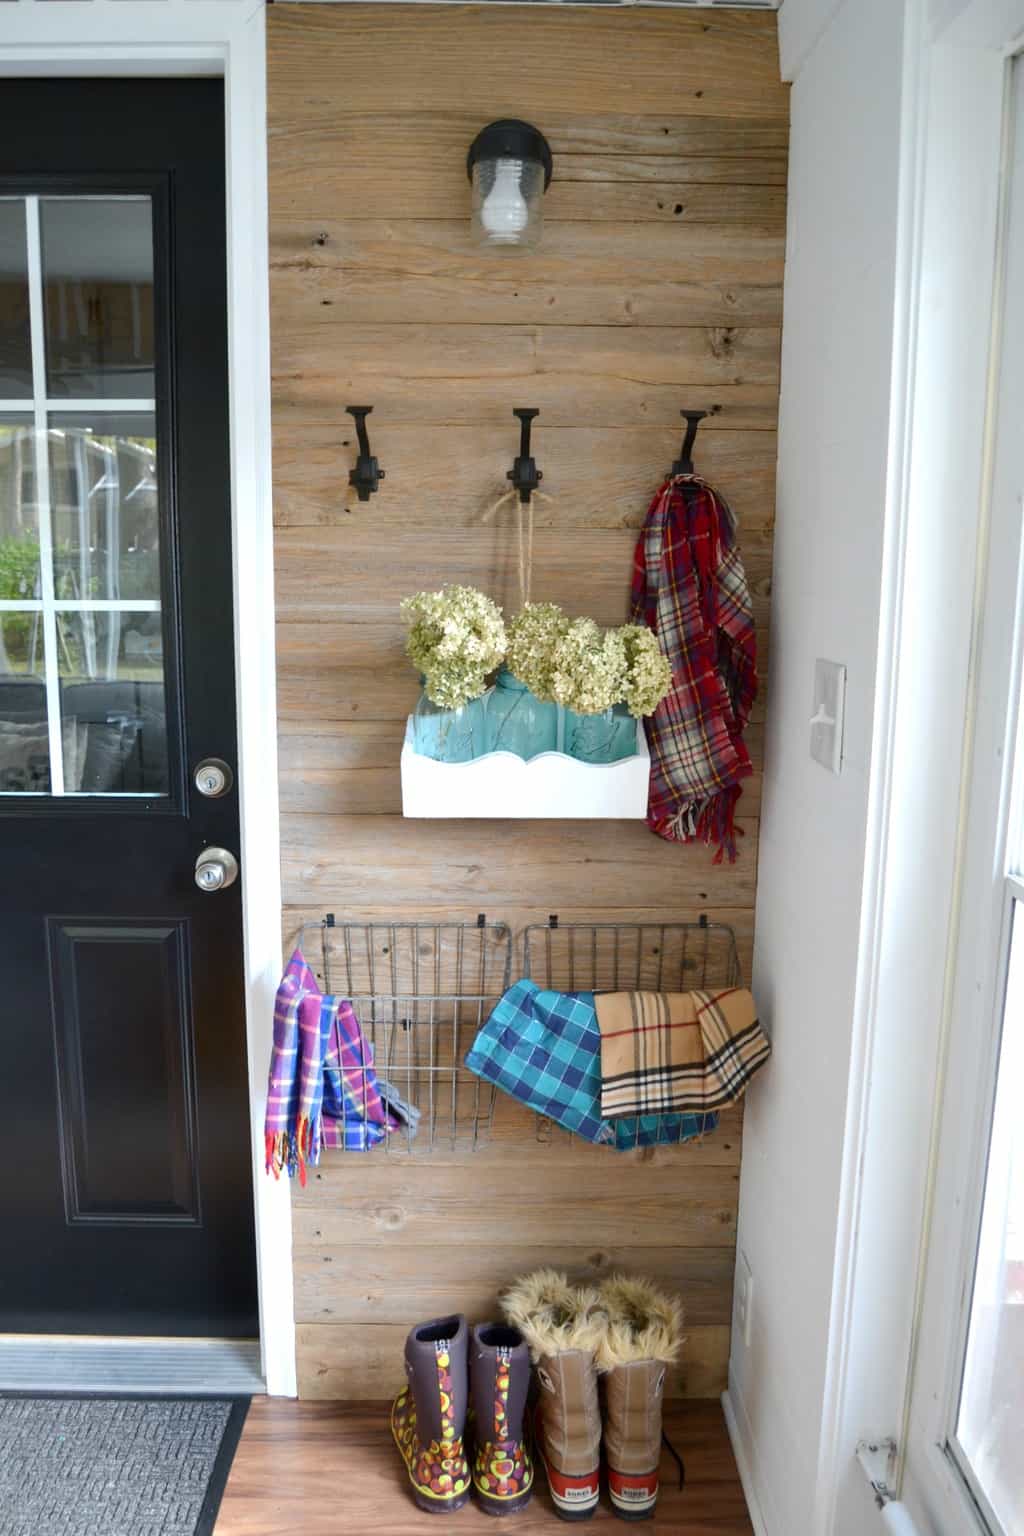
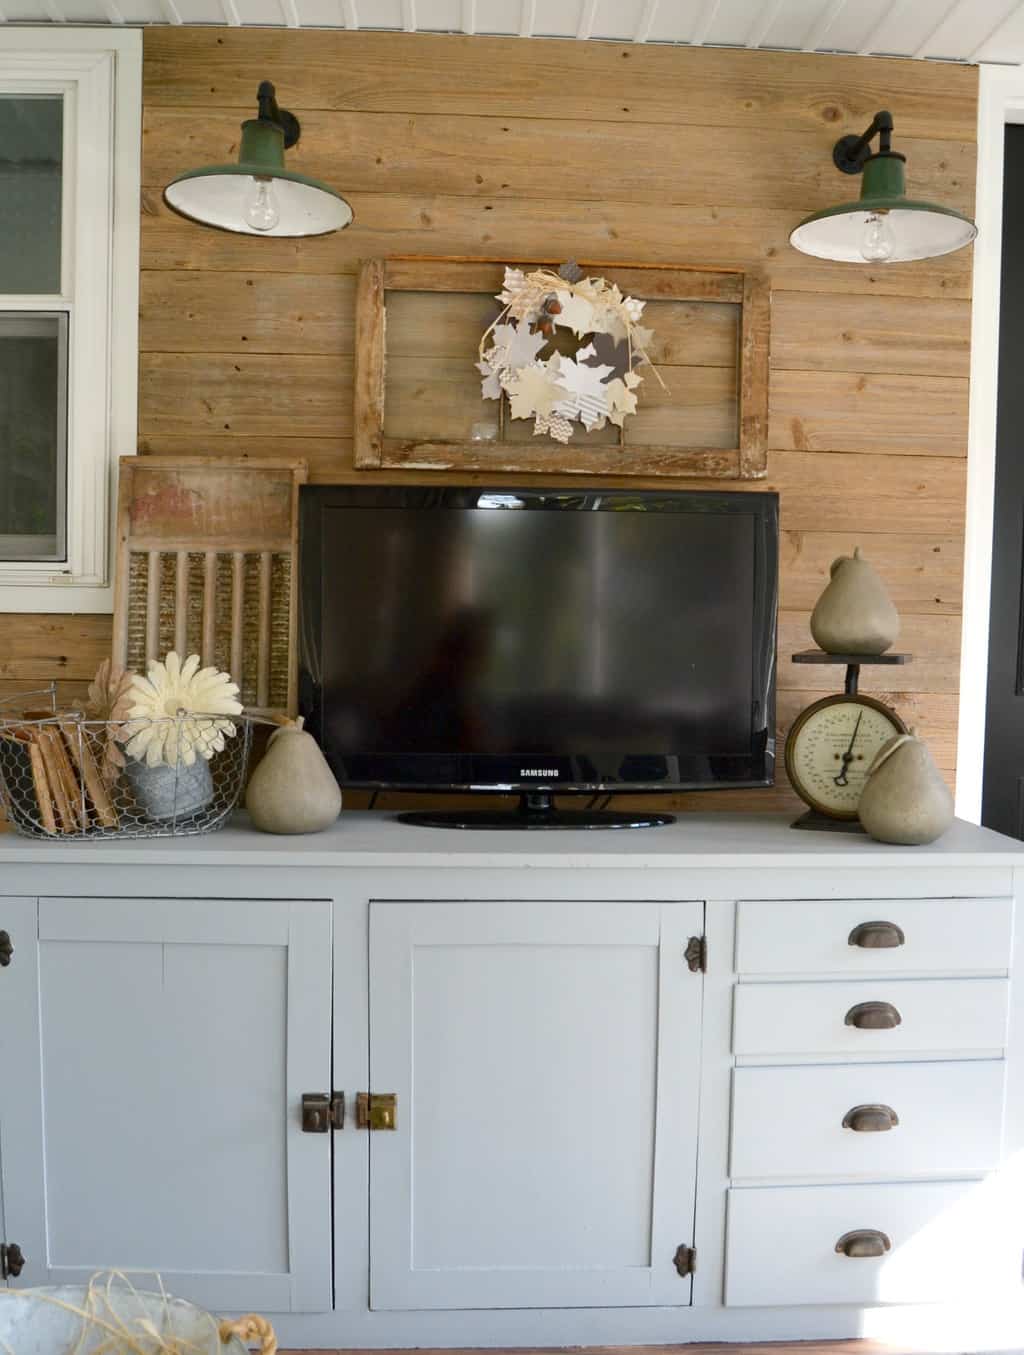
Once all the reclaimed wood wall was up, I was like a kid in a candy store. I could not wait to see how things would look against the weathered wood. We added Bungalow Double Coat Hooks from Hickory Hardware to the right side of the back door. They look incredible against the wood. I added my Thrifted Mason Jar Caddy to the hooks for some pictures and it has lived there ever since. It’s too pretty to take down.
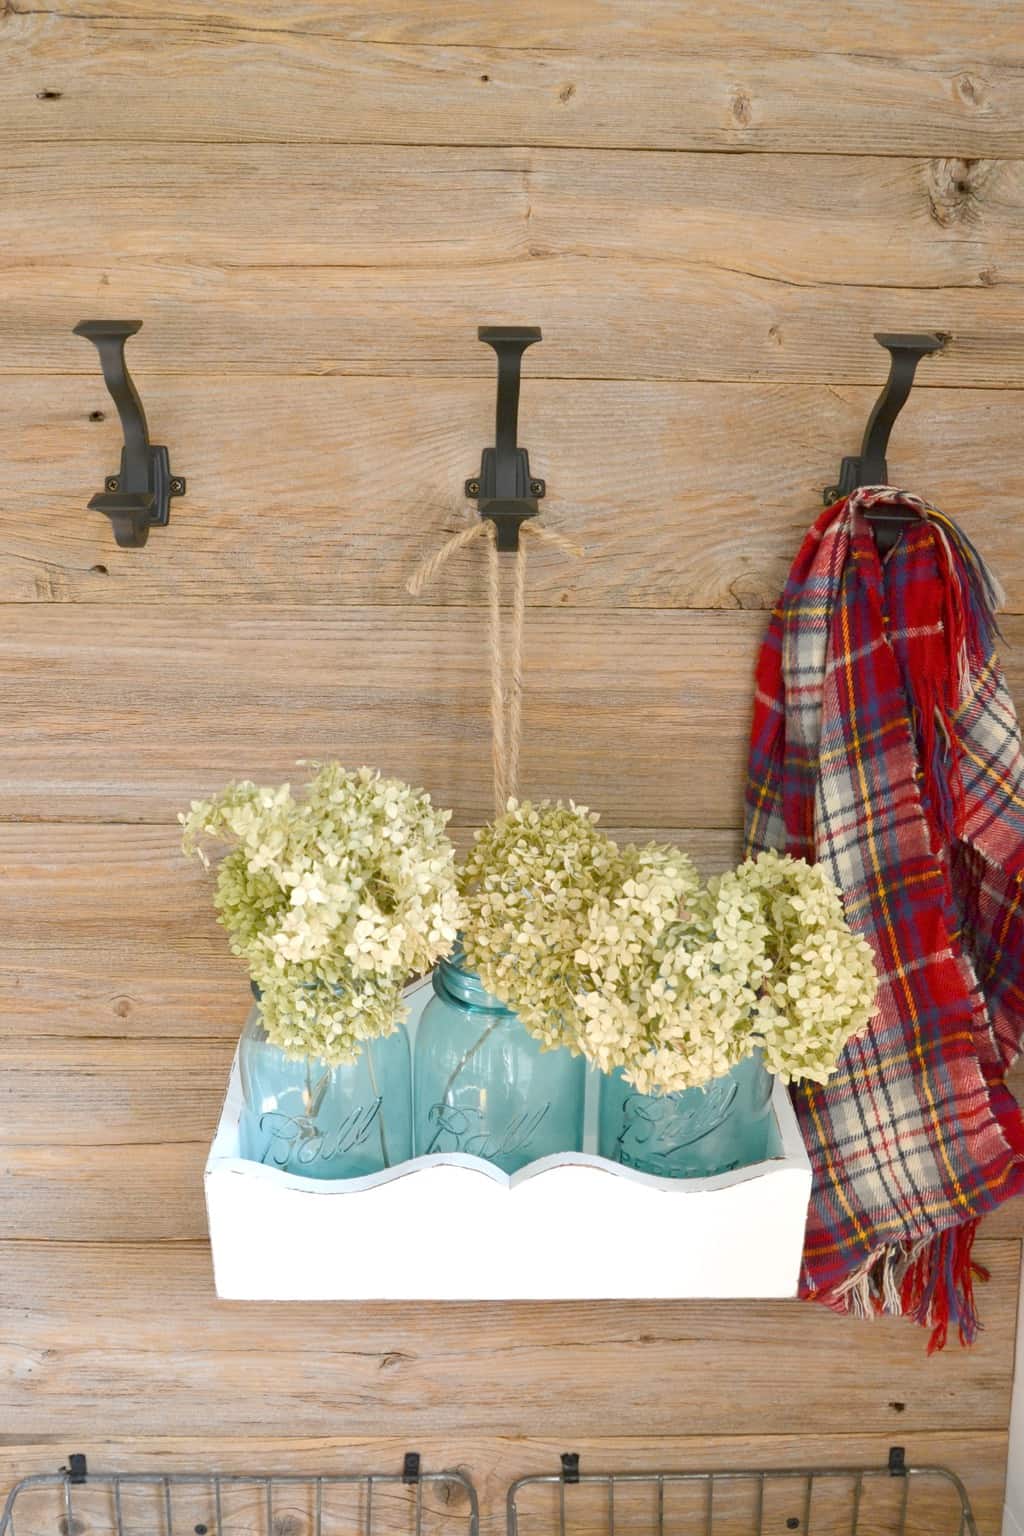
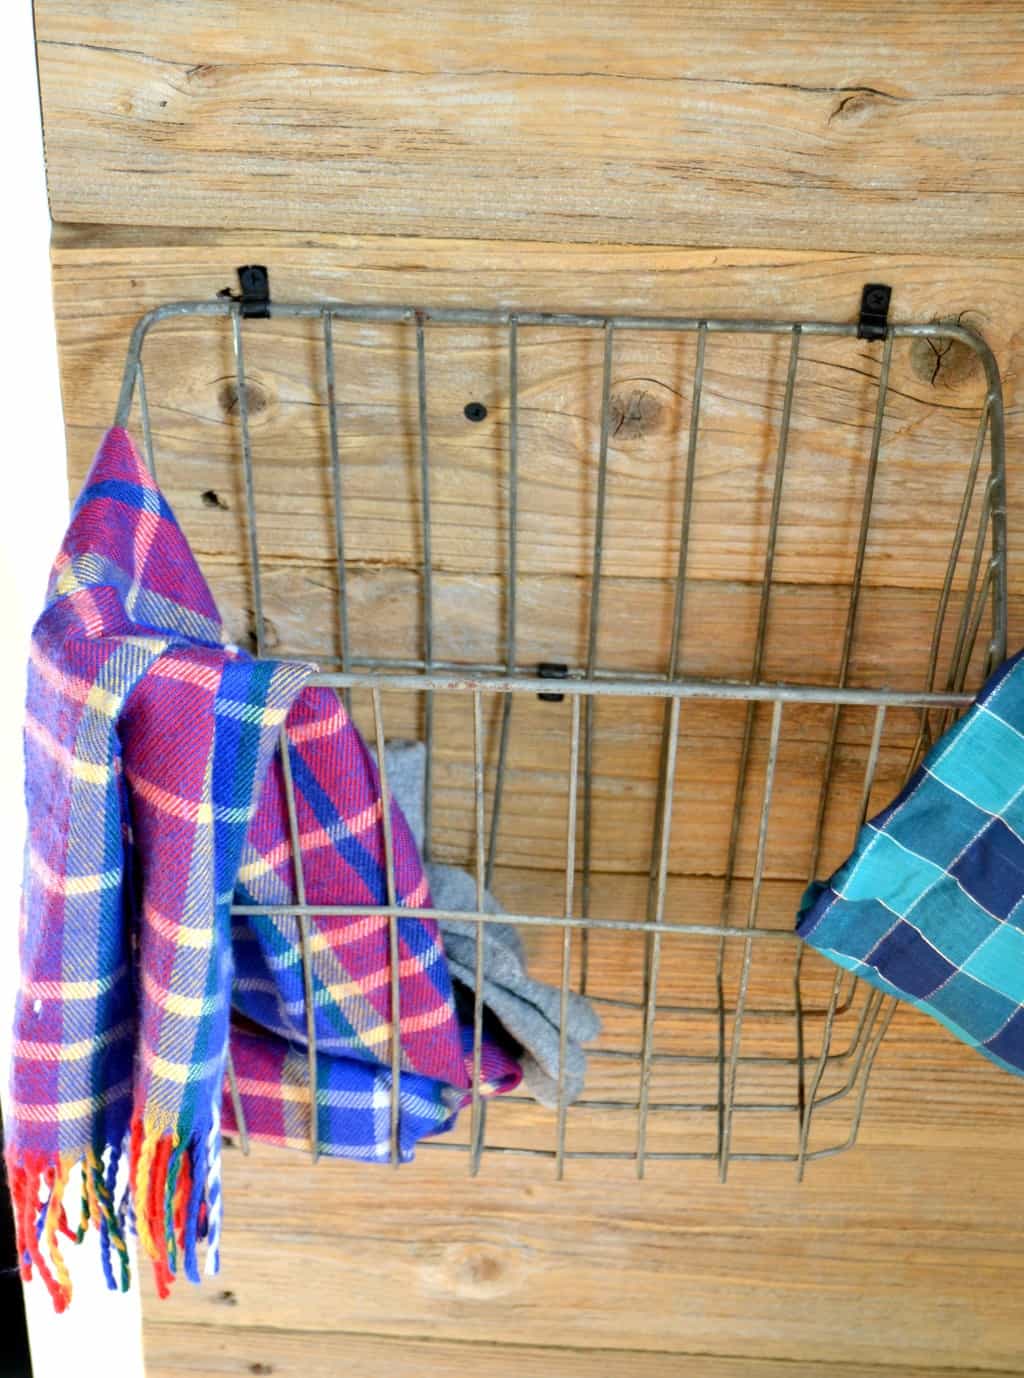
We used to have an old ladder with wire baskets in this little corner. I took the ladder down because it was too much, but I couldn’t get rid of the baskets. They are a life-saver for corralling mittens, scarves, flip-flops and hats. If I can get the kids to put all of that stuff in the baskets and not on the floor, it is a design necessity.
(Not to mention the old metal looks great against the wood. Just sayin’.)
I painted the back door black which was a little nerve-racking for me. It took me some time to pull the trigger. I couldn’t be happier with the color.
Isn’t it amazing what a free reclaimed wood wall can do to a space?
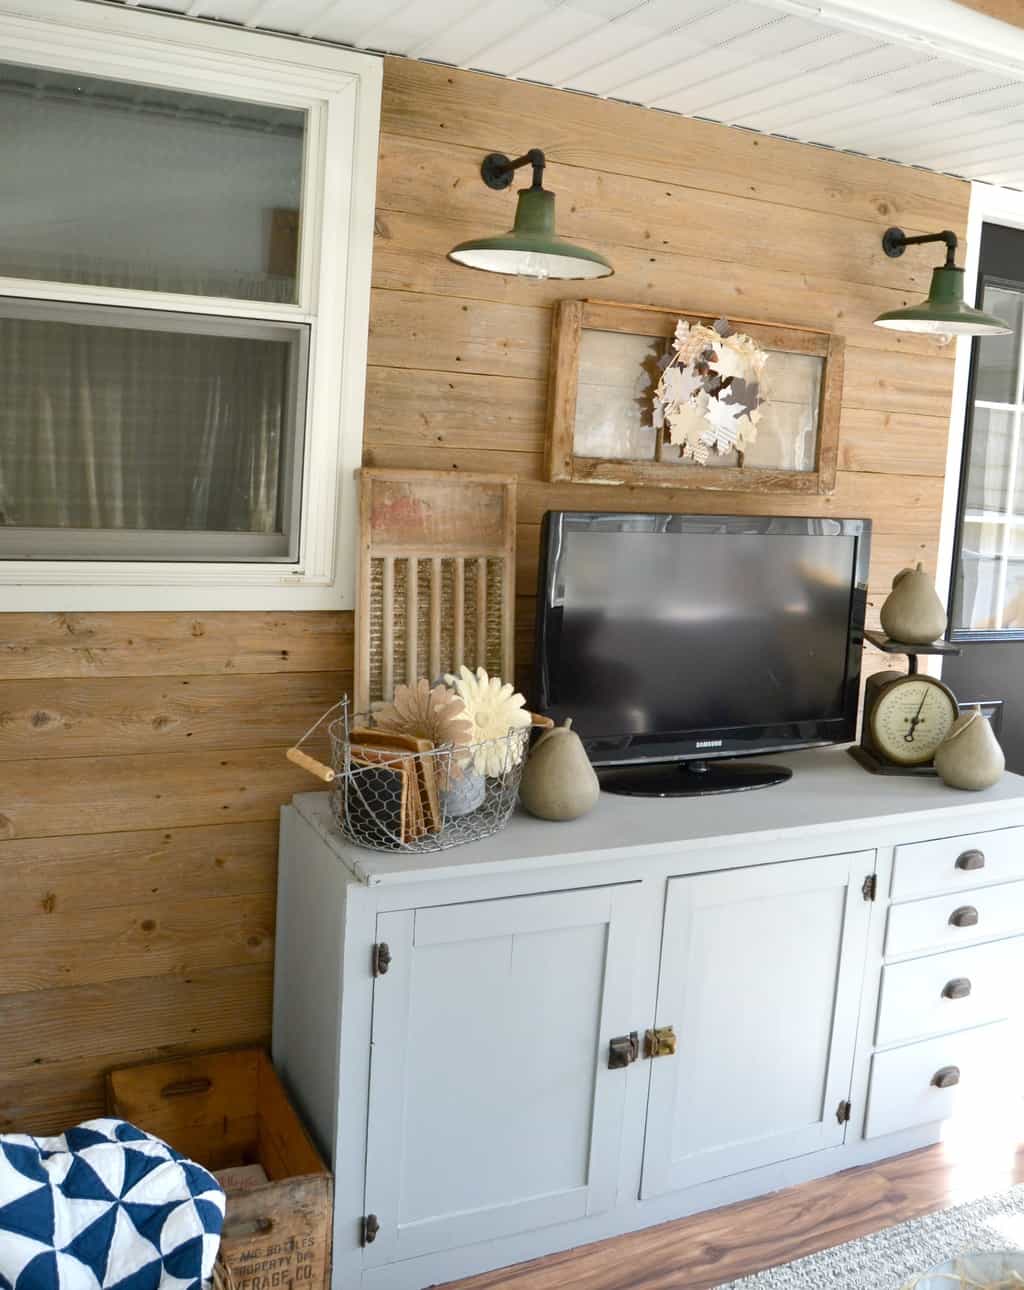
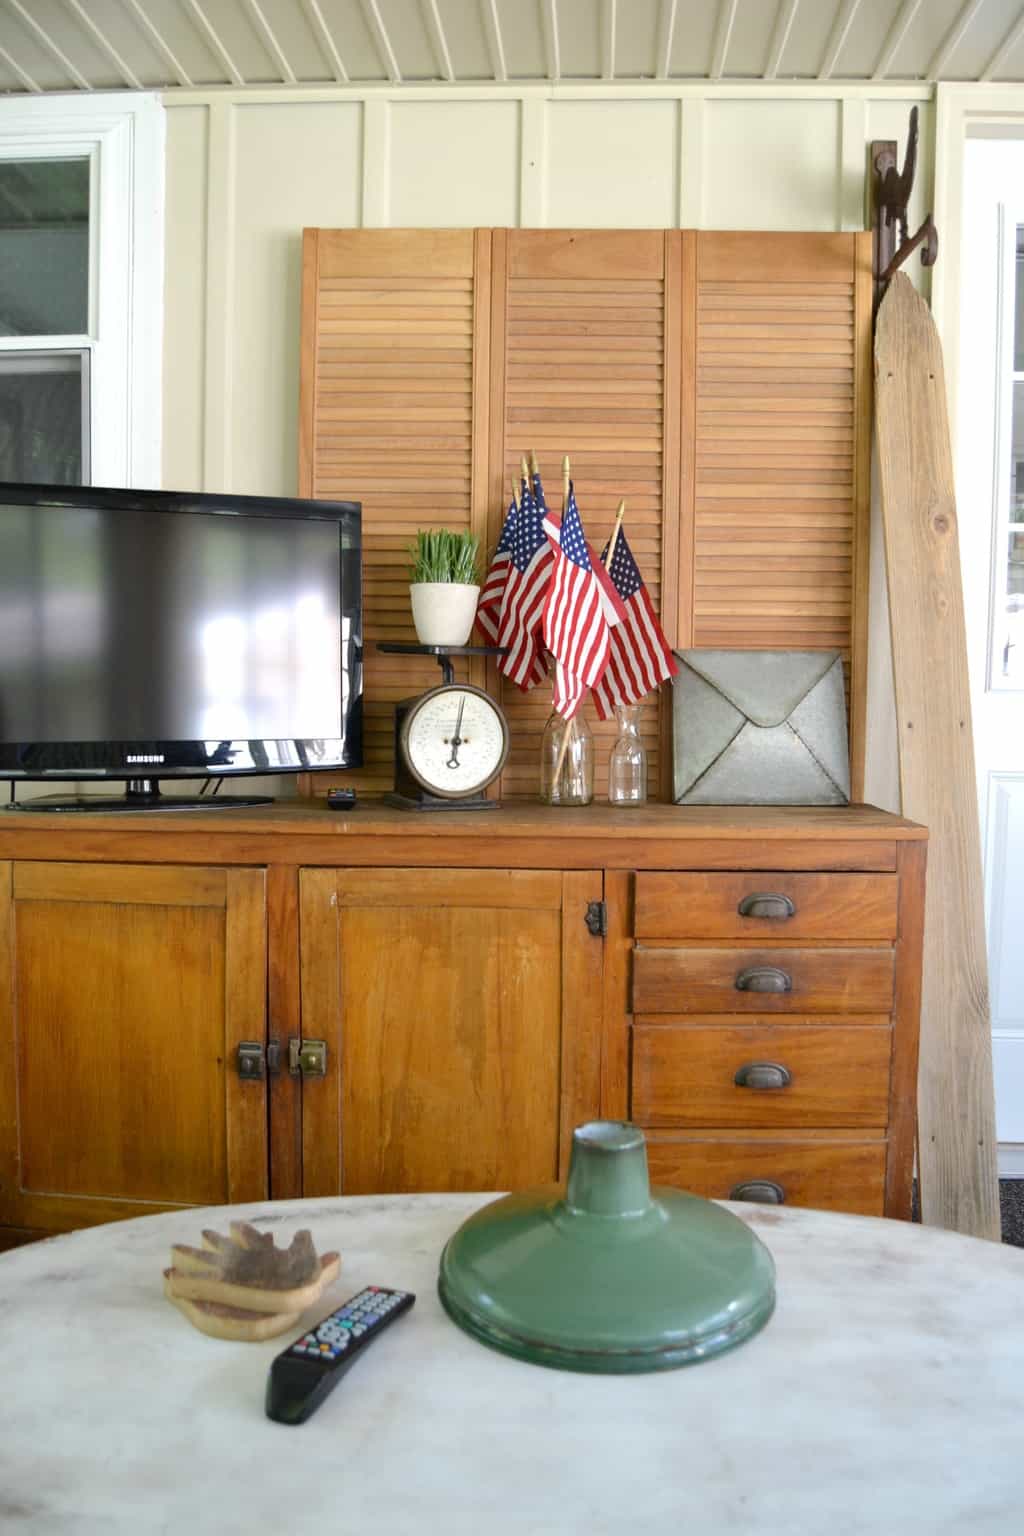
This is the view we have now as we veg out and watch our favorite games and TV shows. What a dramatic difference, huh?! When Matt and the kids continually say they love all the changes, I couldn’t be happier. I do all these crazy projects and come up with different decorating ideas for them….. for us. There really is a method to my madness. I want our home to be comfortable, cozy and fit our needs. It’s coming right along.
{Affiliate links are used in this post. You can read my disclosure HERE.}
What do you think of the porch? Do you have a reclaimed wood wall in your home? If not, what area do you think your home could benefit from one?
If you can’t find old fencing, I found some great peel and stick options online:
PIN THIS POST!
If you liked this reclaimed wood wall post, you will also like these ideas:
Custom Wood Signs – Our Family Room Sign
Spring Wreath: Made From Embroidery Hoops & Book Pages
Love your porch! It looks great. The reclaimed wood wall really makes everything pop. I would love to do this to one of my living room walls and have my husband on the look out for free fencing because, like all frugal people, all projects must wait for the right “deal” to come along. I too would love to paint my back door black but have also been to nervous to do it. Yours looks great and gives me more incentive to “just do it”. Thanks for inviting us into your home and providing the inspiration to try new things.
Thank you for stopping over Pam!
That. Is. Phenomenal! I would have never seen that gorgeous wall in that old fencing. Well done!
And you seriously need to snap a picture of your hubby working on all these projects! 😉
Haha! I need to tell him that.
This looks incredible Lindsay. I never thought about using old fence wood for a reclaimed wood wall. What an amazing idea!!
Thank you Sabrina!
Lindsay,
Your wall looks fantastic! I love how the aged wood hides the beauty of the wood underneath. Did you seal it in any way so that it will keep that beautiful color? Just love it…
Thank you! We love it! We did not seal it. We sanded it a little bit.
Gasp… that was SUCH a save! What an outcome! Your wall is so decadent! Bet your Aunt wants her fence back now… 🙂
I’ve featured you this weekend on DIY Salvaged Junk 354. Thanks for linking up! 🙂
Thank you Donna!
Did you do anything to the wood other than pressure wash it like sand it, stain it, or seal it?
We did sand it a little bit to make sure it wouldn’t give any splinters. We did not seal it though.
Very nice! Thank you
Thanks!
Just came onto your site. What a clever idea to use old fencing! You have inspired me to do the same thing in my bedroom. Now, if I can just talk someone into letting me pull down their old wood fence! Thank you.
Yes! It worked so great!
It looks amazing!!! You all did a wonderful job. I am getting ready to replace my fence and guess what I will be doing with the pickets…..
YAY!!!! Good luck! We love it!
Did you tear the fence panel apart and hang each board separately or hang the whole section at one time?
It looks great. Thinking about doing that to our mudroom. And hang a sliding barn door.
We did it board by board. It would be beautiful in a mudroom!
Love it! I think it would make our covered back porch a more inviting space to spend time. And especially if I could find enough wood to cover the ceiling beams. Thanks for the specific tips, too! Makes me think I actually might be able to accomplish this project!
We are so happy we did it! Made a huge difference at no cost! 🙂
How did he put the wood strips up for the boards to get screwed into? I thought the idea was not to screw anything into the house itself. Thinking a out doing this to our porch at our summer home but don’t want to screw it into the front of the house (log cabin siding) and was thinking about using pallets for the wood and doing the beams on the open ceiling. Thoughts?
He did screw those boards into the house. Since the porch is all enclosed and there weren’t that many, we did it that way. That project sounds amazing!!!
LOVE THIS!! Awesome job to both you and Matt!…. one question though, what made you choose to use the small mason jar light? I’m a huge fan of the old metal barn lights and was just curious… the simplicity is perfect but I would not have thought to use that type of light fixture. Again, I absolutely love this concept and it turned out great ~ thank you for sharing!
We pulled the lights from an old barn. I couldn’t wait to use them in our home. The porch wall was perfect for them. We also pulled a pair of larger ones that we put in my office: https://mycreativedays.porch.com/diy-farmhouse-office-sign/
Love this wall! I have a cedar t&g fence over 25 years old that I want to use for same project. Do you have any photos of how it looks where the 6 foot fence planks butt together? Also when you pressure washed the boards, did it bring out the grain of the wood or just remove the surface aging?
Thank you so much!
I don’t have photos of that. We just used a small spacer in between them. I think Matt used a dime for the spacer.
The washing removed all the dirt and debris and cleaned it up well. I think it brought the wood grain out. We sanded it a bit after the washing too.
Good luck with your project.