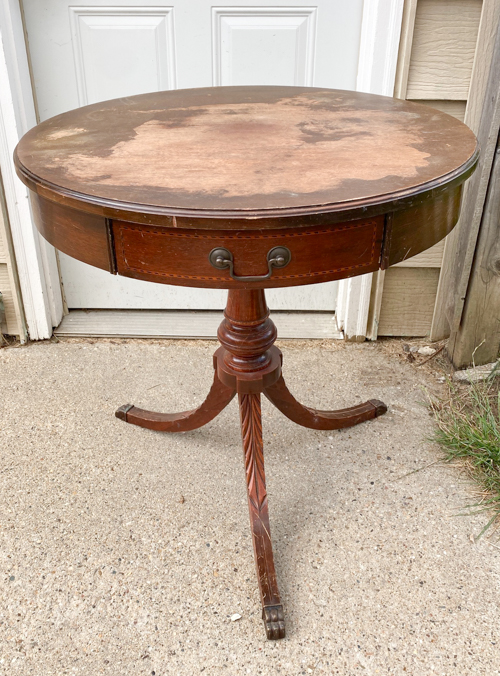
If you’ve been following along with my DIY furniture projects, you know I can’t resist a good vintage piece that needs some love. When I spotted this mahogany drum table at my local thrift store, I knew it was perfect for a mahogany drum table makeover. The wood was beautiful but scratched, faded, and a little sad. I wanted to revive it while preserving its classic charm.
This post will share the exact steps I took, the supplies I used, and some tips so you can tackle your own mahogany drum table makeover with confidence.
{Affiliate links are used in this post. Click on any of the underlined links to find the products I am talking about. You can read my disclosure HERE.}
Supplies I Used for This Mahogany Drum Table Makeover
- Screwdriver (to remove hardware)
- Sander
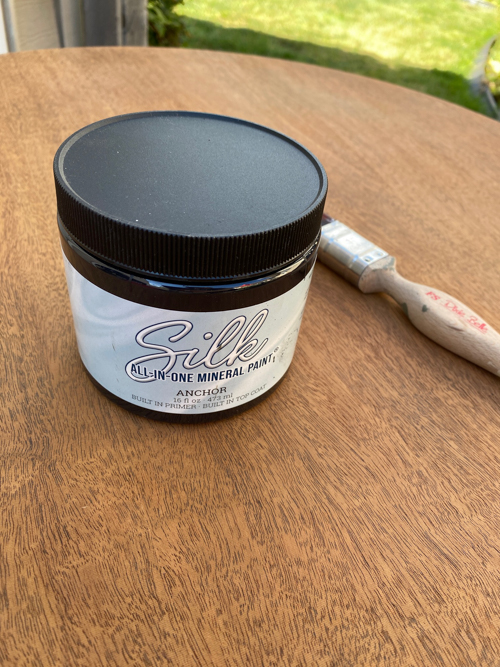
- Paint
- Stain
- Topcoat
- Clean rags or a tack cloth
- High-quality paintbrush
Tutorial For This Mahogany Drum Table Makeover
Step 1: Clean and Prep
The first step in any makeover is prep work. I removed the drawer pull and gave the entire table a good cleaning. To see how I clean a piece of furniture before a makeover, click over to my post HERE. Years of grime can keep your paint, stain, etc. from adhering, so don’t skip this step!
Step 2: Sand
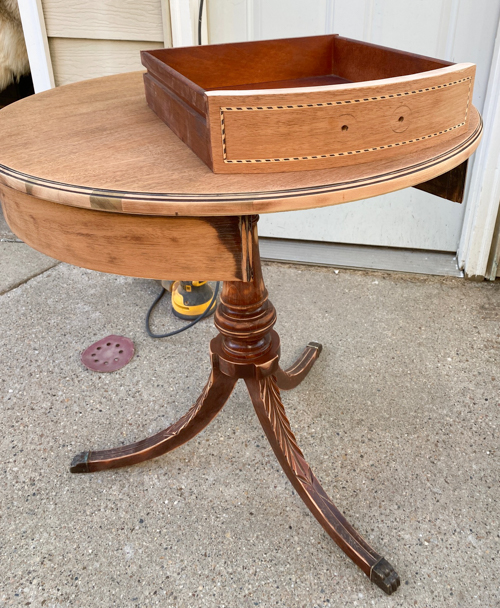
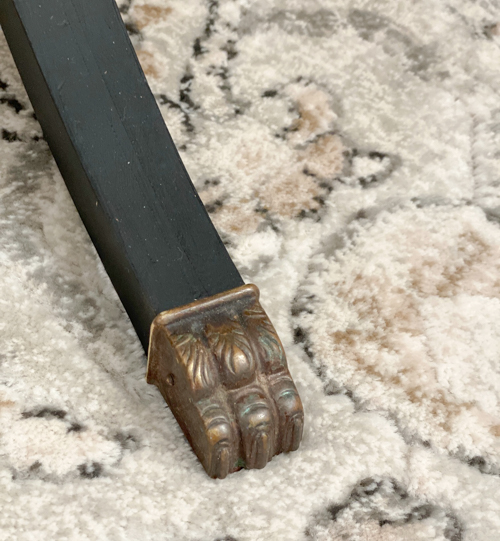
I carefully sanded the surface with 120-grit sandpaper. The top and sides sanded down so easily to the bare wood. It was a dream to sand. I did want to paint the bottom of the table, so I just gave the legs and “stem” a scuff-sand.
Step 3: Stain or Paint
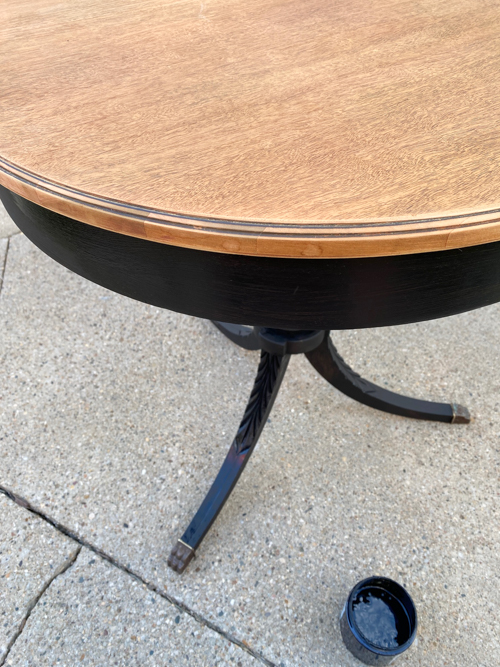
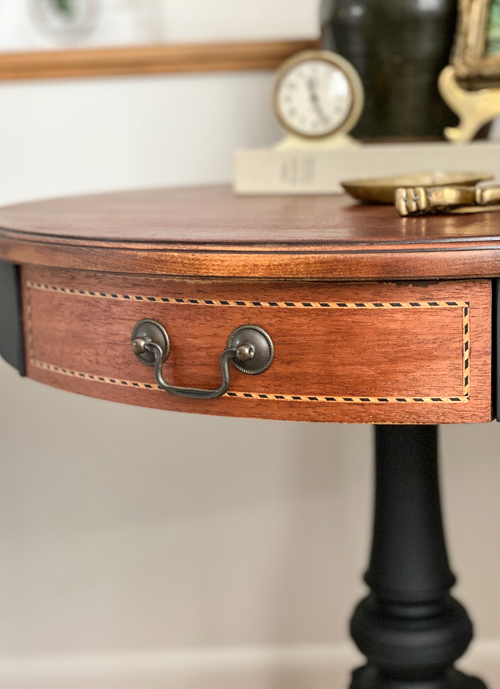
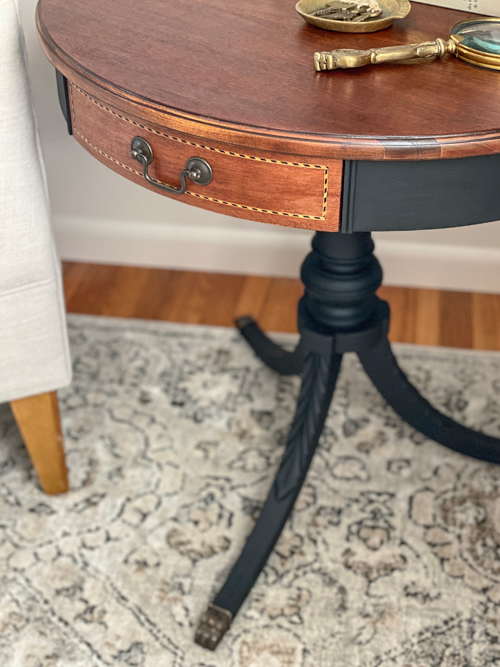
Once all the sanding was done, I took a damp cloth and cleaned away all the sanding debris. I rinse out my rag a few times and continue this until my rag comes away clean so I know I got it all cleaned up. Once that was dry, it was time for paint and stain. I painted the sides and the bottom of the table in “Anchor”. I stained the top in this color.

Step 4: Protect the Finish
Once the stain dried completely, I applied two coats of a clear topcoat for protection. I didn’t have to do that to the painted portion because the paint I chose has the primer, paint, and topcoat built right in. It saves me so much time and effort on my projects.
Step 5: Reattach Hardware
The last step was reattaching the drawer pull.
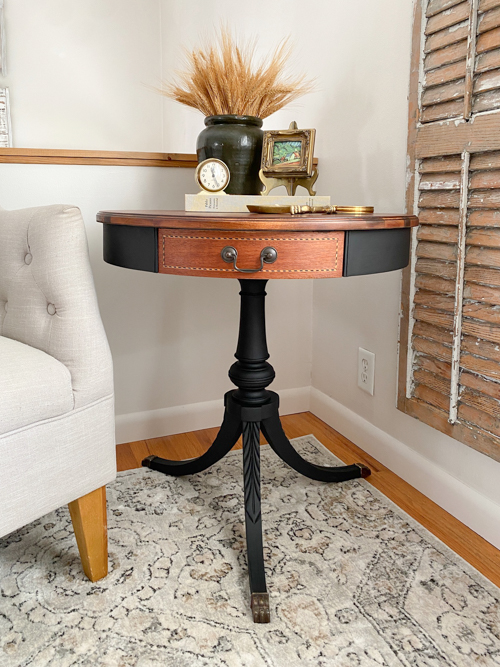
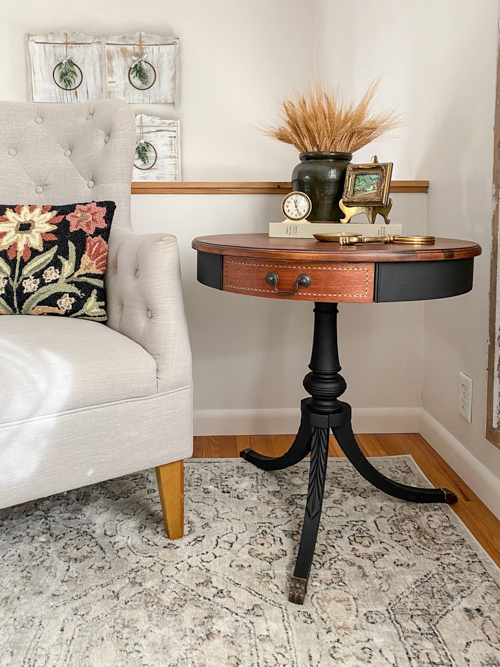
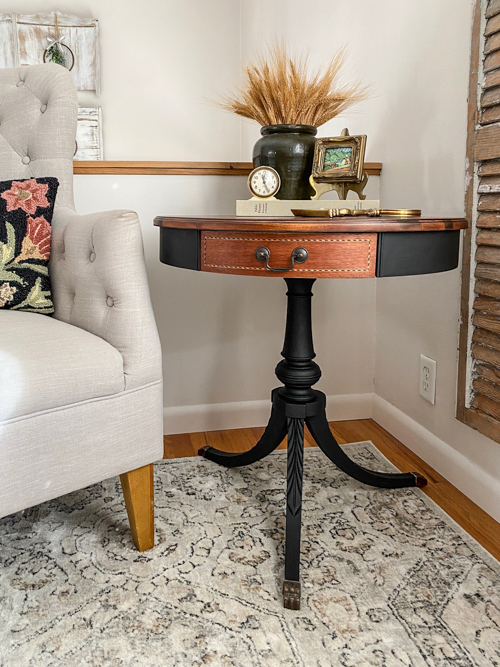
The Before & After
The transformation blew me away! This mahogany drum table makeover took a dated, worn-out piece and turned it into a statement table. I LOVE the mix of the black paint with the stain on this one. It is masculine and rich-looking.
Tips for Your Own Mahogany Drum Table Makeover
-
Take your time with sanding. This makes the biggest difference in the finished look.
-
Test your stain on the underside of the table first to see how it will look.
-
Always apply thin, even coats of finish for the best results.
With a little work and the right supplies, you can do your own mahogany drum table makeover and save money compared to buying new furniture.
PIN THIS POST!

If you liked this makeover, you will also love these:
French Country Buffet Makeover
1 Comment