• Home
  • About
    • Disclosure
      • Terms And Conditions
      • Cancellation Policy
      • Refund Policy
      • Shipping Policy
    • Contact Me
    • My Favorites
      • Our Toolbox
      • Paint Colors
      • My Amazon Store
  • Categories
    • Seasonal
      • Easter
      • Mother’s Day
      • Spring
      • Fall
      • Halloween
      • Thanksgiving
      • Christmas
      • Valentine’s Day
    • DIY
      • Repurposed
      • Furniture
      • Crafts
    • Our Home
    • Recipes
    • Crafts
      • Party Planning Ideas
      • Kids Activities
  • Resources
    • Furniture Flipping
      • The Ultimate Furniture Flipping Program For Beginners
      • The Creative Squad
      • The Furniture Flippers Social Media Planner
      • Furniture Flipping Assessment
      • Furniture Flippers E-Book
      • Mini Courses
      • Quick Guide To Painting Furniture
      • Types Of Paint For Furniture
    • Organization Tools
      • Organization Challenge
      • 5-Day Organization Challenge
      • 12 Monthly Purge Checklists
      • Sentimental Purge Guide
    • Thrifting | Decorating
      • 105 Things To Throw Away | Recylce | Sell | Donate For Instant Decluttering
      • 50 Things To Donate For Instant Decluttering
      • 50 Things To Throw Away For Instant Decluttering
      • How To Decorate Your Home On A Yard Sale Budget
      • 11 Quick Tips To Organize A Profitable Yard Sale
    • Consultations
    • Join My Newsletter
    • Become An Affiliate
  • Podcast
  • Furniture Flipping Course
  • Learn With Me
  • My New E-Book!
    • Facebook
    • Instagram
    • Pinterest
    • RSS
    • Twitter
    • YouTube

My Creative Days

DIY blog sharing our home, budget decorating tips with repurposed farmhouse decor.

DIY White End Table Makeover

December 29, 2015 51 Comments

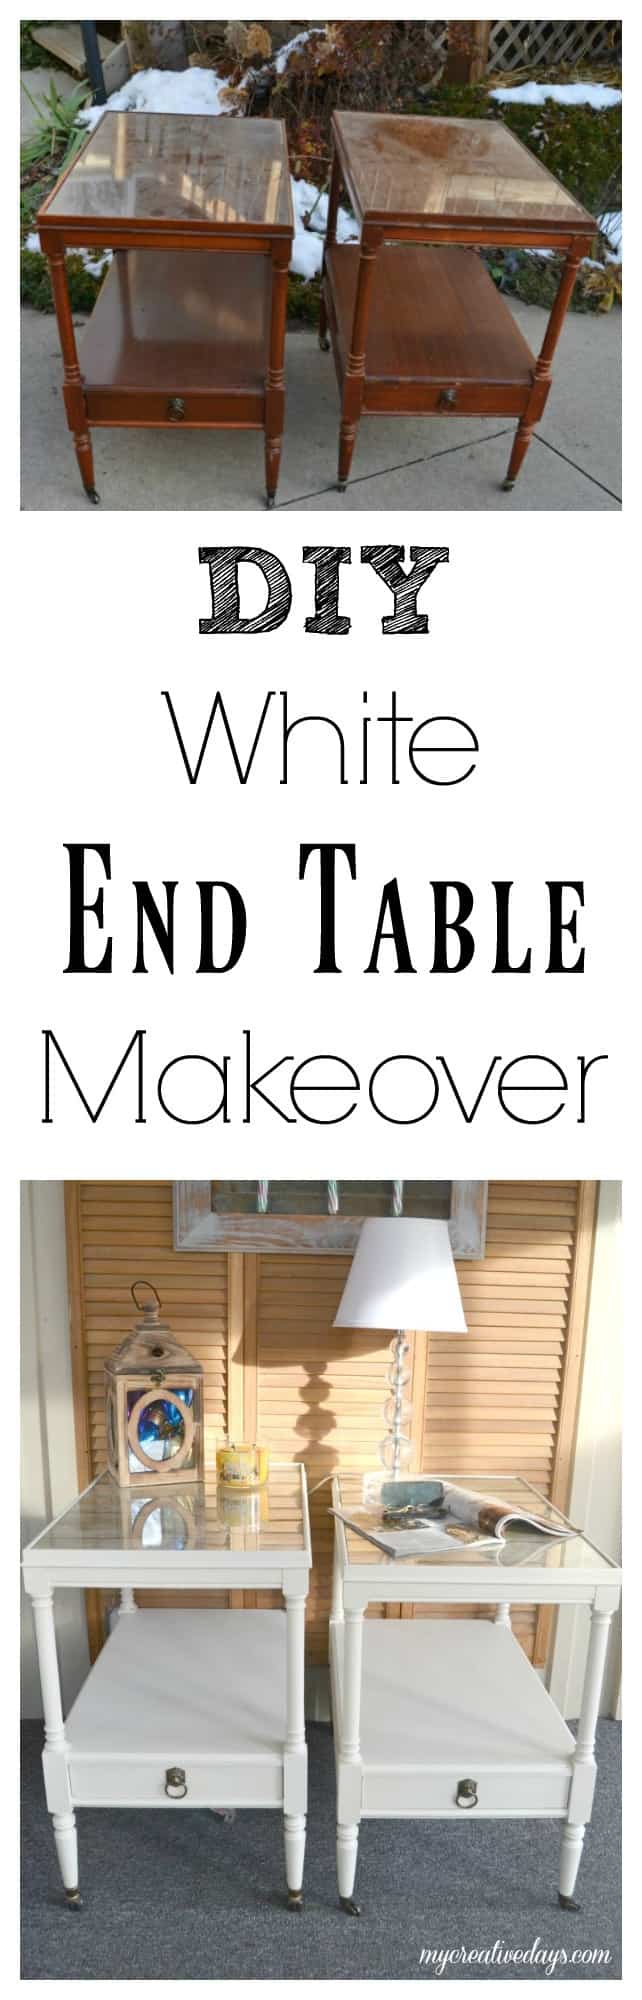
I hope you all had a wonderful Christmas! It is crazy to think that it is already over. Every year, I get more and more bummed because there is such a huge build up for it and then it goes by in a flash. Not fair. My kids are dreading going back to school and I am dreading getting back to the daily grind. It is so nice to have the break from practices, school and schedules to regroup and wind down with the family. The one thing that isn’t slowing down around here are the projects. Even though they keep me busy, it never feels like work because I enjoy doing them so much. I could do them day in and day out and not get tired of it. My latest project was this DIY White End Table Makeover. 

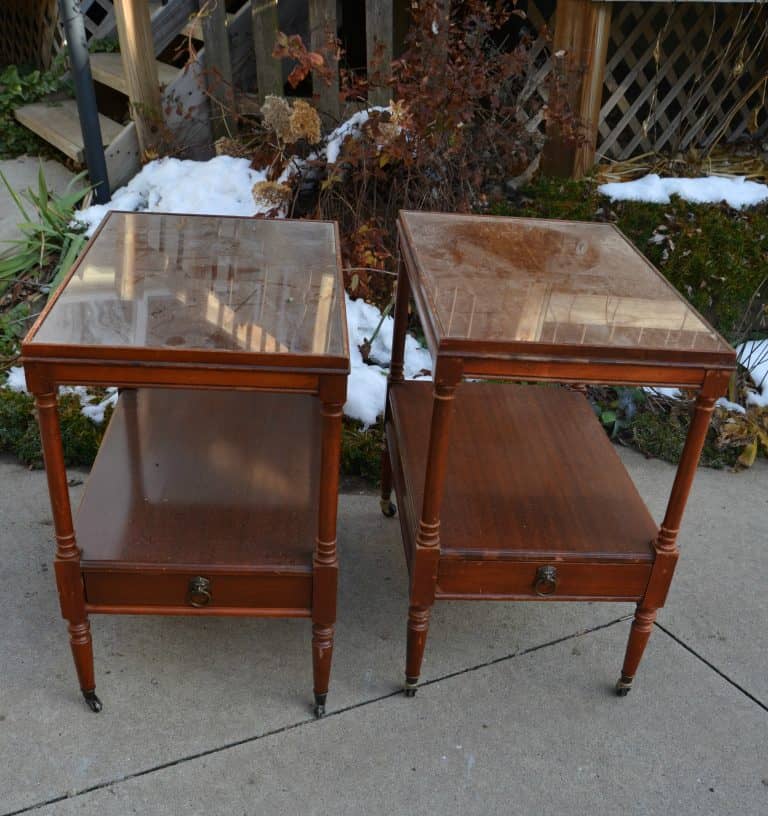
I found these tables at a local thrift store.

This white end table makeover took a pair of outdated tables and turned them into something current and so pretty!

I am usually not an “end table” person.

I don’t look for them to make over, but these were different.

This white end table makeover took a pair of outdated tables and turned them into something current and so pretty!

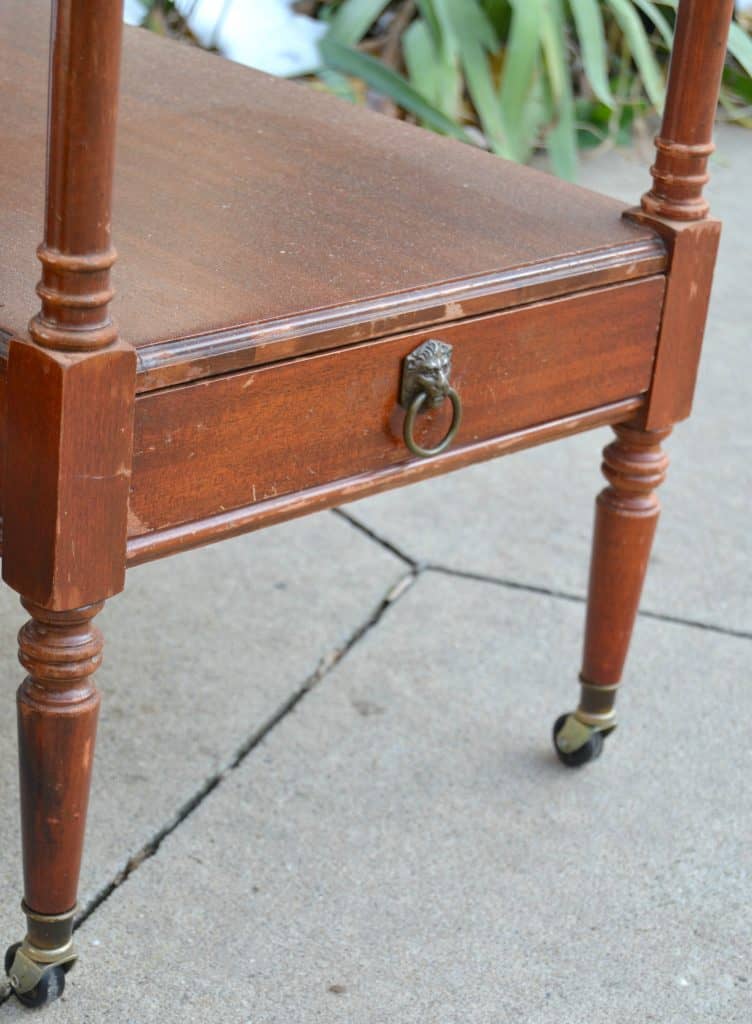
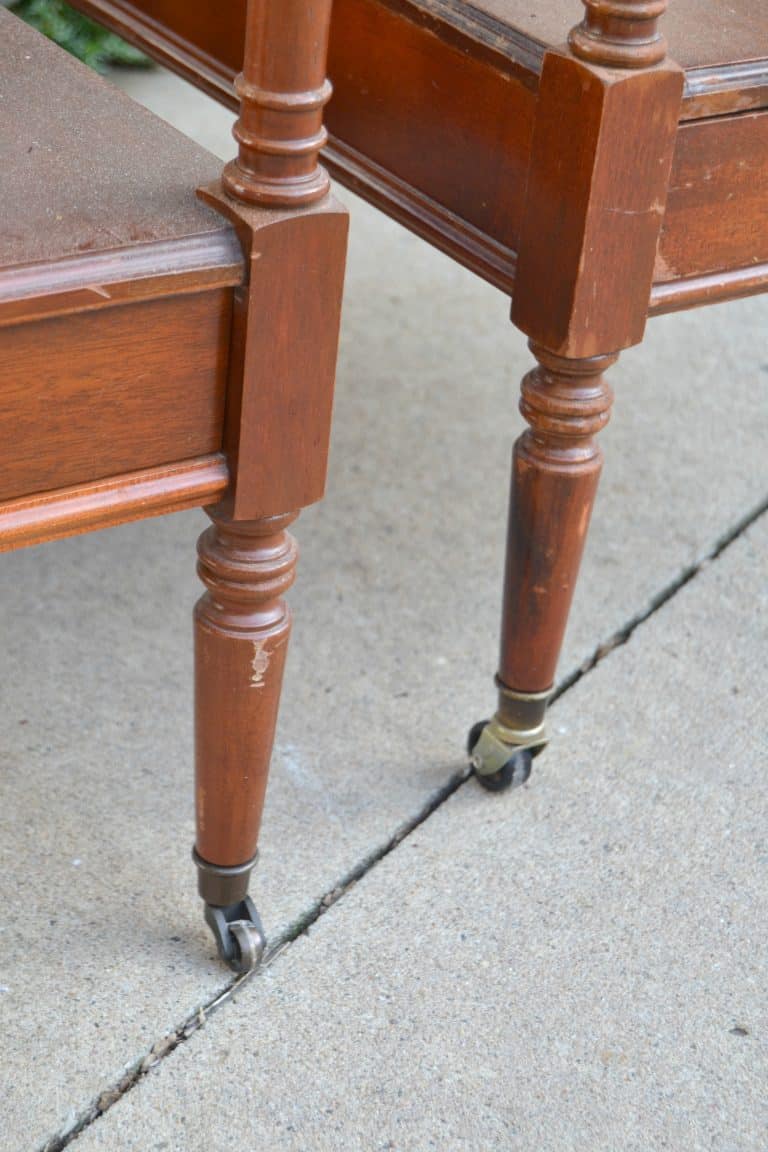
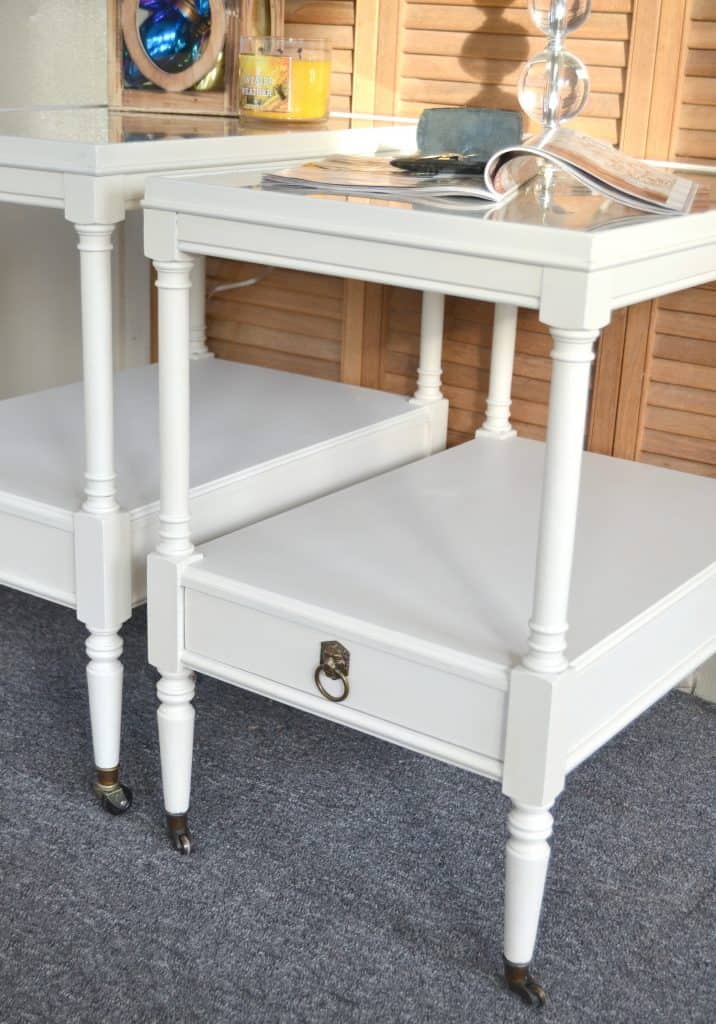
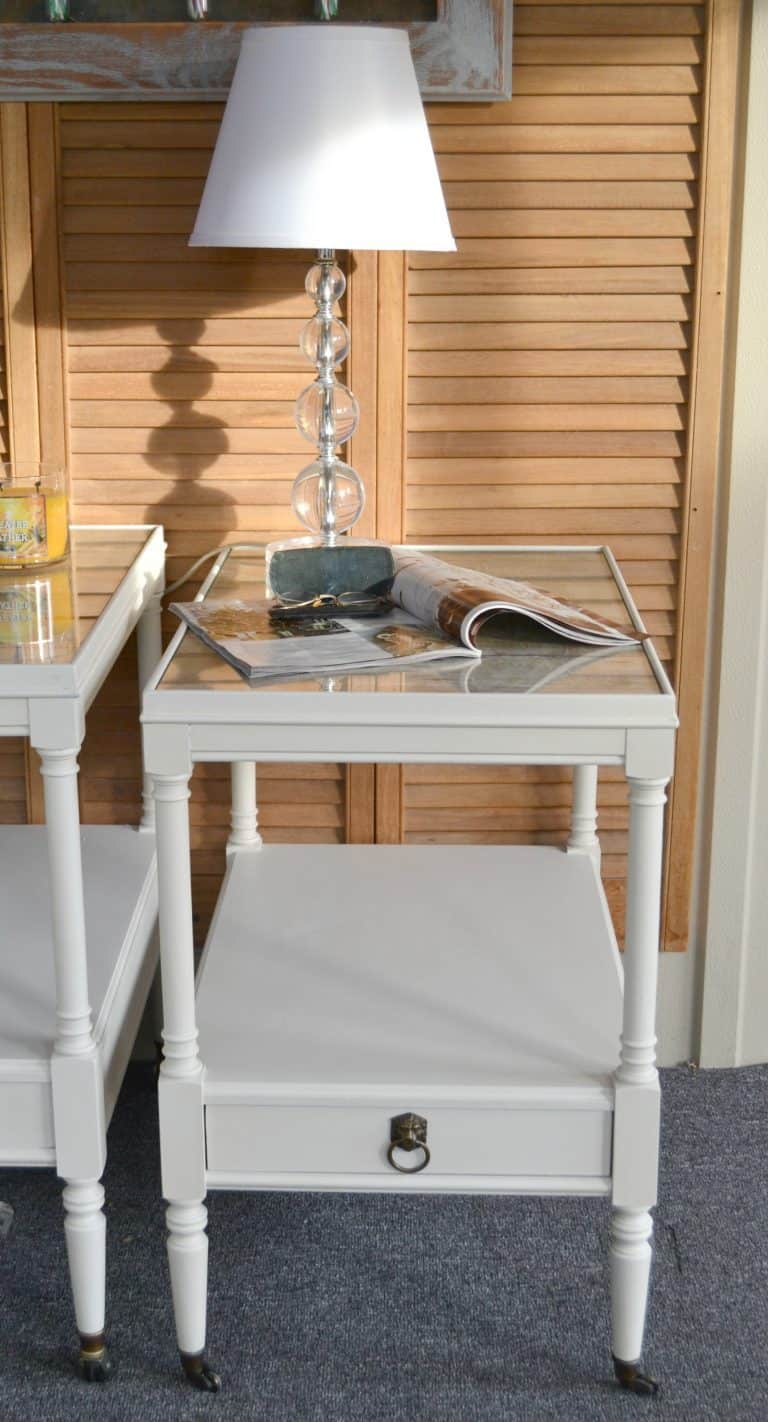
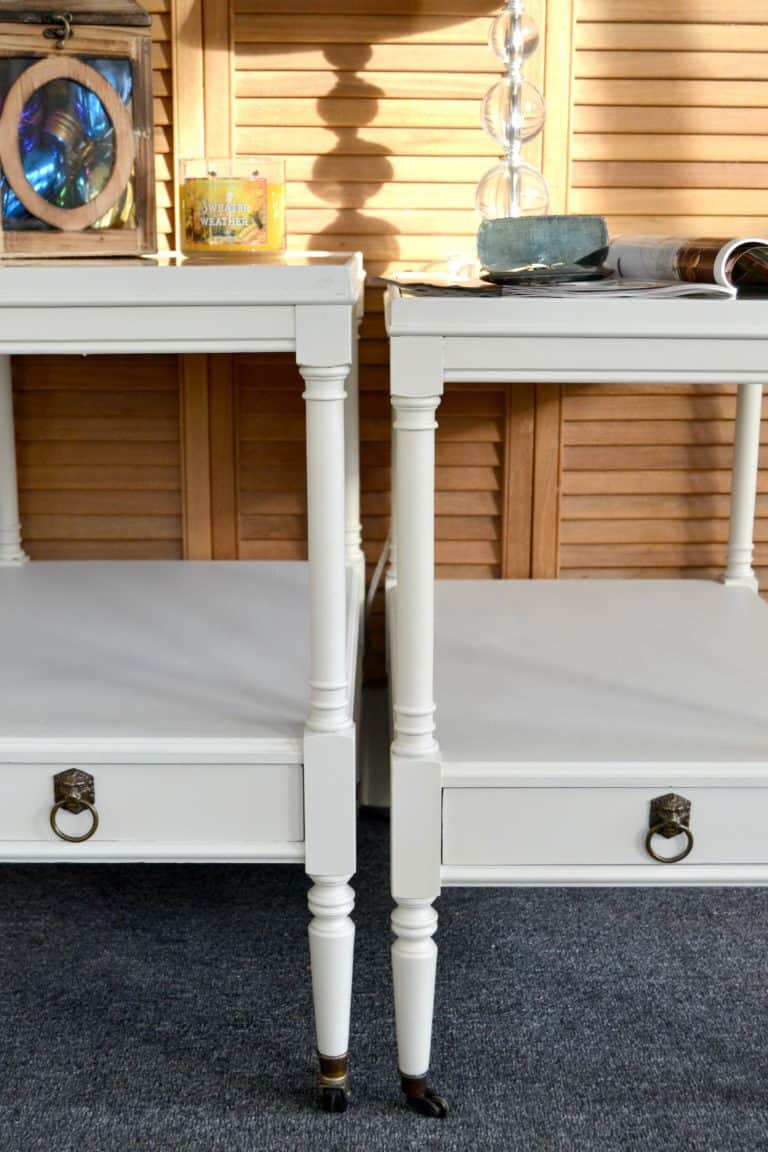
Hello, lion hardware and casters!

Furniture was half off that day so that helped too.

This white end table makeover took a pair of outdated tables and turned them into something current and so pretty!

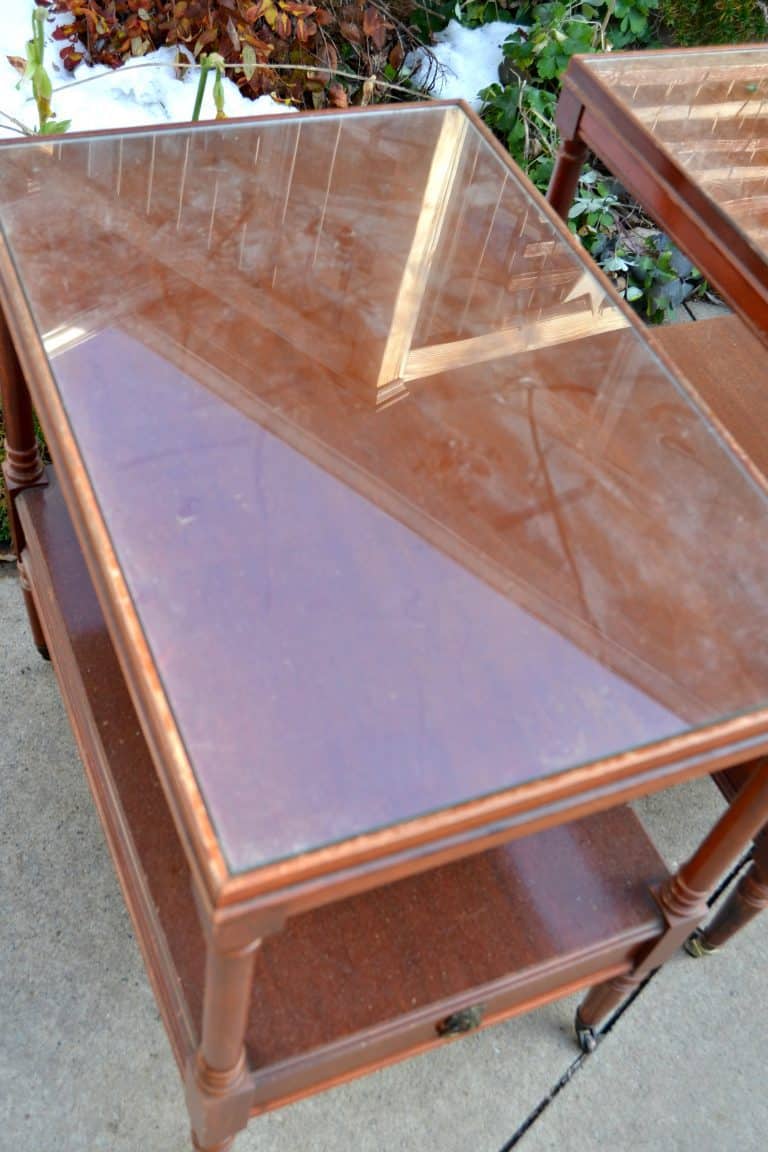
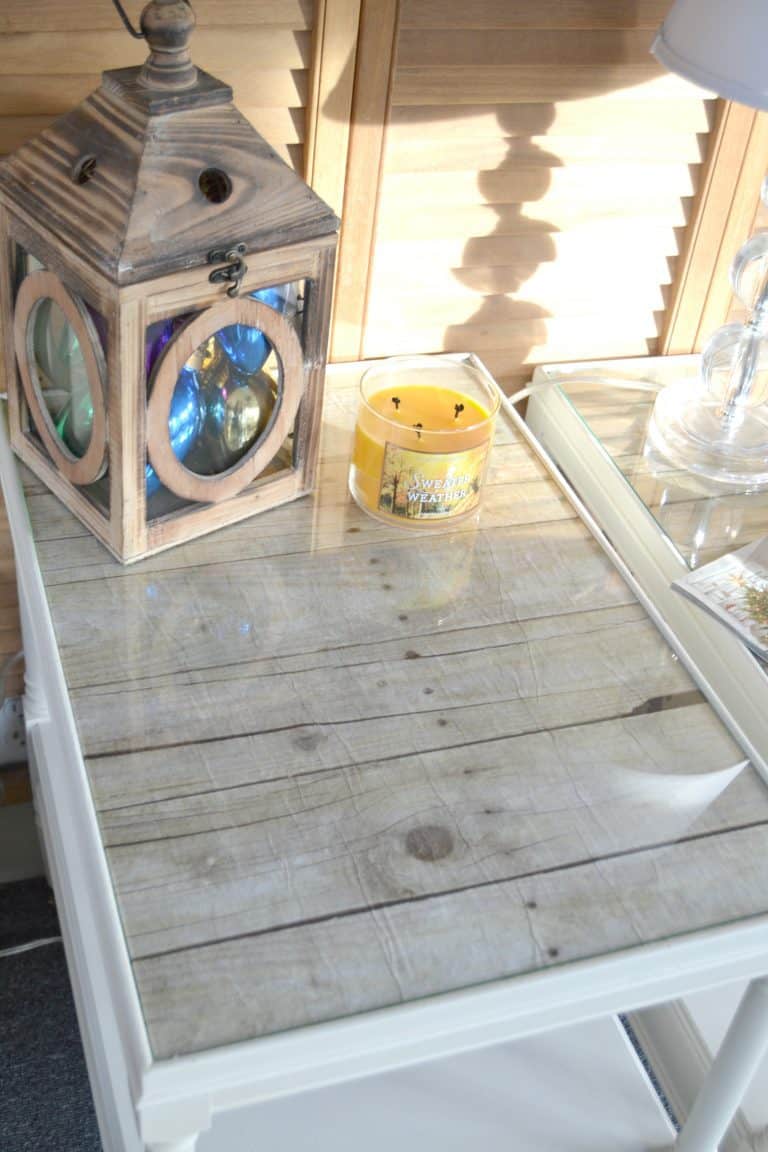
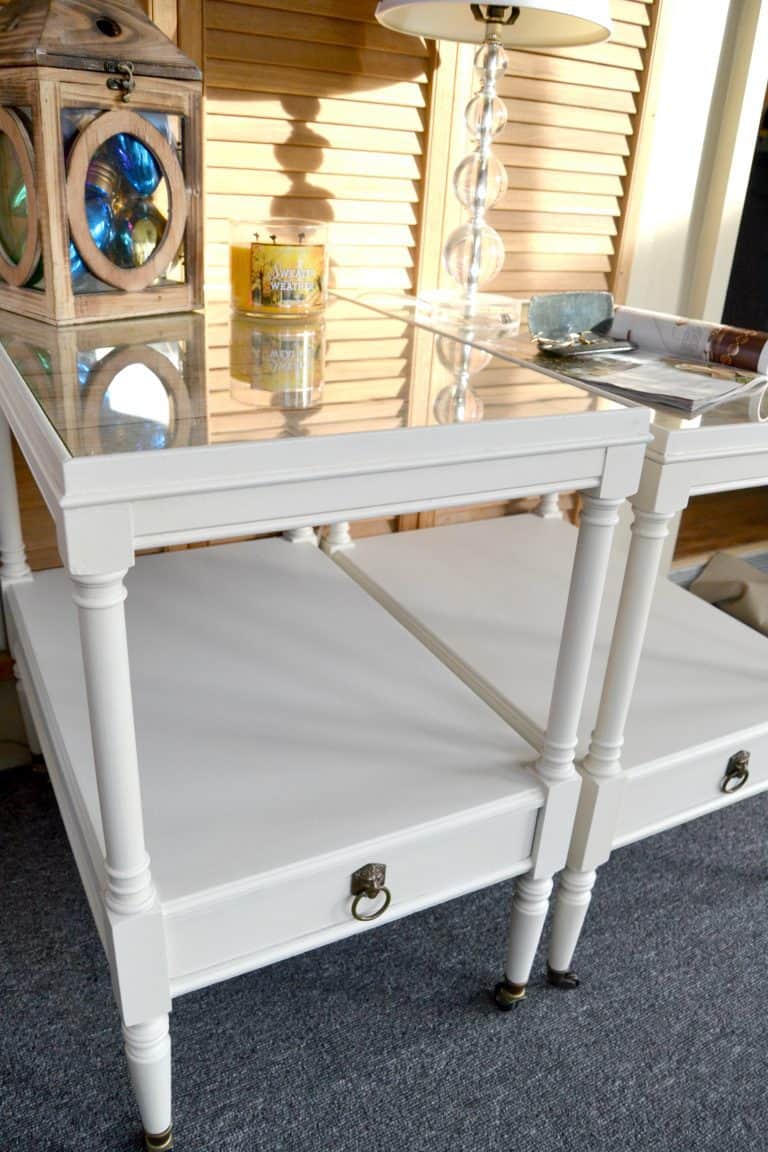
Another bonus was that they had glass tops. I started imagining all the possibilities I could put under the glass.

This white end table makeover took a pair of outdated tables and turned them into something current and so pretty!

{Affiliate links are used in this post. You can read my disclosure HERE.}

Supplies Used In This White End Table Makeover:

Paint Deglosser

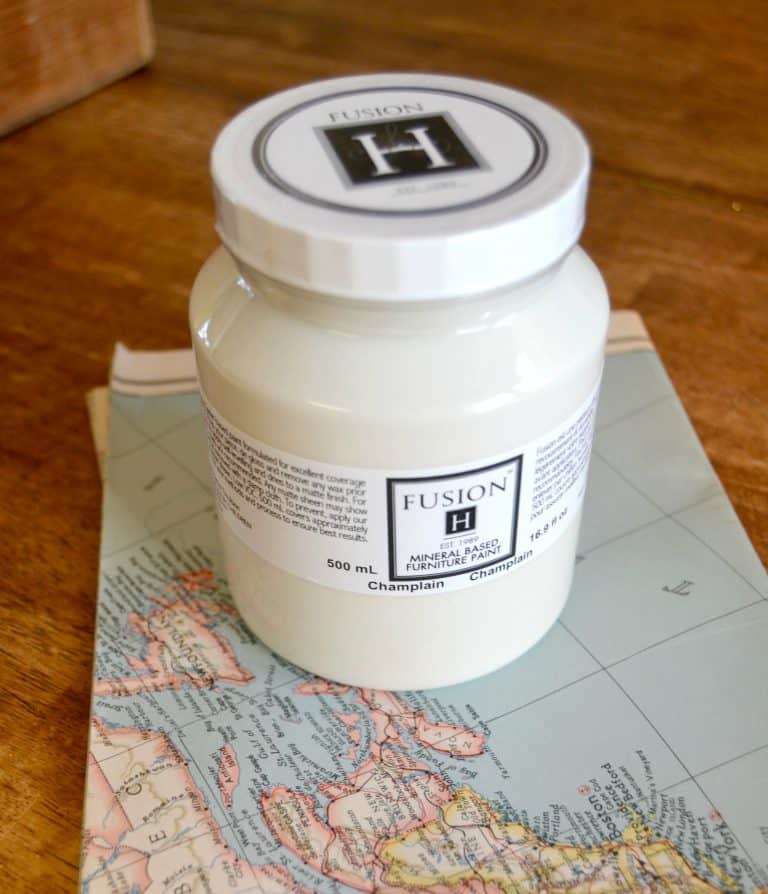
Fusion Mineral Paint – “Champlain”

Wood Grain Paper

To start the makeover, I used Paint Deglosser. These tables were a lot more “shiny” and “finished” than I usually like so the Deglosser worked great at prepping them before I painted them.

This white end table makeover took a pair of outdated tables and turned them into something current and so pretty!

I was super excited to give Fusion Mineral Paint a try.

Their color choices are so great! I decided to go with “Champlain” for these tables.

This white end table makeover took a pair of outdated tables and turned them into something current and so pretty!

They look like different tables!

This white end table makeover took a pair of outdated tables and turned them into something current and so pretty!

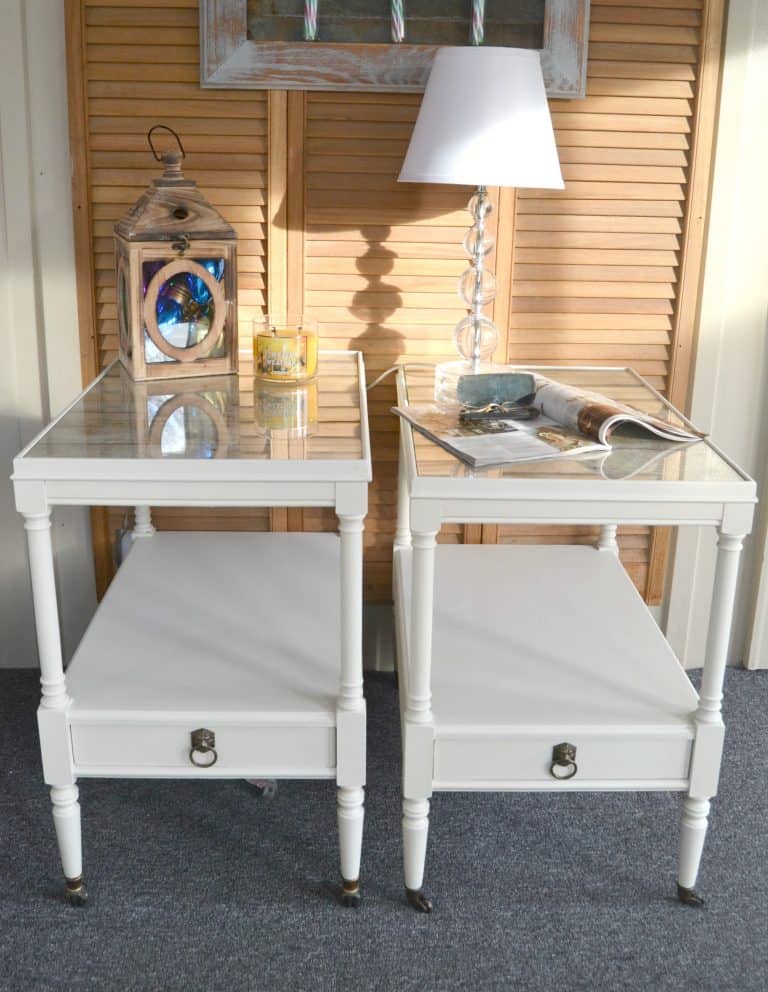
The “Champlain” color is a perfect, country white color.

It highlights the hardware and casters so well.

This white end table makeover took a pair of outdated tables and turned them into something current and so pretty!

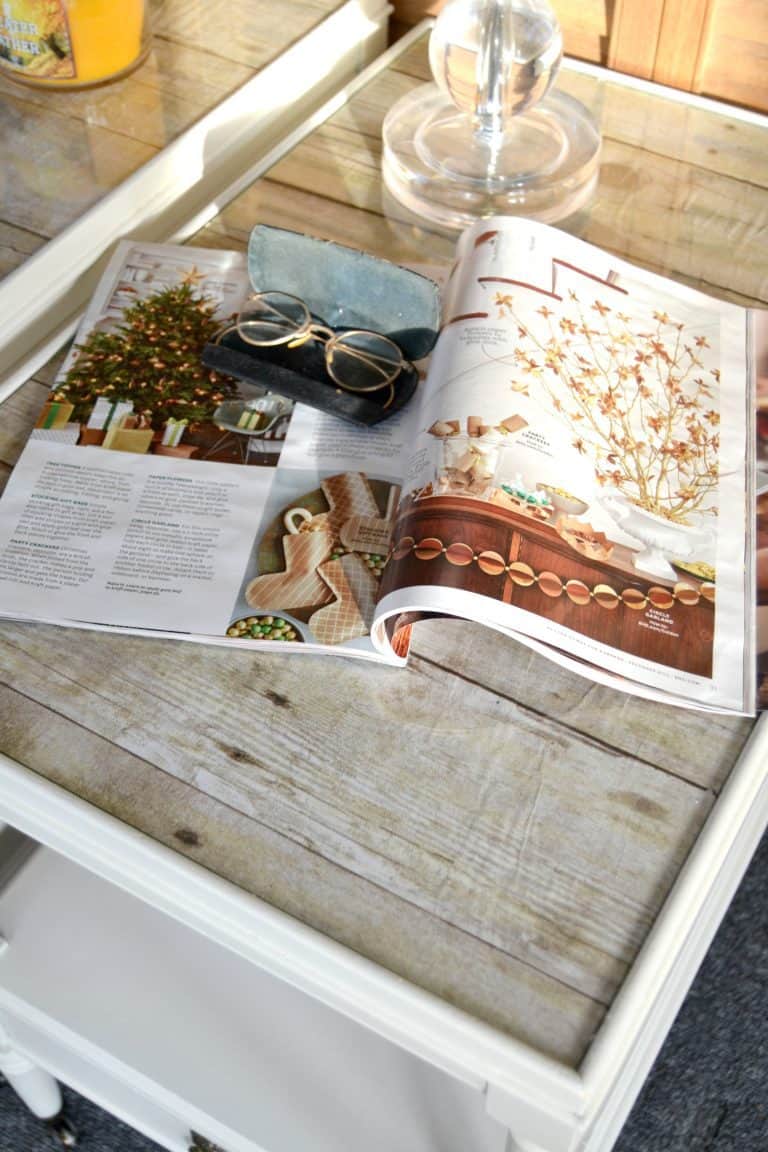
I was thinking about putting old maps under the glass tops, but once I had the paint on the tables, I came up with a different plan. The reclaimed wood paper was a much better fit. I wish I could have put real wood under the glass, but there wasn’t enough space to do that.

The paper was the next best thing and it came out great.

This white end table makeover took a pair of outdated tables and turned them into something current and so pretty!

If you noticed in the initial picture, the tables have different casters on them so one is higher. That didn’t bother me because you wouldn’t use these tables side by side so you would never notice.

This white end table makeover took a pair of outdated tables and turned them into something current and so pretty!

This white end table makeover took a pair of outdated tables and turned them into something current and so pretty!

The Fusion paint was amazing and I will be using the Deglosser on more projects like this. 

This white end table makeover took a pair of outdated tables and turned them into something current and so pretty!

This white end table makeover took a pair of outdated tables and turned them into something current and so pretty!

Once I had these done, my sister stopped by. She loved them so much that she said she wanted them for Christmas. Guess what was under the tree for her this year? 😉

She is finishing her basement so these are going to work perfect in the new space.

What do you think of the makeover? Have you used a deglosser before? What did you think of it?

PIN THIS POST!

This white end table makeover took a pair of outdated tables and turned them into something current and so pretty!

If you liked this DIY White End Table Makeover, you will also be head over heels for these makeovers (at least I hope you are!): 

Large Square Coffee Table Makeover

10 Tips On How To Paint Furniture

DIY Painted Buffet Makeover


Sharing is caring!

392 shares
  • Share

Filed Under: DIY Projects, Furniture, Uncategorized Tagged With: end table makeover, white end tables

Click HERE to Support My Creative Days


HURRY – 10% OFF EVERYTHING!


Use coupon code: TAKE10 at checkout
LEARN MORE

« DIY Arrow Wall Decor
Small Chest Of Drawers Makeover »

Comments

  1. pat buresh says

    December 29, 2015 at 6:11 AM

    very clean look

    Reply
  2. cindy downing says

    December 29, 2015 at 6:50 AM

    Where did you find the barnwood paper? I love it!!

    Reply
    • Lindsay says

      January 1, 2016 at 8:43 AM

      Cindy – I added the link in my post. It is from Amazon.

      Reply
  3. Susan B says

    December 29, 2015 at 8:26 AM

    I love the transformation! Where are these products available?

    Reply
    • Lindsay says

      January 1, 2016 at 8:42 AM

      I put all the links in my post! They are all so great!

      Reply
  4. Zografia says

    December 29, 2015 at 11:27 AM

    They look great! White was a great choice! I love using Fusion, but i have never worked with a deglosser!

    Reply
    • Lindsay says

      January 1, 2016 at 8:41 AM

      It is so great! You should give it a try!

      Reply
  5. Carol Paulus-Kalis says

    December 30, 2015 at 12:27 AM

    Hi,
    If I would have seen these tables before your sister did, I would have wanted them for Christmas! I love the style of the tables and am currently looking for two end tables and these would have been perfect! Where did you get the barn wood paper? What a nice idea. Good job. You really rock.

    Happy new year!

    Carol P-K

    Reply
    • Lindsay says

      January 1, 2016 at 8:40 AM

      Carol, I put the link in the post for the paper. It is photo back drop paper that is inexpensive and you get a lot of it!!!

      Reply
  6. Marie from The Interior Frugalista says

    December 30, 2015 at 2:07 PM

    Whaaaat, Zinsser has a deglosser? I LOVE their primer, the only one I keep in the shop but I MUST get their deglosser now too. I love these tables and your sister is a lucky gal to get them under her tree this Christmas. The barn wood paper is a much better choice Lindsay – love it!

    Reply
    • Lindsay says

      January 1, 2016 at 8:39 AM

      I am so excited I found this stuff and used it! It has opened up a lot more projects for me!

      Reply
  7. Rachael says

    December 31, 2015 at 6:18 AM

    These tables are fabulous !! This has given me inspiration to redo my ugly dinner table. It looks like the before pic and has glass top. I’m getting excited to hit the paint store.

    Reply
    • Lindsay says

      January 1, 2016 at 8:38 AM

      YAY Rachael! Go for it! Would love to hear how it went!

      Reply
  8. Janet Siano says

    January 1, 2016 at 7:30 AM

    I love Zinsser! I used it about 15 years ago to degloss varnished doors that were dark and painted them white. It worked great! I then used Zinsser to degloss a Formica vanity in my bathroom and painted the entire cabinet and top and then used polyurethane on top. It still looks wonderful! That have a ten star product.

    Your end tables came out super great. Now I want to find a project where I can try the fusion paint. I’m saving your end tables to my favorites!

    Reply
    • Lindsay says

      January 1, 2016 at 8:36 AM

      Thank you Janet. This was the first time I have used that product and I am hooked too. I just used it on another piece. I will be looking at more pieces to pick up now too because of this product.

      Reply
  9. Ramona says

    January 1, 2016 at 7:49 AM

    I love these tables! Did you glue the paper on top of the table or does it just lay there under the glass? Great job!

    Reply
    • Lindsay says

      January 1, 2016 at 8:34 AM

      I Mod Podged it on the top of the tables to make sure it stayed. You could just lay it on there though because the glass would make it so it wouldn’t move.

      Reply
  10. Wendy says

    January 1, 2016 at 11:04 AM

    Funny thing, when I followed your link to the wood look paper, I slid over the pics on the ad. On the second pic I thought, Why in the world did they put a raw turkey in the picture ?? HA! Then I noticed it’s not a turkey. LOL

    Reply
    • Lindsay says

      January 2, 2016 at 10:03 AM

      🙂 Funny!

      Reply
  11. Sharon says

    January 1, 2016 at 7:18 PM

    Beautiful job! I love the barn wood paper. I’m pinning this to our Fusion Lovers Pinterest board!

    Reply
    • Lindsay says

      January 2, 2016 at 10:02 AM

      Thank you!

      Reply
  12. Martha says

    January 1, 2016 at 9:13 PM

    Your tables are beautiful! I have an old china cabinet I’m going to paint and use it for storage in my craft room. The products you used I believe will be great!! Thank you!!

    Reply
    • Lindsay says

      January 2, 2016 at 10:01 AM

      Thank you Martha!

      Reply
  13. Cynthia - Clockwork Interiors says

    January 4, 2016 at 7:52 PM

    Your tables are fabulous and the rustic paper was the perfect choice!

    Reply
    • Carol Paulus-Kalis says

      January 4, 2016 at 10:54 PM

      Hi Lindsey,
      I submitted a comment last week and I appreciated you getting back to me. However, you have continued to email me with the same thing over and over and over. Probably 10 or 12 times. Please check this out and discontinue sending me the same email. I’m sure it is a computer glitch and you probably don’t even know this happening and that is why I am advising you of this matter.
      Thank you.
      Carol P-K

      Reply
      • Lindsay says

        January 5, 2016 at 12:57 PM

        Carol, I am so sorry!!! I have no idea why that is happening. I will try and look into it. Again, I am so sorry. I wonder what is happening???

        Reply
    • Lindsay says

      January 5, 2016 at 12:57 PM

      Thank you Cynthia!

      Reply
  14. Cindy says

    January 5, 2016 at 3:51 AM

    They turned out great and I love the old wood look added beneath the glass!
    Thanks so much for sharing at AMAZE ME MONDAY!
    Blessings,
    Cindy

    Reply
    • Lindsay says

      January 5, 2016 at 12:56 PM

      Thanks Cindy!

      Reply
  15. Terry says

    January 5, 2016 at 11:00 AM

    I absolutely love that paper you put under the glass!! Brilliant idea! It looks like real wood. You did a wonderful job on these tables. The color and the details you added are perfect for giving them a classy chic look!
    Hope you have a great week!
    Smiles!
    Terry

    Reply
    • Lindsay says

      January 5, 2016 at 12:55 PM

      Thank you so much Terry!

      Reply
  16. Doreen says

    January 5, 2016 at 10:33 PM

    This was an incredible transformation. So simple and so beautiful.

    Reply
    • Lindsay says

      January 6, 2016 at 6:51 AM

      Thank you Doreen.

      Reply
  17. Krista says

    January 12, 2016 at 12:45 PM

    Super cute makeover Lindsay!! I’m featuring it tomorrow at Work it Wednesday – thanks for sharing!

    Reply
    • Lindsay says

      January 14, 2016 at 2:28 PM

      Thank you so much Krista!!!

      Reply
  18. Debrashoppeno5 says

    April 8, 2016 at 8:25 AM

    I love the details on the tables.. Your makeover brought them to a new level and the look beautiful.

    Reply
    • Lindsay says

      April 8, 2016 at 12:47 PM

      Thank you!

      Reply
  19. Toni says

    April 9, 2016 at 2:08 PM

    Wow, I love the transformation of these tables. I really like the use of the barn wood paper under the glass, it really makes a huge change over just a plain top. I haven’t used a deglosser yet but might have to try it soon since it’s much easier and less messy than sanding.

    Reply
    • Lindsay says

      April 12, 2016 at 8:55 AM

      I really like the Deglosser for projects like this Toni! I have used it many times since these tables. Thanks for stopping by!

      Reply
  20. Susie from The Chelsea Project says

    April 12, 2016 at 8:01 AM

    These end tables turned out great. Love the color …and the barnwood wall paper. How clever. Thanks so much for linking to Friday’s Furniture Fix. Sharing out on IG and FB later today. XO Susie from The Chelsea Project

    Reply
    • Lindsay says

      April 12, 2016 at 8:54 AM

      Thank you Susie!

      Reply
  21. Judy Schiffer says

    January 8, 2017 at 8:18 AM

    Hi Lindsay, I just love this project. Did you just cut and lay the paper under the glass or did you decoupage it to the table before adding the glass?

    Reply
    • Lindsay says

      January 9, 2017 at 10:56 AM

      I decoupaged it, but you could just lay the paper on there too.

      Reply

Leave a Reply Cancel reply

Your email address will not be published. Required fields are marked *


follow along

  • Facebook
  • Instagram
  • Pinterest
  • RSS
  • Twitter
  • YouTube

search the blog

Listen In!

CLICK TO DOWNLOAD FOR FREE

My Creative Days is a participant in the Amazon Services LLC Associates Program, an affiliate advertising program designed to provide a means for sites to earn advertising fees by advertising and linking to Amazon.com
If you are looking for the best paint brushes for furniture makeovers, you don't have to look any further. Click over to find the paint brushes that everyone needs in their toolbox when painting furniture or anything for that matter.

Best Paint Brushes For Furniture Makeovers

The Best Black Matte Furniture Paint

DIY Farmhouse Table - Want a farmhouse table? Make your own! Check out how to refinish one easily from My Creative Days.

Farmhouse Table DIY Made From A Dumpster Find

DIY Farmhouse Office Sign

DIY Office Sign

PO Box 11823, Cedar Rapids, Iowa, 52410
Copyright © 2023 · Design + Development by Grace + Vine Studios · Privacy Policy

392 shares