• Home
  • About
    • Disclosure
      • Terms And Conditions
      • Cancellation Policy
      • Refund Policy
      • Shipping Policy
    • Contact Me
    • My Favorites
      • Our Toolbox
      • Paint Colors
      • My Amazon Store
  • Categories
    • Seasonal
      • Spring
      • Fall
      • Halloween
      • Thanksgiving
      • Christmas
      • Valentine’s Day
      • Easter
      • Mother’s Day
    • DIY
      • Repurposed
      • Furniture
      • Crafts
    • Our Home
    • Recipes
    • Crafts
      • Party Planning Ideas
      • Kids Activities
  • Resources
    • Organization Tools
      • Organization Challenge
      • 5-Day Organization Challenge
      • 12 Monthly Purge Checklists
      • Sentimental Purge Guide
    • Thrifting | Decorating
      • 105 Things To Throw Away | Recylce | Sell | Donate For Instant Decluttering
      • 50 Things To Donate For Instant Decluttering
      • 50 Things To Throw Away For Instant Decluttering
      • How To Decorate Your Home On A Yard Sale Budget
      • 11 Quick Tips To Organize A Profitable Yard Sale
    • Furniture Flipping
      • The Ultimate Furniture Flipping Program For Beginners
      • The Creative Squad
      • The Furniture Flippers Social Media Planner
      • Furniture Flipping Assessment
      • Furniture Flippers E-Book
      • Mini Courses
      • Quick Guide To Painting Furniture
      • Types Of Paint For Furniture
    • Consultations
    • Join My Newsletter
    • Become An Affiliate
  • Podcast
  • Furniture Flipping Course
  • Learn With Me
  • My New E-Book!
    • Facebook
    • Instagram
    • Pinterest
    • RSS
    • Twitter
    • YouTube

My Creative Days

DIY blog sharing our home, budget decorating tips with repurposed farmhouse decor.

DIY Throw Pillow Covers For $2

April 13, 2016 10 Comments

There are so many great accessories you can add to your space to make it feel comfy, cozy and inviting. When you see a warm blanket on a couch or fluffy pillows on a bed or chair, it makes you want to sit down, put your feet up and relax. When I decorate our home, I like to keep most things neutral (wall color, furniture color, etc.) and then add pops of color with blankets, throw pillows and art. That way, when I get bored with them, they are cheap and easy to replace. Throw pillows are a slight addiction for me and if I don’t weed them out often, our home would be taken over with them.

The bad thing about throw pillows is that they are expensive!! Who pays $20-$40 for a pillow? Not me. I find so many pillows I love, but I am too cheap frugal to pay retail for them. Because of that, I have found a way to make throw pillow covers easily and so inexpensively! 

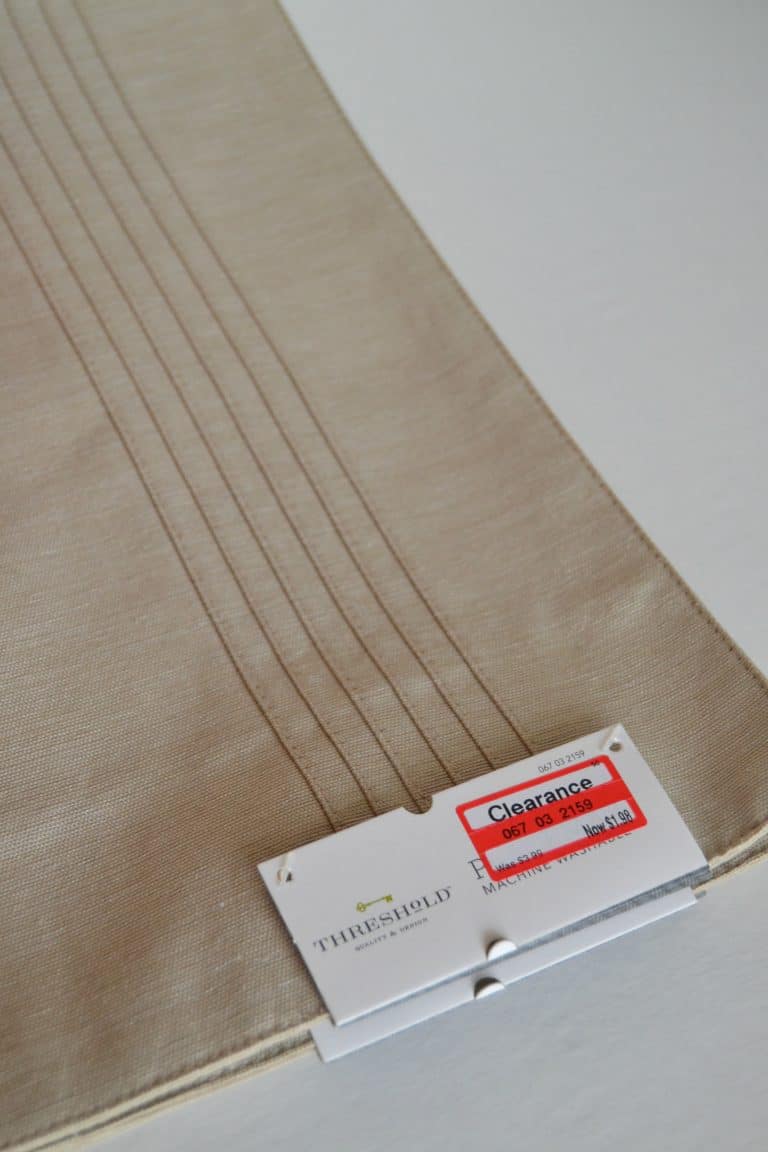
If yard sales aren’t producing any great pillows, I search Target’s placemat aisle for clearance mats that I can make into great throw pillow covers.

Throw pillows can be so expensive in the stores and online. Click over to get the tutorial on how to DIY throw pillow covers for only $2 a pillow!

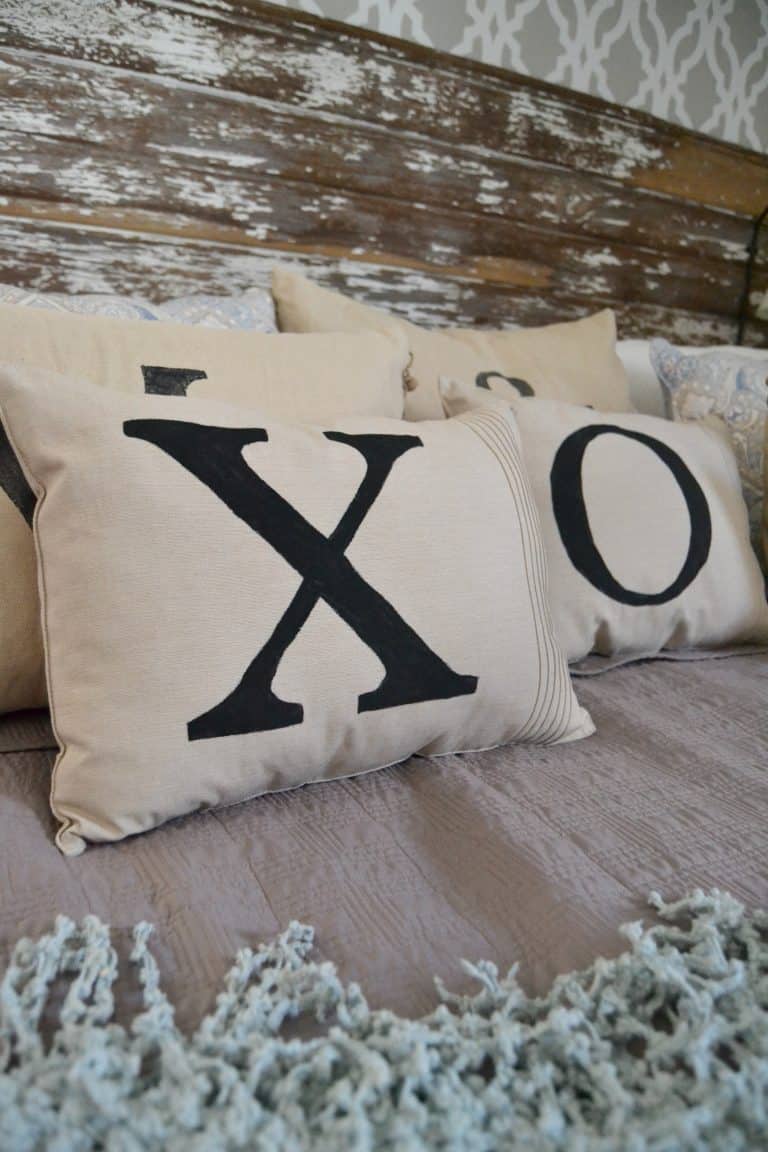
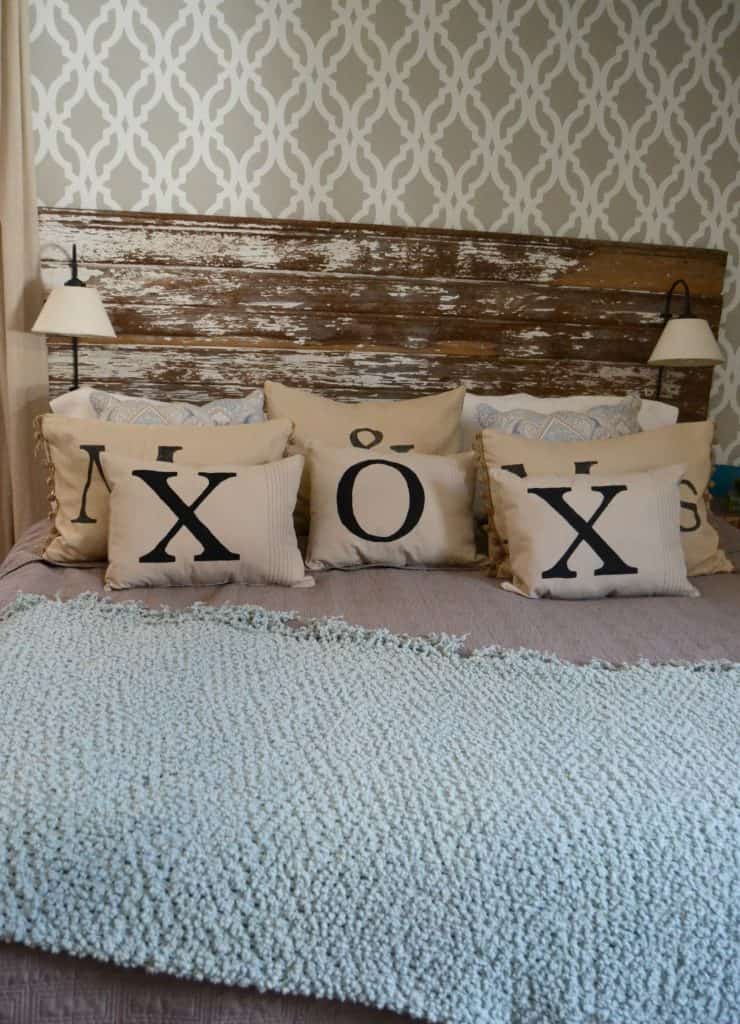
A couple of years ago, I made throw pillows for our bed out of neutral pillows I scored at a yard sale. They are still on our bed to this day. I also made bird pillows for the couch in our family room this way. Since I get so many compliments on them, I thought I would put a post together showing you how I did them.

Now, I know there are a lot of people out there who don’t have access to yard sales or don’t have the time to go to them in search of pillows to make over. So, this post is all about how I make throw pillows from clearance placemats from Target.

Throw pillows can be so expensive in the stores and online. Click over to get the tutorial on how to DIY throw pillow covers for only $2 a pillow!

(Affiliate links are used in this post. You can see my full disclosure HERE.)

Materials Needed For DIY Throw Pillows:

Neutral Colored Placemats 

Black Fabric Paint

Letter Stencils cut from your Cricut machine

Paint brush

X-Acto Knife

Pillow Stuffing (or an old pillow that you can remove the stuffing from)

I got a great deal on these neutral placemats at Target.

Throw pillows can be so expensive in the stores and online. Click over to get the tutorial on how to DIY throw pillow covers for only $2 a pillow!

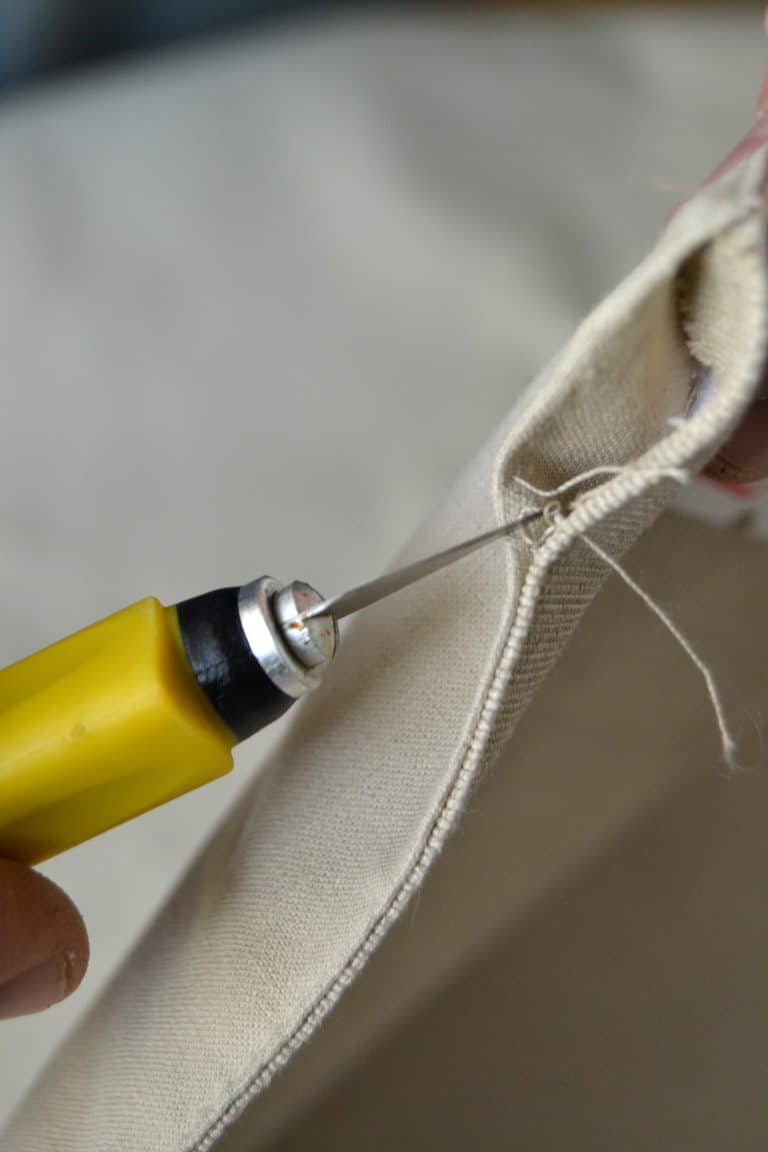
Now, you all know that I avoid sewing projects whenever I can (I still have my brand new sewing machine in the box in the basement), but these pillows do call for a little sewing. Don’t be scared. If I can do it, you can to.

To start transforming these placemats into throw pillows, you need to take out the stitching on one corner of the placemat. I use an X-Acto knife for this. This allows you to stuff the pillow and also put paper between the fabric layers so the paint doesn’t bleed through. If you aren’t painting the pillow, then all you have to do at this point is stuff it and restitch the corner back up.

Throw pillows can be so expensive in the stores and online. Click over to get the tutorial on how to DIY throw pillow covers for only $2 a pillow!

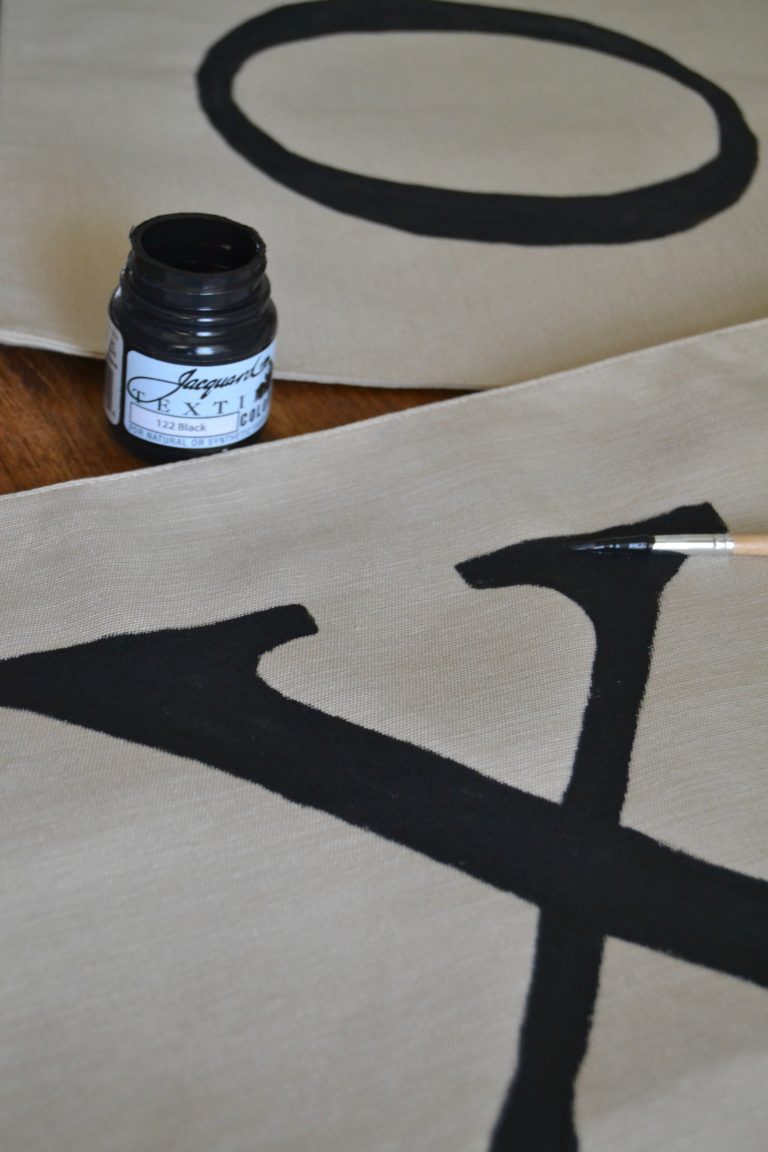
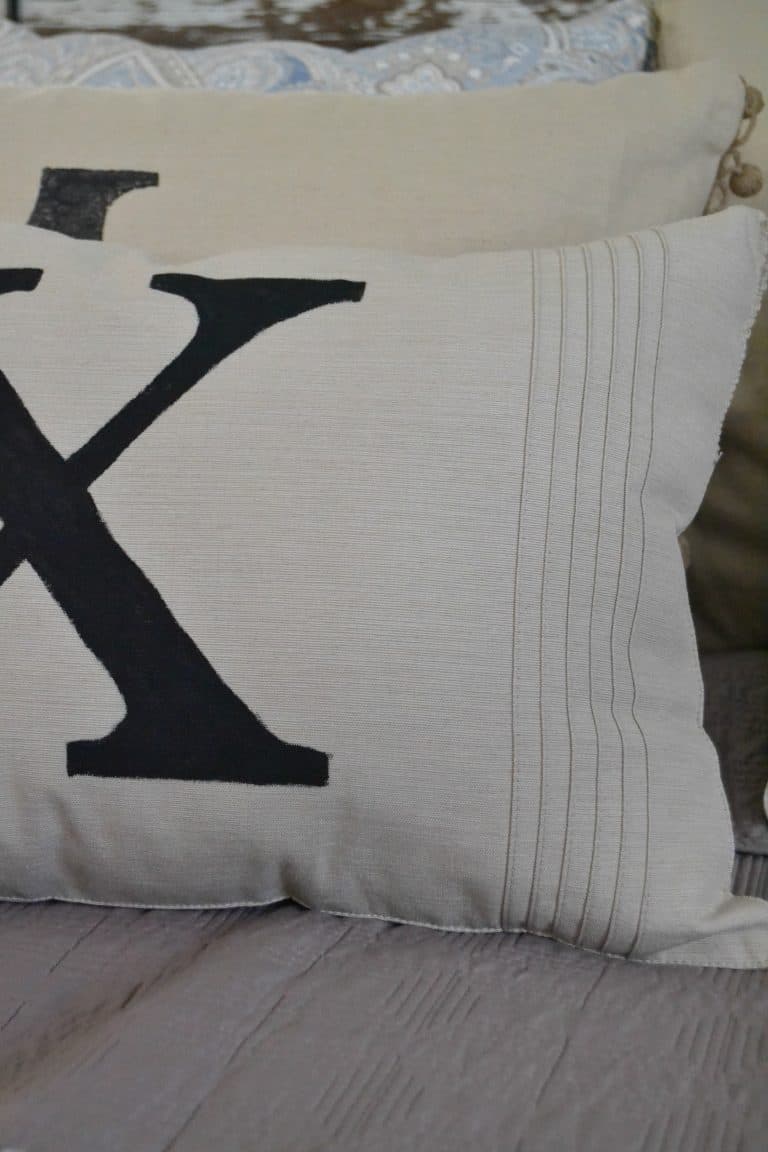
For this set of pillows, I wanted “kisses and hugs” on them.

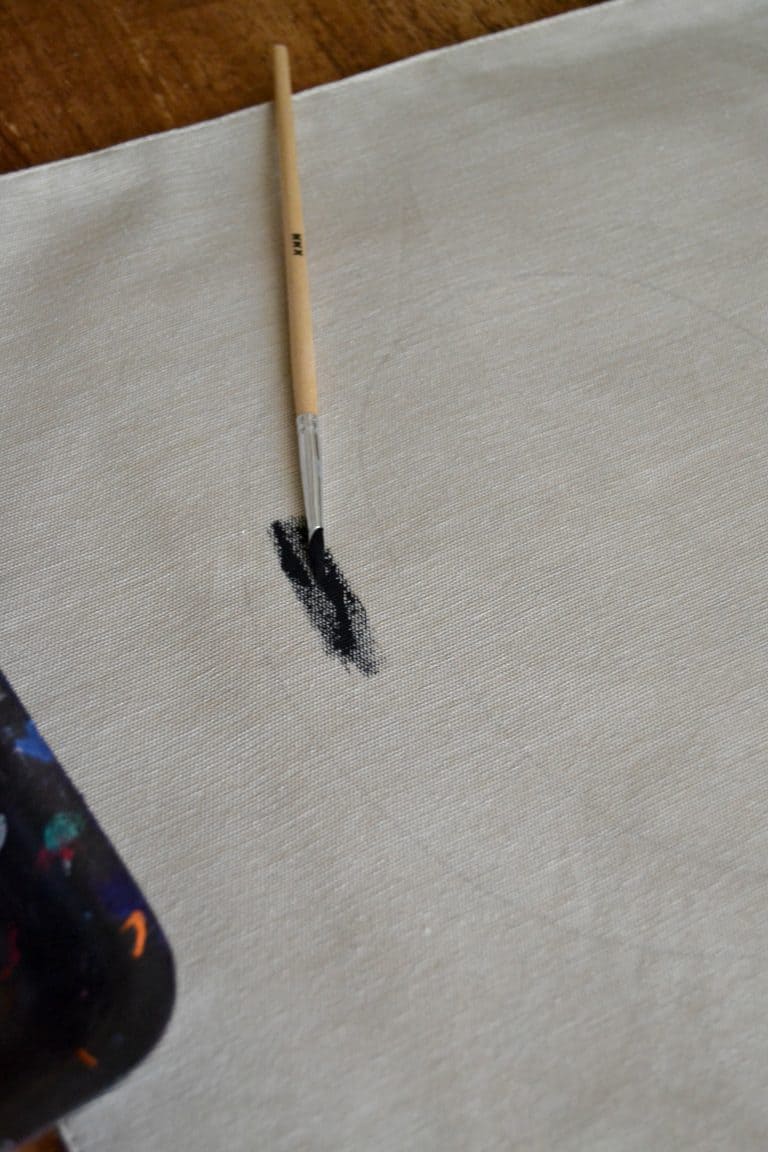
I cut out an “X” and “O” from my Cricut to trace on the pillows.

Throw pillows can be so expensive in the stores and online. Click over to get the tutorial on how to DIY throw pillow covers for only $2 a pillow!

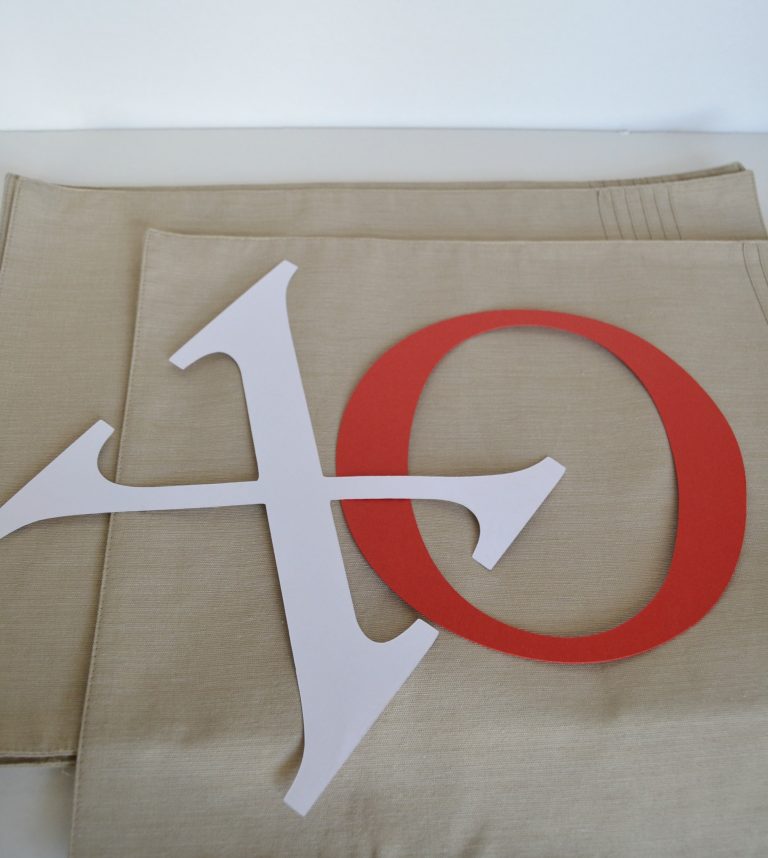
I traced the letters with a pencil and then painted them in with fabric paint and a small paint brush.

Throw pillows can be so expensive in the stores and online. Click over to get the tutorial on how to DIY throw pillow covers for only $2 a pillow!

This is a great project to do while listening to music, catching up on your favorite Pericopes and/or TV shows.

Throw pillows can be so expensive in the stores and online. Click over to get the tutorial on how to DIY throw pillow covers for only $2 a pillow!

Once the paint dries, remove the newspaper and stuff the pillow. I used an old pillow that I was getting rid of for the stuffing inside. If you don’t have an old pillow, you can buy the stuffing.

Throw pillows can be so expensive in the stores and online. Click over to get the tutorial on how to DIY throw pillow covers for only $2 a pillow!

I used a wooden spoon to make sure and get the stuffing in the corners.

Once the pillow is stuffed to your liking, all you need to do is sew the corner back up.

Throw pillows can be so expensive in the stores and online. Click over to get the tutorial on how to DIY throw pillow covers for only $2 a pillow!

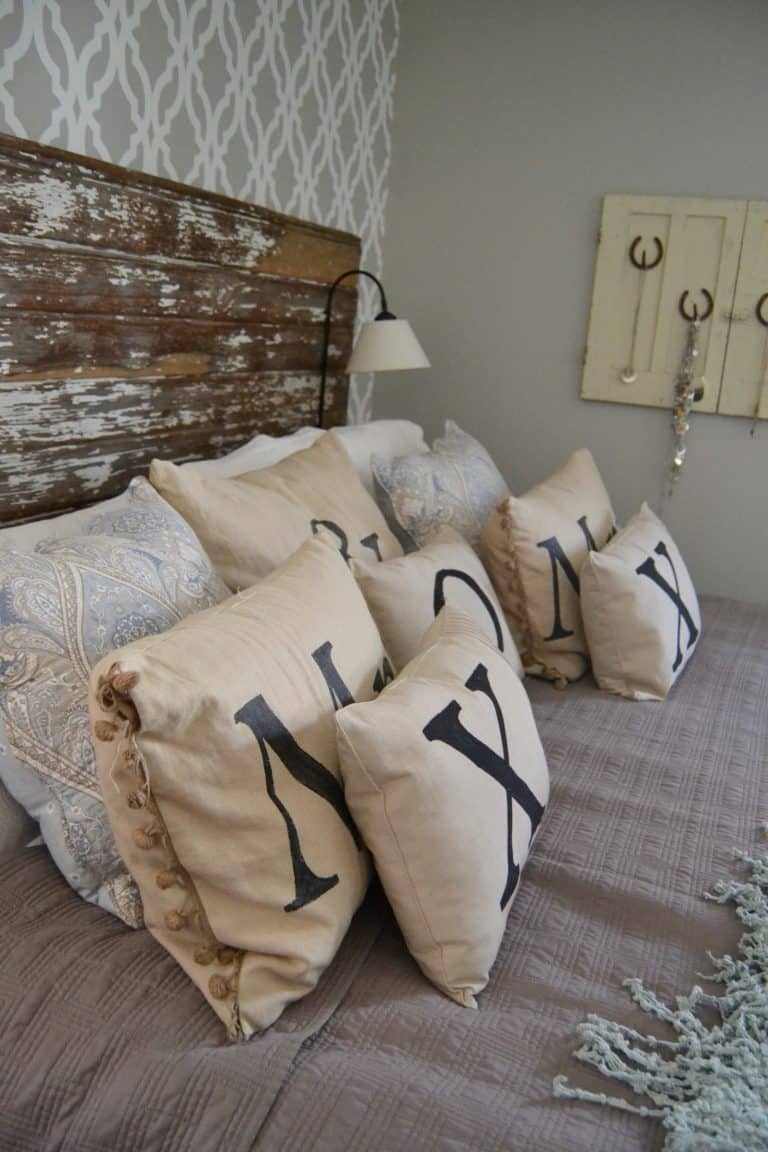
DIY Throw Pillows are so much more fun than buying them because you can customize them however you like.

Throw pillows can be so expensive in the stores and online. Click over to get the tutorial on how to DIY throw pillow covers for only $2 a pillow!

Here is a Facebook Live video I did to share the process of making DIY throw pillow covers with some different place mats: 

Throw pillows can be so expensive in the stores and online. Click over to get the tutorial on how to DIY throw pillow covers for only $2 a pillow!

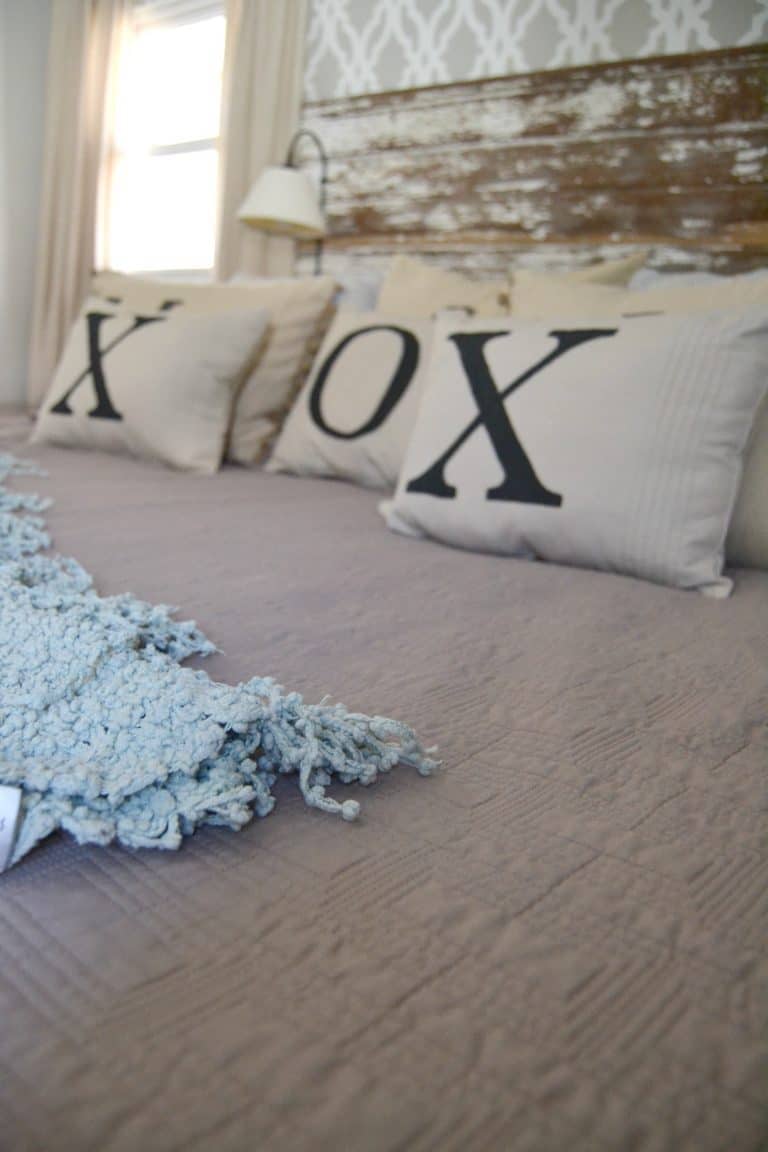
If you are in the market for some new throw pillows, make your own! You will save tons of money and give your space the warm and welcoming feeling you are looking for!

If you don’t have time to make your own throw pillow covers, I found some inexpensive options instead:
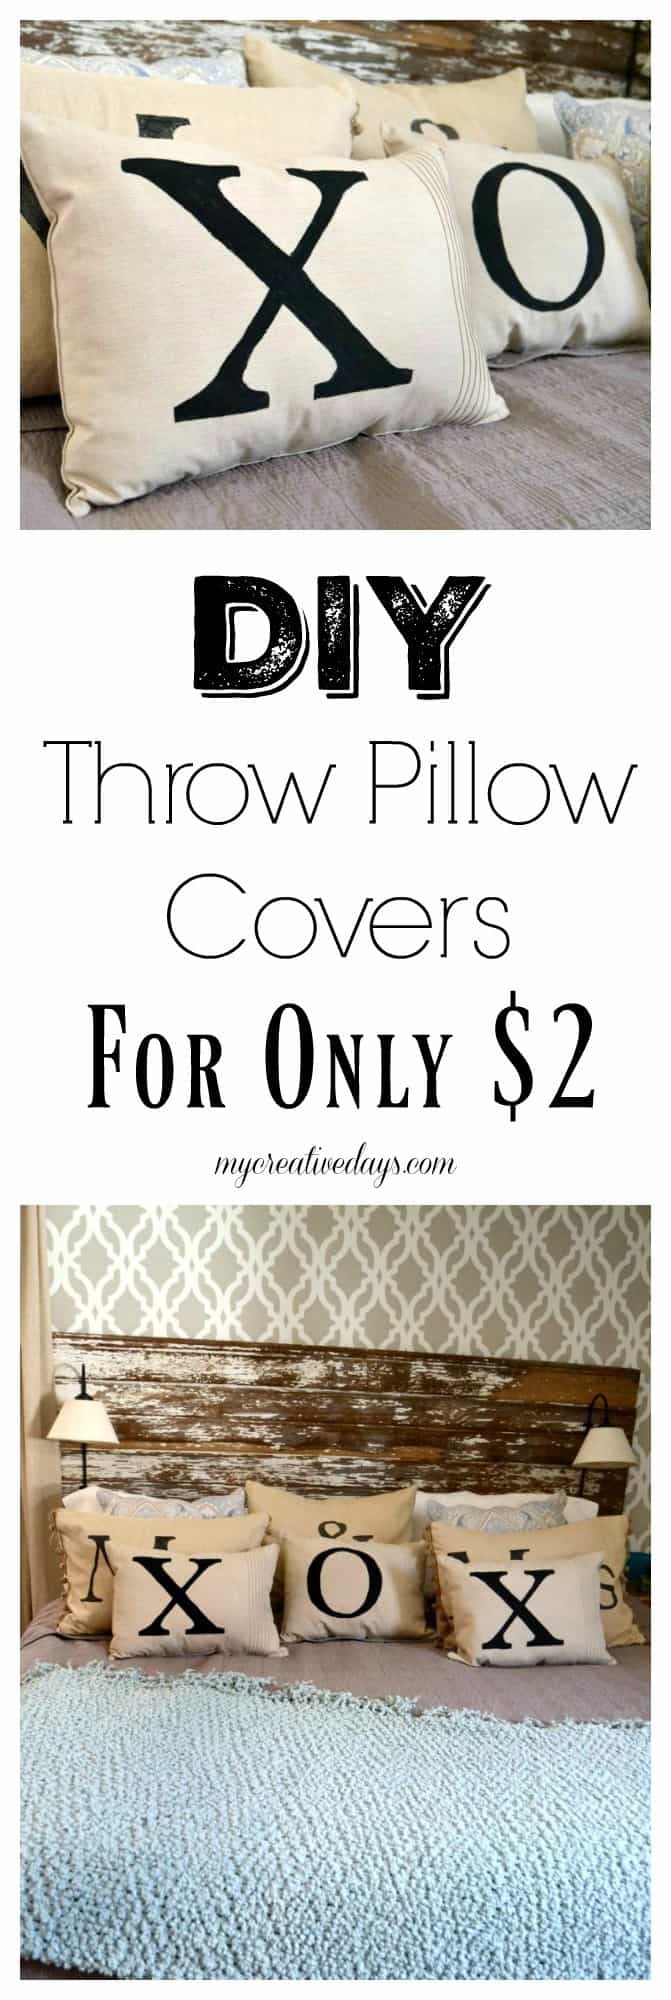

PIN THIS POST!

Throw pillows can be so expensive in the stores and online. Click over to get the tutorial on how to DIY throw pillow covers for only $2 a pillow!

If you liked this throw pillow covers post, make sure to check out:

DIY Architectural Hanging Map 

The Easy Way To Paint Paneling

How To Paint Furniture Without Sanding


Sharing is caring!

143 shares
  • Share

Filed Under: DIY Projects, Uncategorized Tagged With: DIY Throw Pillow Tutorial, DIY Throw Pillows, Throw Pillows

Click HERE to Support My Creative Days


HURRY – 10% OFF EVERYTHING!


Use coupon code: TAKE10 at checkout
LEARN MORE

« DIY Recycled Bathroom Organizer
DIY Painted Round End Table »

Comments

  1. Angie Green says

    April 13, 2016 at 1:51 PM

    I never would have thought to use place mats for pillow cover. What a creative idea!

    Reply
    • Lindsay says

      April 17, 2016 at 12:23 PM

      Thank you Angie!

      Reply
  2. Marie, The Interior Frugalista says

    April 14, 2016 at 5:07 PM

    Love this idea, Lindsay. I’ve never thought to use placemats but how much easier is that and affordable too. I love how you handpainted X’s & O’s on yours – very nice and expensive looking too!

    Reply
    • Lindsay says

      April 17, 2016 at 12:23 PM

      Thank you Marie!

      Reply
  3. Chris says

    January 14, 2017 at 9:11 AM

    I don’t have a Crichton. How could I make these without one? This site is great!

    Reply
    • Lindsay says

      January 14, 2017 at 9:50 AM

      I would just use stencils then. That is what I am basically making with my Cricut.

      Reply
  4. Aggie says

    January 14, 2017 at 12:41 PM

    What kind of a circuit do you have?Does it cut vinyl too?

    Reply
    • Lindsay says

      January 17, 2017 at 8:20 AM

      I have the older version. It does not cut vinyl.

      Reply

Leave a Reply Cancel reply

Your email address will not be published. Required fields are marked *


follow along

  • Facebook
  • Instagram
  • Pinterest
  • RSS
  • Twitter
  • YouTube

search for a project

Listen In!

VIP Exclusive!

Get The FREE Ultimate Painting Furniture Guide Here!

“ultimate

My Creative Days is a participant in the Amazon Services LLC Associates Program, an affiliate advertising program designed to provide a means for sites to earn advertising fees by advertising and linking to Amazon.com
If you are looking for the best paint brushes for furniture makeovers, you don't have to look any further. Click over to find the paint brushes that everyone needs in their toolbox when painting furniture or anything for that matter.

Best Paint Brushes For Furniture Makeovers

The Best Black Matte Furniture Paint

DIY Farmhouse Table - Want a farmhouse table? Make your own! Check out how to refinish one easily from My Creative Days.

Farmhouse Table DIY Made From A Dumpster Find

DIY Farmhouse Office Sign

DIY Office Sign

PO Box 11823, Cedar Rapids, Iowa, 52410
Copyright © 2022 · Design + Development by Grace + Vine Studios · Privacy Policy

143 shares