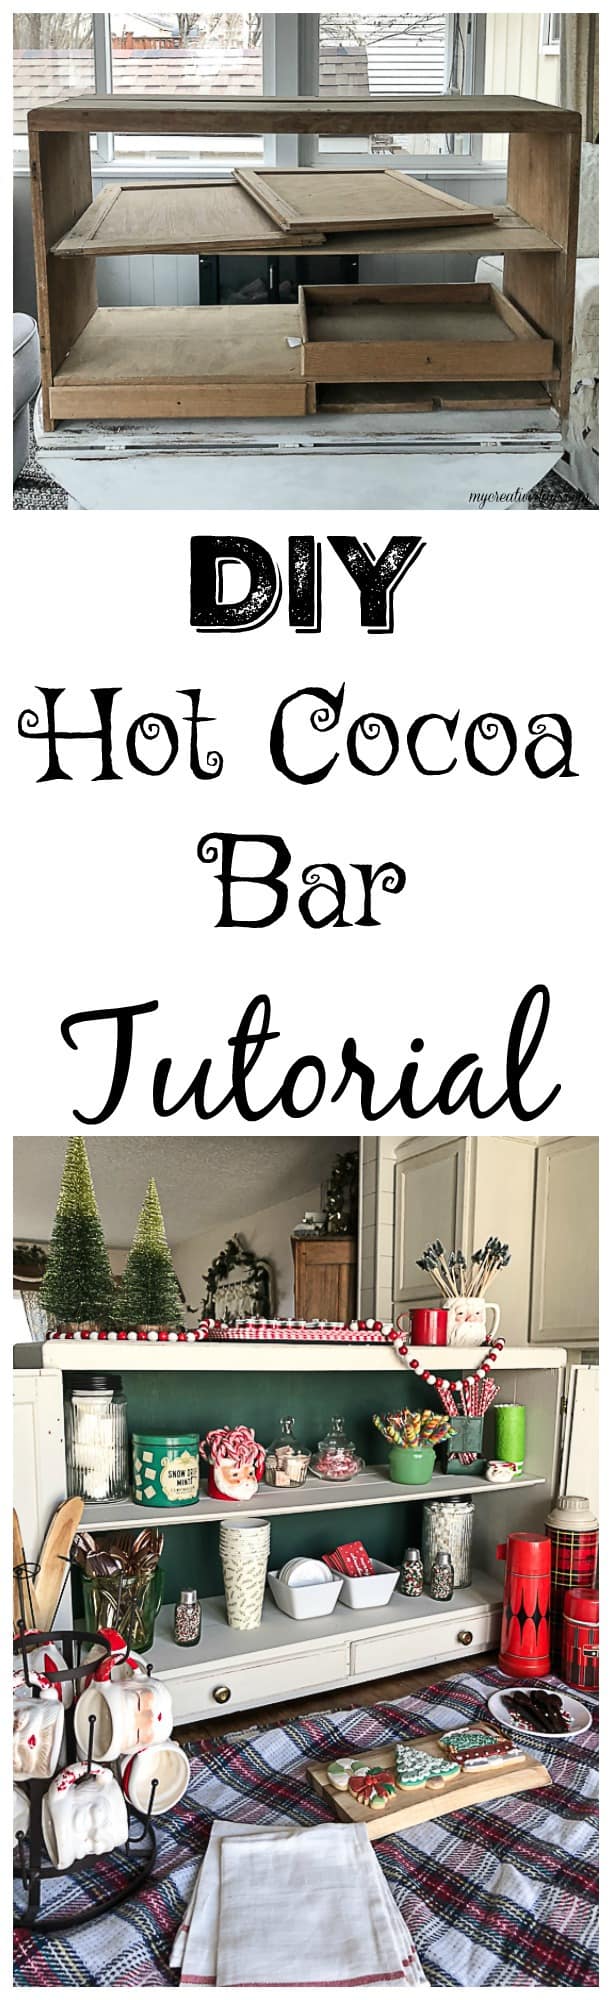
This DIY hot cocoa bar took a broken piece and turned it into something cute and functional again.
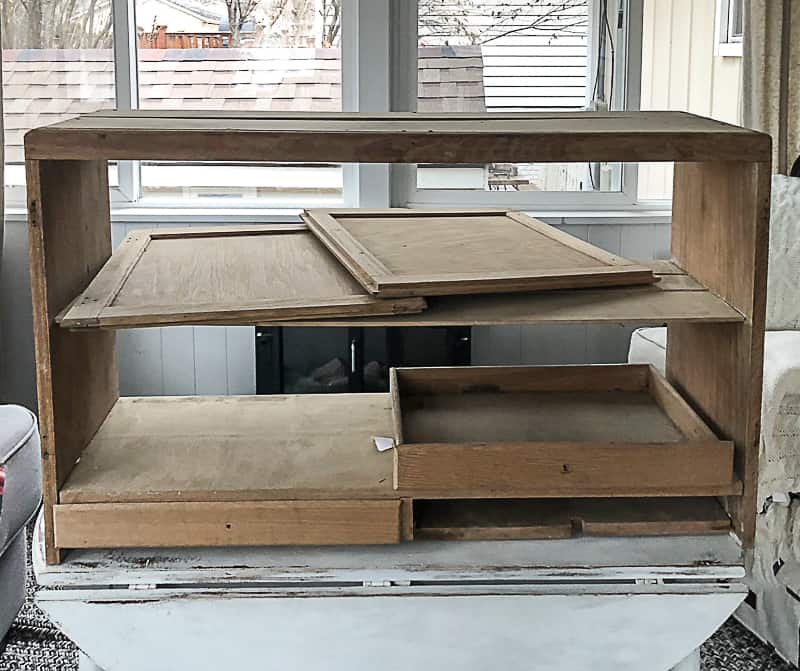
When I was browsing our local Restore shop, I saw this piece. I loved the wood, but it was in pieces and not put together so I had to investigate it a little more. After I looked at it, I thought it was the top of an old hutch of some sort. I could tell that it was an older piece because of the wood, but it was missing all the hardware so it was hard to tell. After much back and forth, I decided to bring it home and breathe new life into it.
Once I got it home and Matt was able to look at it, we started talking about the different things I could do with it. We are coming into winter and Christmas when hot cocoa is served almost daily around here so I thought it would make a cute hot cocoa bar…… after some work, of course.
Matt and I were talking about how great it would have been to have the original hardware on it, but since it didn’t, I searched for hardware online. I came across Van Dykes Restorers for the first time and now, I am hooked. They sell all kinds of products, but I was blown away by all of the hardware they had for older pieces!! I landed on the Hoosier hardware section and swooned over everything they had! They even have a section for pie safes and barn door hardware!! I couldn’t believe I had found a place that could offer me the hardware to the old pieces we are picking up all the time! I didn’t need to worry about not having original hardware anymore because Van Dykes Restorers would have the newer version of it! After I found the hardware, I couldn’t wait to start the makeover.
I recorded a video of this makeover from start to finish. I wanted to share how I go about a project like this and tips we learned with the mishaps we had to overcome during the makeover.
(Affiliate links are used in this post. You can read my disclosure HERE.)
Supplies Used In This DIY Hot Cocoa Bar Tutorial:
Drop Cloth Dixie Belle Paint
Palmetto Dixie Belle Paint
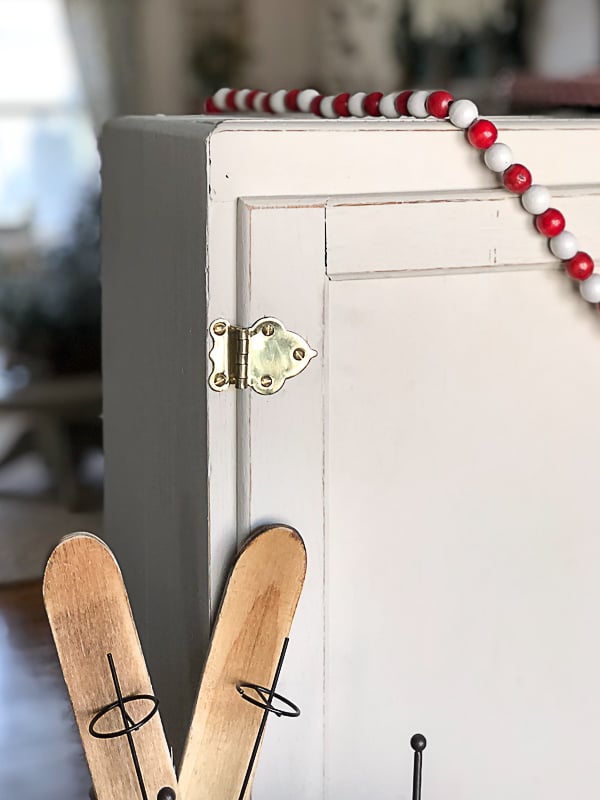
Hinges from Van Dykes Restorers
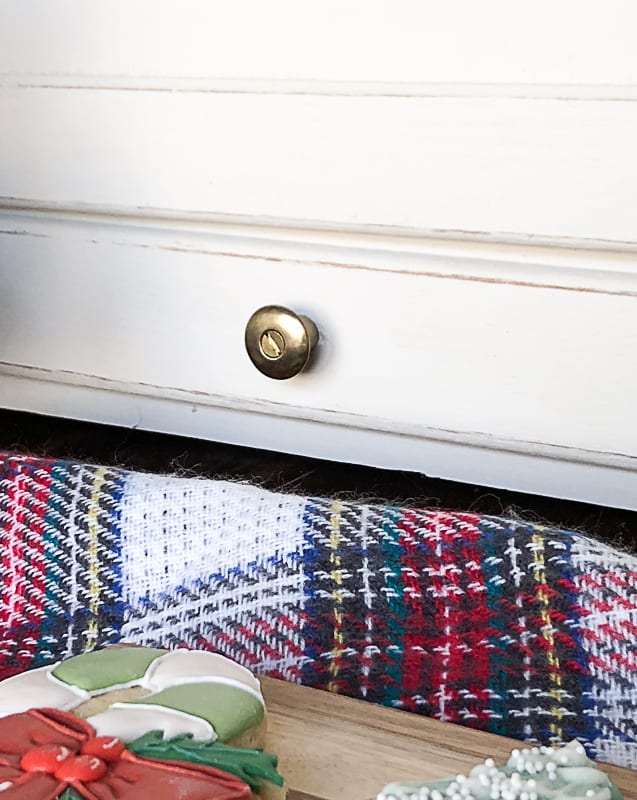
Knobs from Van Dykes Restorers
Latch from Van Dykes
Toothpick Jars from Van Dykes Restorers
Large Hoosier Jars from Van Dykes
Sandpaper
Zibra Paint Brushes
Drill
Nail Gun
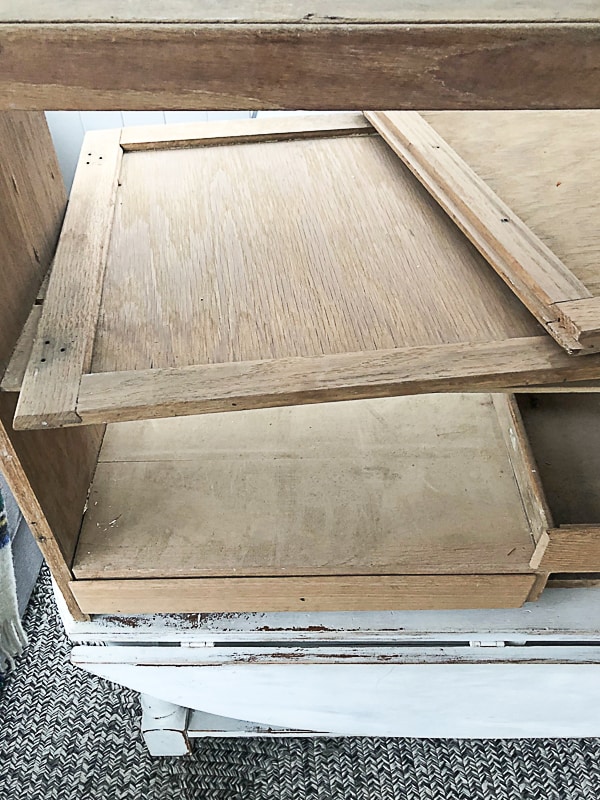
The first thing I did to this piece was clean it and then I sanded it. The surface was a little rough so I sanded it to smooth it out. Then, Matt cut a piece of thin plywood to fit the back since it was missing.
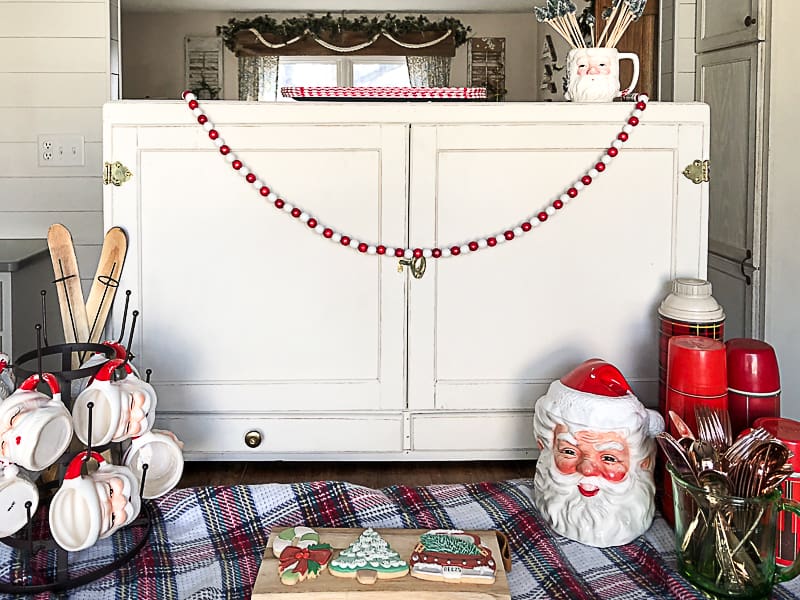
Then, it was time for paint. I wanted to keep it clean and classic so I decided to paint it a neutral color. That way, we can use it all year round. I chose the color, “Drop Cloth” from Dixie Belle Paint. After I put a few coats of paint on the piece and it dried, I roughed up the edges with a little sandpaper.
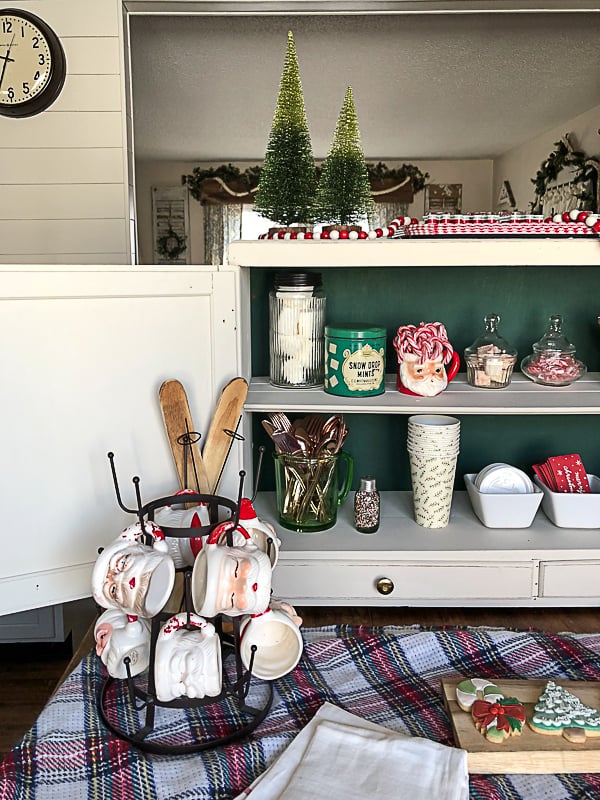
I painted the thin plywood Matt cut for this back with “Palmetto” from Dixie Belle Paint. I thought a pop of color would look great when you opened the doors to the Hot Cocoa Bar.
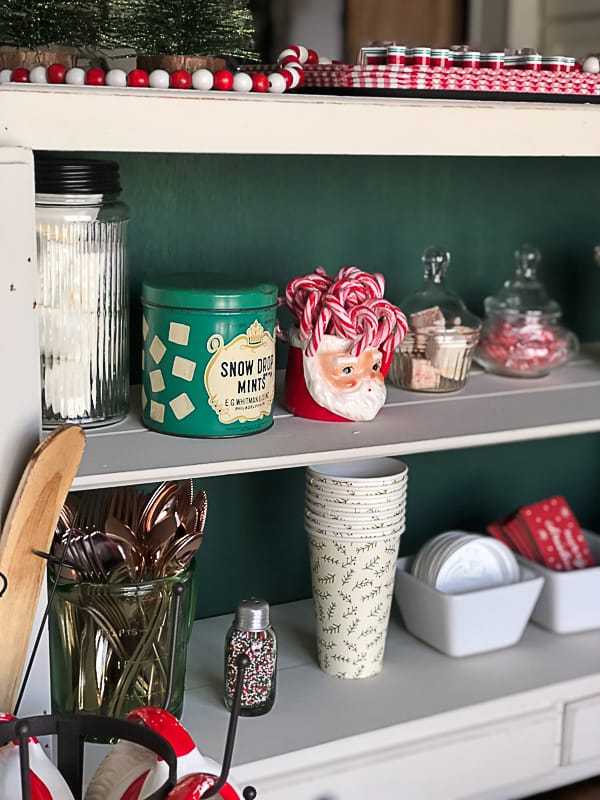
Once the paint dried, Matt attached the back to the piece. This green color is beautiful against the creamy white.
Once the piece was painted and the back was on, it was time for the jewelry… the hardware from Van Dykes Restorers.
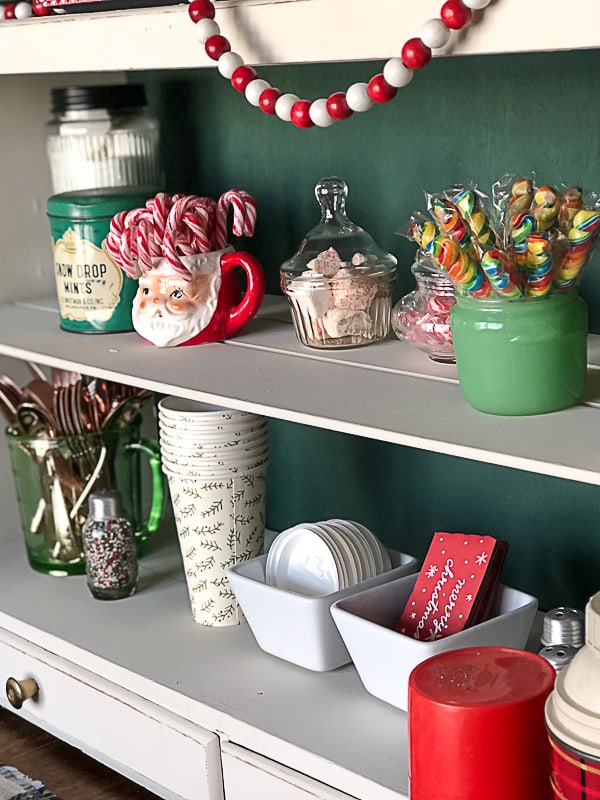
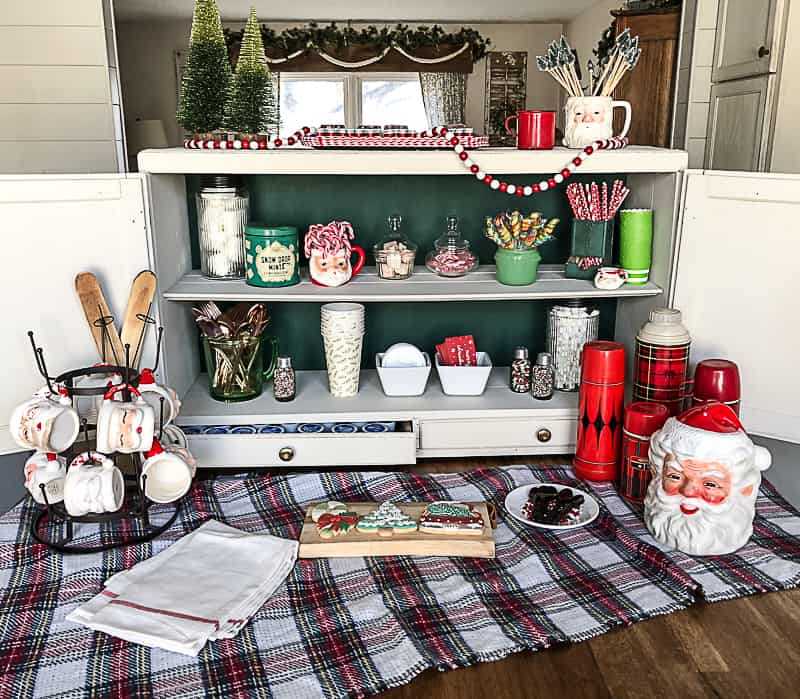
I went with the brass color on the hardware because I really wanted it to stand out and add some sparkle to the hot cocoa bar. I have an obsession with brass and I think the hardware we chose really makes this piece special. The toothpick jars from Van Dykes Restorers were perfect for putting sprinkles in. The holes in the lid are big enough for sprinkles to come out easily. Everyone needs sprinkles on top of their hot cocoa. I also loved the large jars they sent! They look vintage, I love the black lid and they hold marshmallows well. These jars will be used all year round to store all kinds of things. I love them!
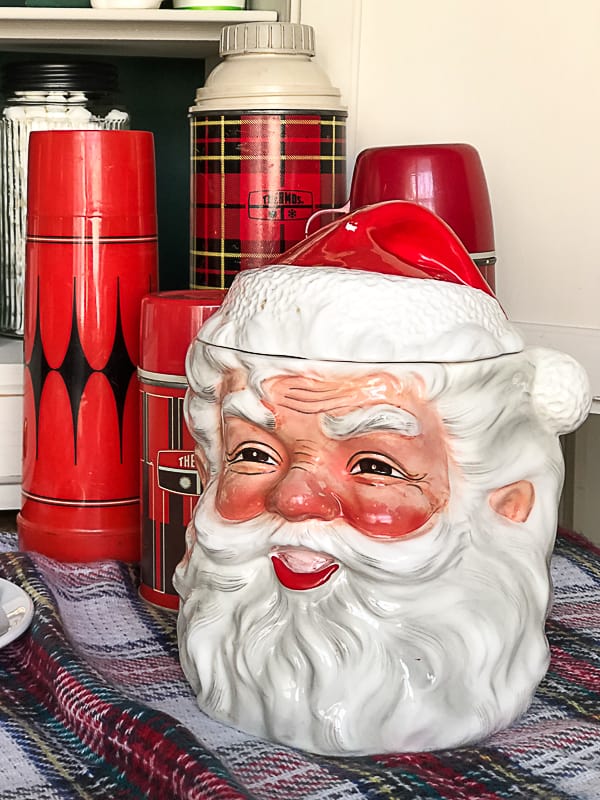
This DIY hot cocoa bar was so much fun decorating and setting up for business! It is the perfect excuse for getting out the Santa mugs and my new Santa cookie jar! The kids have been waiting patiently for this project to be complete so they could partake in the hot cocoa making. It is finally time for them to take full advantage of all the goodies I put in it.

One of my favorite features of this piece is the small drawers. They are the perfect size for holding all the hot cocoa pods! That was a bonus that I wasn’t sure was going to work.
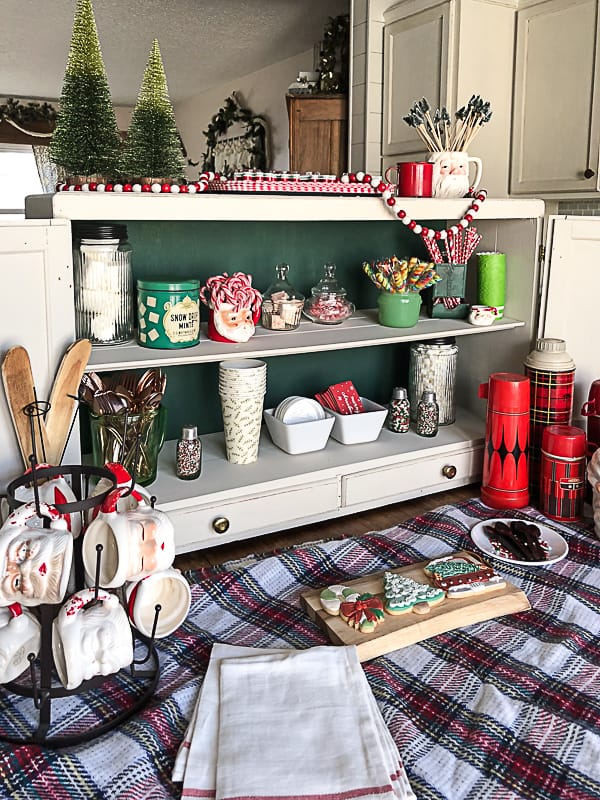
This bar is complete with candy canes, sprinkles, chocolate spoons and marshmallows and cookies from OctoberTraci. She is the most talented cookie artist I have ever seen. Check out her shop HERE.
I couldn’t be happier with the way this turned out. It is another great example of how you can rescue a piece that isn’t even put together and breathe new life into it for something you will actually use. The people at Restore said they were thinking about tossing this piece because it had sat there for so long. I told them, it was holding on for that one person who still saw its potential. I am glad I was that person.
What would you have done with this piece?
PIN THIS POST!
If you liked this DIY hot cocoa bar, you will also love these projects:
Mid-Century Modern Dresser Makeover
Tall Cabinet Becomes Sleek Office Storage
love this idea, and everyhing is so handy!! Wondered what were in the drawers–perfect fit
Love this. However at times your camera work was giving me motion sickness so I had to stop. You were jumping around to much when you were doing the hinges. FYI