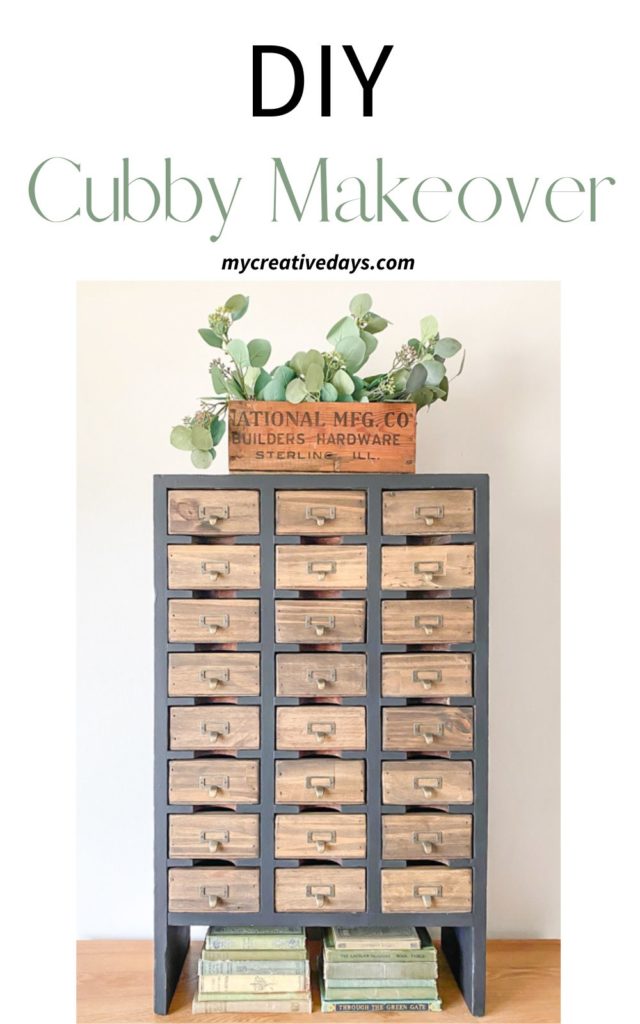
This DIY cubby makeover is a great example of how paint, stain, and scrap wood can turn an old piece into something beautiful again.
As soon as I rounded the corner in my local Restore and saw this piece, I couldn’t get over to it fast enough to see if it was a reasonable price. I fall in love with any piece that has cubbies or little drawers and this piece fits the bill perfectly. The fact that it was green was also a highlight.
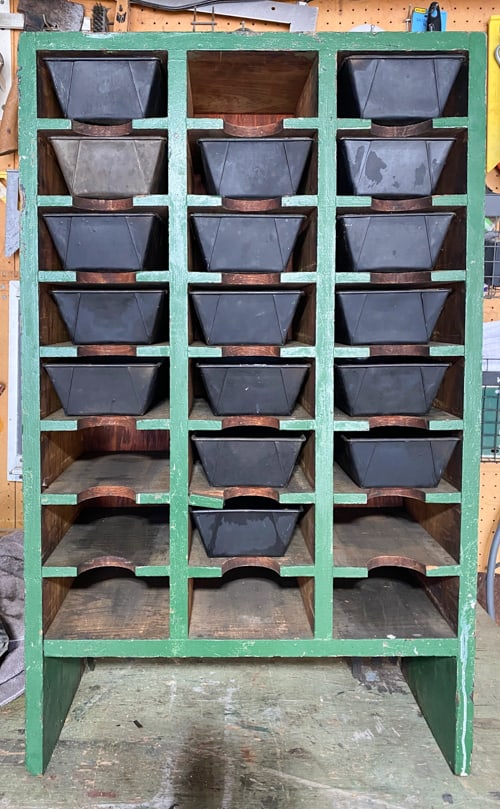
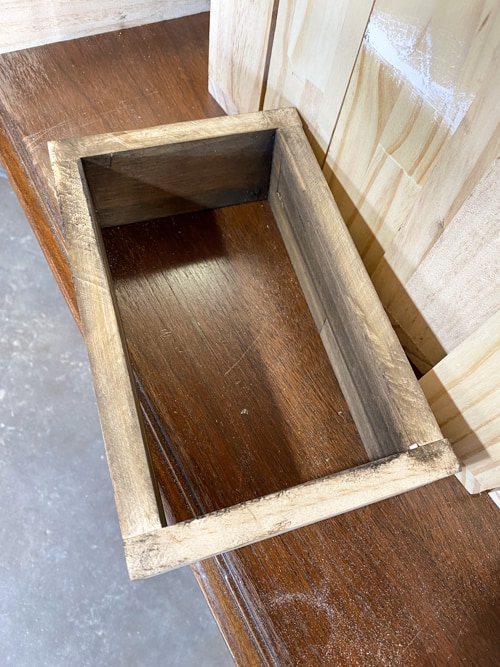
It is a homemade piece and I could tell someone got some great use out of it. The old bread pans were a genius way to have “drawers” to hold the screws and tools that this was used for. I saw this piece totally differently so when I saw that the price was right, I was thrilled to bring it home.
5 Quick Tips For Picking Pieces To Flip
There are many things I look at when I am choosing pieces to flip. I have been flipping pieces for more than twenty years so I have come up with easy ways to know which pieces are worth it or not. This one was definitely worth it.
Here are a few things I look at when hunting for pieces to flip and sell:
- The piece doesn’t need a lot of work.
- The price is right.
- The piece is sought after.
- The profit margin is well worth the work it needs.
- It will be a quick turnaround from buying it to selling it.
{Affiliate links are used in this post. Click on any of the underlined links to find the products I am talking about. You can read my disclosure HERE.}
Supplies Used In This DIY Cubby Makeover
3-in-1 Paint (primer, paint, and topcoat in one)
Scrap Wood
The first thing we did to this piece was created all the drawers.
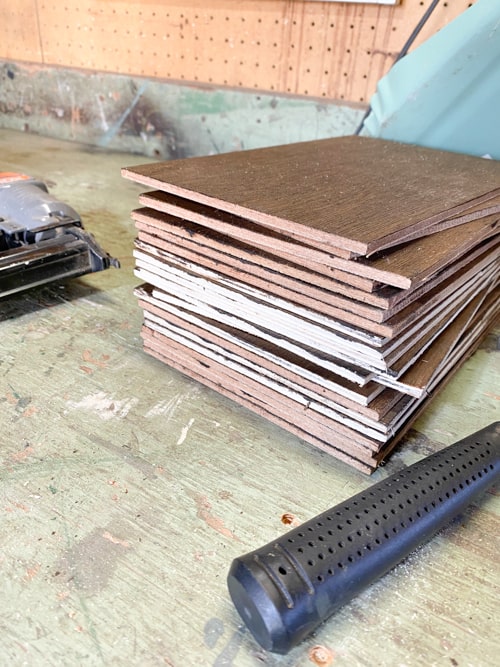
We always have scrap wood in the garage from other projects so we were able to use that to create the drawers. NEVER THROW OUT SCRAP WOOD! You will be amazed at how many projects you can complete just from scrap wood. I shared a few of our other scrap wood projects HERE. These are all amazing decor pieces we use in our home and they were free because we used scrap wood to create them!
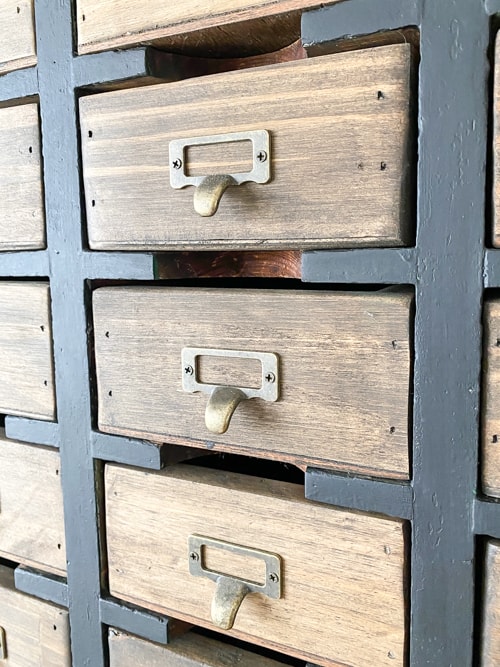
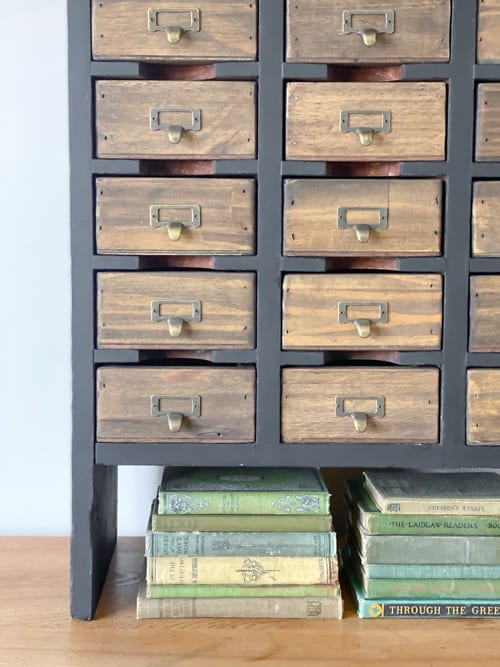
How We Created Small Drawers
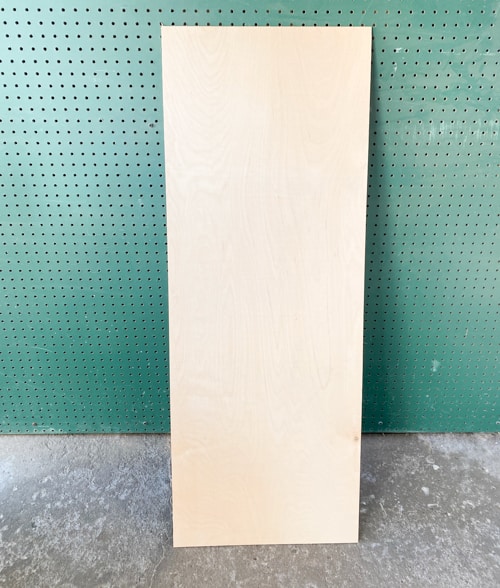
We used thin plywood for the bottom of each drawer and leftover 1″ boards for the sides.
If you are someone who likes to see the makeover being done in real-time, I shared the process, from start to finish, of this makeover as we were doing the project on my YouTube channel HERE. Make sure to SUBSCRIBE when you are there. I am uploading new videos every week!
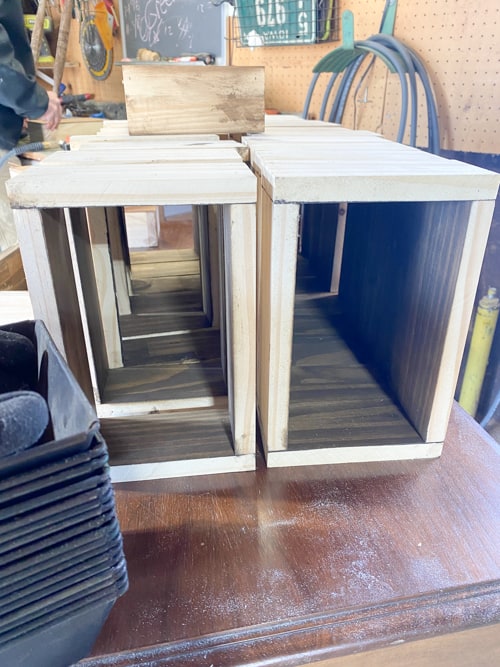
PRO TIP: When you are making something like this that has a lot of pieces, it is best to set it up like an assembly line.
We measured all the cubbies and figured out the size of drawers we wanted. Then, we cut everything at once. We cut all the drawer bottoms and then, we cut all the pieces we needed for the sides, fronts, and backs.
Once we had a pile of all the cut pieces we needed, we started assembling the drawers. If you can get everything cut at once and then set it up as an assembly line, it goes a lot faster.
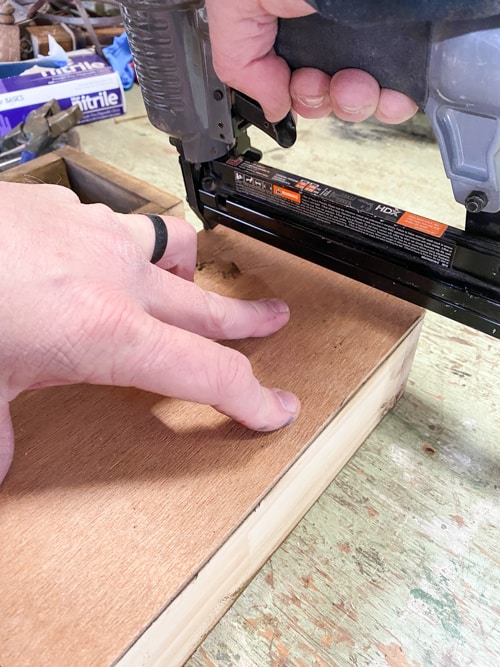
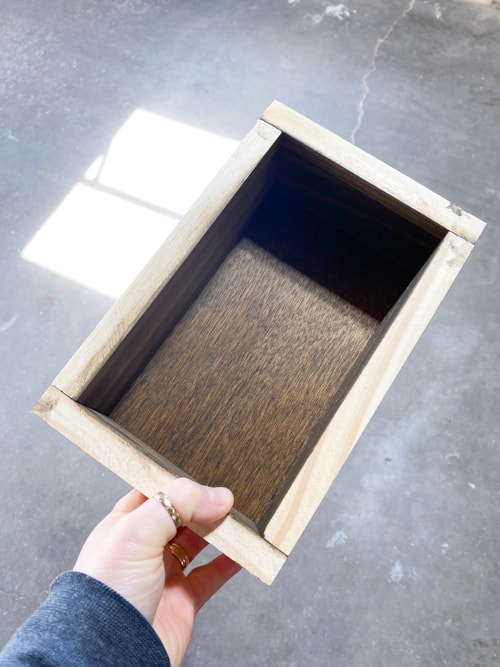
We nailed the outer parts of the drawer together first. Then, I stained the insides of them all with gel stain in the color “Walnut“. It was easier for me to get in all the inside nooks and crannies of the wood before the base of the drawer was put on. I also stained all the bottoms of the drawers before putting them on for the same reason. It is just easier that way.
Once the stain dried, we nailed all of the bottoms on each drawer.
An all-in-one paint will speed up your project time.
As the drawer pieces were drying, I scuff-sanded and painted the shell of the cubby piece in a 3-in-1 paint. (This paint is a game-changer for anyone painting furniture. It has the primer, paint, and topcoat in one can. You only have to worry about one product to get your entire piece done. It is great for beginners but also for someone like me who has been flipping for a long time. It has reduced my project time by more than half. Definitely, check it out if you are looking to speed up the process or you don’t want to have to worry about three separate products).
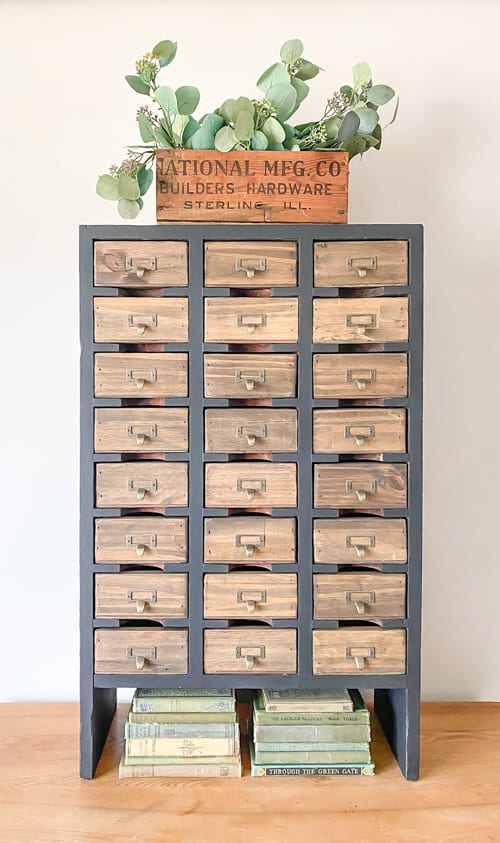
I covered the green color which is crazy for me but I knew this piece would look so much better in black.
I had some label pulls left over from another project and they were the perfect finishing touch to the drawers of this DIY cubby makeover.
This was once a piece to hold nuts and bolts but now, it is a beautiful piece someone can use in their home.
Pieces like this make me so happy. Just think of all the things you could store in these little drawers.
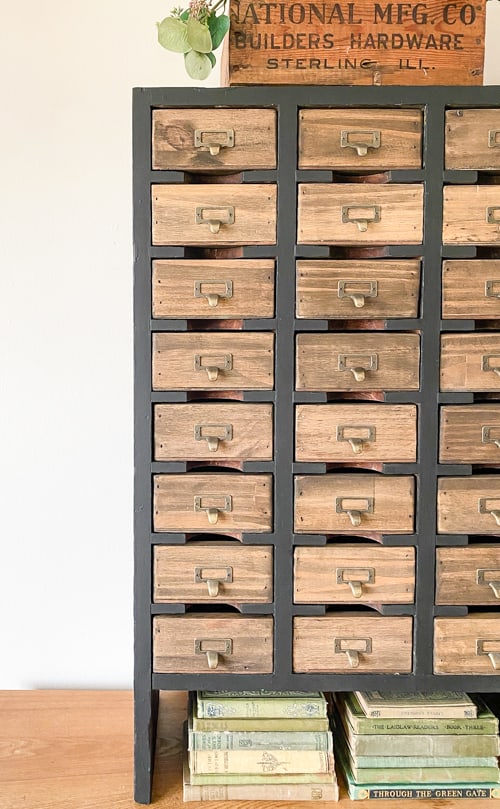
A coat of paint and some new drawers made this piece totally different.
Flipping furniture comes in all kinds of pieces. If you are flipping to sell, it doesn’t have to be a big piece of furniture to be profitable. Think beyond dressers and tables. It is knowing the right pieces to pick up that have the most potential for profit.
Do You Want To Make Money Flipping Furniture?
After twenty years of doing this, I am still picking up pieces when I can find them because I love the creative outlet, but I am now coaching other furniture flippers on how to make more money in their business. If you are someone who is looking to start and/or grow a furniture flipping business, I would love to help you. There are ways to make money in your business beyond painting a piece of furniture. Once I learned that, my business flourished. Don’t waste your time trying to figure it out on your own.
To help other flippers, I created The Furniture Flipping Academy! The academy includes everything you need to start, grow, and/or scale a furniture flipping business. It includes courses, resources, templates, social media planner and guide, a private community, and so much more. It will ensure that you are doing the steps that will lead to success and not wasting your time on things that won’t.
You can find all the information about the Furniture Flipping Academy HERE.
Let’s get your business started and/or moving in the right direction. The Furniture Flipping Academy is for any flipper, from beginner to experienced. If your business is stagnant, there is a reason for that. Let me help you grow it into a flipping career that is profitable and fits the lifestyle you want to live.
PIN THIS POST!