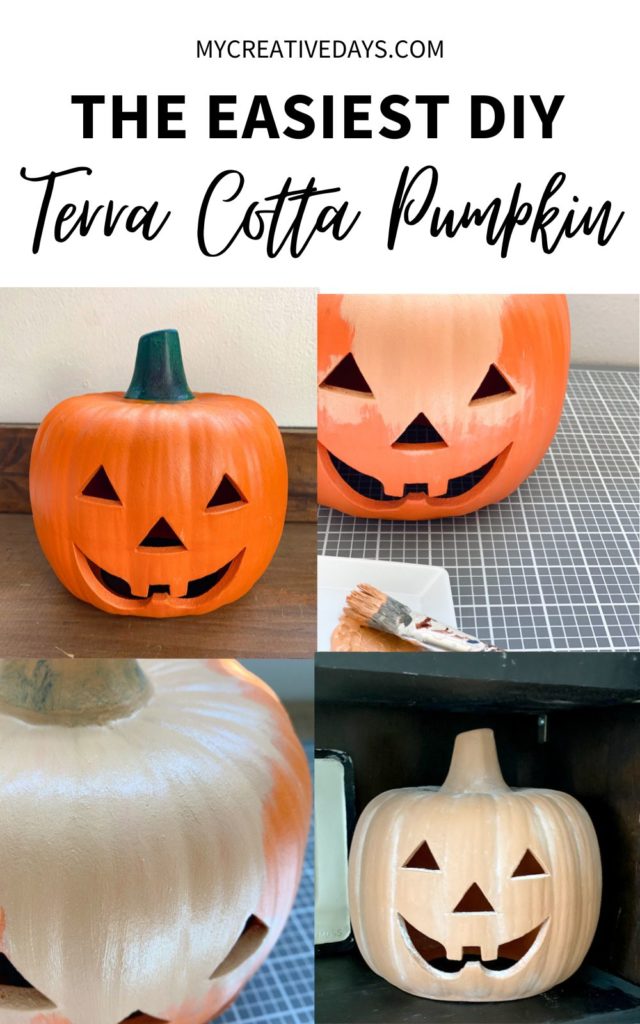
This is the easiest DIY terra cotta pumpkin tutorial. With only a few supplies, any pumpkin can look just like the expensive terra cotta pumpkins you see in stores and online.
Terra cotta is all the rage right now and terra cotta pumpkins are the thing for fall.
There are many beautiful options for terra cotta pumpkins online, but some of them are SO EXPENSIVE!
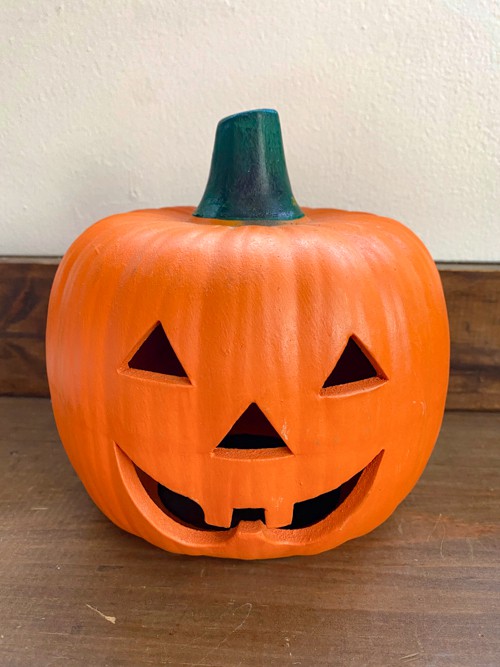
I knew there had to be an easy way to get the same look for a lot less so I headed to my local thrift store to pick up some pumpkins to flip.
This is the first one I found.
{This post does contain Affiliate links. Click on any of the underlined links to find the products I am talking about. You can read my disclosure HERE.}
Supplies Needed For DIY Terra Cotta Pumpkins
Ceramic pumpkins (check your thrift stores)
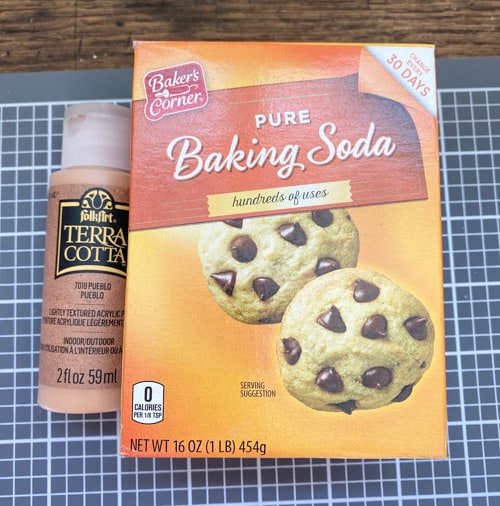
Terra Cotta Paint – I chose the Pueblo color
Baking Soda
Paintbrush
Primer (if your pumpkins are really shiny and slick – to ensure the paint sticks)
If you head into your local thrift stores, you will see ceramic pumpkins like the one I got a lot. People are getting rid of them all the time. I will be picking up more when I head back.
Steps To Creating A Terra Cotta Pumpkin The Easy Way
- First, clean your pumpkin. Make sure there isn’t any dust or dirt on it. The paint and/or primer won’t stick if there is. Just use vinegar and water.
- ***If your pumpkin is super slick and shiny, I would highly recommend using this primer before applying the paint. It will ensure the paint sticks and you won’t be wasting paint to cover your pumpkin.
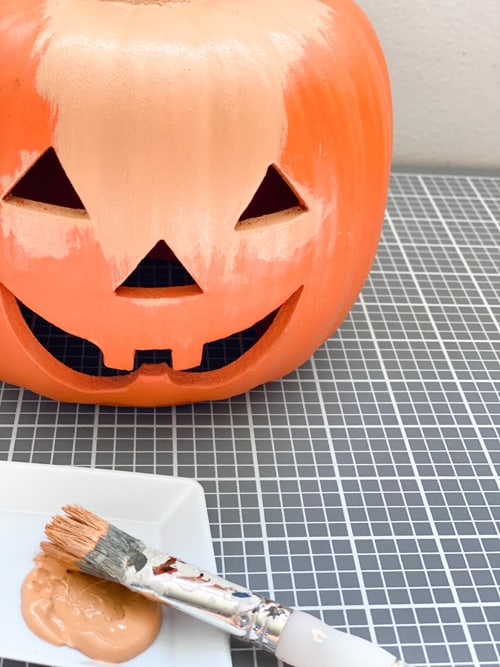
- Apply the terra cotta paint (I chose the Pueblo color) all over your pumpkin. You want to cover the stem as well. It will be a solid color. This pumpkin took two coats. You want to make sure it is fully covered.
-
You can use whatever paint you have on hand, but this terra cotta paint set is so good. There is a texture in the paint that really makes it look like authentic terra cotta. You need to try it. I have been using it on all kinds of things since I got it.
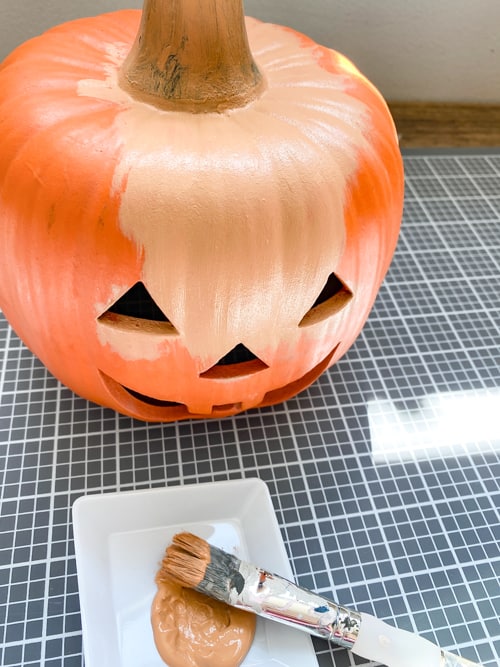
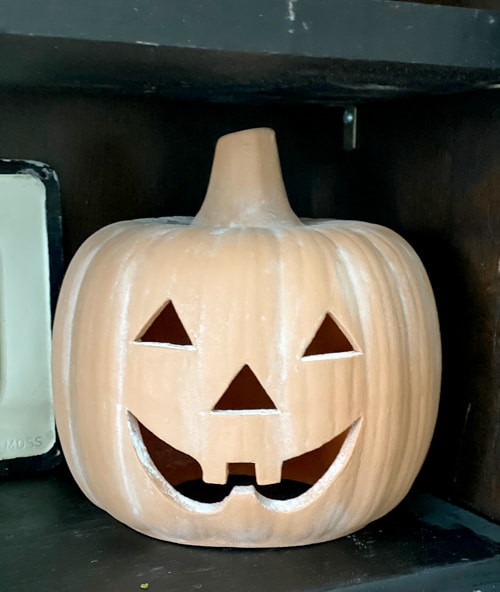
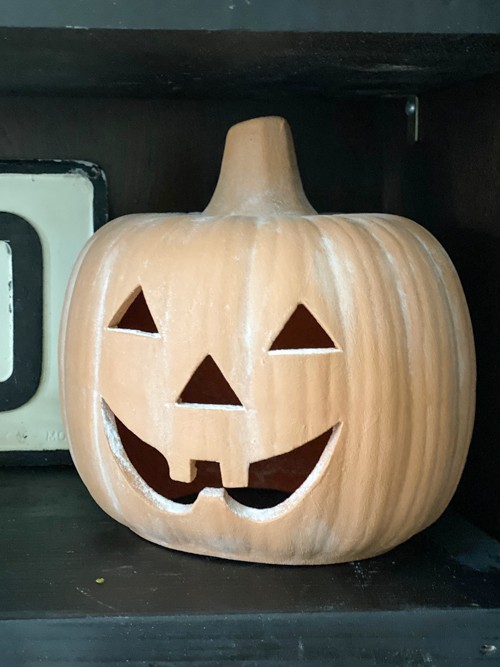
- Once the paint is all dry, you are ready to add the white detail. Pour a little bit of the baking soda into a dish or on a plate so it is easy for you to grab.
- Now, figure out where you want to white details to be. I chose the lines going down the pumpkin and around the base of the stem.
- Using a paintbrush, dab some of the same paint you used to paint the pumpkin onto the areas you want the white detail.
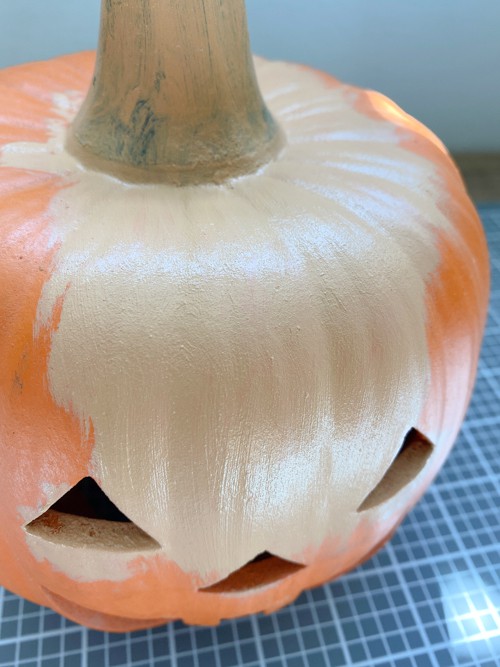
- Then, sprinkle the baking soda over that wet paint. I just used my fingers to do this.
- Let it sit for a little bit as you do this same process in the other areas you want the white detail. Then, come back and wipe off the excess. You could use a clean paintbrush to wipe off the excess but I just used my fingers.
- If you are like me and need to see how something is being done to understand it, you can watch me do this entire process HERE.
- Once you have all the excess off and you are happy with the look, it is done!
I LOVE THIS DIY TERRA COTTA PUMPKIN PROJECT SO MUCH!
I am already working on another pumpkin that I found at the thrift store. This one is just a plain ceramic pumpkin and not a jack-o-lantern. I see a few more of these in my near future.
If you try this project, I would LOVE to see it. Post a photo on Instagram and tag me @mycreativedays.
PIN THIS POST!
If you liked this DIY, you will also love these easy fall projects:
DIY Aged Copper Jack-O-Lanterns
Upcycled Pumpkin Craft Project