I want to thank Durham’s® Rock Hard® Putty for sponsoring this Raised Stencil Dresser Makeover post.
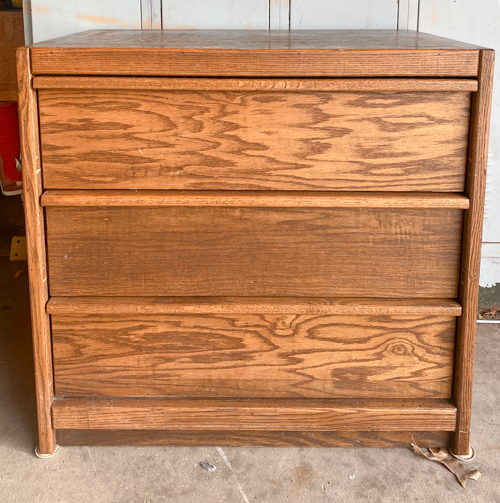
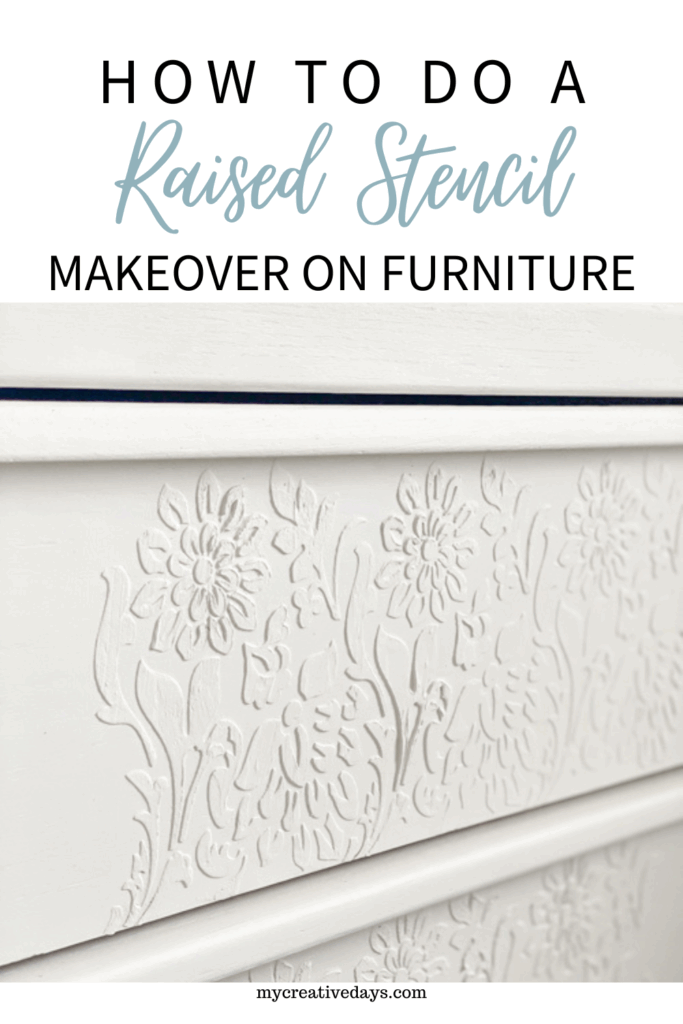
If you’ve been looking for a fun and creative way to update a plain dresser, this raised stencil dresser makeover will inspire your next project! I took a basic 3-drawer chest and gave it an entirely new look using a fun technique called raised stenciling. This piece is solid oak and built to last, but it was so plain and lacked personality. The raised stencil technique is such a fun way to add texture, charm, and a custom touch to any furniture makeover, and it’s easier than you might think, thanks to Durham’s® Rock Hard® Putty!
{Affiliate links are used in this post. Click on any underlined links to find the products and sources I am referring to. You can read my disclosure HERE.}
Raised Stencil Dresser Makeover
Supplies I Used for This Raised Stencil Dresser Makeover:
- Primer (I used Bonding Boss)
- Stencil
-
Paint (I chose Magnolia)
-
Paintbrush or sprayer
-
Optional: top coat/sealer (I used this one)
Step 1: Clean & Prime the Dresser
Before diving into the fun stuff, I always make sure to prep the piece properly. For this raised stencil dresser makeover, I started by cleaning and scuff-sanding the dresser. Then, I applied a good coat of primer to help the stencil and paint adhere better and last longer.
Step 2: Apply the Raised Stencil
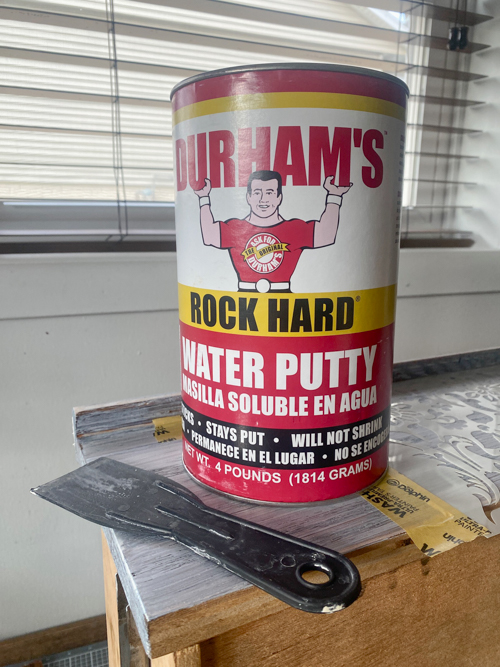
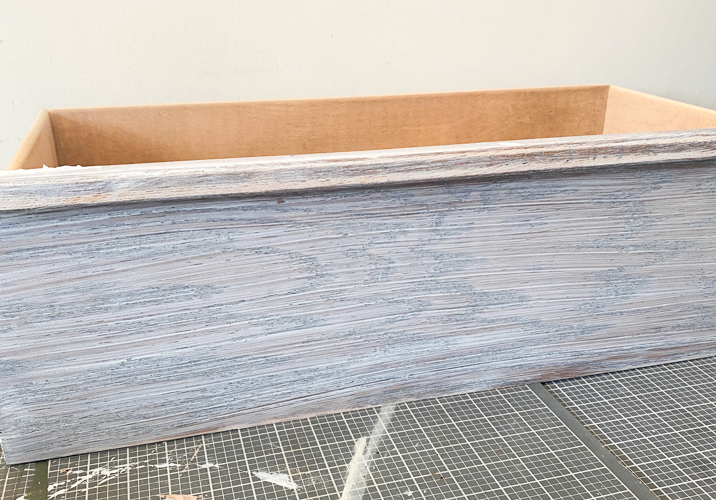
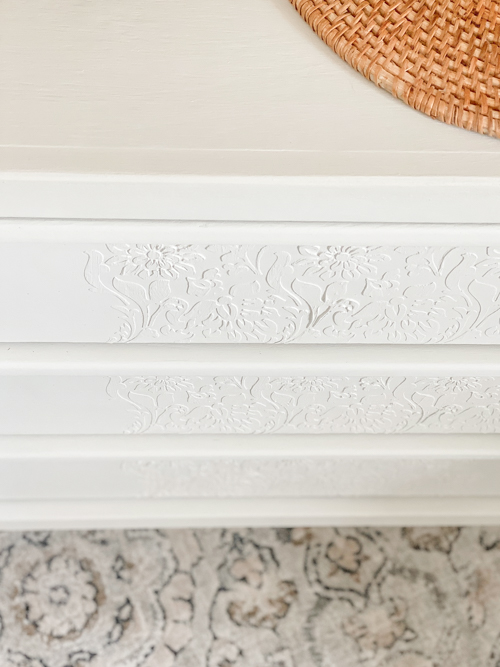
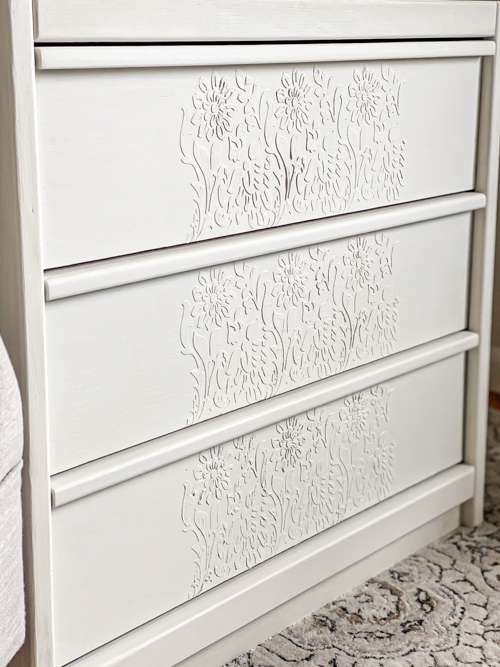
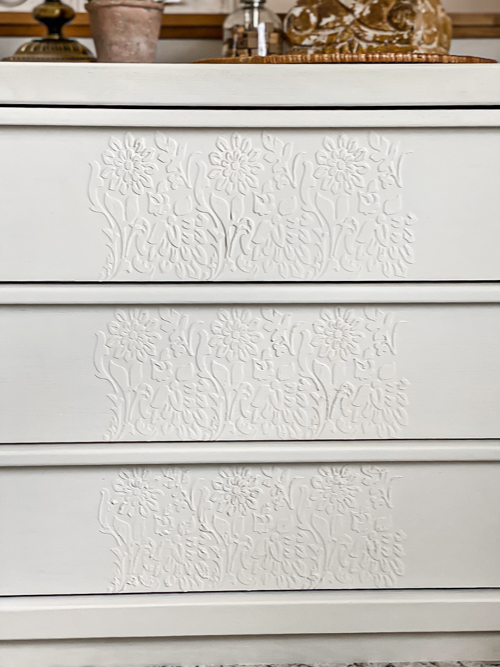
Here’s where the magic happens! I chose a pretty stencil pattern that added just the right amount of texture without overwhelming the piece. Using Durham’s® Rock Hard® Putty, I carefully applied the mixture over the stencil with a putty knife. Once the stencil was lifted, the raised design stayed in place. I let it dry completely before moving on to the next step.
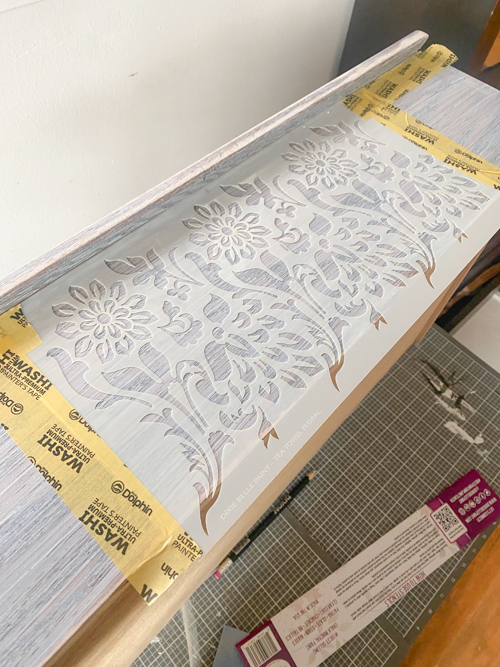
Pro tip: If your stencil is much bigger than mine, you may want to work in sections and clean the stencil in between applications to keep those lines crisp!
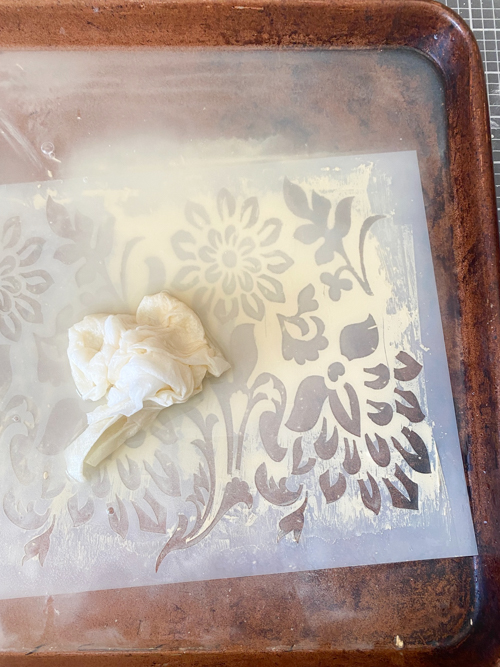
Cleaning Tip: DO NOT clean the stencil in your sink. You do not want the Rock Hard going down your drains. I fill an old cookie sheet with some water, and then I put the stencil in that. I use an old rag or paper towel to wipe the stencil clean. Then, I dump the water outside and rinse off the stencil with the hose.
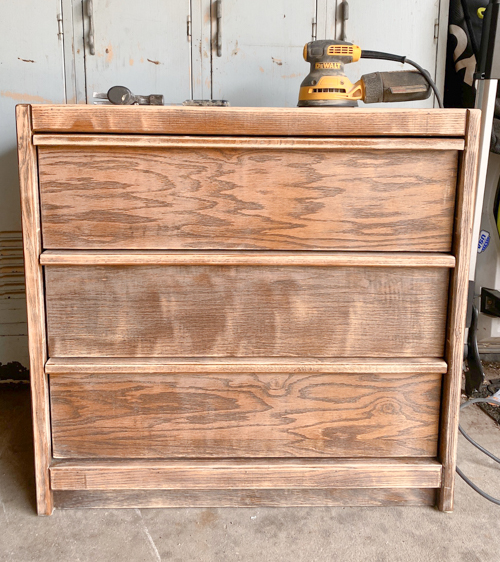
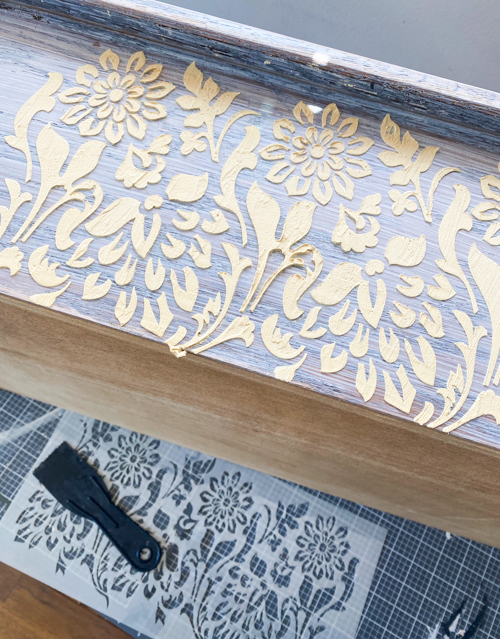
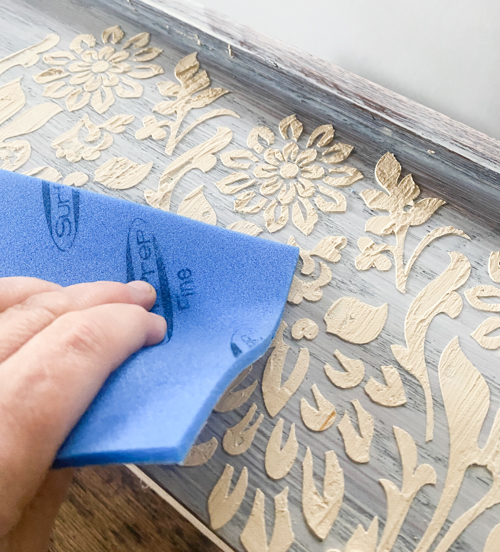
Step 3: Sand
After the raised stencil was fully dry, I went over it lightly with 220 sandpaper just to remove any high peaks of the putty.
Step 4: Paint It All Out
Then, I painted the entire dresser in a beautiful color that brought everything together. You can use a brush, roller, or sprayer—whatever you’re comfortable with. The raised stencil adds such a beautiful, subtle dimension under the paint. It’s one of those details that elevates the entire piece!
Step 5: Topcoat
After the paint had fully dried, I went over it with a topcoat.

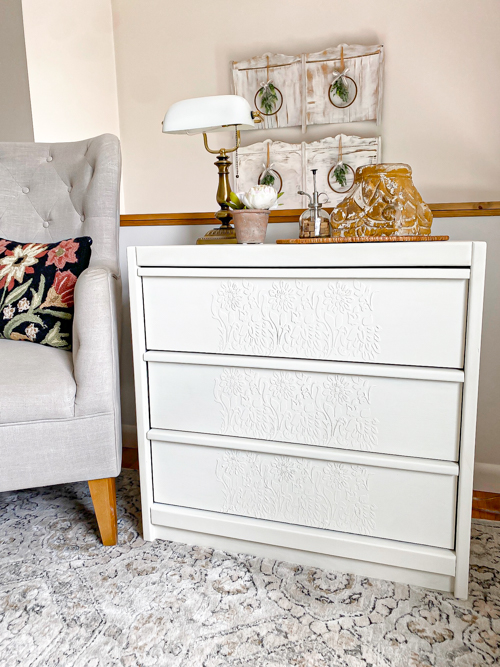
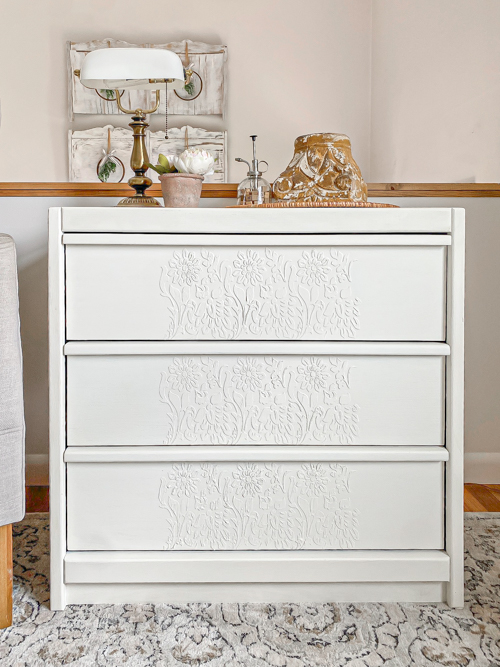
The Finished Look of this Raised Stencil Dresser Makeover
I couldn’t be happier with how this Raised Stencil Dresser Makeover turned out. The texture gives it a high-end, custom look.
This makeover is a perfect example of how just a few extra steps can transform a plain piece of furniture. If you’ve never tried raised stenciling before, I highly recommend giving it a shot—especially with Durham’s® Rock Hard® Putty. It’s affordable, easy to use, and gives amazing results!
Let me know in the comments if you’ve tried this technique or plan to! Don’t forget to pin this project for later. 🙌
To see this project being done in real time, head over to my YouTube video HERE. Make sure to SUBSCRIBE when you are there. I am launching new videos every week!
PIN THIS POST!
If you liked this Raised Stencil Dresser Makeover, you will also love these:
How to Repair Veneer with Durham’s® Rock Hard® Putty