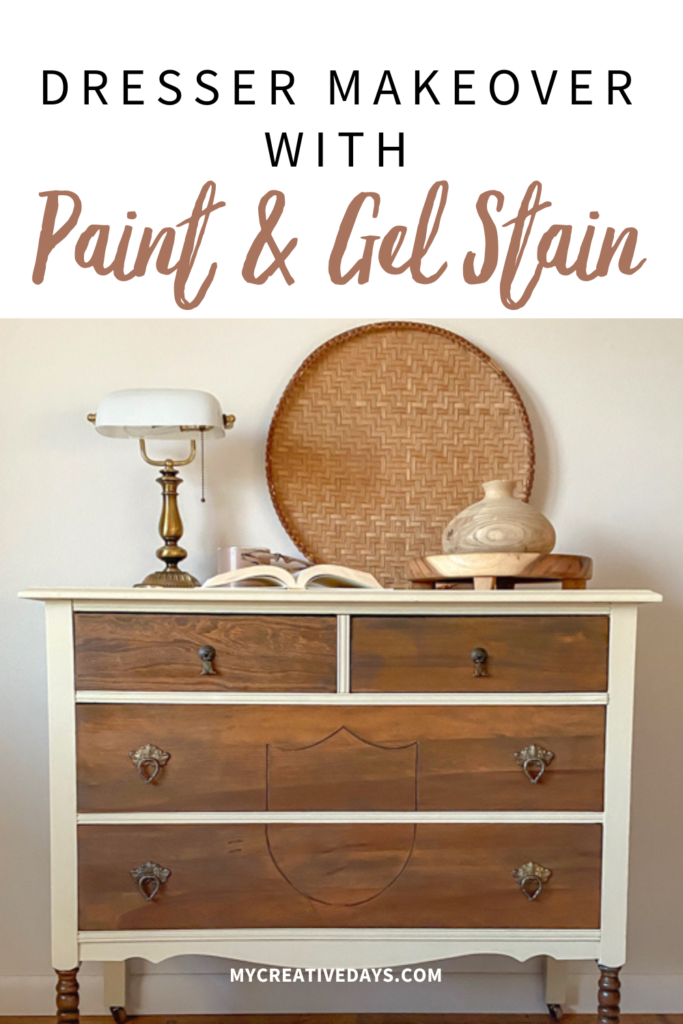
If you’re looking for a budget-friendly way to give your furniture a stunning transformation, this dresser makeover with paint and gel stain is the perfect project to try. Using just a few supplies and some creativity, you can turn an outdated dresser into a statement piece that looks high-end and completely custom.
Why Choose a Dresser Makeover with Paint and Gel Stain?
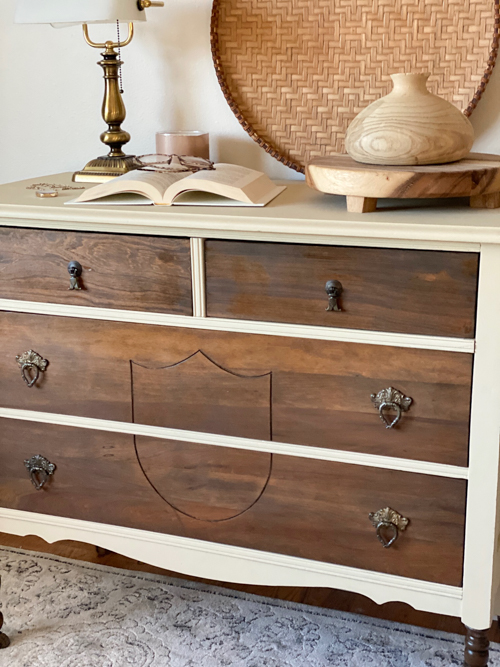
Combining paint and gel stain is a versatile way to revamp a dresser. Paint provides a clean, fresh base, while gel stain highlights the natural beauty of the wood, adding warmth and character. This method works beautifully for dressers that have solid wood components, as the stain can bring out unique grain patterns while the paint adds contrast and style.
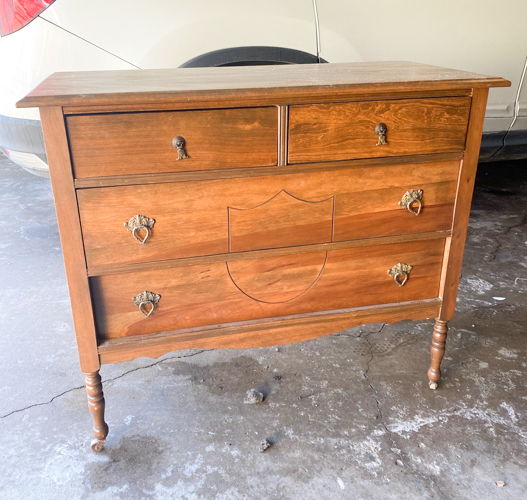
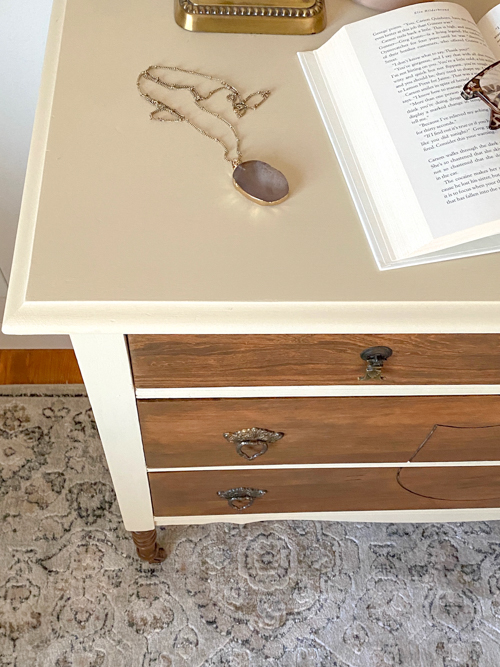
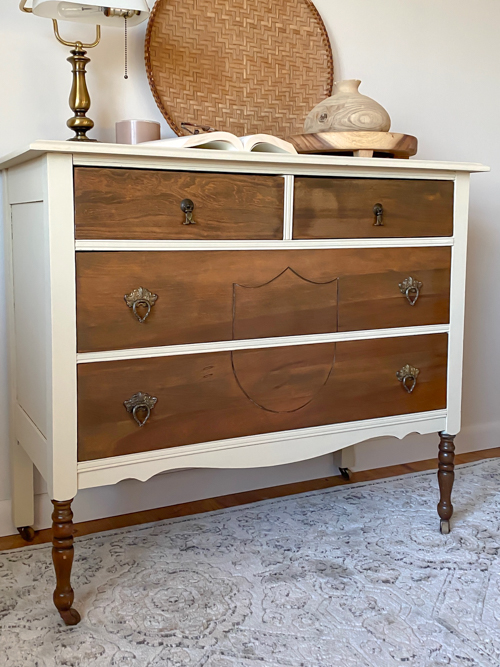
I found this dresser at my local Restore store, and it immediately caught my eye. It had all the original hardware and was the perfect piece to make over. I wanted to preserve the natural beauty of the wood, so I decided to stain the drawers. At the same time, I was eager to try out a new paint color I had never used before. I knew the contrast between the paint and stain would create a stunning effect on this piece.
{Affiliate links are used in this post. Click on any underlined links to find the products and sources I am referring to. You can read my disclosure HERE.}
Supplies You’ll Need
Here’s a quick list of what you’ll need for a dresser makeover with paint and gel stain:
- A solid wood dresser
- Sandpaper or an orbital sander
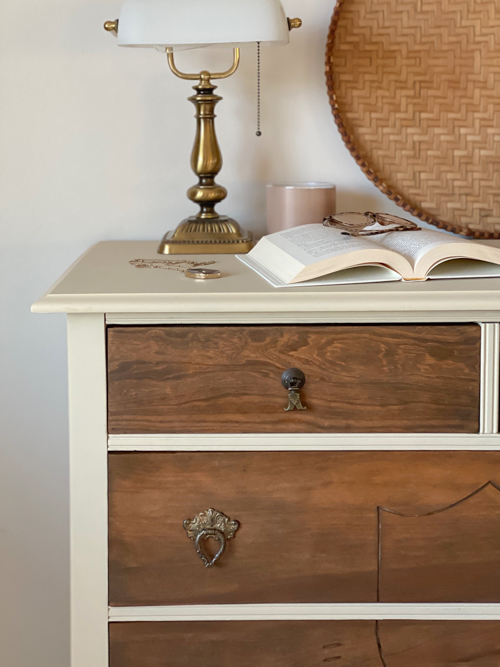
- All-in-One Paint (I used the color “Sand Castle“)
- Paintbrushes
- Gel Stain (I used Golden Ash)
- Stain Applicator
Step-by-Step Process
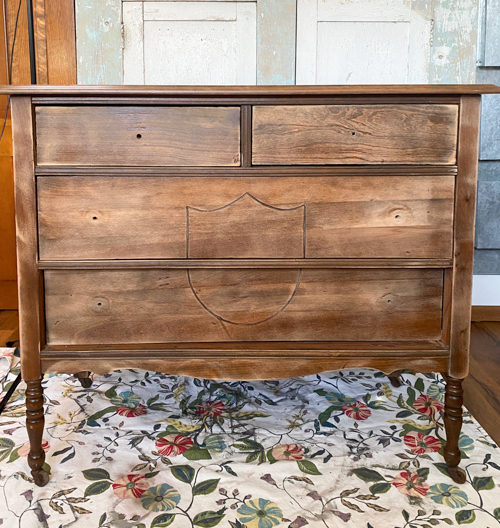
- Prepare the Dresser: Start by cleaning the dresser thoroughly to remove dirt, dust, and grease. To see how I like to clean my pieces before a makeover, head to my post HERE.
- Scuff-Sand: I always scuff-sand a piece of furniture before I paint it. You can find my tips for scuff-sanding HERE.
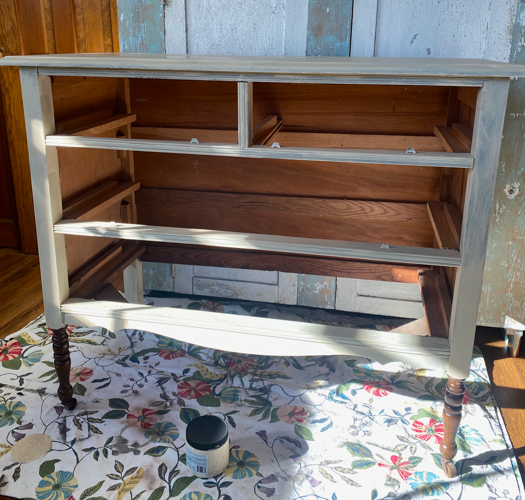
- Paint the Dresser: Tape off any areas you don’t want to paint. Then, begin painting the rest of the dresser. If you are using an all-in-one paint as I did here, you save on all the steps of having a separate primer and topcoat. are going to save so much time. You are essentially priming, painting, and topcoating all at the same time! It is a total game-changer. This dresser took two coats. Make sure to allow each coat to dry completely before applying another coat.
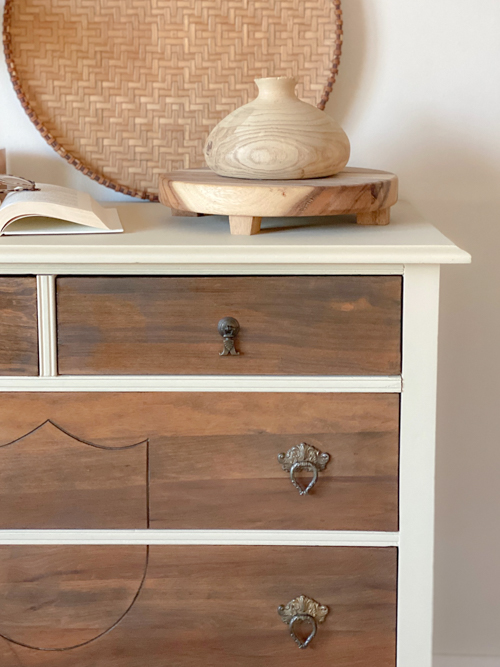
- Apply Gel Stain: Decide which areas of the dresser you want to stain. For this project, I just wanted to do the drawer fronts. Use an applicator to apply the gel stain in smooth, even strokes. Repeat until you achieve the desired depth of color.
- Seal the Finish: You don’t have to seal this paint. Remember, the topcoat is inside the paint. You can add a clear topcoat over the stained areas if you like. This step ensures durability and keeps the dresser looking great for years to come.
- Add Hardware: Replace or reinstall hardware to complete the look.
Tips for Success
- When working with gel stain, start with a lighter layer and build up gradually to avoid over-saturating the wood.
- Choose a paint color that contrasts beautifully with the stained areas for maximum visual impact.
- Test your stain and paint on a hidden area of the dresser before committing to the entire piece.
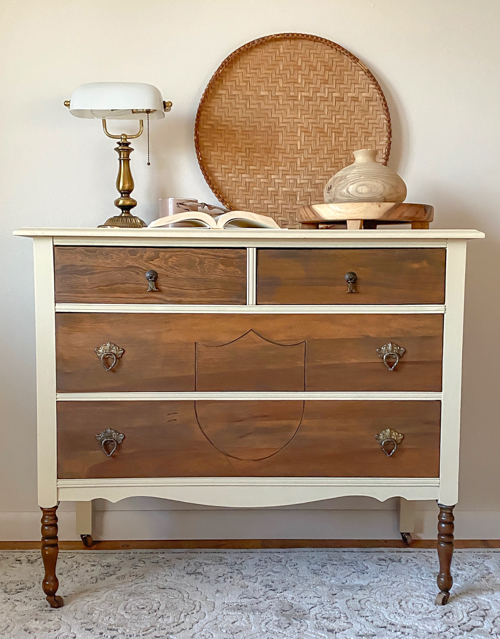
The Results of Your Dresser Makeover with Paint and Gel Stain
The final result of this project is a beautifully updated dresser that blends classic and modern styles. The combination of paint and gel stain creates a sophisticated, timeless piece that can elevate any room in your home. Whether you use it in a bedroom, entryway, or living space, your newly transformed dresser is sure to be a conversation starter.
To see my tips while doing this project, head to my YouTube video HERE. Make sure to SUBSCRIBE to my channel when you are there. I am launching new videos every single week!
Curious About Flipping Furniture?
After more than twenty years of flipping furniture, I still pick up pieces whenever I can because I love the creative outlet. What started as a way to transform forgotten pieces has grown into something I now help others learn and enjoy, too.
That’s why I created The Furniture Flipping Academy. It is not just a course, but an all-in-one resource you can use at any stage of your journey.
Whether you want to try one project, flip occasionally for extra income, or grow it into something more over time, the Academy meets you where you are. Inside, you’ll find practical tools like worksheets, templates, guides, and real-life examples you can use when you need them. There is no pressure. No overwhelm. No requirement to turn it into a full-time business.
You don’t need experience or a huge following. You just need a starting point and a trusted resource to guide you.
Find all the details (and the new LOW PRICE) for the Furniture Flipping Academy HERE.
If you liked this Dresser Makeover with Paint and Gel Stain, you will also love these:
Simple Dresser Makeover with Green Paint
Modern Buffet Makeover: The Products and Process Revealed
Thrifted Clawfoot End Table Makeover