I get excited to share every project here, but there are certain projects that I get super excited to share. Those projects usually have little or no money invested and make a big impact or change. This DIY Plug In Wall Sconce for our headboard did both.
After we made over our daughter’s bedroom, I felt inspired to make a few changes in our bedroom. Then, I felt inspired to start a kitchen makeover at the same time. (It is just the way things go around here). Since we have been at a standstill in the kitchen (we are waiting for countertops to be installed), we started this lighting project in our room.
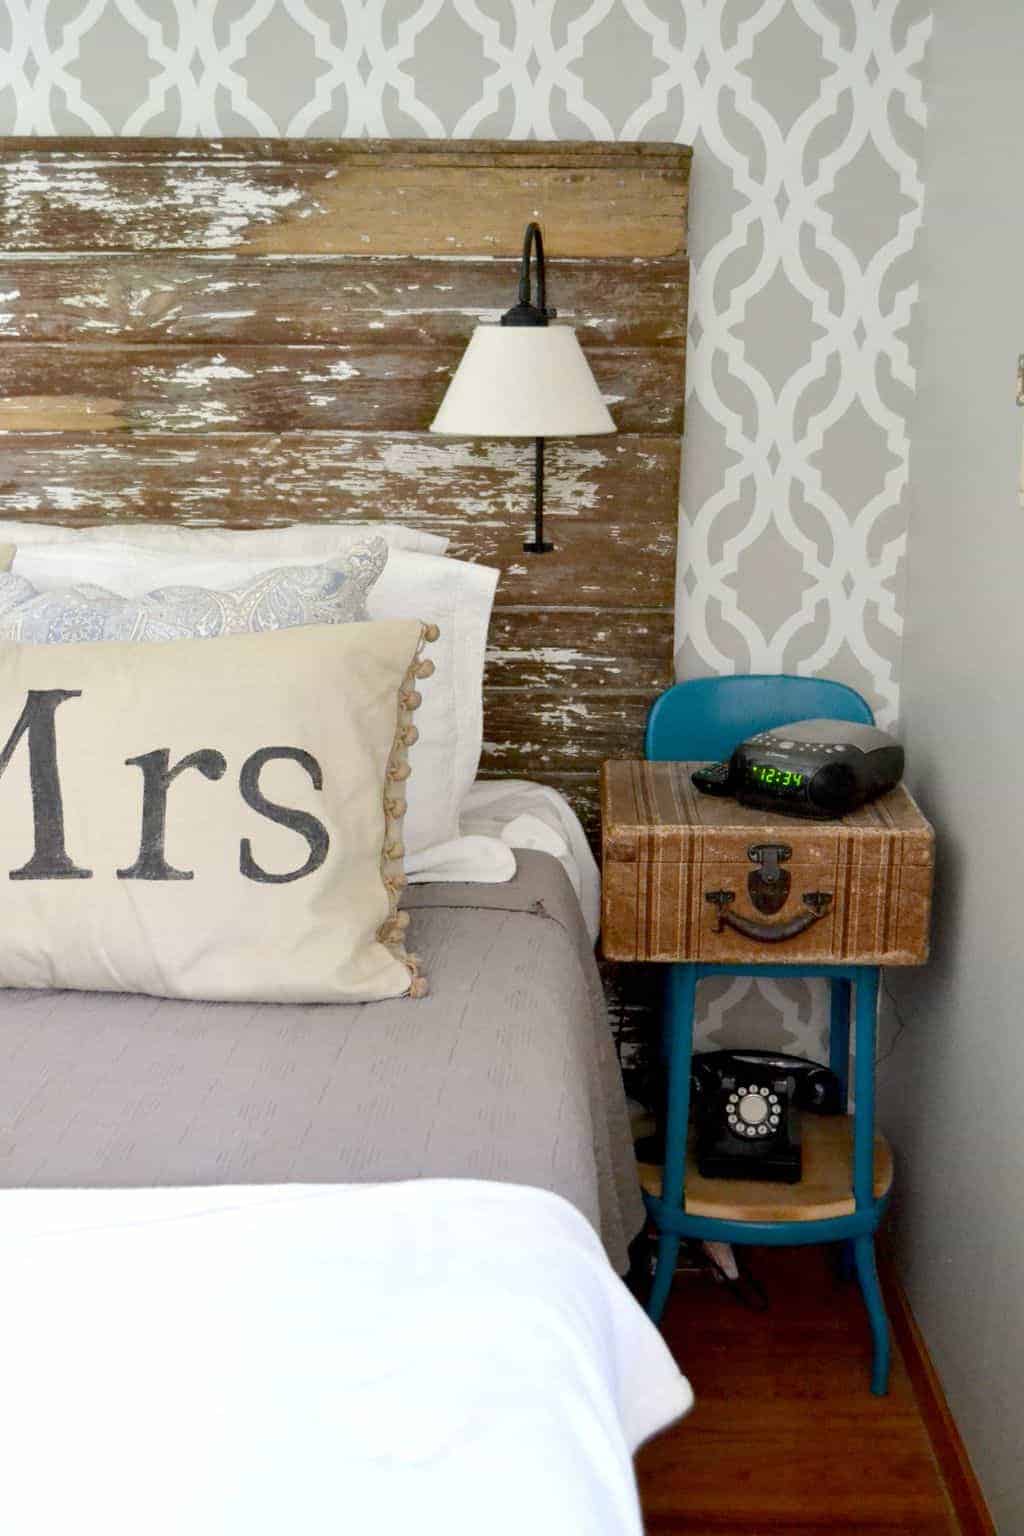
This project came about when I was complaining about the lack of space we have in our bedroom for night stands. The night stand we have on my side of the bed is a stool with a suitcase because it was the only thing that would fit. There is no space on top of that suitcase for much so I wanted to put some lights in our headboard so we could free up the night stand.
I was determined to come up with a DIY Plug In Wall Sconce for our headboard.
A trip to a local thrift store had the DIY Plug In Wall Sconce gods shining down on me.
I say that for a few reasons:
- You never find a pair of anything at a thrift store.
- You never find a pair of anything that is going to work exactly for what you need at a thrift store.
- And, you never find a pair of anything that is going to work exactly for what you need for under $10 at a thrift store.
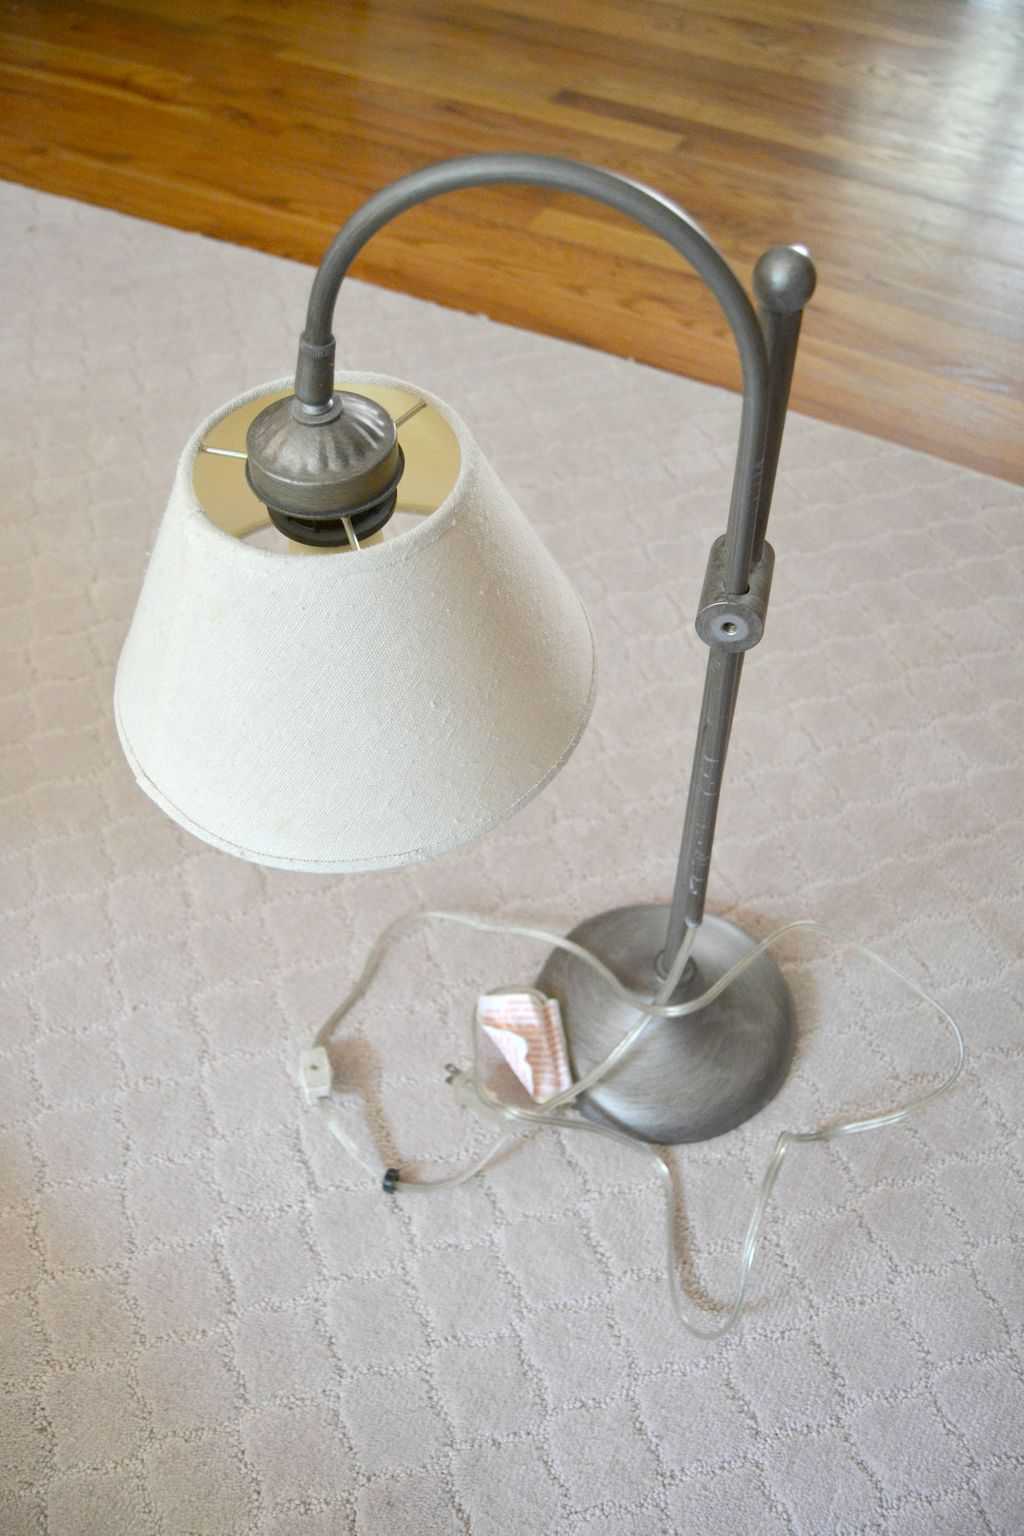
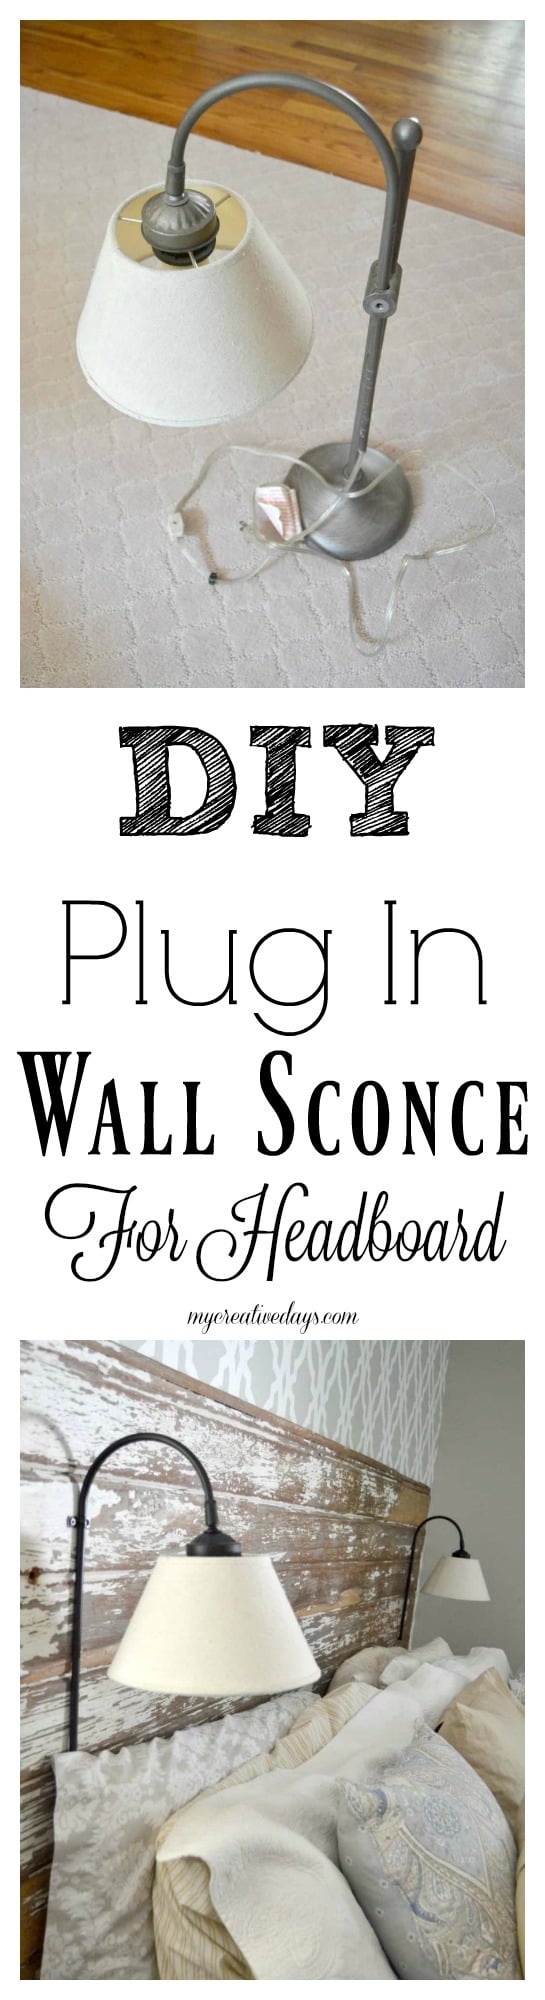
I scored two of these lamps for $4.38 each!
After some alterations, they were going to be perfect sconces for our headboard.
Like most rooms in our home, our bedroom is small so I need to get creative for space and storage. The back wall is the only wall our bed can go and why the original owners only put one window in the left corner of this wall is beyond me. It makes everything feel off-centered. We have a king size bed so we don’t have tons of space for side tables. I have used small, metal stools as side tables because they serve the purpose but don’t take up a lot of space. I like to read at night so lamps on the side of the bed is essential. The problem is that they take up way too much room on the stools. I knew sconces on the headboard would take care of that problem.
This is how we did it.
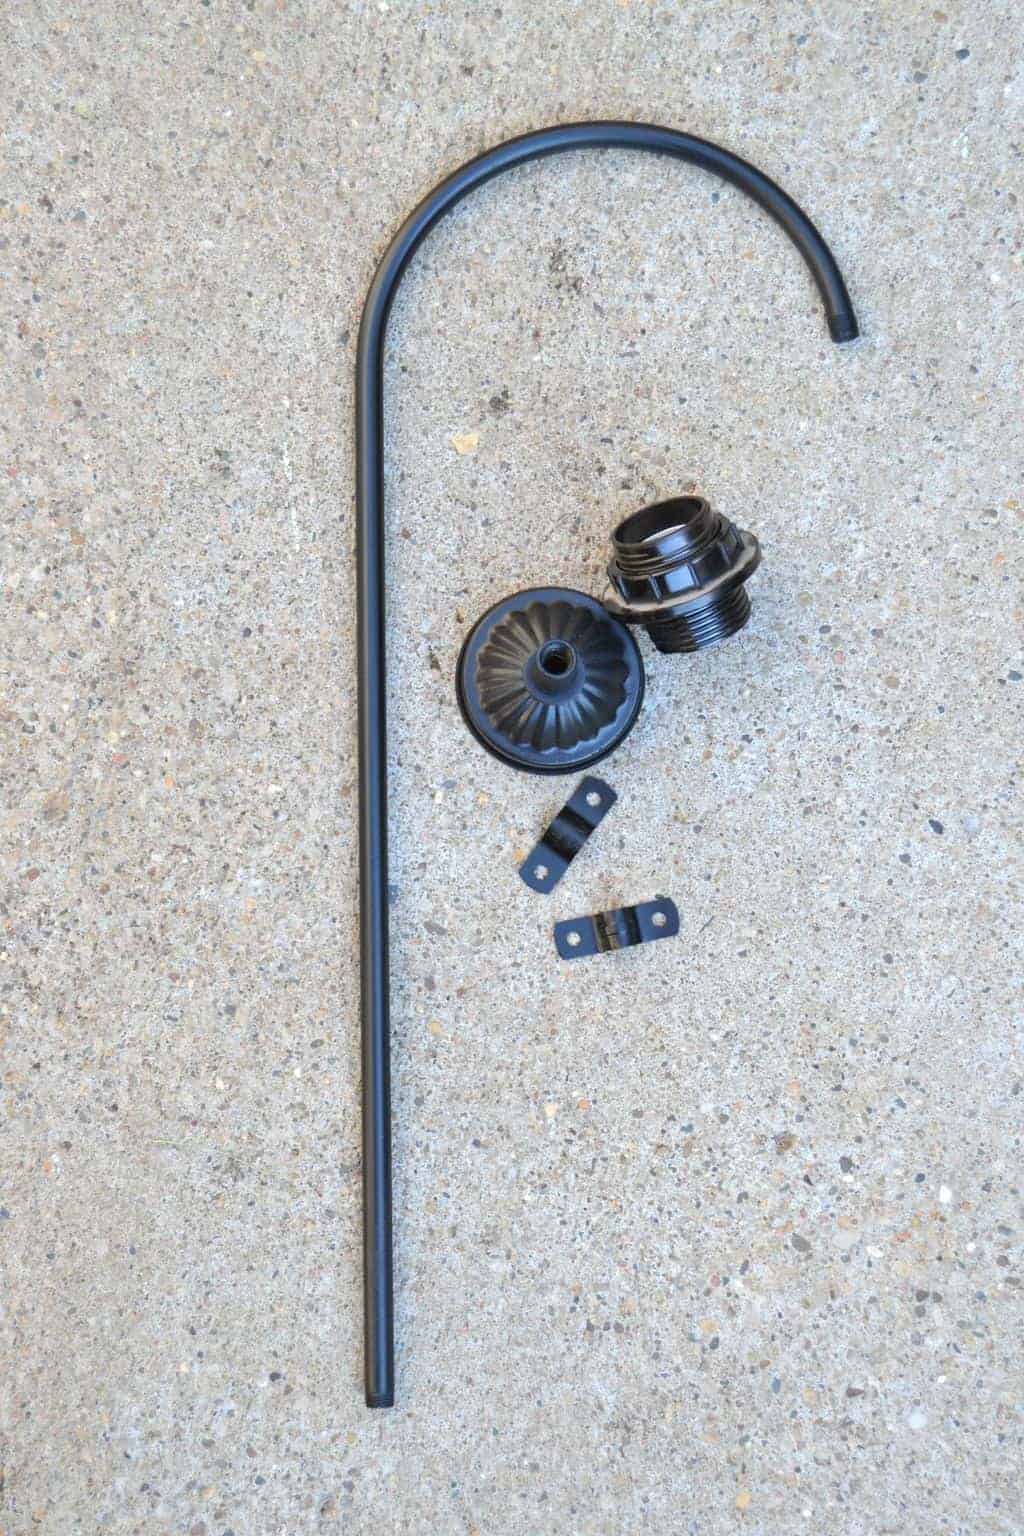
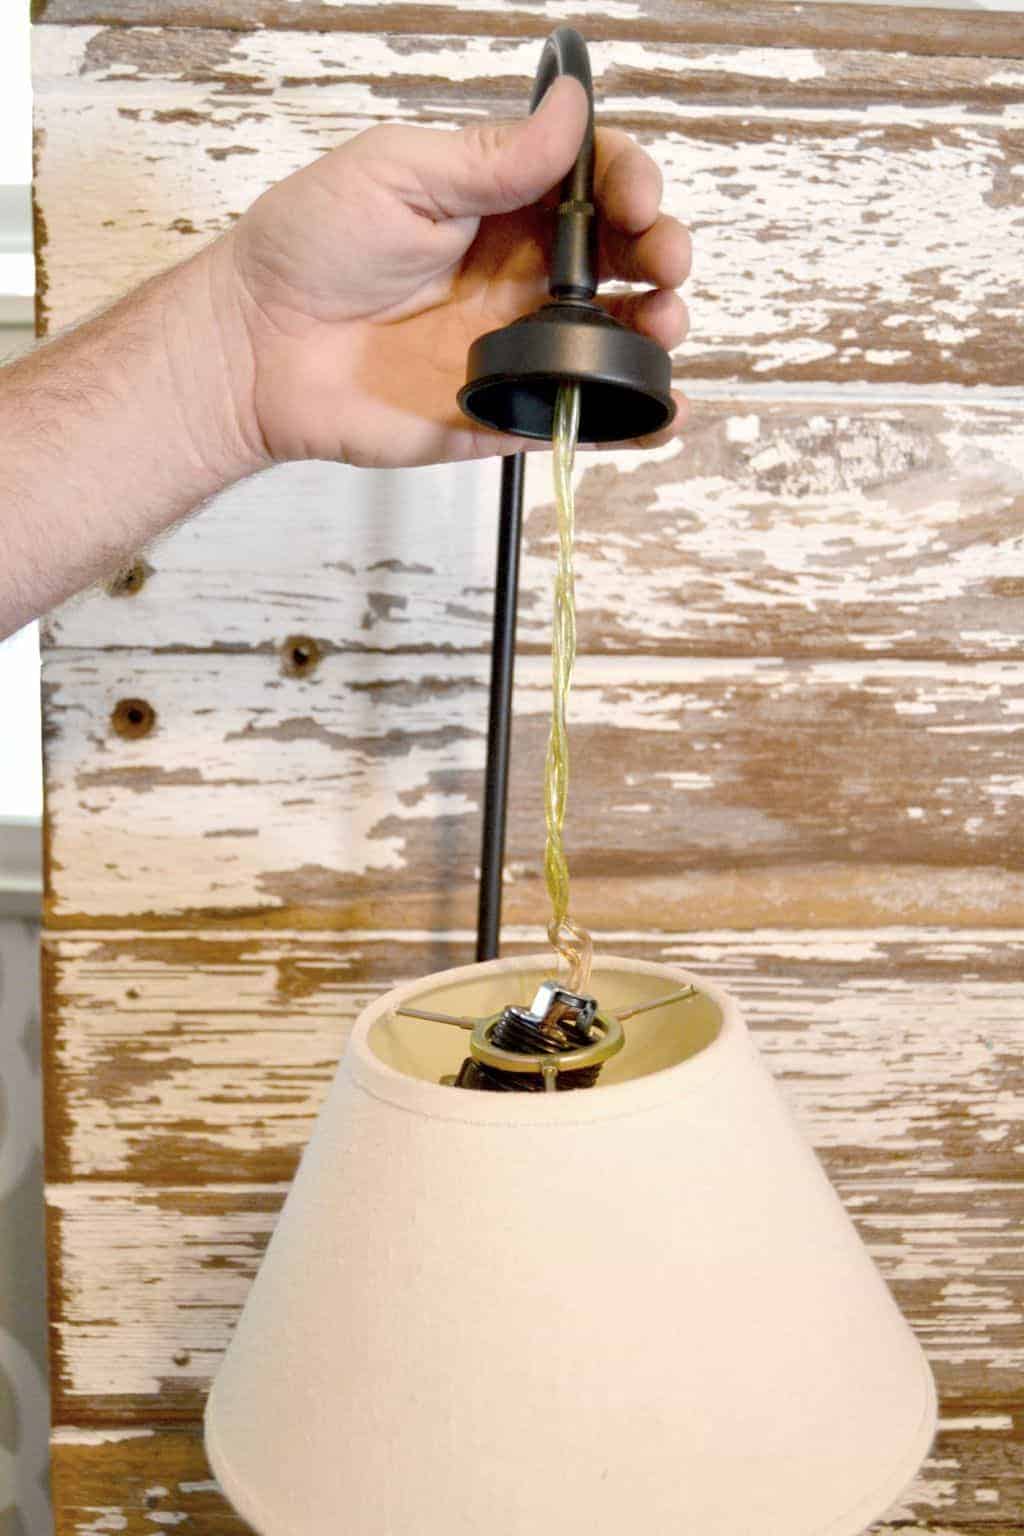
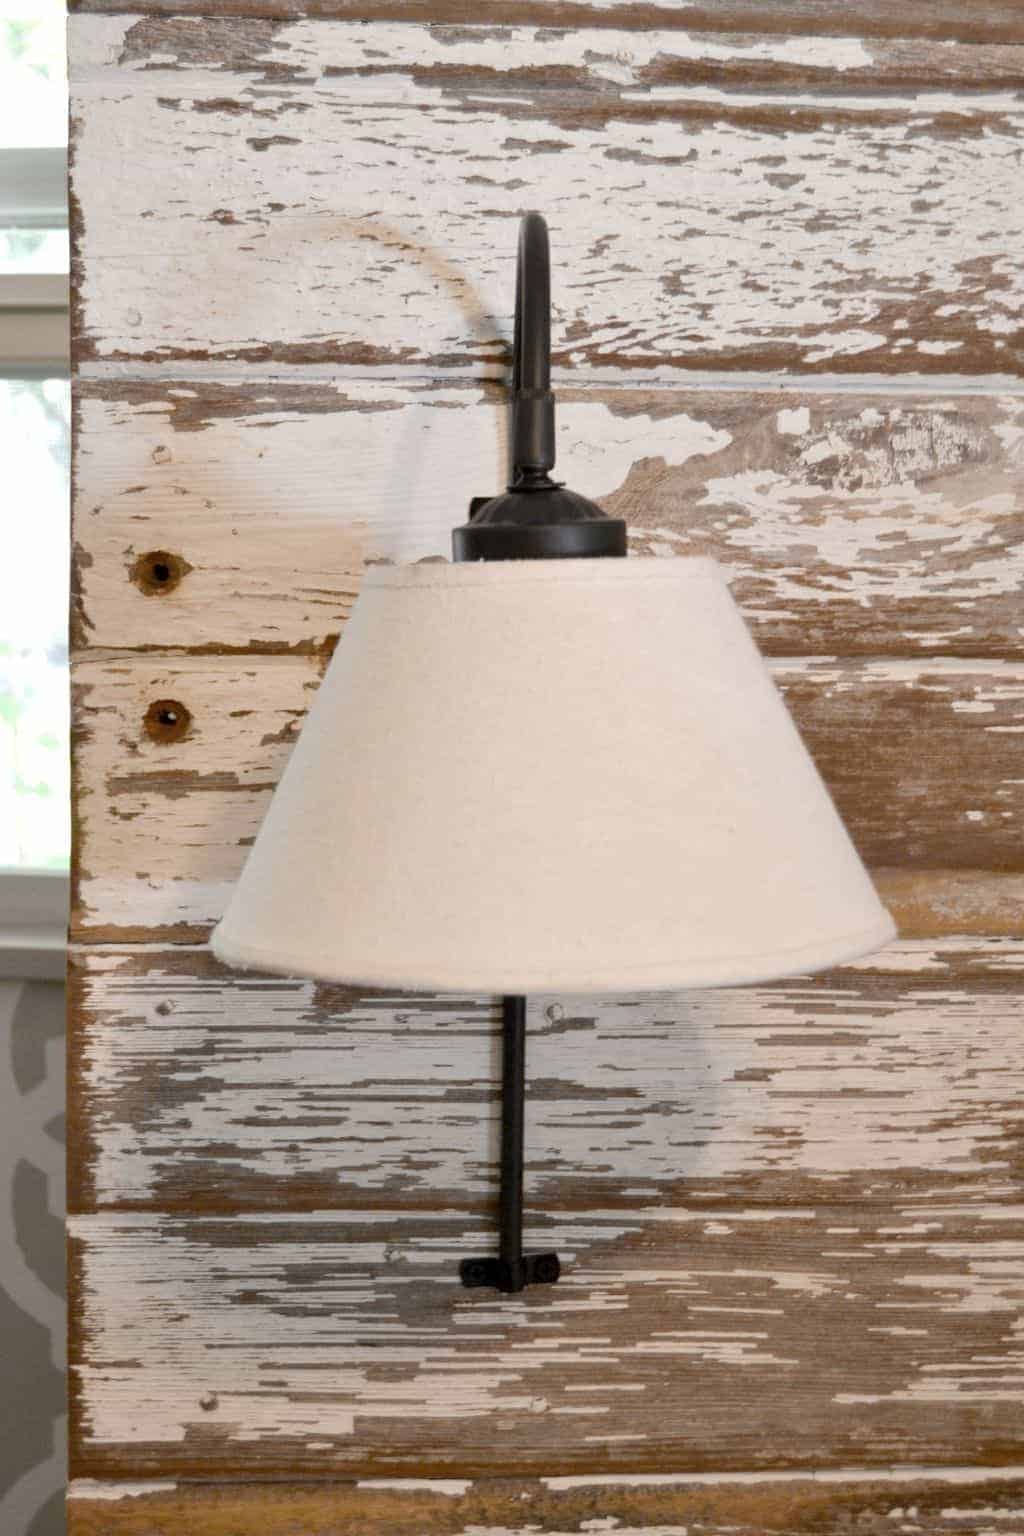
I took the lamps apart and spray painted the parts we were going to use black.
Matt has made so many DIY lights around here so he knows how to rewire different things to make them work as lights.
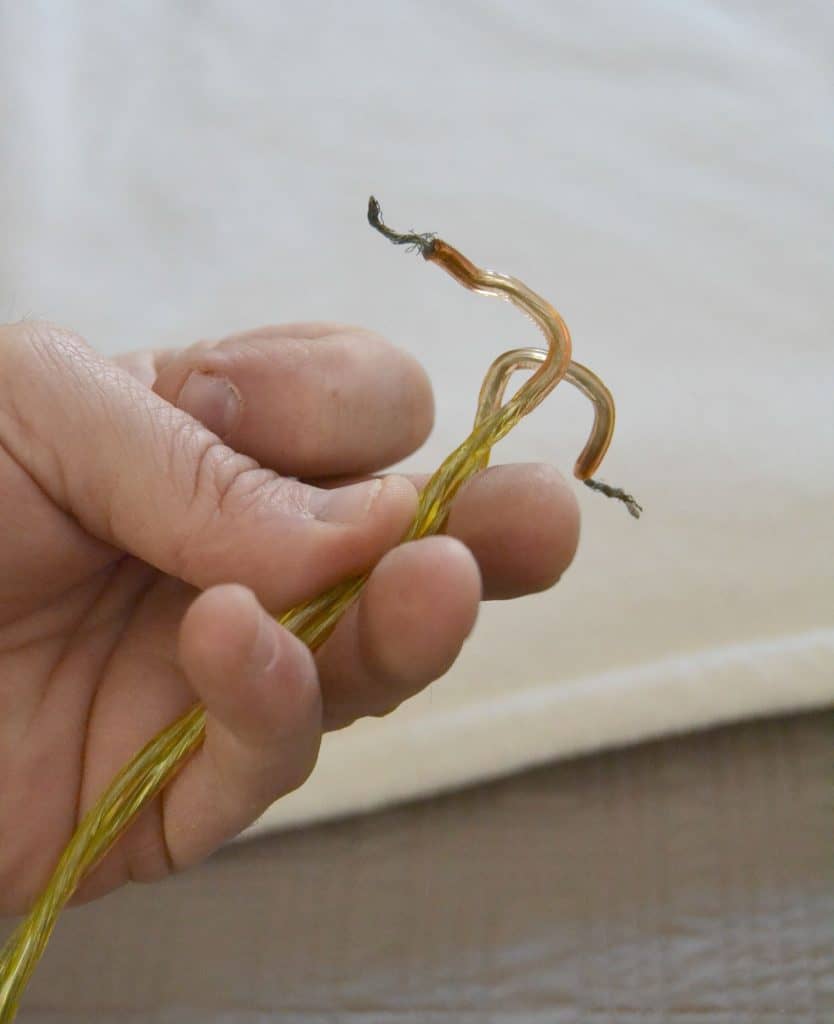
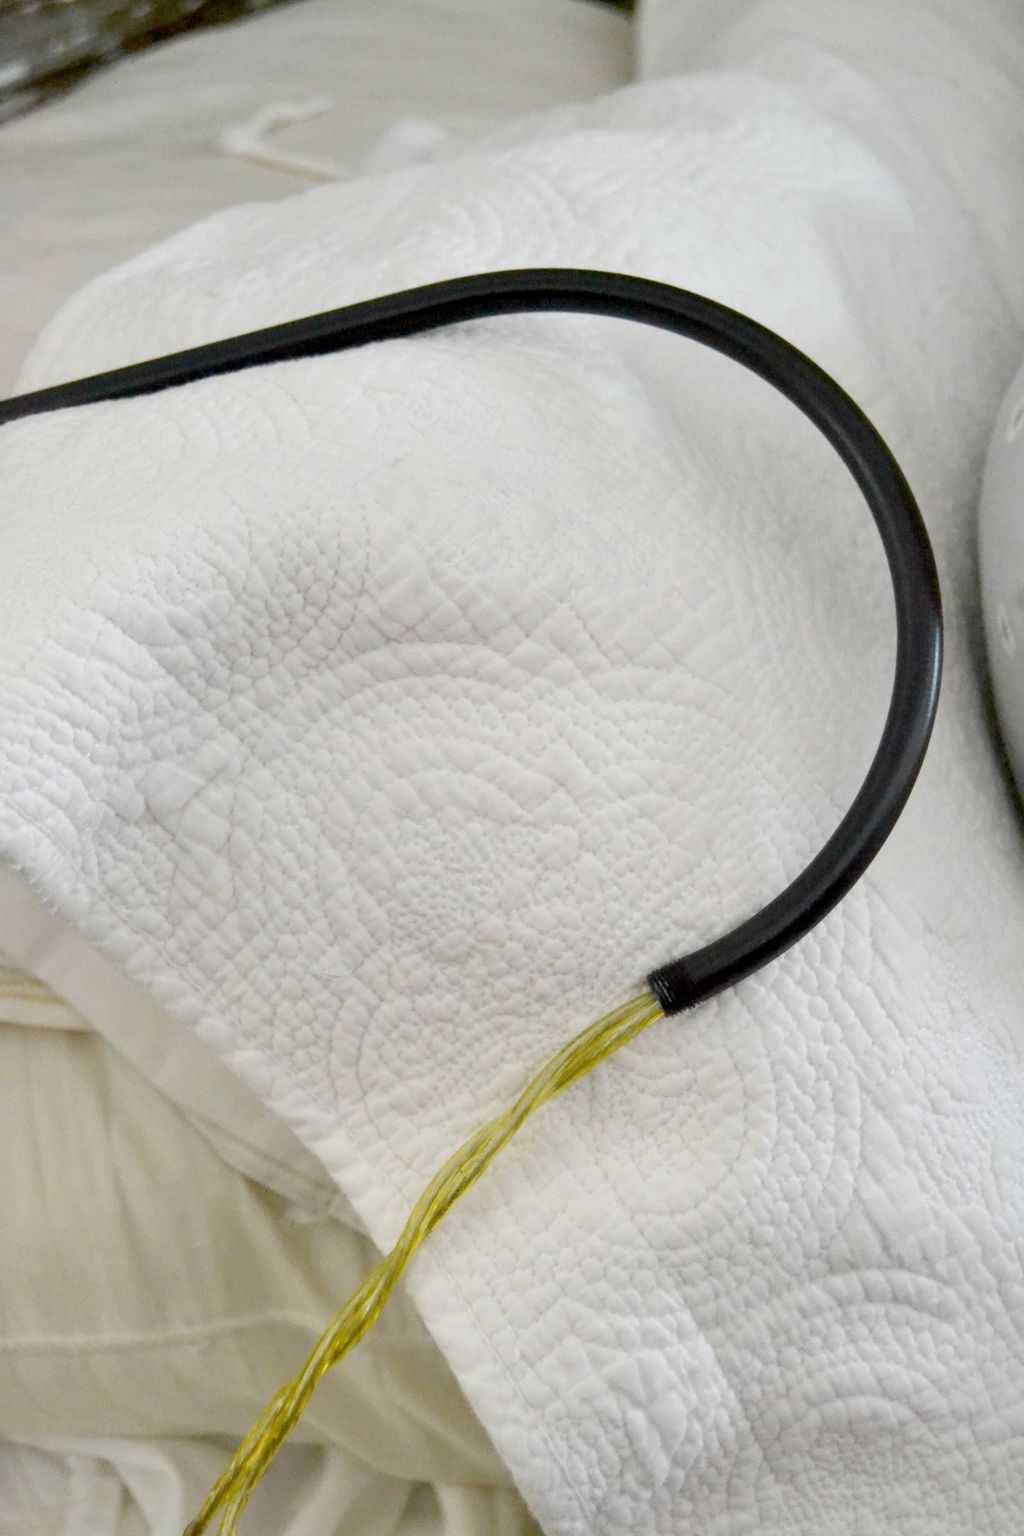
We were only using the “arm” of the lamp (the base wasn’t needed) so we had to take the wires out, paint the arm and then push the wires back through. This was kind of tough, but we were able to push it through.
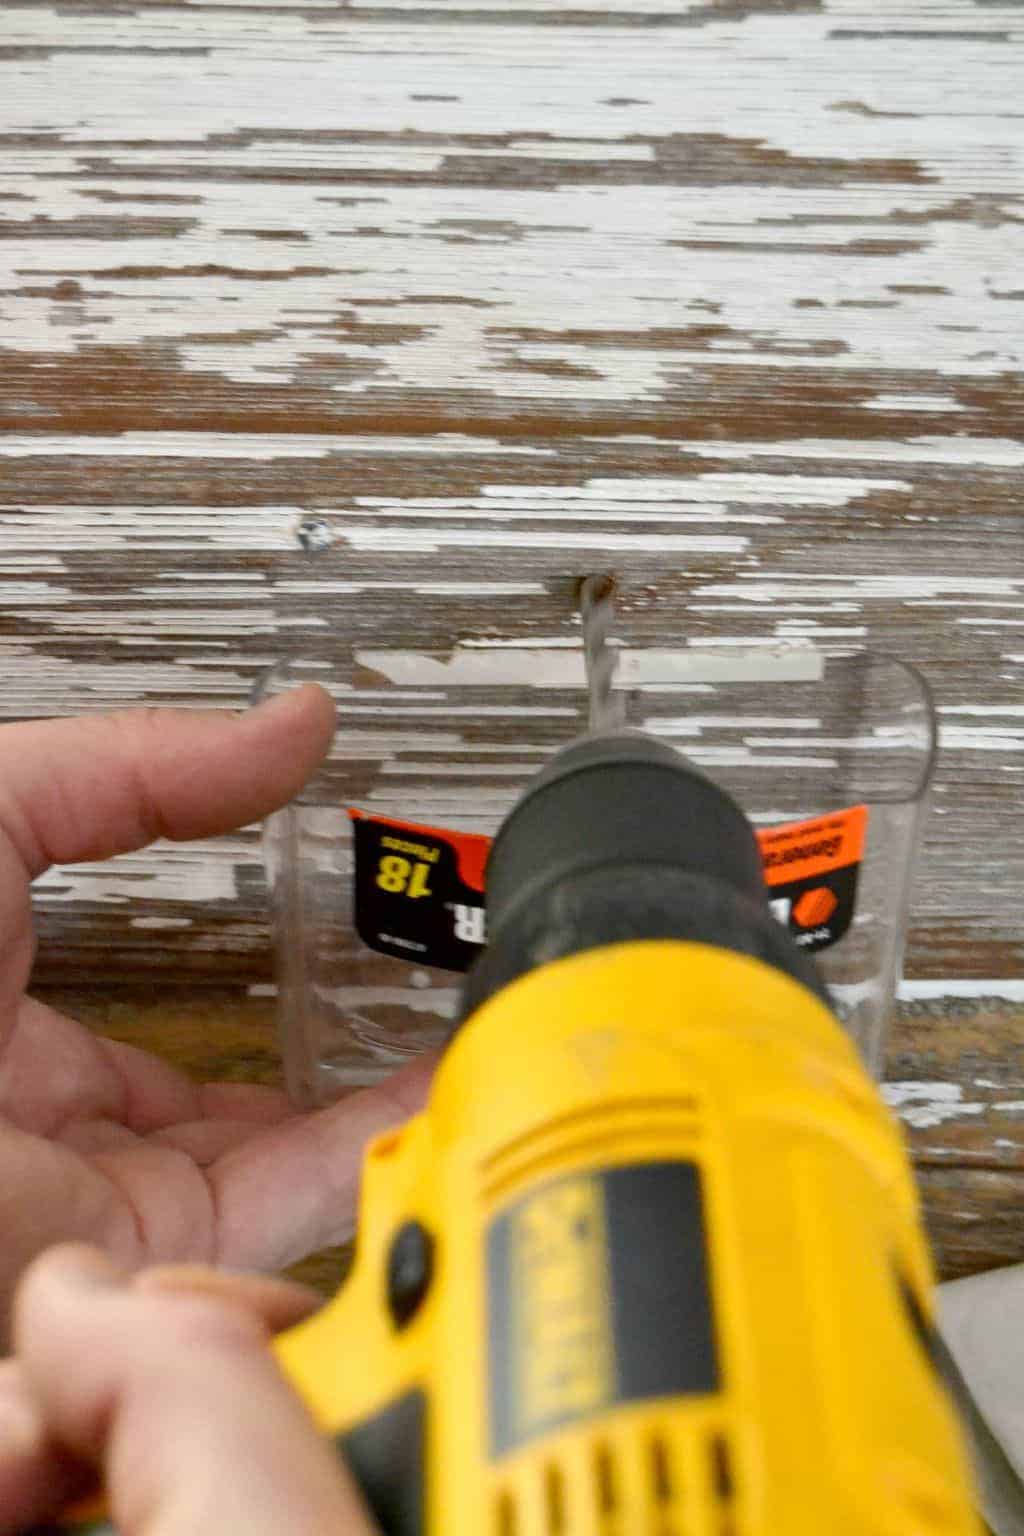
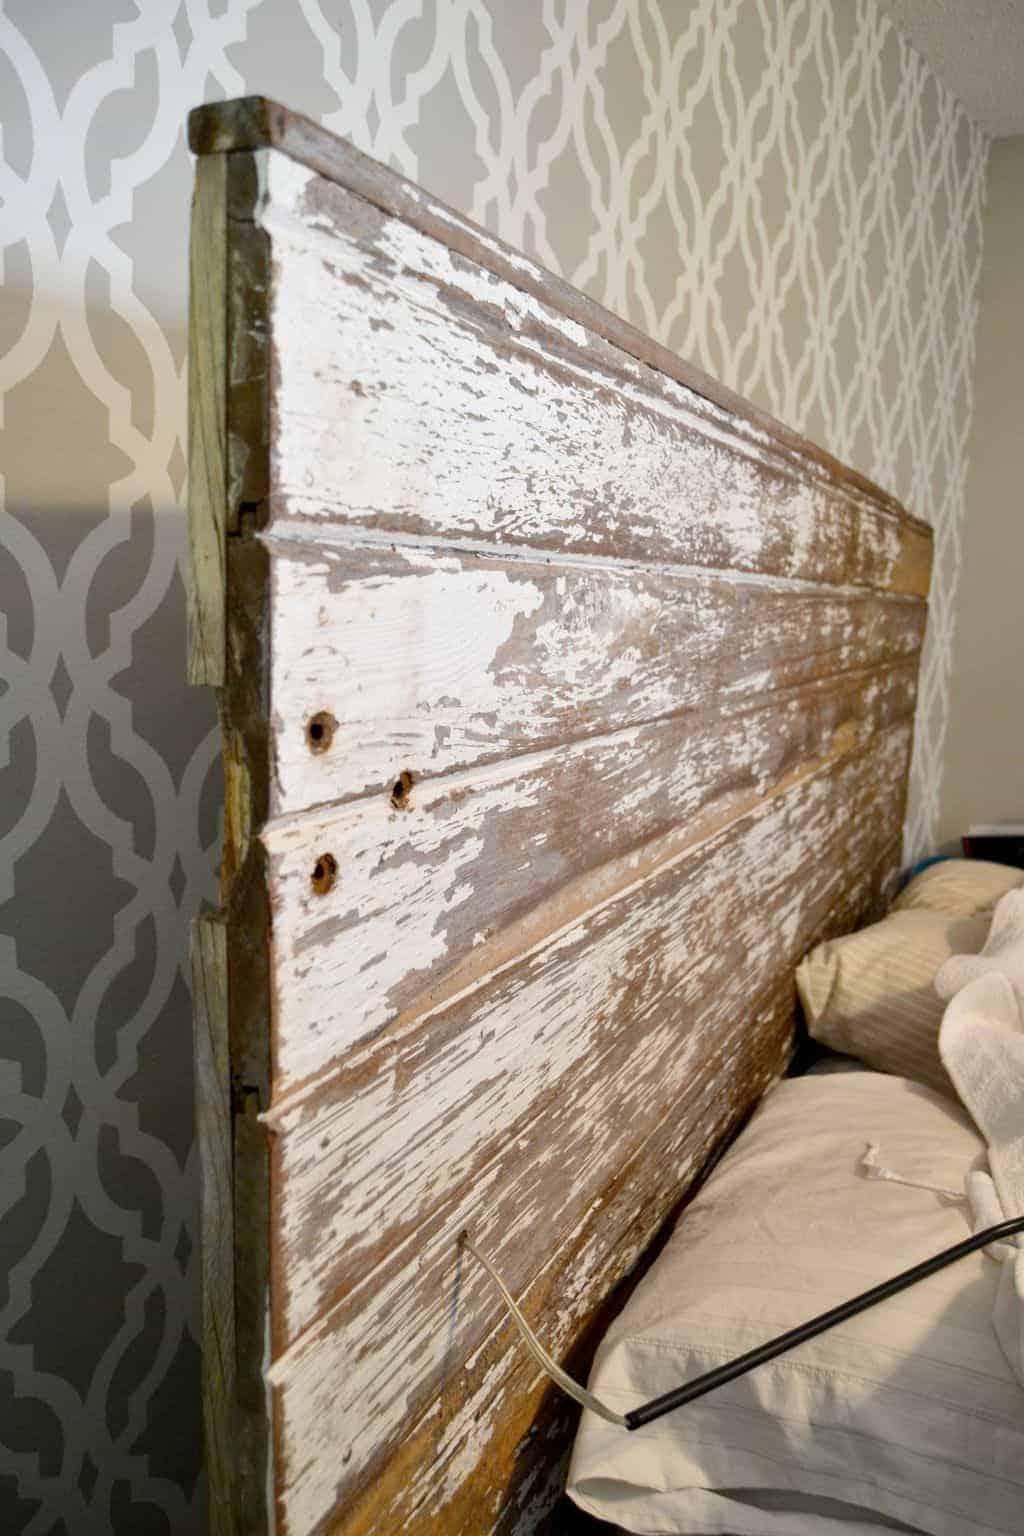
We figured out where we wanted the lights to hang and Matt drilled the holes in the headboard.
We threaded the wires through the headboard.
Then, it was time to put the light back together.
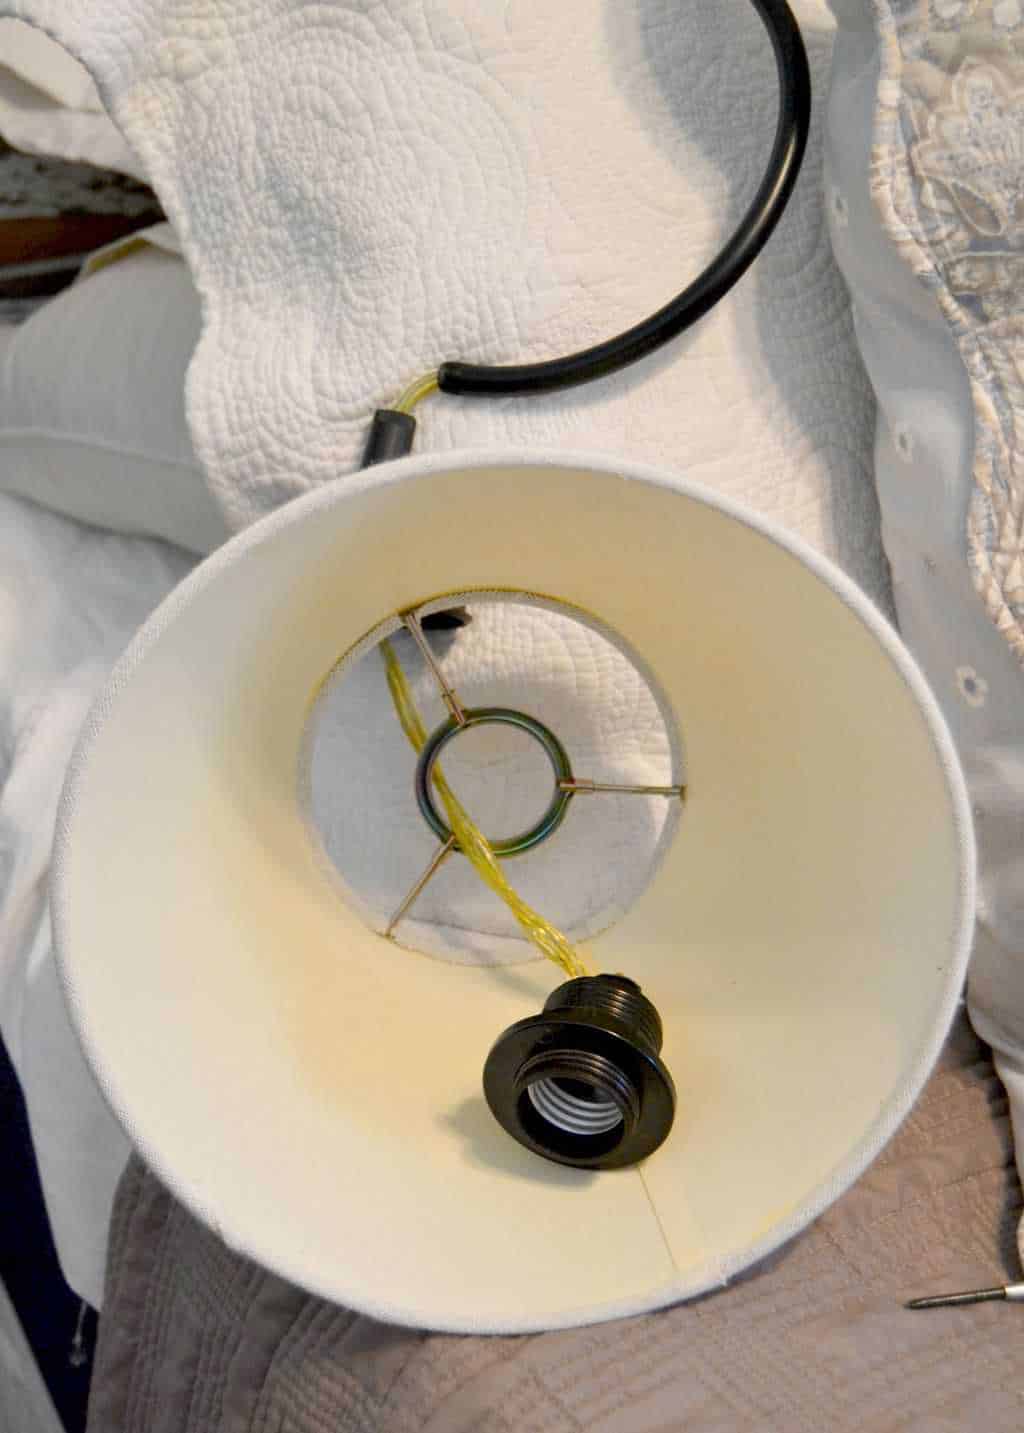
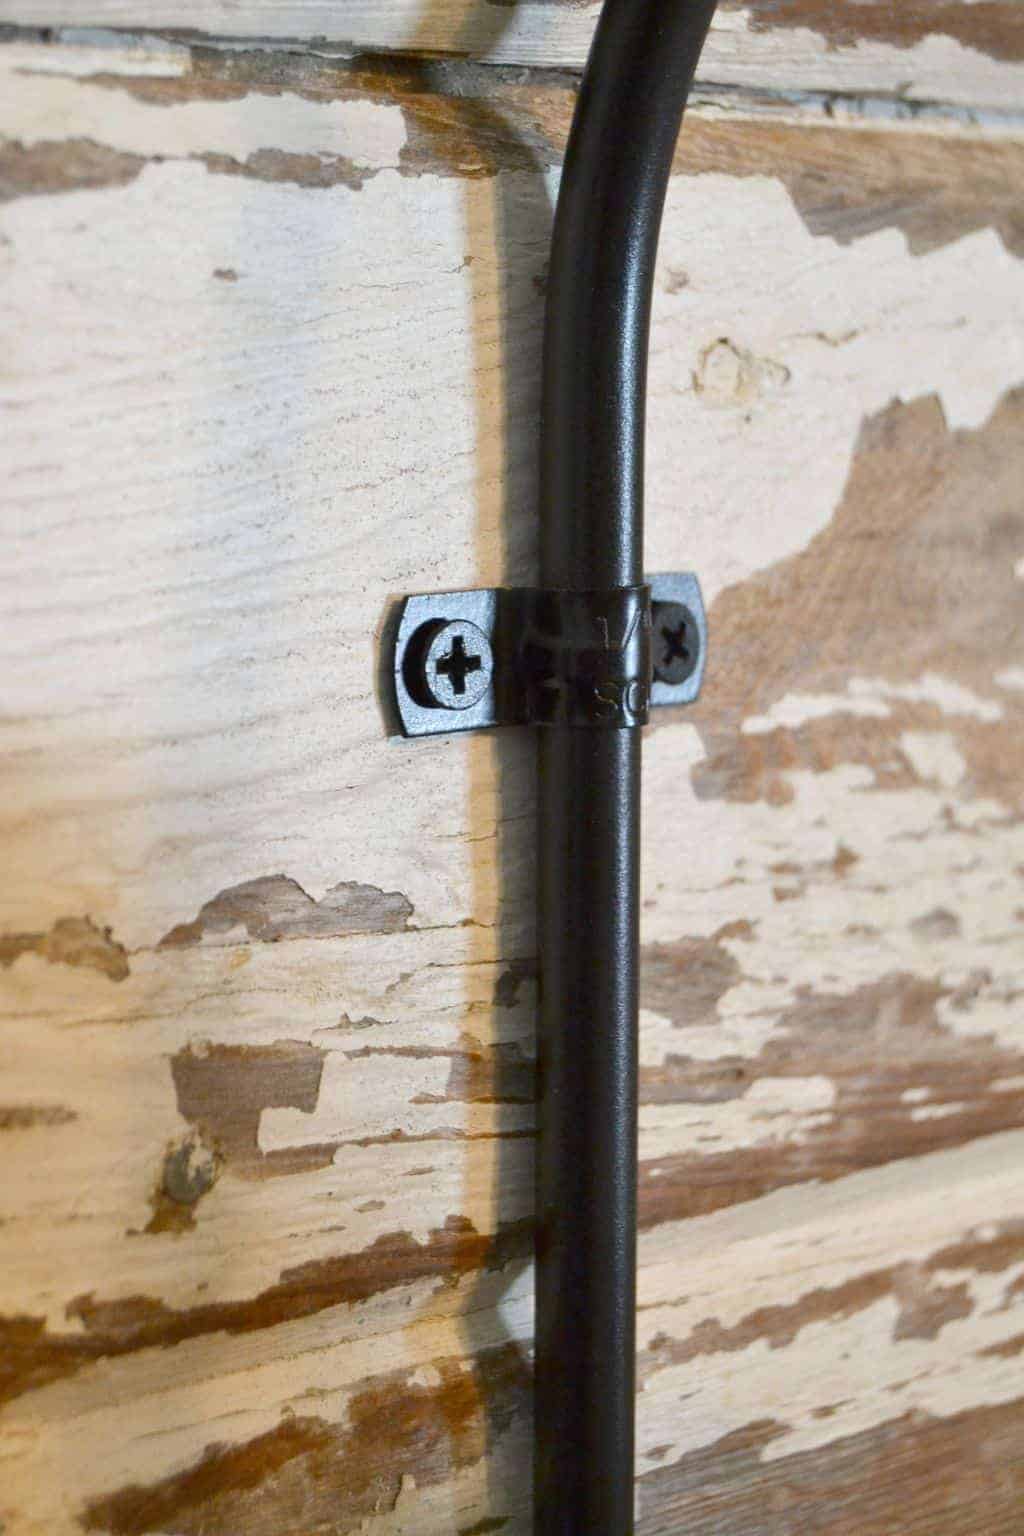
We used small clamps over the arm to secure it to the headboard.
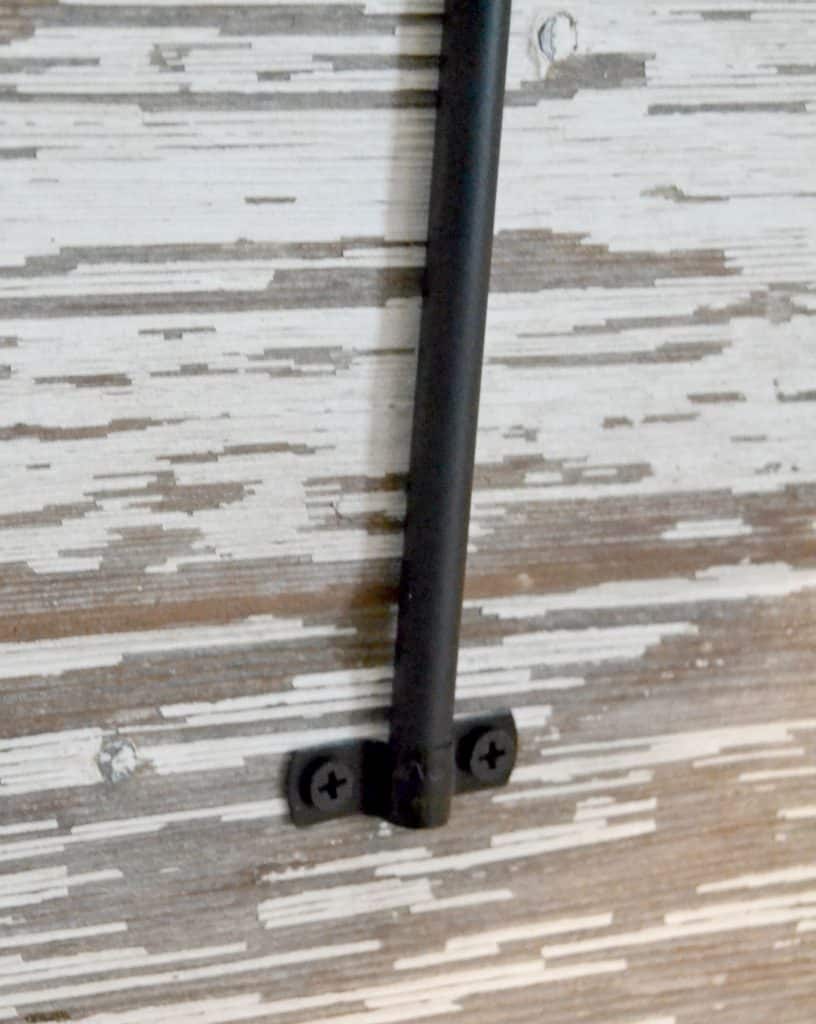
Matt put a second clamp at the bottom of the arm to hide the wire coming out and through the back. Genius!
The switch on the cord needed to be assessable so we used electrical staples to nail the switch at a spot that was easy to reach when we are in bed.
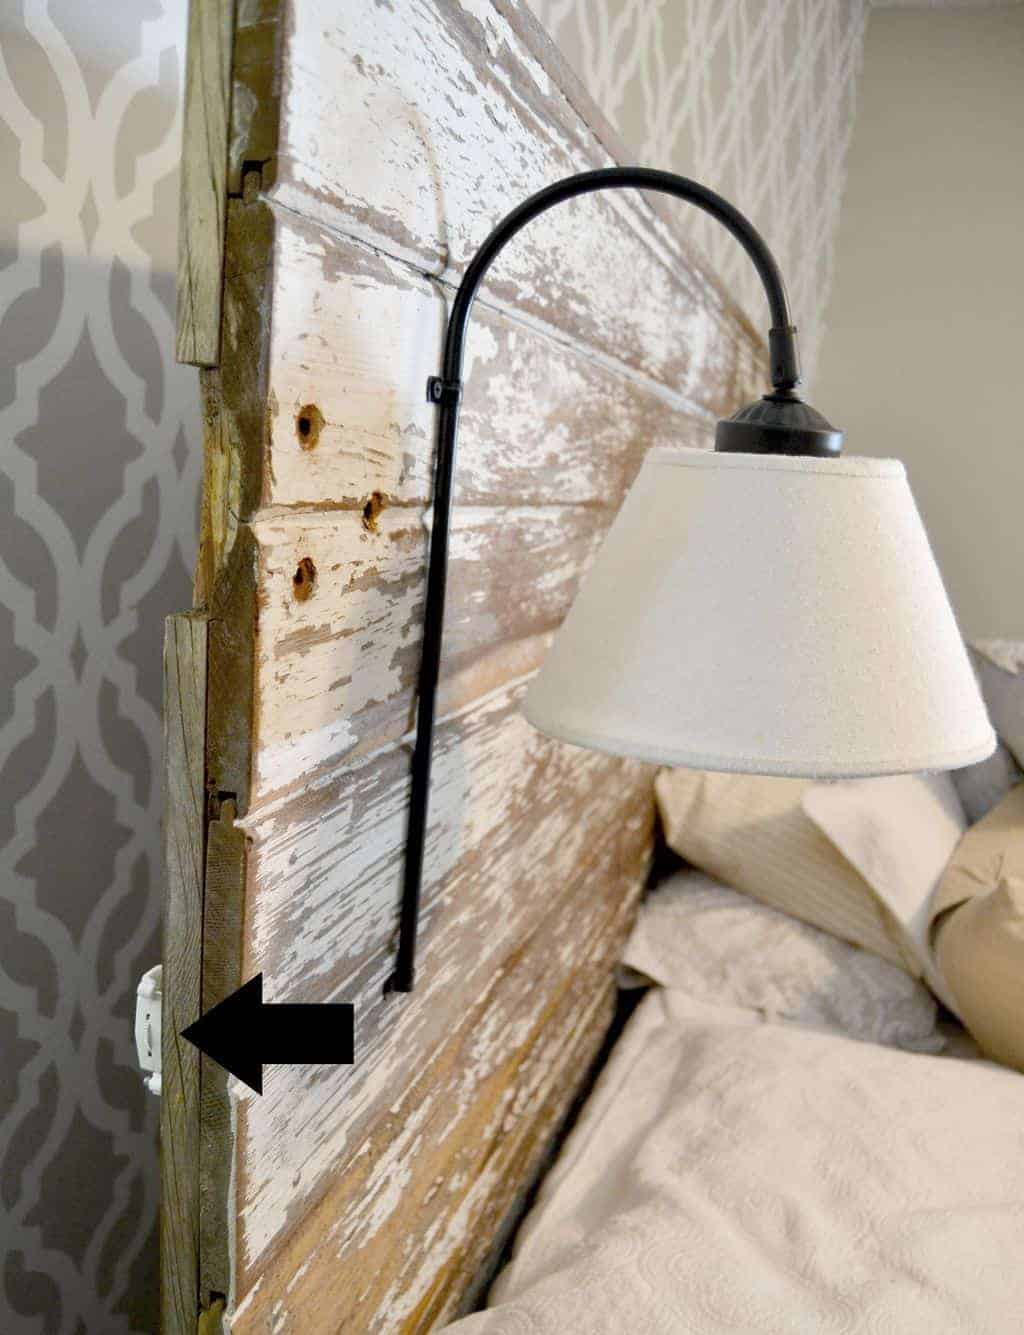

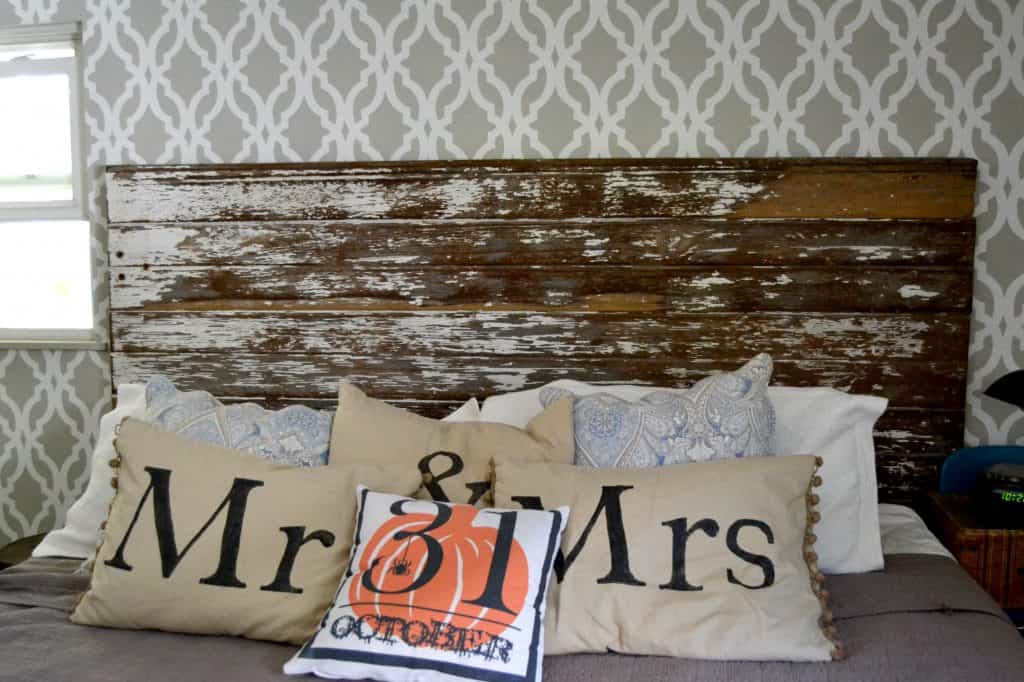
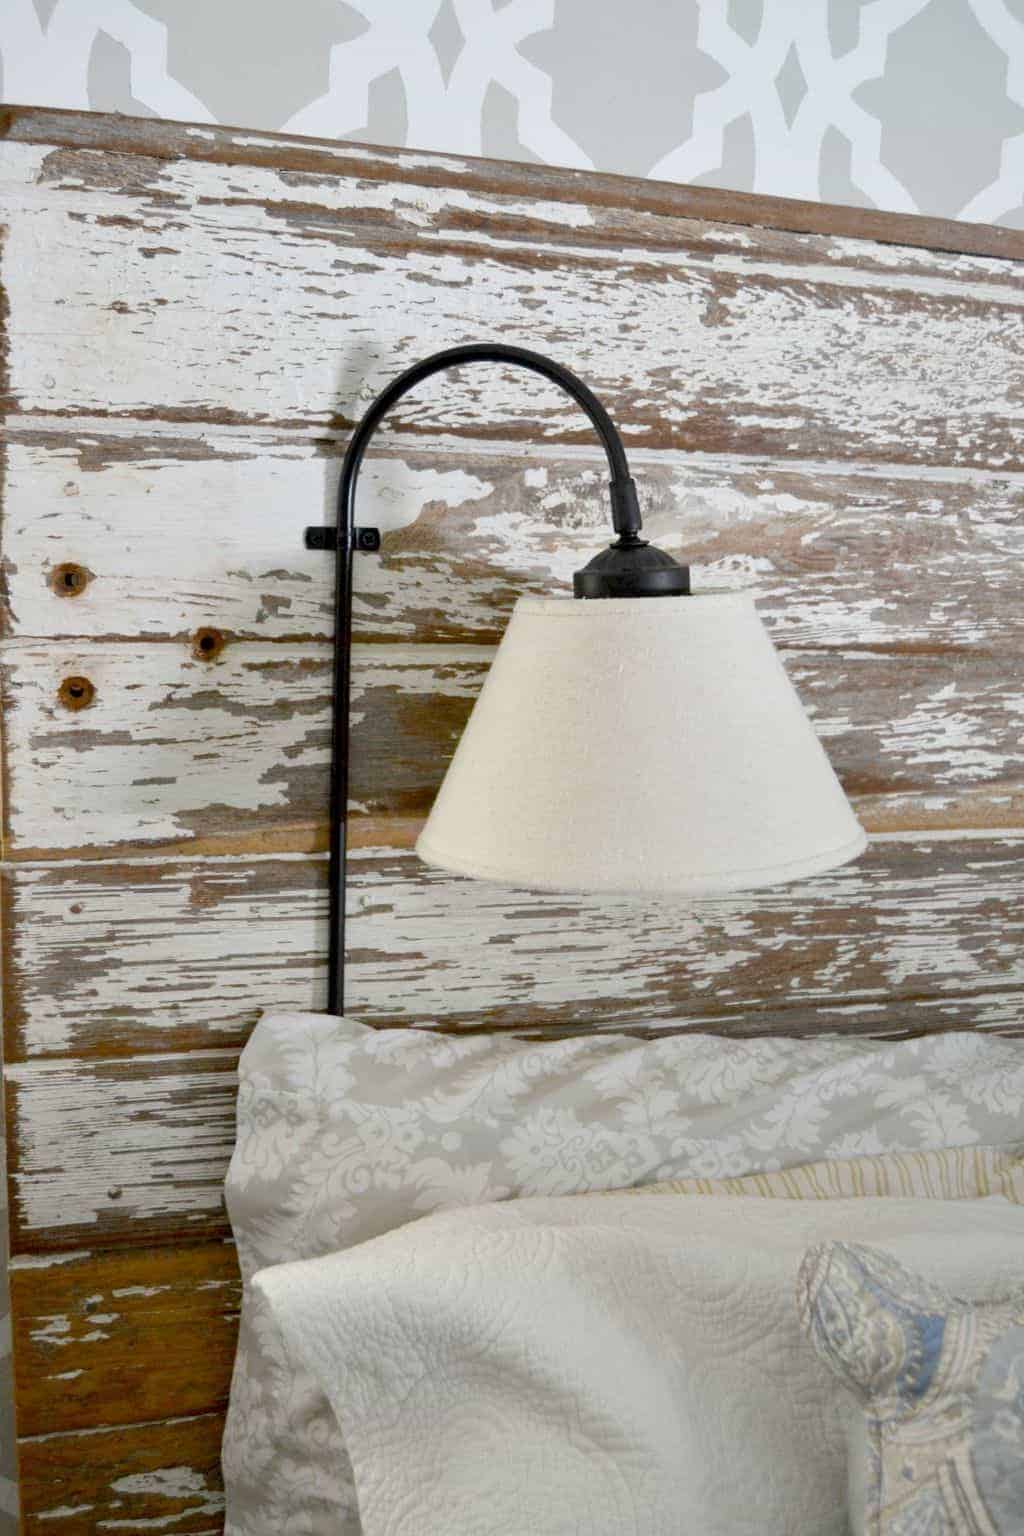
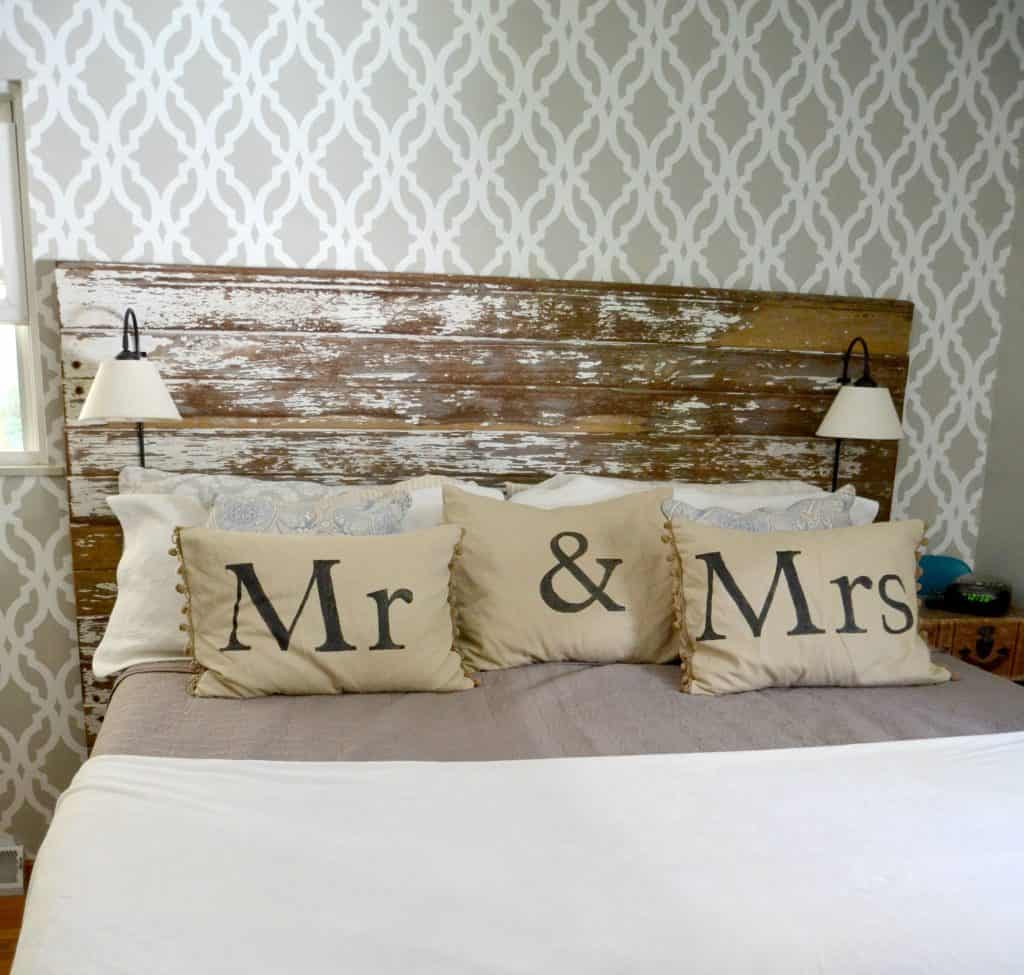
They are simple, quaint and take up no extra space on side tables.
Mission accomplished.
I am in love with these sconces! Once I find new bedding and we make a new closet door like the one we did in our daughter’s room, our room should be done for a while. 😉
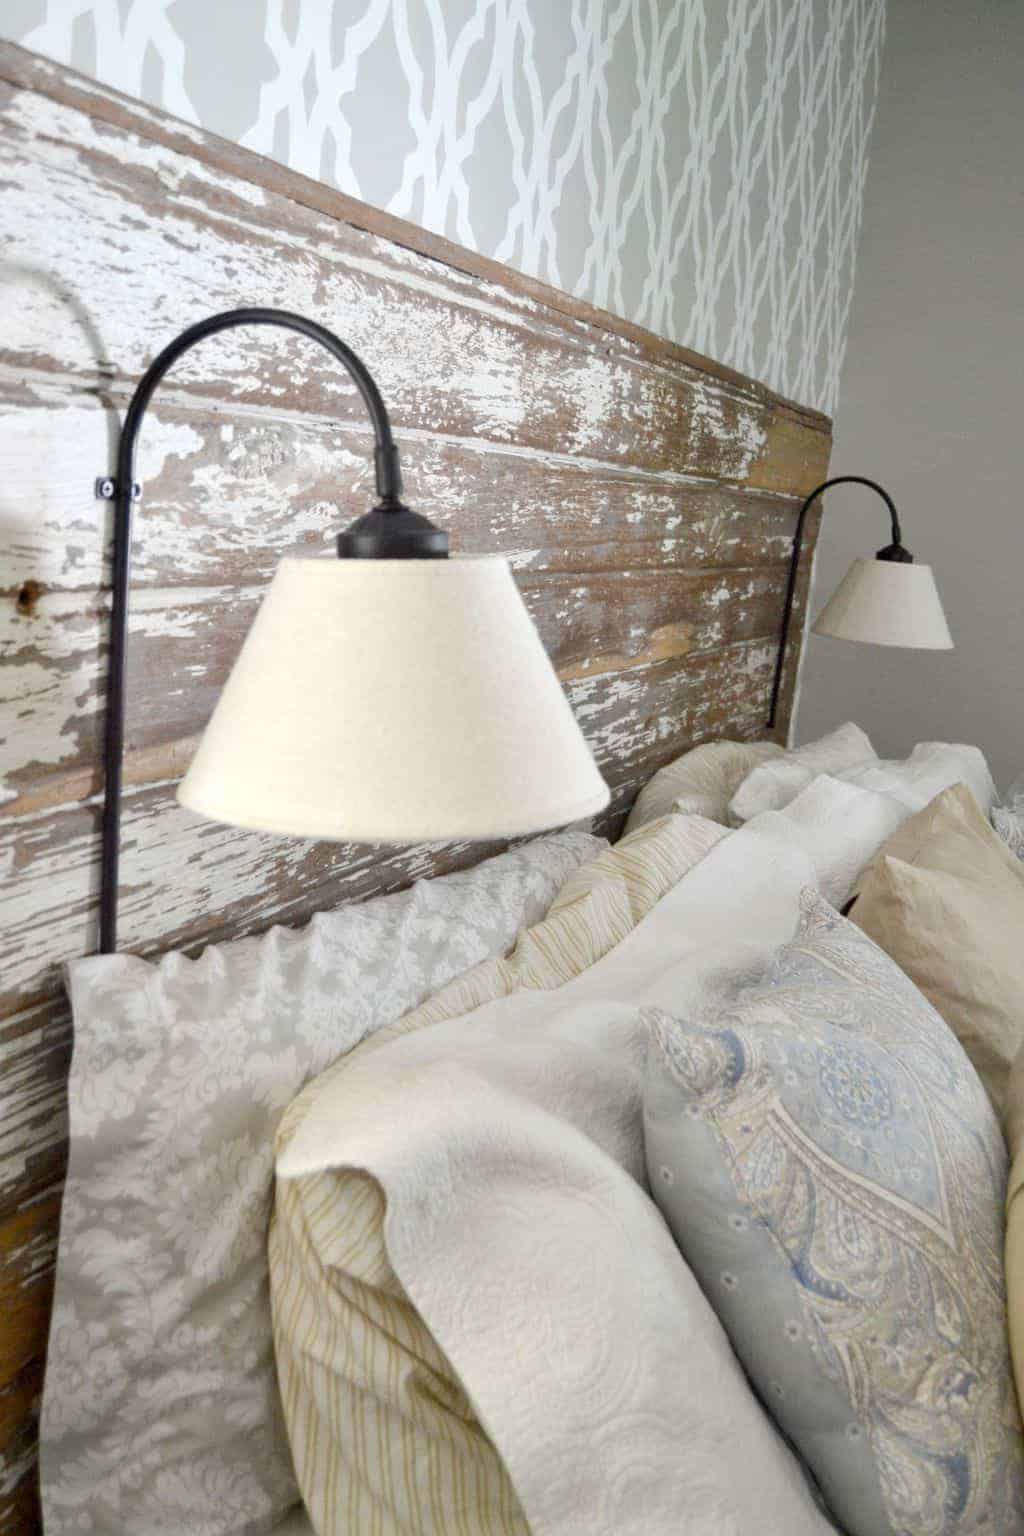
The best thing about these lights is that they swivel!
We can move them from side to side so they are exactly where we need them.
I must have some kind of “table” on the side where I sleep. I am the one who gets up a lot earlier than anyone else so the alarm is on my side. But, look at all the space I have on that suitcase now!! No lamp to compete with.
{Affiliate links are used in this post. You can read my disclosure HERE.}
This DIY Plug In Wall Sconce is perfect because:
- They are unique.
- We made them.
- They solved a problem.
- They fit the room.
- They cost less than $10!
Sounds like the perfect sconce to me.
If you don’t have time to make your own plug in wall sconce, I found some amazing options online:
PIN THIS POST!
If you liked this DIY Plug In Wall Sconce, you will also love these projects:
DIY Small Wreaths That Cost Under $2 To Make
Repurposed Chairs Become Wall Decor In Entry
Curbside Cabinet Makeover For The Office
That looks amazing and is so practical. I love the headboard and the lights.
Thank you Stacey!
Perfection! I would NOT have had the vision to buy those and make that transformation. 🙂
Thank you Kimm!
What ingenuity! Wires and lighting scare me a bit 😉 I appreciate you linking up to Create – Share – Inspire Link party! Hope to see more of your fun projects!
Thank Cami!
Wow! So impressed with this DIY!
Thanks Michelle!
Fabulous project! The headboard is so pretty and rustic, and I love the addition of the lights! Can’t beat that price either! 🙂 …coming from The Alder Collective. ~Rhonda
Thanks Rhonda!
Well aren’t the two of you clever – such a great idea! The style and painted black finish pairs so beautifully with your rustic headboard. Pinning to share ☺
Thanks Marie!
nice project,
the outcome is awesome
Thanks Mom. I couldn’t remember if I showed you them!
I’m not sure I’m brave enough to get DIY with anything electrical yet, but these are gorgeous! And I’m drooling over that suitcase bedside table!
Thanks for linking up with The Alder Collective! Your post has been pinned to our group board. We hope you’ll join us again next Tuesday at 8 EST!
Thank you Abby!
Such a cute idea and an unbelievable find! They look stunning! Thank you for sharing at Dream. Create. Inspire. Link! I am pinning your idea!
Cat
Thank you Cat!
These are awesome! I love it when the thrift store gods look down on me – these were the perfect find. I love how you disassembled them to make them part of your headboard. Nice work!
Thank you Jenny!
I just love it!! I’ve been thinking of a solution for my bedroom as well and this could be one, thanks for the inspiration!
I want to invite you to share it with others at our party: http://sweethings.net/two-uses-tuesday-53/
Hugs,
Pili
Thanks Pili! I linked up!
Such a useful (and beautiful) DIY — and the fact that you accomplished it for $10 is amazing! Your bed and wall are pretty awesome, as well! Thanks for sharing!
Thank you Cynthia!
Wow, those look great!
Tania
Thank you!
Ok how stinkin smart are you? I LOVE these and how clever of your hubby to conceal the wire at the bottom with another clamp. Now I know why you were so excited about this project…well done!
Thank you Christy!
Hi Lindsay! I absolutely LOVE your headboard! I have 2 quick questions! First, did you seal the chippy paint with anything? I have a beautiful old door to use but it has lead paint… and in the past when I have used a non yellowing sealer on white paint it yellowed! And second, could you post a picture showing the entire wall? I think my room looks EXACTLY like yours and would like to get ideas. Who would put an off centered window in a bedroom??? Had to be a man! 😉 Thanks! Ronda
Thank you Ronda. If you search on my site for feature wall that should bring up more pictures of the entire room. I did a post just on the stenciled wall. Yes. I did put the General Finishes matte top coat on the bed. It did not yellow. The off centered window drives me crazy!!!!
Have been gathering items to renovate my master bedroom and bath. Now I just may have to call the electrician . . . Again! :D. This is darling. Thanks for sharing!
Your welcome! I know! The projects are never ending, but it is so much fun!
I love your headboard and the lamps are so clever. Did you do anything with the bottoms of the lamps?
Thank you. We did not do anything with the bottoms that I can remember. It seems so long ago. Too many projects in between! 😉
Your sconces are so attractive, little spray paint and electrical experience. Great idea how he put on/off switches on side of headboard which is fantastic by the way. Love wall bed is on, did you stencil that yourself?
Just love it when a post like yours is featured. If I can’t quite picture how to redo an affordable item at thrift store or yard sale, just hang onto it for while and something will grab your intuition and solve your problem. Your hubs is handy guy, don’t you love that?
Mine has electrical experience after doing things on his own for years as a farmer’s son, always fiixed things when we got married then he worked for friend of ours in San Diego who did commercial jobs, learned even more.
When we bought our place in MT we wanted our mfg. home moved over few feet so hubs transferred all electrical over. City told us would have to get electrician, don’t think so. When they inspected complimented hubs on job he’d done with electrical, and moving sewer connections over. Hubs also had to hook up to pressure tank and well pump under home, all on his own. Sure saved us alot. We also put electrical connection on pole in a blizzard so our travel trailer next to pole shed would have electric. Put in a frost free water pump next to trailer also.
It is so much nicer to be able to do jobs yourself. I know of women who can do electrical, guess depends on how badly person needs something done or how handy they are. Have to admit I rely on hubs to make things, do for me, lazy old lady.
Have great new week
Thank you! We love DIYing everything we can. It is a great way to learn and we take so much more pride in the job when it is done!!!
I know this was done some time ago, but I had to comment, I have been trying to find affordable sconces for some time,. These are awesome!!! Thanks for all the info,. I also really liked all the photos! I also had a question about the flip house.. What kind of preparation did you do on the panelling? Our entire living room has old panelling and I have to paint it all. Being lazy and trying to figure out the easiest way to do it!! Any advice/help would be greatly appreciated!! Again, love the sconces!! Sincerely, Rita
We washed the paneling and then we used a few coats of primer on it before the paint went on. It took a few coats of each, but it was well worth it!! The sconces were a great addition to our bedroom! You can read more about the paneling in this post and follow the links to the HomeRight site: http://mycreativedays.porch.com/flip-house-update-paneling-makeover/
Oh that looks so amazing! I wonder if i could do that with my headboard? Its a log bed. I love that they swivvel. I like to read in bed but book lights are a pain and not a good source of reading light. Thrse would also be good for us as our bedroom is very small! My one worry is the wiring. How do you know how to do the wiring so it doesnt catch fire? I tried rewiring an old table lamp once and the bulb exploded when i turned it on. Ive been afraid ever since!
My dad used to do electrical work so he is a big help. We have done a lot of lighting projects and had good luck with all of them! Thank you! These sconces have really freed up so much space on the side of our bed.