• Home
  • About
    • Disclosure
      • Terms And Conditions
      • Cancellation Policy
      • Refund Policy
      • Shipping Policy
    • Contact Me
    • My Favorites
      • Our Toolbox
      • Paint Colors
      • My Amazon Store
  • Categories
    • Seasonal
      • Easter
      • Mother’s Day
      • Spring
      • Fall
      • Halloween
      • Thanksgiving
      • Christmas
      • Valentine’s Day
    • DIY
      • Repurposed
      • Furniture
      • Crafts
    • Our Home
    • Recipes
    • Crafts
      • Party Planning Ideas
      • Kids Activities
  • Resources
    • Furniture Flipping
      • The Ultimate Furniture Flipping Program For Beginners
      • The Creative Squad
      • The Furniture Flippers Social Media Planner
      • Furniture Flipping Assessment
      • Furniture Flippers E-Book
      • Mini Courses
      • Quick Guide To Painting Furniture
      • Types Of Paint For Furniture
    • Organization Tools
      • Organization Challenge
      • 5-Day Organization Challenge
      • 12 Monthly Purge Checklists
      • Sentimental Purge Guide
    • Thrifting | Decorating
      • 105 Things To Throw Away | Recylce | Sell | Donate For Instant Decluttering
      • 50 Things To Donate For Instant Decluttering
      • 50 Things To Throw Away For Instant Decluttering
      • How To Decorate Your Home On A Yard Sale Budget
      • 11 Quick Tips To Organize A Profitable Yard Sale
    • Consultations
    • Join My Newsletter
    • Become An Affiliate
  • Podcast
  • Furniture Flipping Course
  • Learn With Me
  • My New E-Book!
    • Facebook
    • Instagram
    • Pinterest
    • RSS
    • Twitter
    • YouTube

My Creative Days

DIY blog sharing our home, budget decorating tips with repurposed farmhouse decor.

DIY Light Fixtures For The Kitchen

October 15, 2014 43 Comments

We are making changes to our kitchen slowly and as the budget allows. We are always working with a tight budget so I am constantly trying to come up with creative ways to get what we want without spending a ton of money to get it. I have to keep my motto going strong – You can have pretty spaces without breaking the bank. It just takes a little extra creativity and elbow grease to get you there. These DIY Light Fixtures are my favorite addition to the kitchen so far and today, I am going to show you how we made them work.

I love repurposed projects in the home. I think when you can take something that isn’t being used anymore and recreate it into something functional and pretty again, you can add so much character and charm to your home.

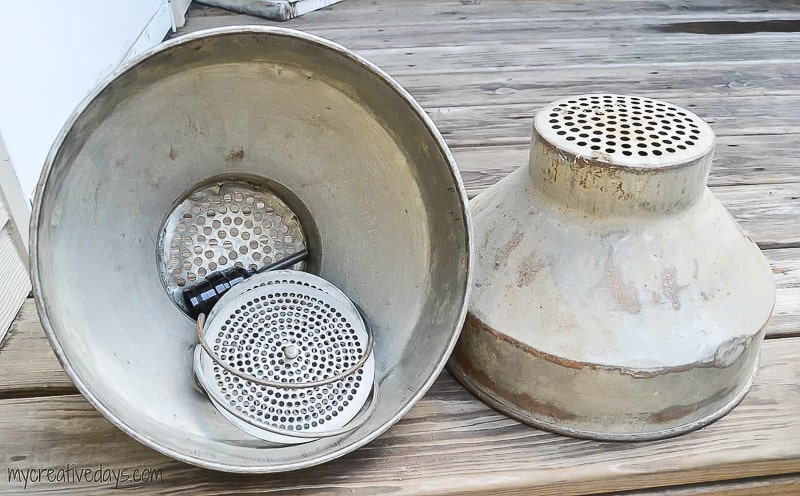
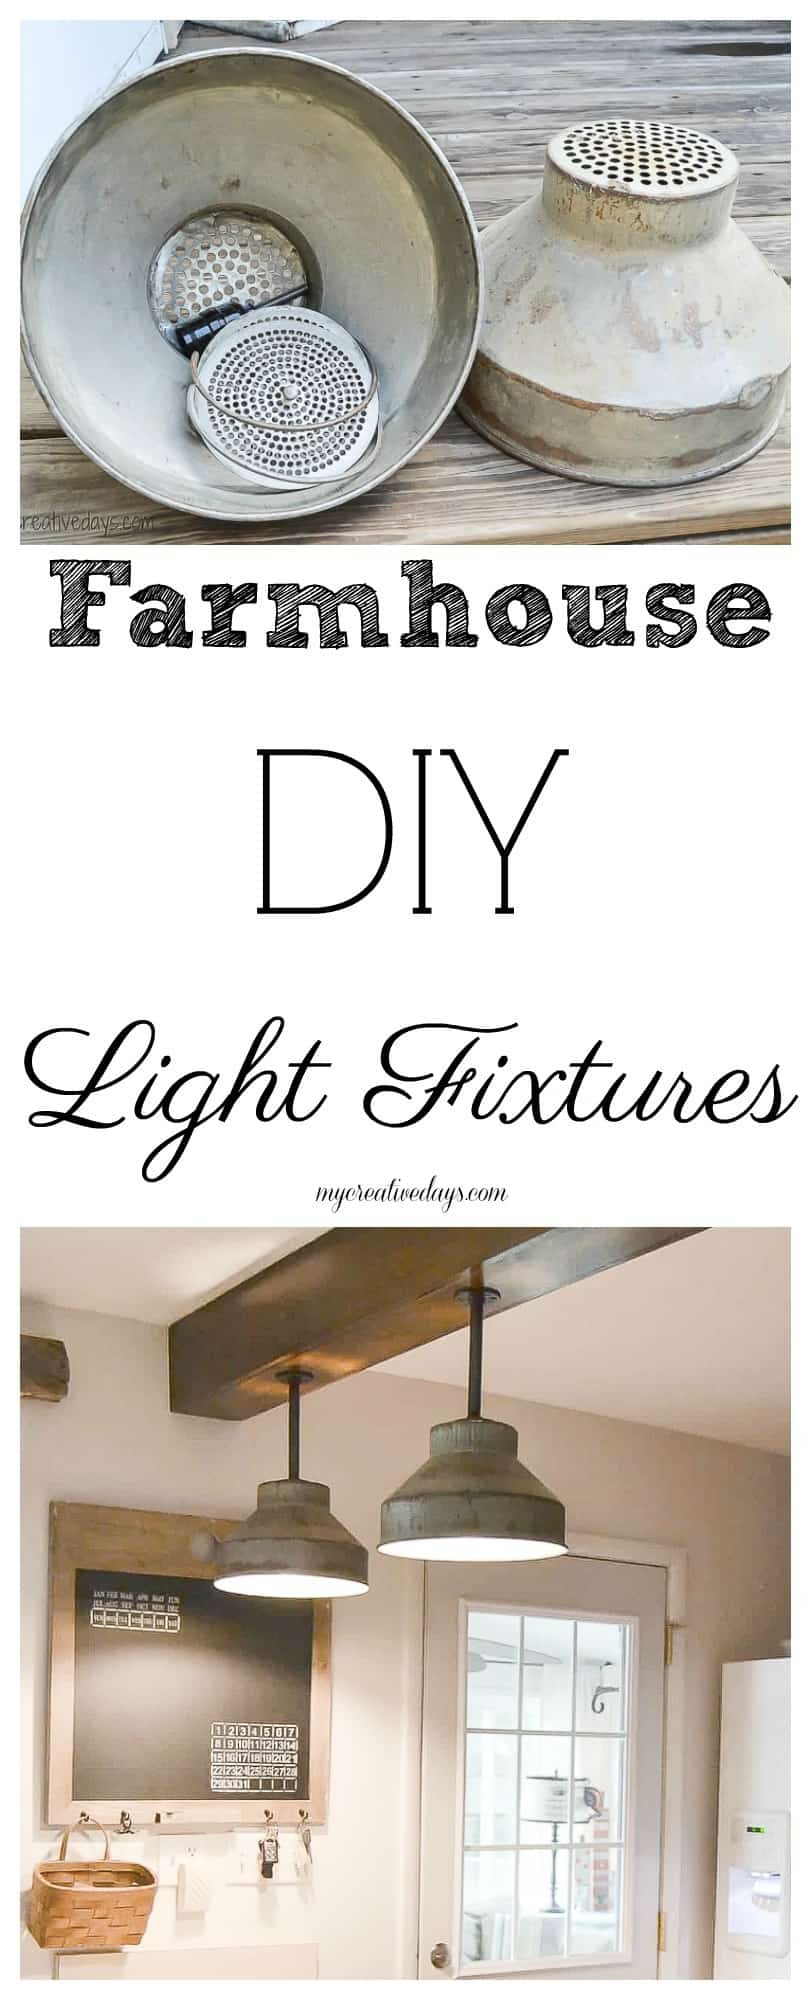
When I spotted these pieces at a yard sale for $1 each, I knew right away that they would be our DIY light fixtures in the kitchen.

Looking to update the lighting in your kitchen? These DIY Light Fixtures upcycle farm pieces to create custom farmhouse lighting in this kitchen.

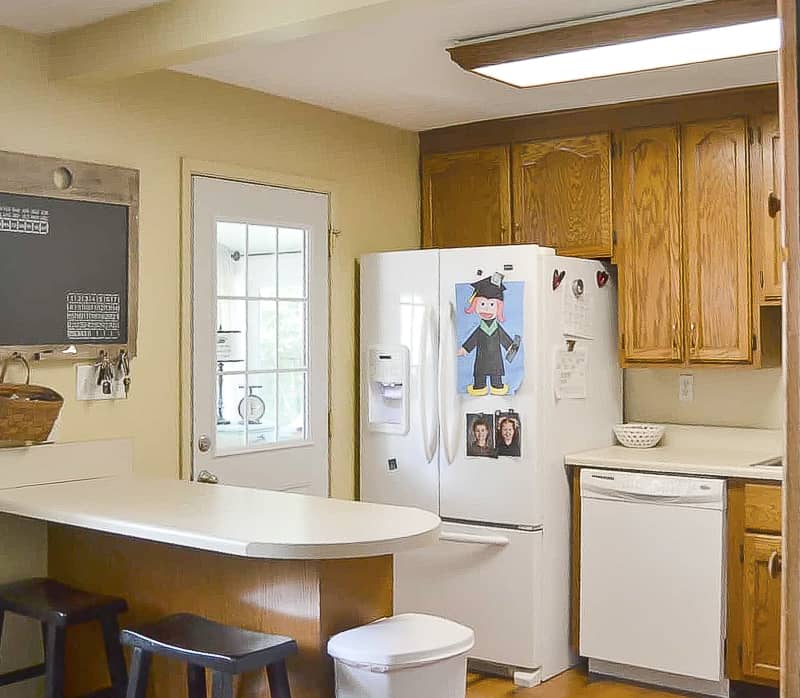
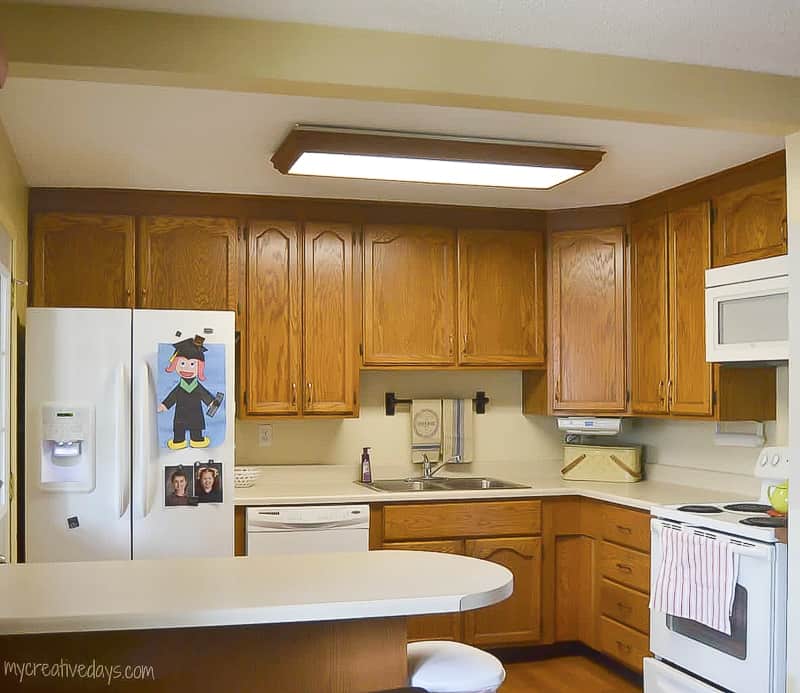
We have a bar in our kitchen that has a faux beam above it. It is the perfect spot for a DIY light fixture. I thought it would be a great way to add some visual interest in our bland kitchen too. Since this post, we have painted our cabinets, added new countertops, changed out hardware, added a backsplash and so much more. See it all in the post HERE. 

Looking to update the lighting in your kitchen? These DIY Light Fixtures upcycle farm pieces to create custom farmhouse lighting in this kitchen.

Looking to update the lighting in your kitchen? These DIY Light Fixtures upcycle farm pieces to create custom farmhouse lighting in this kitchen.

{Affiliate links are used in this post. You can read my disclosure HERE.}

*Side note: Looking at these before pictures of the kitchen makes me so happy that we took the plunge and gave this space a makeover. 😉

This project had a lot of steps so this post is going to be a little longer. I used to have it split up into two posts, but after giving my site a makeover, decided to put it all in one post so people searching for it had it all in one place. 

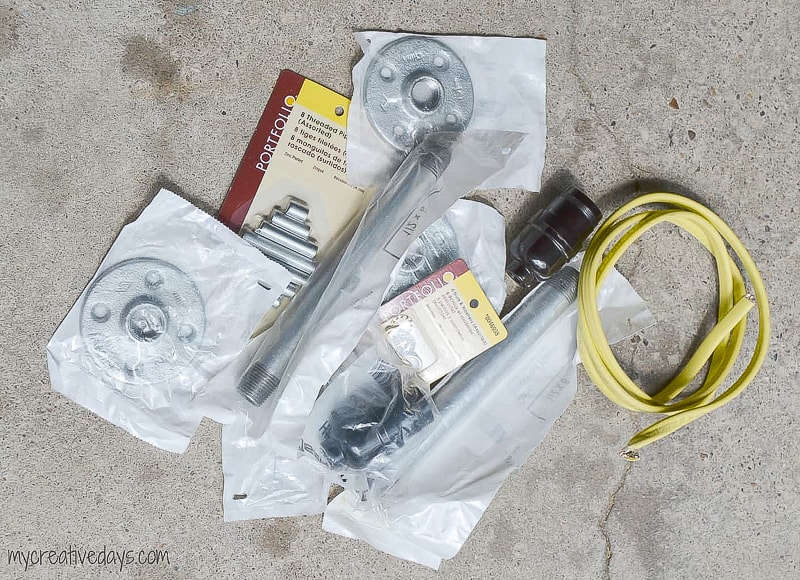
Supplies Needed For These DIY Light Fixtures:

Amazing Galvanized Pieces For Fixtures (I don’t know what these are called, but you can find them in antique stores, yard sales and maybe online.)

Drill

Lamp Kit (Depending on what you are using for the fixture, will determine what you need for the kit. I linked many HERE.)

Electrical Wire (Hire a professional to do this part and tell you what you need.)

Plumbing Pipe and Flanges  (Again, sizes and fittings you need will depend on what your needs are.)


Looking to update the lighting in your kitchen? These DIY Light Fixtures upcycle farm pieces to create custom farmhouse lighting in this kitchen.

I took step-by-step photos of how we made these work.

Looking to update the lighting in your kitchen? These DIY Light Fixtures upcycle farm pieces to create custom farmhouse lighting in this kitchen.

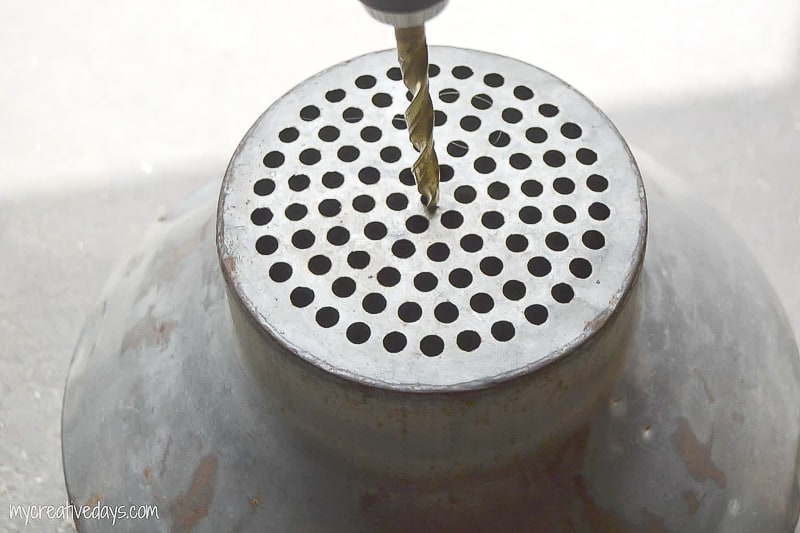
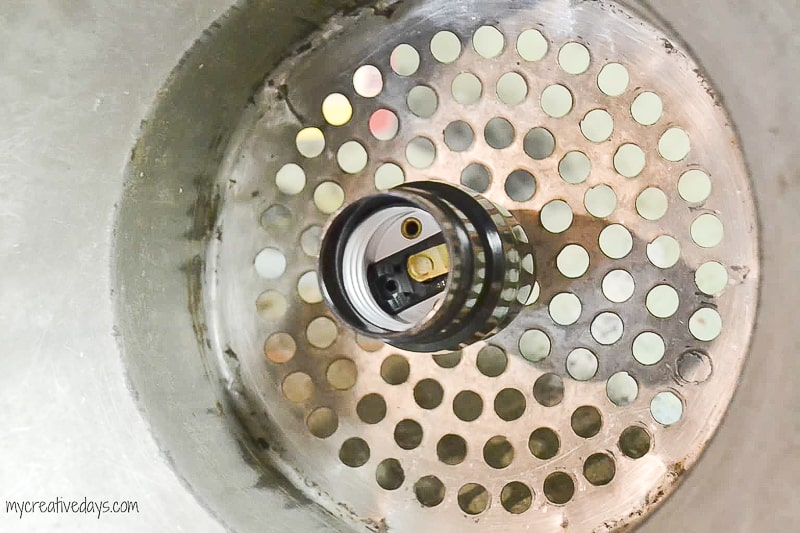
The first thing we did was drill a bigger hole in the center of the top of the fixtures so we could fit the lamp parts in them. 

Looking to update the lighting in your kitchen? These DIY Light Fixtures upcycle farm pieces to create custom farmhouse lighting in this kitchen.

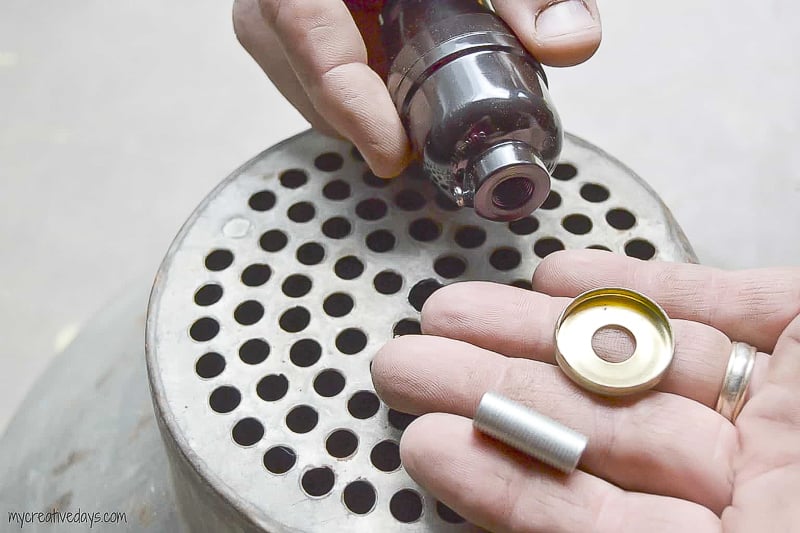
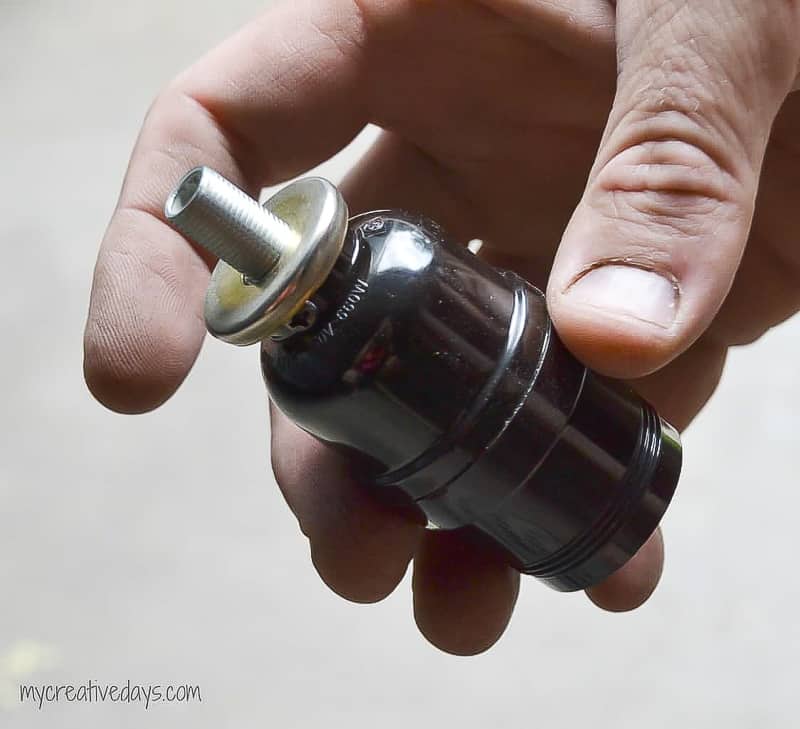
This is how we put the “fixture” part together.

Looking to update the lighting in your kitchen? These DIY Light Fixtures upcycle farm pieces to create custom farmhouse lighting in this kitchen.

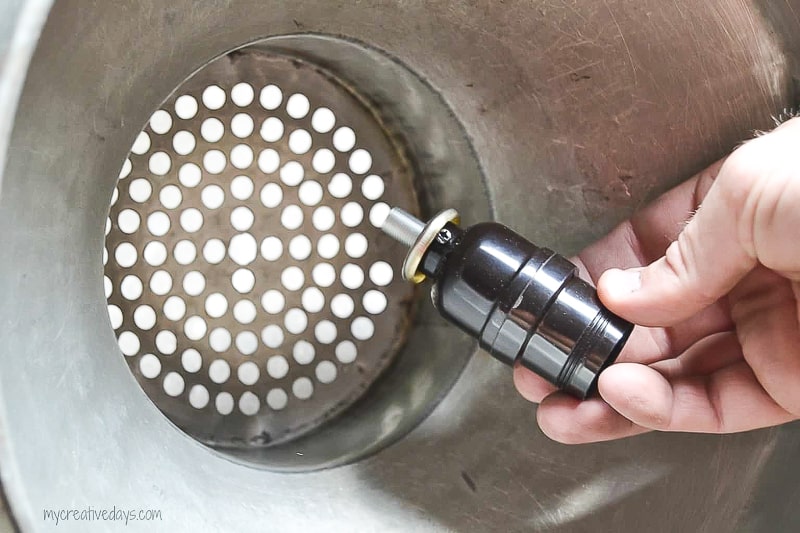
Then, we put that fixture in the hole we drilled and secured it with a nut.

Looking to update the lighting in your kitchen? These DIY Light Fixtures upcycle farm pieces to create custom farmhouse lighting in this kitchen.

Looking to update the lighting in your kitchen? These DIY Light Fixtures upcycle farm pieces to create custom farmhouse lighting in this kitchen.

Looking to update the lighting in your kitchen? These DIY Light Fixtures upcycle farm pieces to create custom farmhouse lighting in this kitchen.

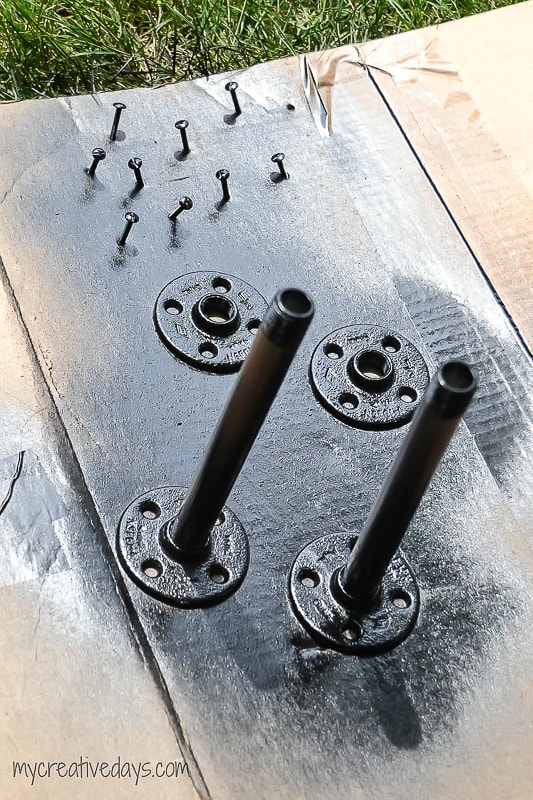
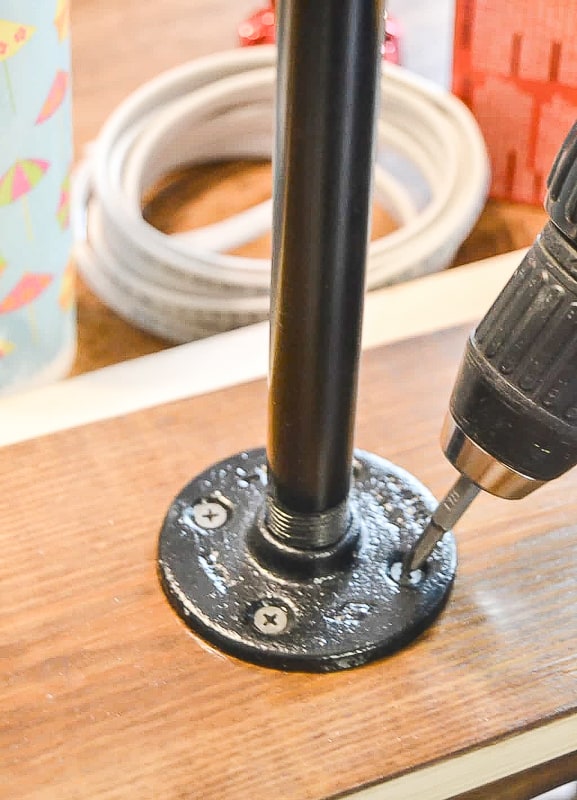
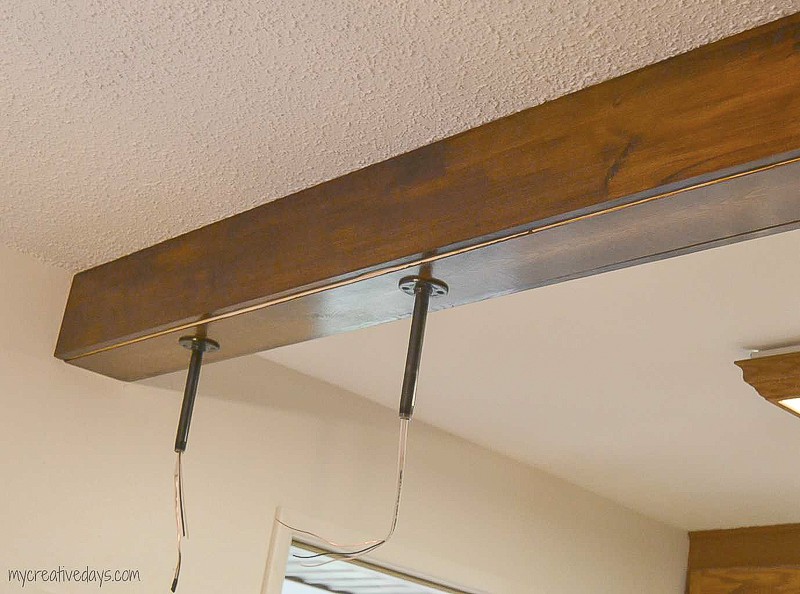
I wanted these fixtures to hang from the beam so we used the pipes and flanges to make that happen. 

Looking to update the lighting in your kitchen? These DIY Light Fixtures upcycle farm pieces to create custom farmhouse lighting in this kitchen.

I didn’t want the pipes to be silver so I spray painted them black.

Looking to update the lighting in your kitchen? These DIY Light Fixtures upcycle farm pieces to create custom farmhouse lighting in this kitchen.

To fit the pipes on the top of the light fixtures, we set the spray painted flange on top of the fixture and used a black permanent marker to mark the holes we needed to drill. The fixture was full of holes but of course they didn’t match up perfectly for the flange.

Looking to update the lighting in your kitchen? These DIY Light Fixtures upcycle farm pieces to create custom farmhouse lighting in this kitchen.

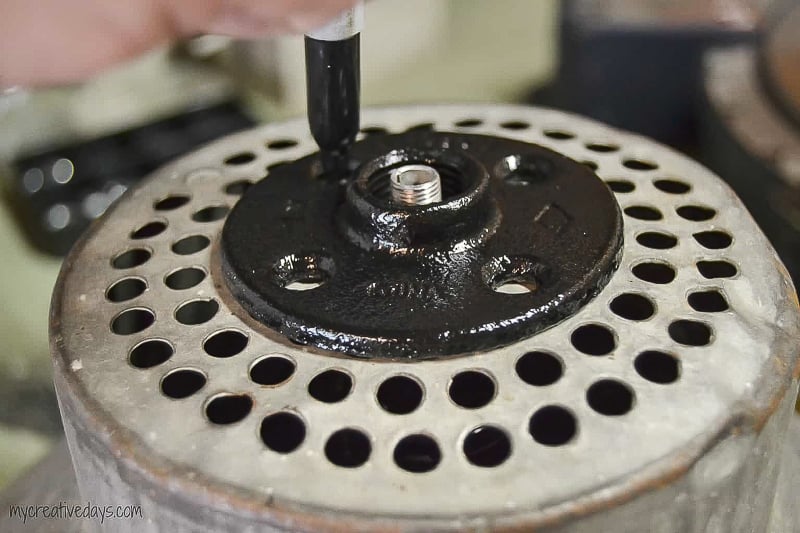
We attached the flange with bolts and nuts.

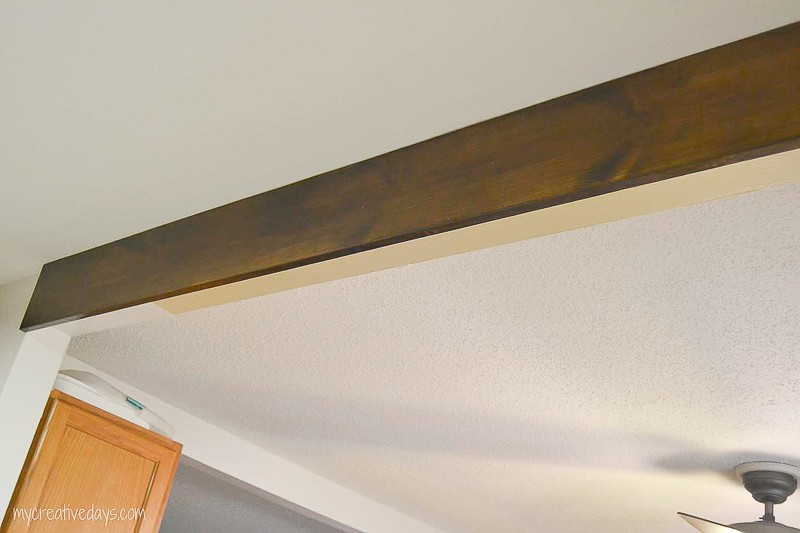
Now that we had DIY light fixtures, we needed to figure out how to attach them to the beam in the kitchen.  

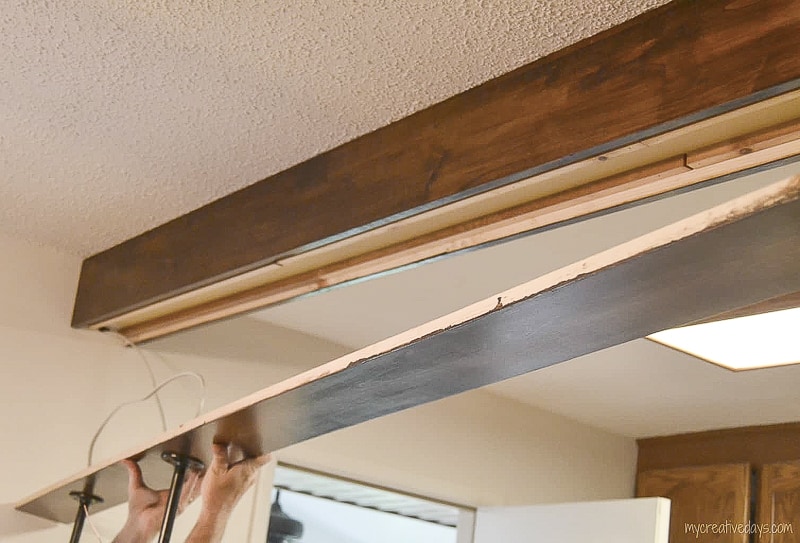
I wanted the make the beam in our kitchen look more substantial and wood toned. So, we bought wood boards to cover the beam. Not only was this going to give me the wood look I wanted, but it also made it easier to hide the wiring for the DIY light fixtures.

Looking to update the lighting in your kitchen? These DIY Light Fixtures upcycle farm pieces to create custom farmhouse lighting in this kitchen.

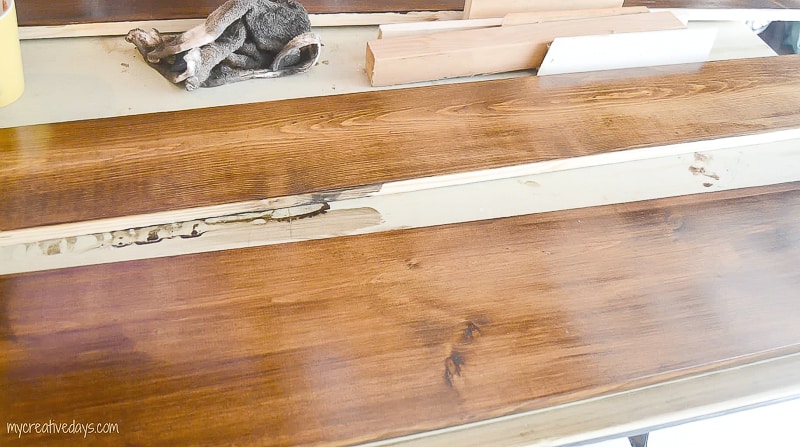
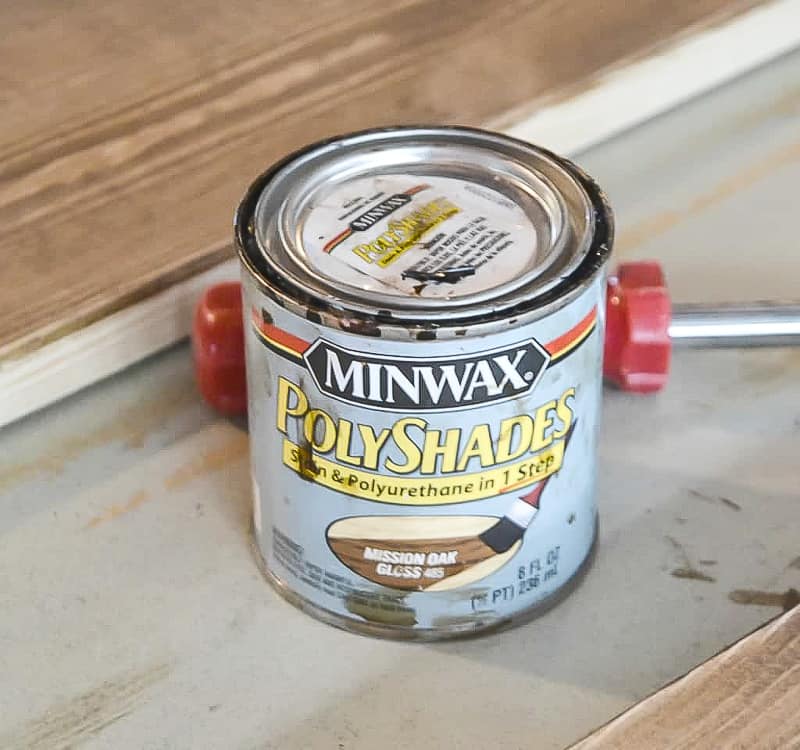
We first stained the boards a dark color.

Looking to update the lighting in your kitchen? These DIY Light Fixtures upcycle farm pieces to create custom farmhouse lighting in this kitchen.

The wood was the easy part. Now, it was time for the electrical (hire a professional for this part). My dad is a professional so we had him help up with this. Since we have light switches by the bar, we were able to tie the wiring for the fixtures into those. Phew.

After a few holes added to the wall, we were ready to fish the wires through and start making this all come together.

Looking to update the lighting in your kitchen? These DIY Light Fixtures upcycle farm pieces to create custom farmhouse lighting in this kitchen.

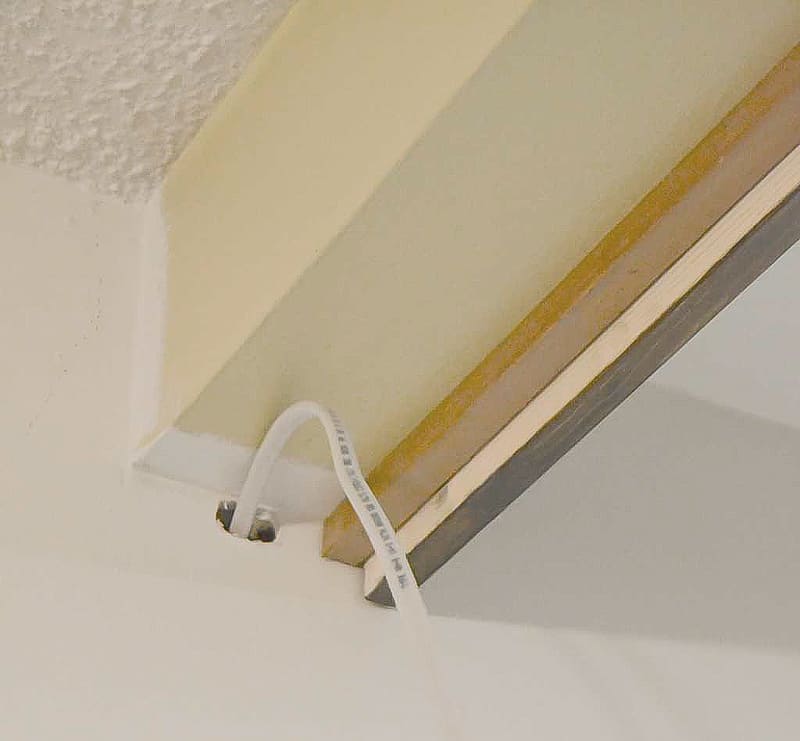
Once we got the wires through, we nailed our stained boards to the sides of the beam.

Looking to update the lighting in your kitchen? These DIY Light Fixtures upcycle farm pieces to create custom farmhouse lighting in this kitchen.

Then, we secured the other flanges to the board that was going to be on the bottom.

Looking to update the lighting in your kitchen? These DIY Light Fixtures upcycle farm pieces to create custom farmhouse lighting in this kitchen.

After that, we attached all the wiring in the right places and fit the wires into the box we were creating around the beam. 

Looking to update the lighting in your kitchen? These DIY Light Fixtures upcycle farm pieces to create custom farmhouse lighting in this kitchen.

Looking to update the lighting in your kitchen? These DIY Light Fixtures upcycle farm pieces to create custom farmhouse lighting in this kitchen.

Looking to update the lighting in your kitchen? These DIY Light Fixtures upcycle farm pieces to create custom farmhouse lighting in this kitchen.

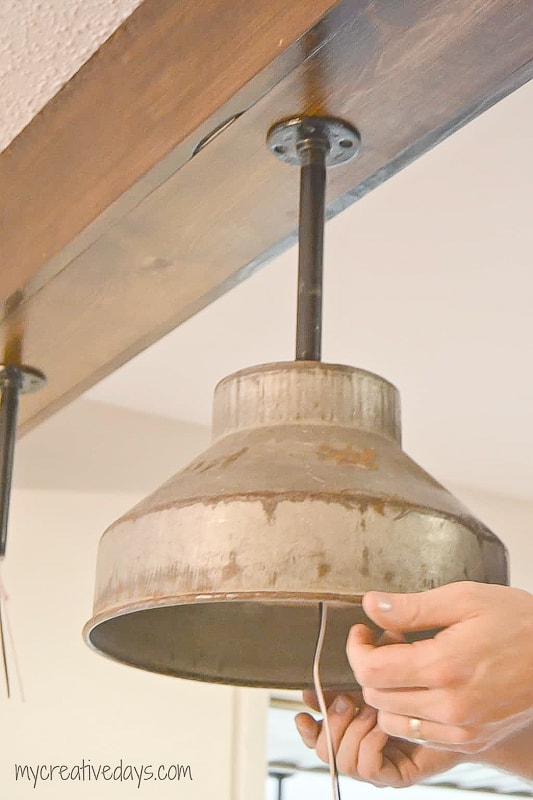
Now, it was time to screw the galvanized pieces back on and then add more nails to the bottom board to make it flush.

Looking to update the lighting in your kitchen? These DIY Light Fixtures upcycle farm pieces to create custom farmhouse lighting in this kitchen.

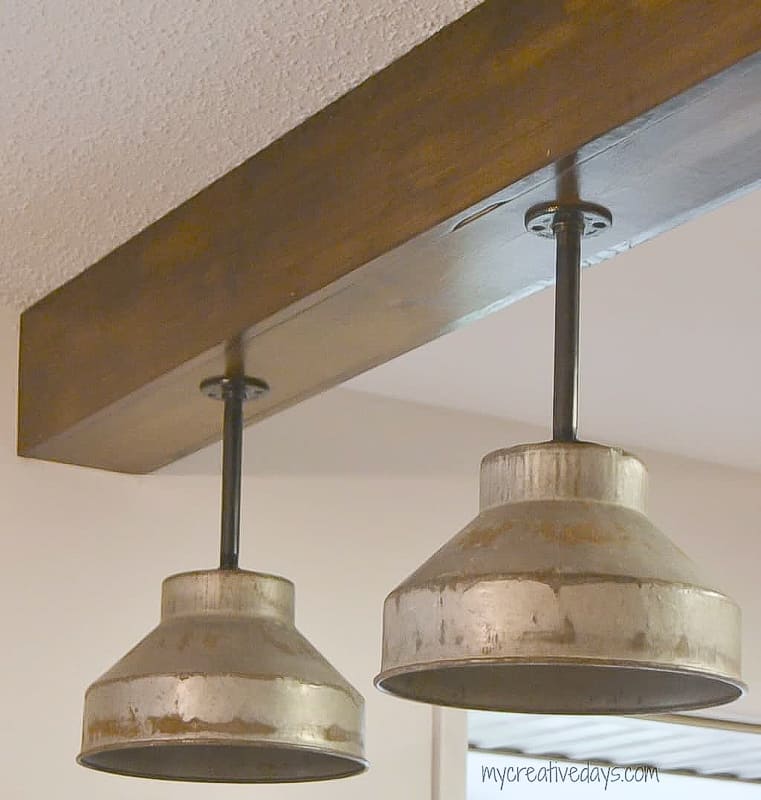
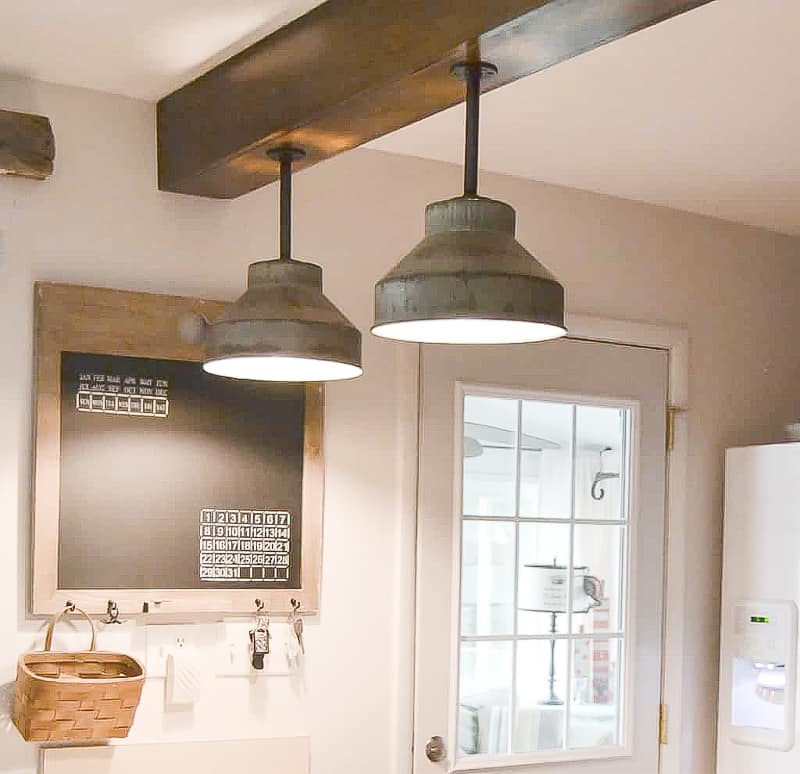
Viola! We have custom, DIY light fixtures in our kitchen!

Looking to update the lighting in your kitchen? These DIY Light Fixtures upcycle farm pieces to create custom farmhouse lighting in this kitchen.

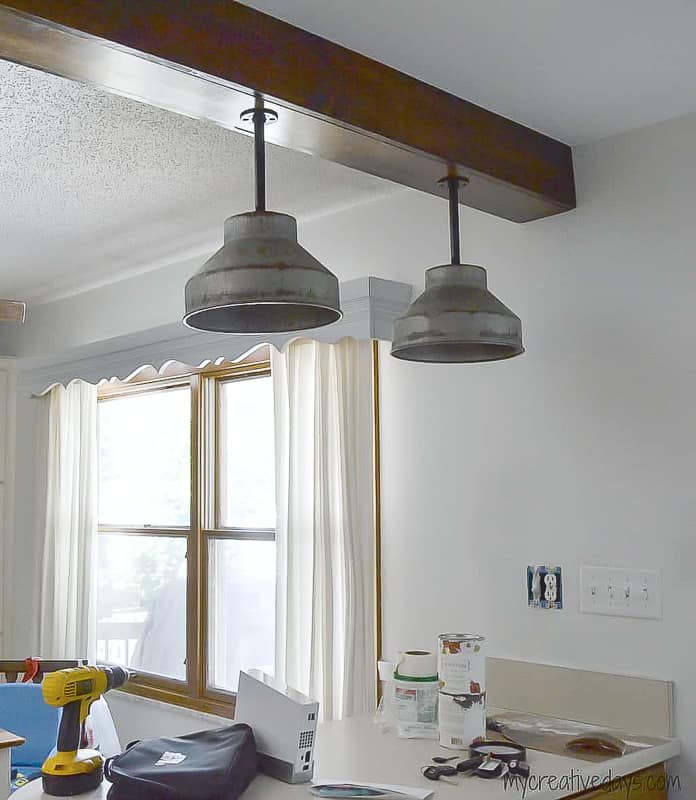
And, they even work! 🙂 

This project alone made us decide to tackle the entire kitchen and give it a HUGE makeover. You can see the transformation HERE. 

Looking to update the lighting in your kitchen? These DIY Light Fixtures upcycle farm pieces to create custom farmhouse lighting in this kitchen.

Do you like adding repurposed items to your home? What is your favorite piece?

PIN THIS POST!

Are you looking to update the lighting in your kitchen? These DIY Light Fixtures upcycle farm pieces to create custom farmhouse lighting in this kitchen.

If you liked this DIY Light Fixtures post, check out the other ways we updated the kitchen ON A BUDGET!

DIY Tile Backsplash For Rookies

Do It Yourself Kitchen Makeover

Corbels For The Kitchen Island


Sharing is caring!

1352 shares
  • Share

Filed Under: DIY Projects, Home Decor Tagged With: diy farmhouse light fixtures, DIY Kitchen Light Fixtures, diy light fixture, DIY lights

Click HERE to Support My Creative Days


HURRY โ€“ 10% OFF EVERYTHING!


Use coupon code:ย TAKE10ย at checkout
LEARN MORE

« DIY Tiered Bushel Baskets For Your Fall Porch
DIY Halloween Decor: Honeycomb Bats »

Comments

  1. Leslie @ House on the Way says

    October 15, 2014 at 7:06 AM

    Can’t wait to see the finished product! How cool!

    Reply
  2. Leigh Anne says

    October 15, 2014 at 7:08 AM

    Oh no you didn’t just leave us hanging (<– haha, pun intended!!). I can't wait to see Part 2

    Reply
  3. Amy Geib says

    October 15, 2014 at 8:36 AM

    UHhh! I can’t wait to see the final result and I would love to know what yard sale items are as well. I want to make these for my kitchen too!!! Great idea!

    Reply
    • lindsayeidahl says

      October 15, 2014 at 7:37 PM

      Amy – it was really quite easy. They turned out so great. We love them!

      Reply
  4. Kristi says

    October 15, 2014 at 10:06 AM

    I’m dying to see how this turns out!!! SO cool!

    Reply
    • lindsayeidahl says

      October 15, 2014 at 7:36 PM

      Thank you so much! We love them!

      Reply
  5. Randi @ FrugElegance says

    October 15, 2014 at 11:24 AM

    looks terrific- can’t wait to see how it turns out!

    Reply
  6. colette says

    October 15, 2014 at 12:57 PM

    Ditto! The suspense is killing me!!

    Reply
  7. Funky Junk Interiors says

    October 15, 2014 at 1:03 PM

    Are you kidding me? We have to WAIT?? Noooo!! I can’t WAIT to see how this turned out! haha LOVE it!!!

    Reply
    • lindsayeidahl says

      October 15, 2014 at 7:36 PM

      I just didn’t think it would be great as one long post so I decided to break it up. I have never done that before. They turned out so great and we love them so much!

      Reply
  8. Jillian says

    October 15, 2014 at 1:55 PM

    Did you really just do that? LOL Can’t wait to see it all finished.

    Reply
    • lindsayeidahl says

      October 15, 2014 at 7:34 PM

      Yes I did that and they turned out so great! ๐Ÿ™‚ We love them!

      Reply
  9. Sarah says

    October 15, 2014 at 2:02 PM

    Those are gonna be so cool when they’re done! Can’t wait to see it.

    Reply
  10. Katie says

    October 15, 2014 at 2:32 PM

    Ohhhh … Can’t wait to see how they look installed! What a great project.

    Reply
  11. Pam @ House of Hawthornes says

    October 15, 2014 at 6:28 PM

    I have no idea what they originally were, but they are going to look so cool as lights. I’ll pop back in to see the finished project ๐Ÿ™‚

    Reply
    • lindsayeidahl says

      October 15, 2014 at 7:34 PM

      Thanks so much Pam. They turned out so great and we love them so much!

      Reply
    • Melisa says

      July 24, 2016 at 1:50 AM

      They’re milk funnel strainers!

      Reply
      • Lindsay says

        August 1, 2016 at 7:54 AM

        Yes! I found that out after the fact. I love them!

        Reply
    • Debbie says

      October 26, 2022 at 5:01 PM

      Milk strainers

      Reply
  12. DeDe@DesignedDecor says

    October 15, 2014 at 8:55 PM

    I cant wait to see how they look hanging!

    Reply
  13. Courtney @ Crafts by Courtney says

    October 16, 2014 at 6:51 AM

    I can’t wait to see what these look like, totally digging the look. By the way I think we have the same cabinets even the color is the same.

    Reply
    • lindsayeidahl says

      October 16, 2014 at 10:33 AM

      I do not love the color of our cabinets, but they are good cabinets so I think I am going to paint them. I am so nervous about it. I need to really start looking at colors.

      Reply
  14. Amy Cole says

    October 16, 2014 at 9:39 AM

    Hey I just wanted to drop in and tell you that these are milk strainers. ๐Ÿ™‚ I have a few that I snagged from the barn to turn into light fixtures for my new laundry room. They look great in your kitchen!

    Reply
    • lindsayeidahl says

      October 16, 2014 at 10:29 AM

      Thank you so much for telling me what these are Amy! They would be great in a laundry room!

      Reply
  15. Jamie | anderson + grant says

    October 17, 2014 at 9:52 AM

    I absolutely ADORE these light fixtures that you made. I bought one of these strainers at Goodwill (I paid $5, so you got a real bargain!) and it took me a long time to find out what they actually were. Mine is still sitting in my collection of “treasures” waiting for me to do something with it.

    Reply
    • lindsayeidahl says

      October 18, 2014 at 7:58 PM

      I have a collection of “treasures” too just waiting for inspiration to hit!

      Reply
  16. AmyH says

    November 6, 2014 at 8:39 AM

    This is awesome. I’m in the process of trying to make my own light and I was wondering what the round piece with the hole in it is called in the sixth picture down (the picture with your hand)? I can’t tell what it is from your picture of the lamp parts above. I’ve been looking for a piece like that and haven’t been able to find one because I’m not sure what it’s called or where to look. Thanks!

    Reply
    • lindsayeidahl says

      November 6, 2014 at 12:13 PM

      Look in the “gas” section of the home improvement store. I am not sure what they are called, but if I remember right, it is in the gas section and not electrical. If you take a picture in, the staff will be able to show you!

      Reply
  17. Carrie says

    October 4, 2015 at 8:14 PM

    These were originally strainer baskets used on the to of a milk can. Cheese cloth went between the two “screens” and the milk was poured from the milking bucket into the strainer basket where it drained into the milk can. Very jealous of the price you paid. Great job on repurposing a piece of history.

    Reply
    • Lindsay says

      October 5, 2015 at 8:15 AM

      Thank you for all the information! We still love them so much!

      Reply
  18. Elizabeth says

    July 25, 2017 at 2:36 PM

    Your lights are adorable. I can help you out…they are large (probably industrial) flour sifter.

    Enjoy!

    Reply
    • Lindsay says

      July 29, 2017 at 5:27 PM

      ๐Ÿ™‚

      Reply
    • house says

      January 31, 2023 at 2:34 AM

      Agree!

      Reply

Leave a Reply Cancel reply

Your email address will not be published. Required fields are marked *


follow along

  • Facebook
  • Instagram
  • Pinterest
  • RSS
  • Twitter
  • YouTube

search the blog

Listen In!

CLICK TO DOWNLOAD FOR FREE

My Creative Days is a participant in the Amazon Services LLC Associates Program, an affiliate advertising program designed to provide a means for sites to earn advertising fees by advertising and linking to Amazon.com
If you are looking for the best paint brushes for furniture makeovers, you don't have to look any further. Click over to find the paint brushes that everyone needs in their toolbox when painting furniture or anything for that matter.

Best Paint Brushes For Furniture Makeovers

The Best Black Matte Furniture Paint

DIY Farmhouse Table - Want a farmhouse table? Make your own! Check out how to refinish one easily from My Creative Days.

Farmhouse Table DIY Made From A Dumpster Find

DIY Farmhouse Office Sign

DIY Office Sign

PO Box 11823, Cedar Rapids, Iowa, 52410
Copyright © 2023 ยท Design + Development by Grace + Vine Studios ยท Privacy Policy

1352 shares