

Learning how to fill deep gouges in wood furniture is one of those furniture repair skills that can save a piece you might otherwise pass up. A deep scratch, chunk missing from a corner, or large gouge can look intimidating, but many of these repairs are easier than they appear.
I’ve repaired plenty of damaged furniture over the years, and the biggest thing I’ve learned is that not every repair needs the same product or technique.
For small scratches and imperfections, a lightweight filler may be all you need. For a deep gouge or missing section of wood, you’ll want something that can handle a more substantial repair.
Here’s how I fill deep gouges in wood furniture and approach these repairs so they are ready for paint or a new finish.
How to Fill Deep Gouges in Wood Furniture
Start by Cleaning the Damage
Before you fill anything, clean the area well.
Remove dirt, dust, loose pieces of wood, and anything else that could keep your filler from adhering properly.
If there are loose or splintered pieces around the gouge, carefully remove anything that isn’t securely attached.
You want a clean, solid surface to work with before you start filling.
{Affiliate links are used in this post. Click on any of the underlined links to find the products and sources I am referring to. You can read my disclosure HERE.}
How to Fill Deep Gouges in Wood Furniture: Choose the Right Filler
This is where choosing the right product matters.
A shallow scratch or small dent doesn’t need the same treatment as a deep gouge where a significant amount of wood is missing.
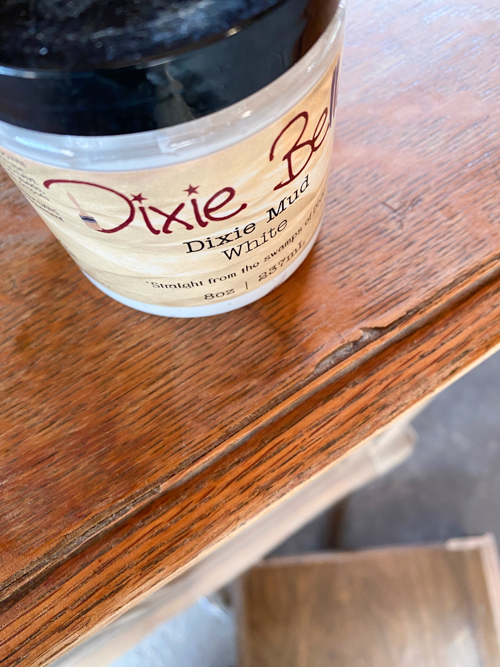
For smaller imperfections, I like MUD Filler. It’s one of my go-to products for filling small holes, dents, scratches, and other surface imperfections before painting furniture.
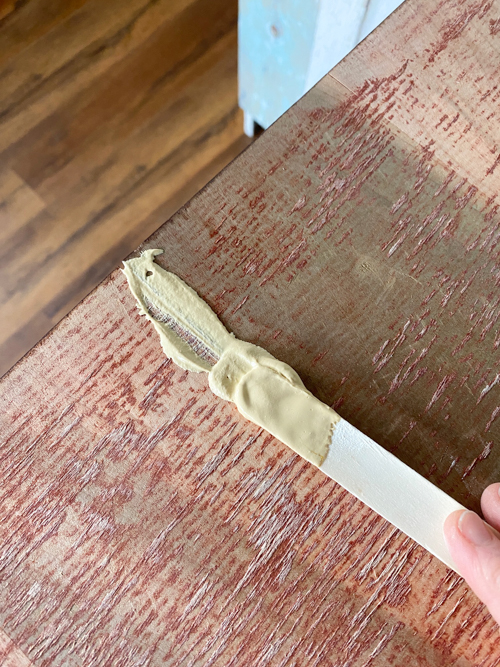
For a deep gouge, missing chunk, or larger damaged area, I like using Durham’s Rock Hard Water Putty.
The repair you need will determine which product makes the most sense.
How to Fill a Deep Gouge
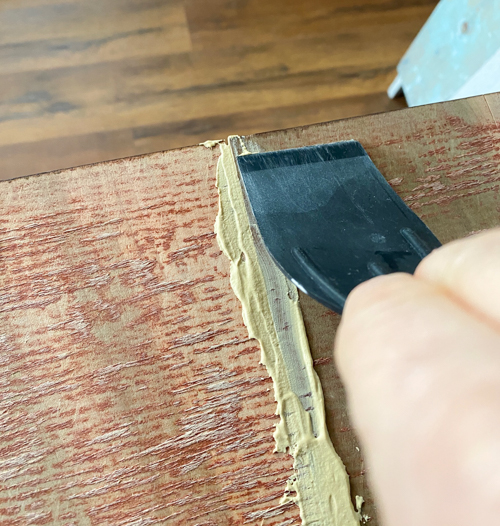
Apply the filler or water putty to the damaged area, working it into the gouge and pressing it into the spaces where wood is missing. (I shared a project doing this exact thing with the water putty in my post HERE.)
You want the repair material to fill the void, but don’t worry about getting it perfectly smooth on the application. You can sand it smooth once it is dry. (I show you how to use the MUD filler in my video HERE).
Don’t Be Afraid to Overfill Slightly
When I’m filling a deep gouge, I would rather have a little extra material that I can sand away than end up with a low spot. Once the repair has completely dried, you can sand it smooth and blend it into the surrounding surface.
Use your favorite sander depending on the size and location of the repair.
Sand the Repair Smooth
This is the step that makes the biggest difference in how your finished furniture will look. Start with a grit appropriate for smoothing the repair, then move to a finer grit as needed.
Run your hand over the repaired area. If you can feel the edge of the repair, you’ll probably be able to see it after you paint.
Keep sanding until the transition between the repair and the original wood feels smooth. If you sand through the repair or discover that you still have a low spot, don’t panic. Add another small amount of filler, let it dry, and sand again.
What If a Large Chunk of Wood Is Missing?
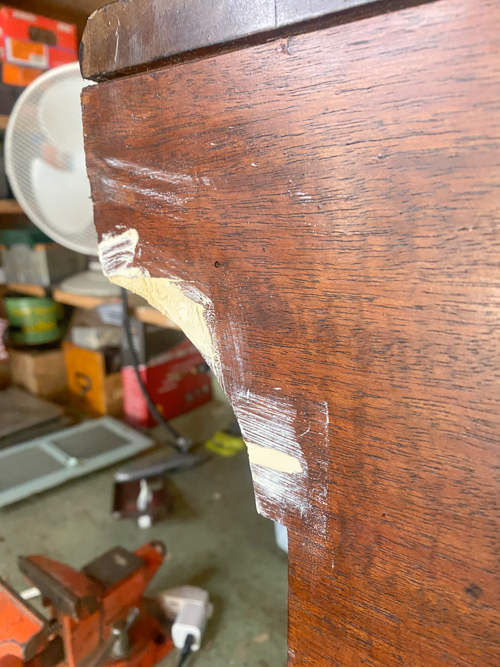
A deep gouge is one thing. A large section of missing wood is another.
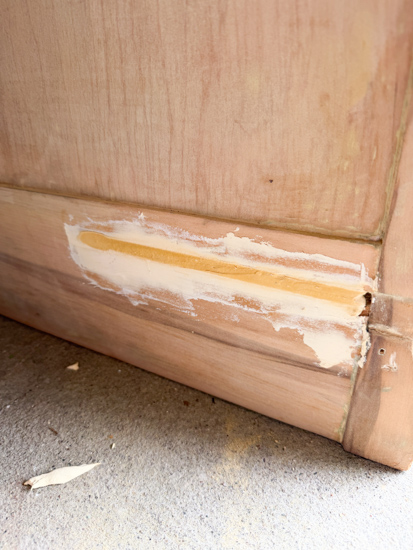
If you have a substantial piece missing from a corner or edge, you may need to rebuild the area rather than simply filling a hole. This is where a harder-setting product like Durham’s Rock Hard Water Putty can be especially useful.
Build up the missing area, allow it to cure completely, and then sand and shape it to match the original furniture.
Another Option: Use a Mold to Recreate Missing Details
If a large piece of wood or a decorative detail is missing, there is another technique I’ve seen furniture flippers use.
If you have an intact matching section somewhere else on the furniture, you can use it to create a mold and then recreate the missing piece.
There are two ways I’ve seen this done. You can make a mold using two-part mold putty, or some people use a hot glue gun to create a flexible mold. The mold is then filled with a material such as Bondo or another epoxy-based repair product to recreate the missing detail. Once it cures, the new piece can be trimmed, sanded, and attached to the damaged area.
This can be especially useful for ornate legs, decorative trim, appliqués, and other details that would be difficult to recreate by hand.
I’ve never personally tried this technique, but I’ve seen some impressive furniture repairs using it. If you have a piece with a beautiful detail that’s only missing on one side, don’t automatically pass it up—you may be able to make a mold from the intact side and recreate it.
Tip: This technique works best when you have an intact section to use as your pattern. If there isn’t a matching detail somewhere on the piece, you’ll need a different repair approach.
Don’t Paint Until the Repair Is Ready
It can be tempting to start painting as soon as the repair looks pretty good.
Don’t.
Make sure the product is completely dry or cured according to its instructions before sanding or painting. Then inspect the area in good light.
Look at it from different angles and run your hand over it. This is your last chance to find imperfections before paint makes them more noticeable.
What About Deep Gouges on Veneer?
Be a little more careful when repairing veneer.
If the gouge has damaged or lifted the veneer, you may need to address the veneer itself before filling the surface.
Don’t automatically assume you can simply fill everything with putty.
First, make sure the remaining veneer is secure. If it is loose, repair that problem before moving on to the cosmetic repair.
When You Shouldn’t Just Fill the Gouge
Sometimes a deep gouge is more than a cosmetic problem. If the damage extends through the furniture, has caused a structural weakness, or is accompanied by splitting, loose joints, or significant water damage, filling the surface won’t solve the underlying problem.
Take a minute to determine whether the furniture needs a structural repair first.
Filler makes damaged furniture look better. It doesn’t make an unstable piece structurally sound.
My Favorite Products for How to Fill Deep Gouges in Wood Furniture
MUD Filler
Durham’s Rock Hard Water Putty
Sander
Putty knives
Deep Gouges Don’t Have to Ruin a Furniture Flip
One of the things I love about working with old furniture is seeing what can be saved.
A piece with a big gouge or damaged corner may look like a hard pass at the thrift store, but sometimes the damage is completely repairable.
The trick is to assess the damage, choose the right repair product, and take the time to sand everything smooth.
Once the repair is finished, you’ll be amazed at how different that same piece can look after a coat of paint or a fresh finish.
And that’s why I never automatically walk away from furniture just because it has a few battle scars.
Sometimes those are the pieces with the most potential.
Curious About Flipping Furniture?
After more than twenty years of flipping furniture, I still pick up pieces whenever I can because I love the creative outlet. What started as a way to transform forgotten pieces has grown into something I now help others learn and enjoy, too.
That’s why I created The Furniture Flipping Academy. It is not just a course, but an all-in-one resource you can use at any stage of your journey.
Whether you want to try one project, flip occasionally for extra income, or grow it into something more over time, the Academy meets you where you are. Inside, you’ll find practical tools like worksheets, templates, guides, and real-life examples you can use when you need them. There is no pressure. No overwhelm. No requirement to turn it into a full-time business.
You don’t need experience or a huge following. You just need a starting point and a trusted resource to guide you.
Find all the details (and the new LOW PRICE) for the Furniture Flipping Academy HERE.
PIN THIS POST!
If you found this How to Fill Deep Gouges in Wood Furniture post helpful, you will also love these:
How to Use Liquid Sandpaper on Furniture
Furniture Pieces Worth Flipping
How to Make $2000 Flipping Furniture—Without Ever Selling It