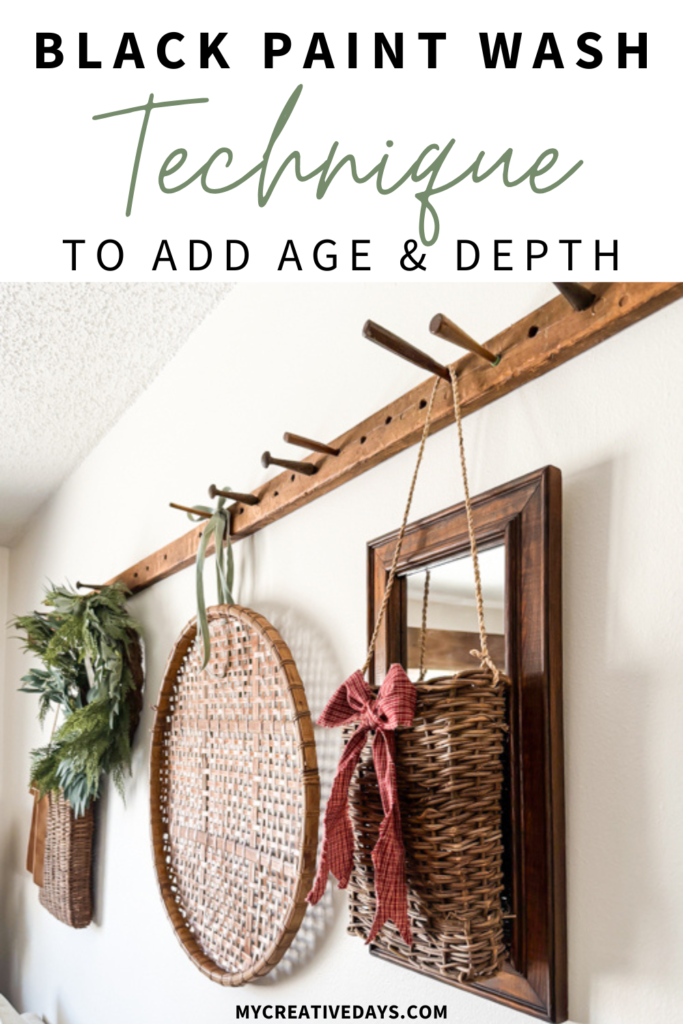
I hadn’t seen anyone doing a Black Paint Wash Technique like this, but I knew exactly the look I wanted, and I decided to try it with what I always have on hand. I wanted more age. More depth. More character than what this thrifted mirror had. And I’m happy to report… it worked, and anybody can do this.
This Black Paint Wash Technique completely transformed a very basic thrifted mirror into something that looks older, richer, and full of charm. If you’ve ever picked up a piece that felt fine but not exciting, this technique might be exactly what you need to try.
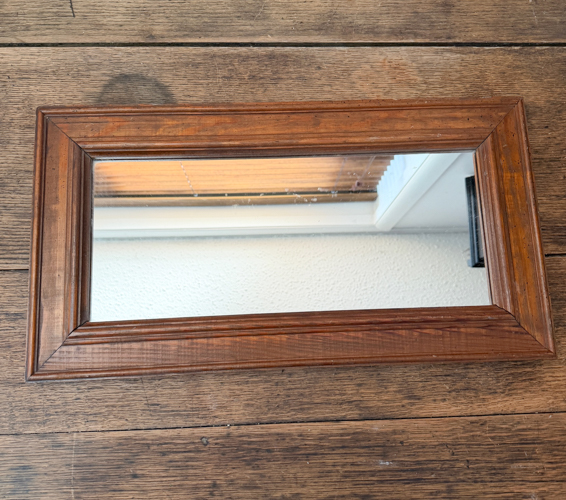
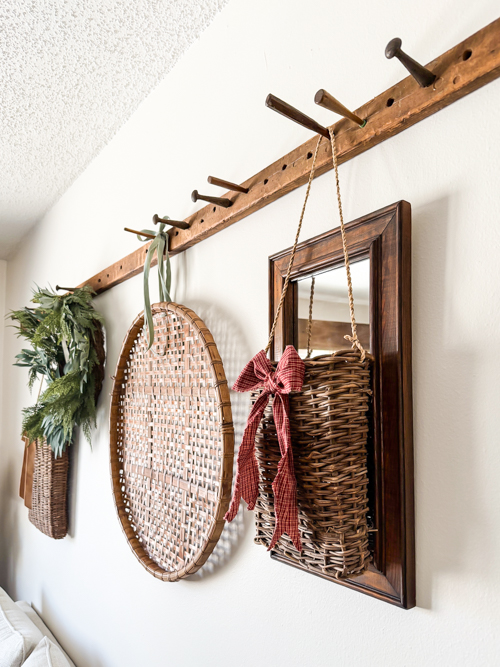
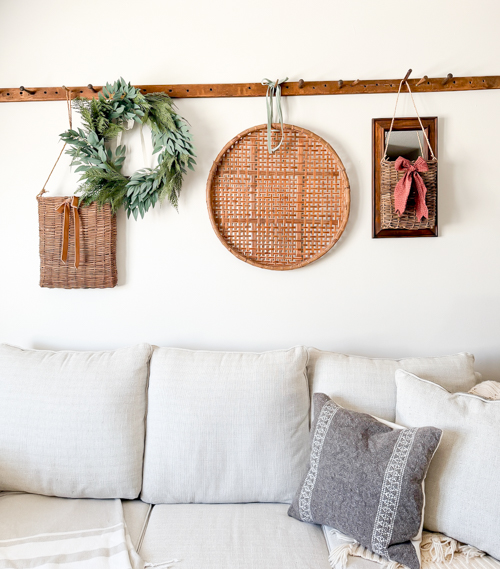
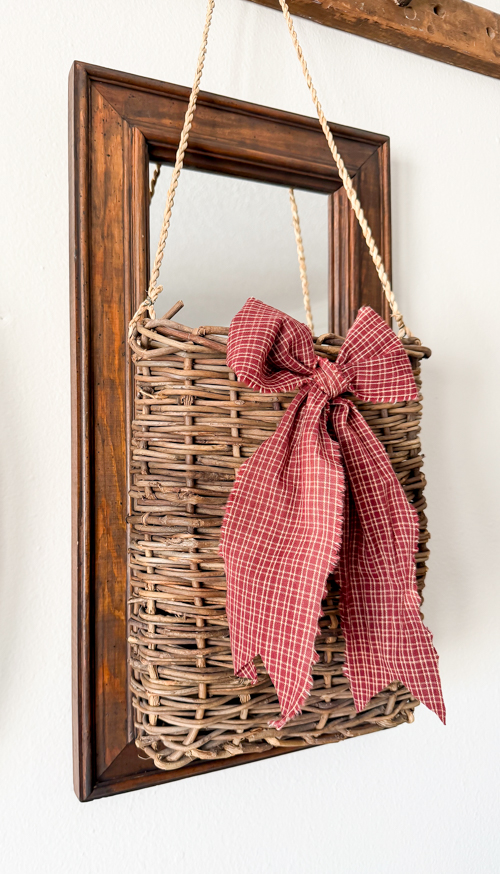
I found this mirror at my local thrift store. It wasn’t anything rare or super old, but the size and shape were the stars of the show. I love smaller mirrors and artwork because they’re perfect for layering, filling awkward spaces, and adding interest where you least expect it.
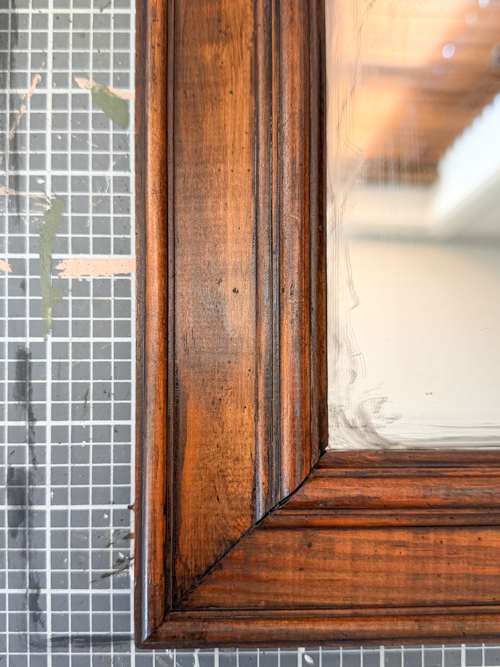
The frame itself was very light and, honestly, a little boring. It didn’t match the mood I wanted at all. I knew a traditional light paint wash wouldn’t get me there, so instead of forcing it, I decided to experiment with a Black Paint Wash Technique to see if I could add the age and character I was craving.
Why a Black Paint Wash (Not a Light One)
Light paint washes are beautiful, but this project needed contrast.
What I love about the Black Paint Wash Technique is how it:
- Adds instant age
- Creates real depth and contrast
- Highlights scratches, dings, and details instead of hiding them
- Makes a newer or plain piece feel collected over time
This darker wash settles into all the imperfections, which turns them into charm instead of flaws.
{Affiliate links are used in this post. Click on any of the underlined links to find the products I am talking about. You can read my disclosure HERE.}

Supplies Used In This Black Paint Wash Technique
NOTE: Now, I know you can buy gel stains (and I have the favorites that I always have on hand), but I wanted to go with something even easier and even more accessible that most people might have on hand. Black paint. This would probably work with craft paint (I haven’t tried it, but I wouldn’t use craft paint and a larger wood project at all), but if I want great results for a project like this, I am going to always grab one of my favorite black paints.
- Thrifted mirror with a wood frame
- Black paint
- Water
- Paint brush
- Clean rag or paper towels
Step-by-Step: Black Paint Wash Technique
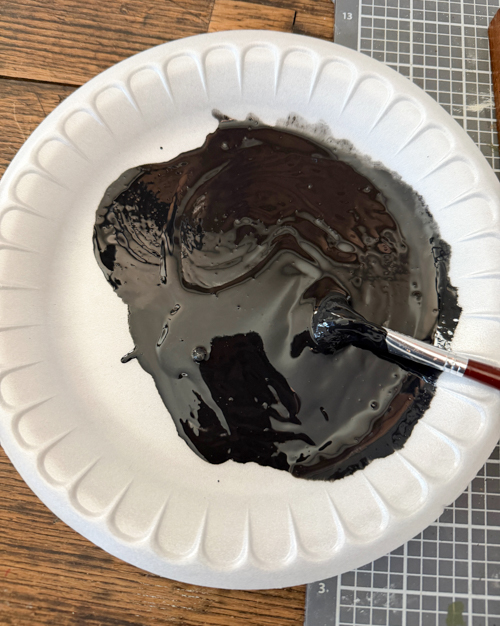
Step 1: Mix the Paint Wash
I watered down my black paint until it was a water-stain consistency. You want it thin, not thick. Start lighter than you think. You can always build the color.
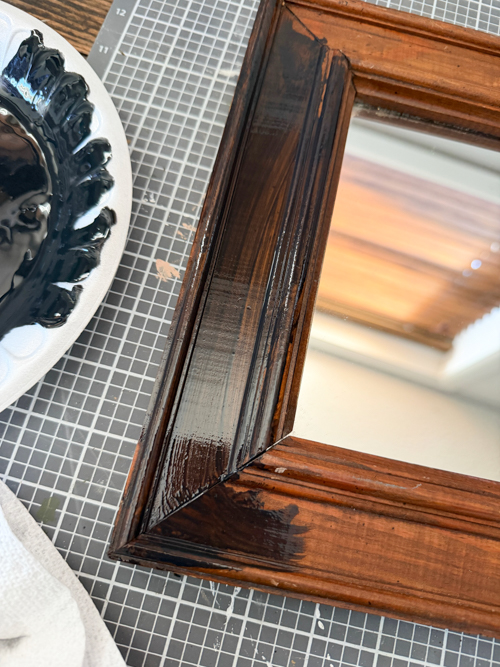
Step 2: Brush It On
Using a paintbrush, I applied the black paint wash directly to the frame. I didn’t worry about being perfect here. I let the paint settle naturally into the grooves, edges, and details of the wood.
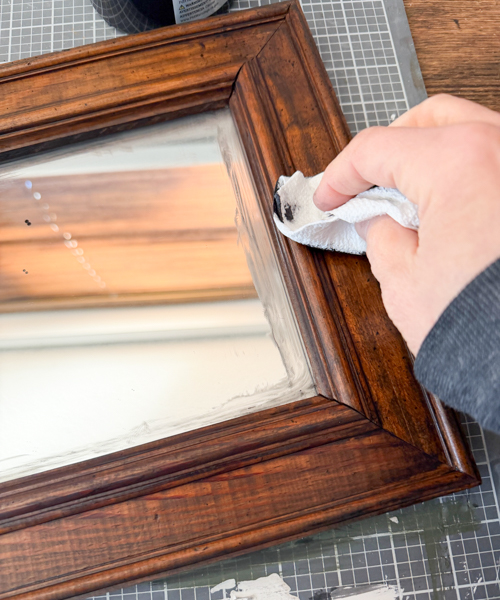
Step 3: Wipe Back the Excess
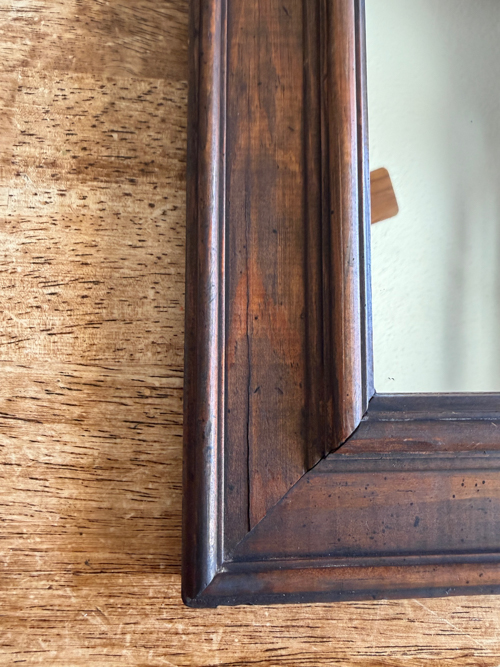
Right after brushing it on, I wiped off any excess paint with a clean rag. If an area started looking too dark, I just wiped a little more. The paint stays in all the scratches and dings, which is exactly what gives it that aged look.
Step 4: Adjust and Layer
This is a very forgiving process. Want it darker? Add another layer. Want it softer? Wipe more off. You’re in full control, and there’s no wrong way to do it.
I Am Now Hooked To This Black Paint Wash Technique!
The difference was immediate. The frame went from flat and forgettable to something that looks older, richer, and full of character. The Black Paint Wash Technique gave me exactly the look I was hoping for, and honestly, better than I expected.
It enhanced every little imperfection in the wood and made the mirror feel like it had a story, not just a finish.
If you’ve been stuck doing the same light paint washes, I highly recommend trying something different. This Black Paint Wash Technique is easy, flexible, and creates a look that feels aged instead of trendy.
I’m already excited to try this on a larger project, but for now, this thrifted mirror proves that sometimes trusting your gut and experimenting is exactly what a piece needs.

If this project inspired you, come hang out with me on my YouTube channel HERE! I share weekly DIY projects, thrifted hauls, favorite products, and all the behind-the-scenes fun. Subscribe while you’re there; it’s free and makes sure you don’t miss a thing.
PIN THIS POST!
If you liked this post, you will also love these:
How To Paint Wash To Get A Raw Wood Look
Oh, I really like the look of this!
Thank you! I LOVE the way it turned out. I am searching for more pieces that I can try it on!!!